
Article verified for Release 15.2 on February 2, 2026.
This article will explain how to set up Webex integration and how proctoring using Webex works from the instructors’ and the candidates’ perspectives.
Setting up the Webex integration
To access the tab to set up Webex integration:
- Click on the System tab in the main menu.
- Select the Integrations tab.
- Select the Webex settings tab.
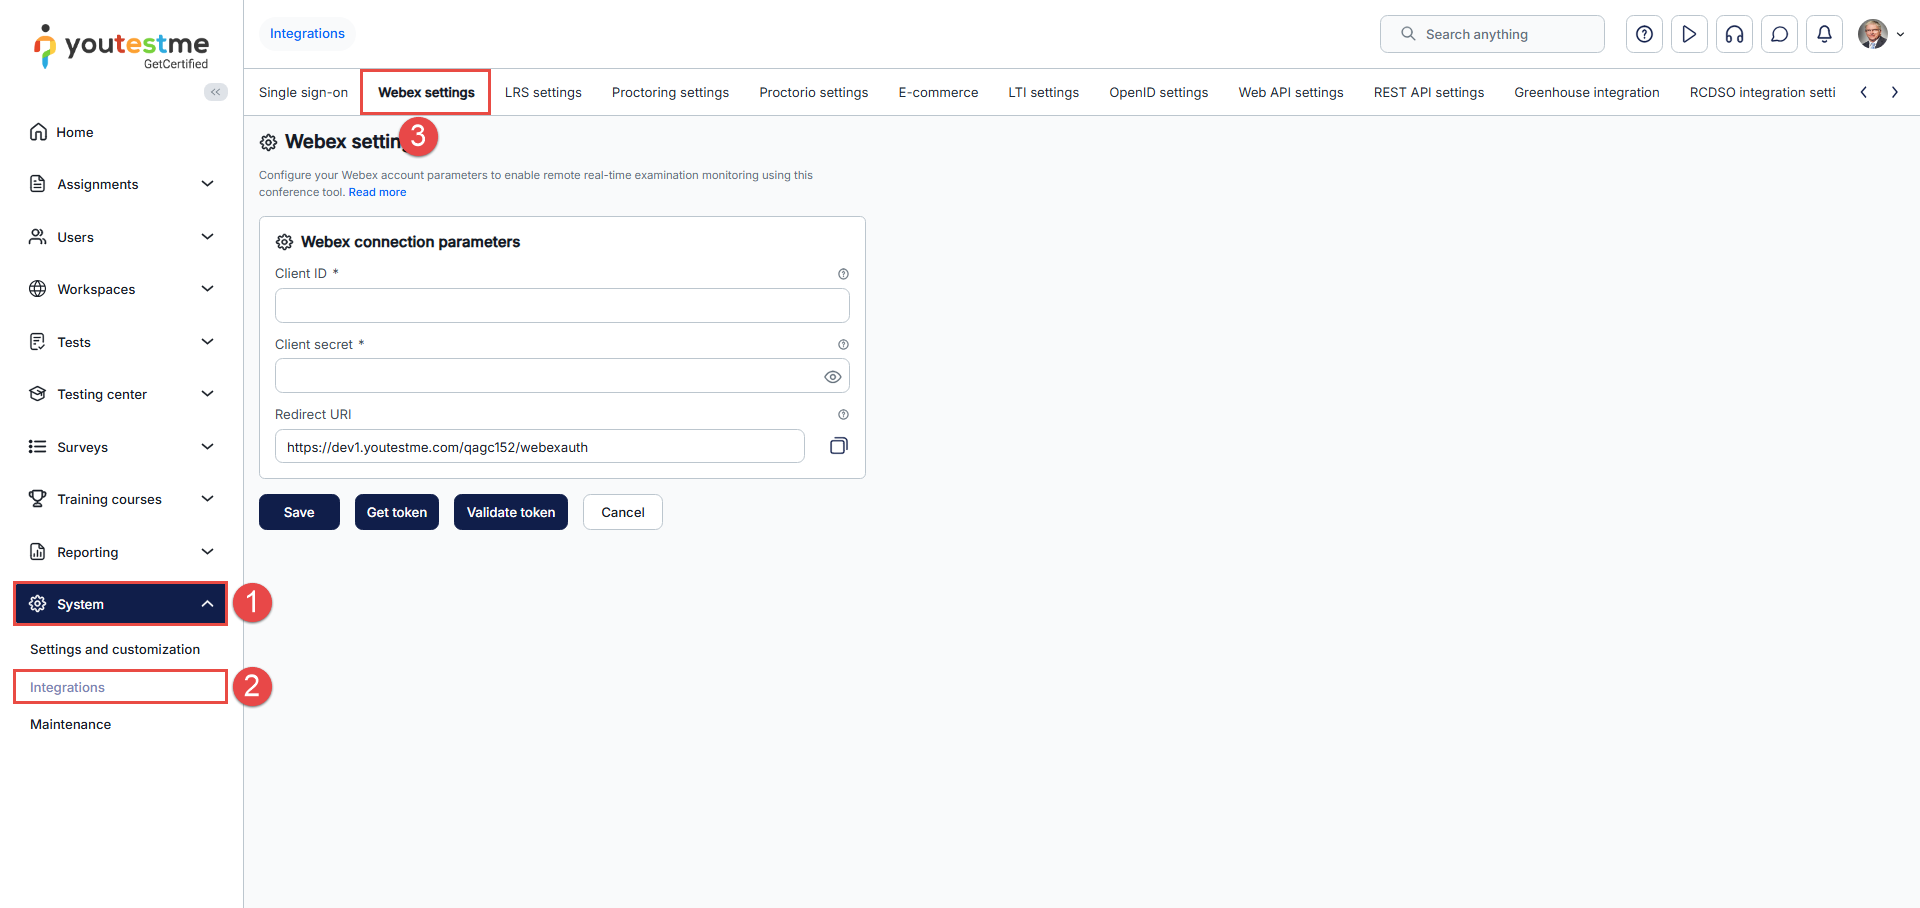
You should log in with the Webex hosting account at https://developer.webex.com/.
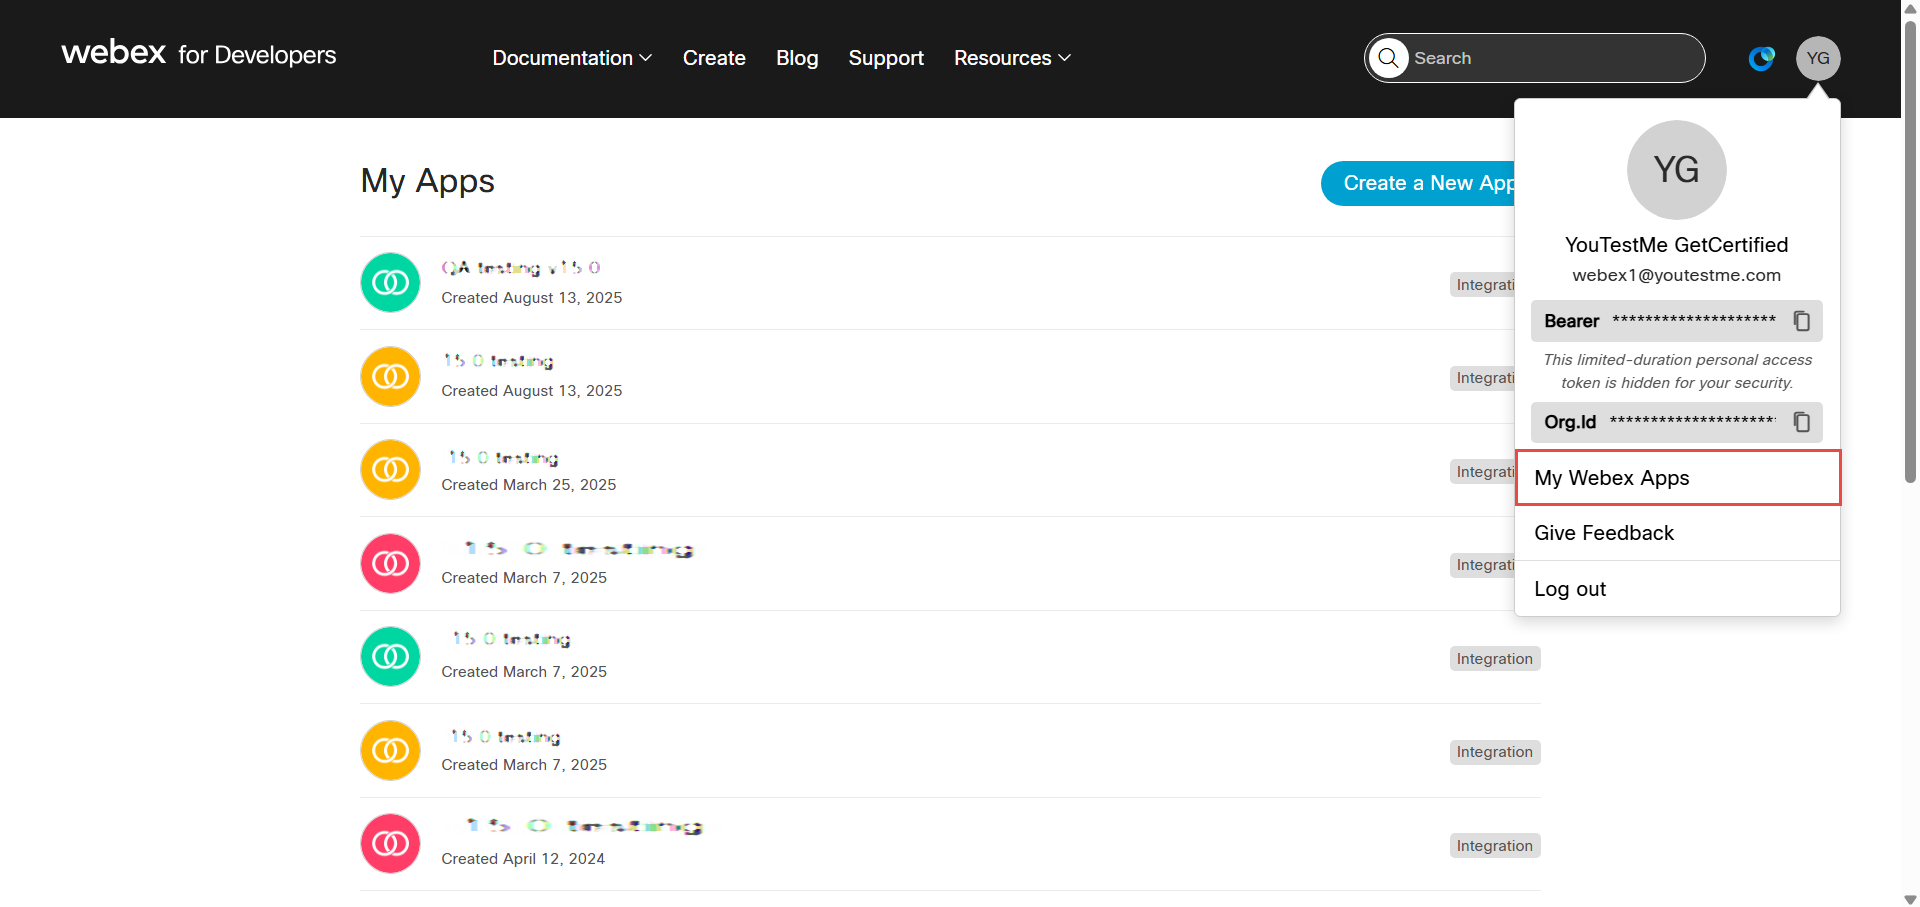
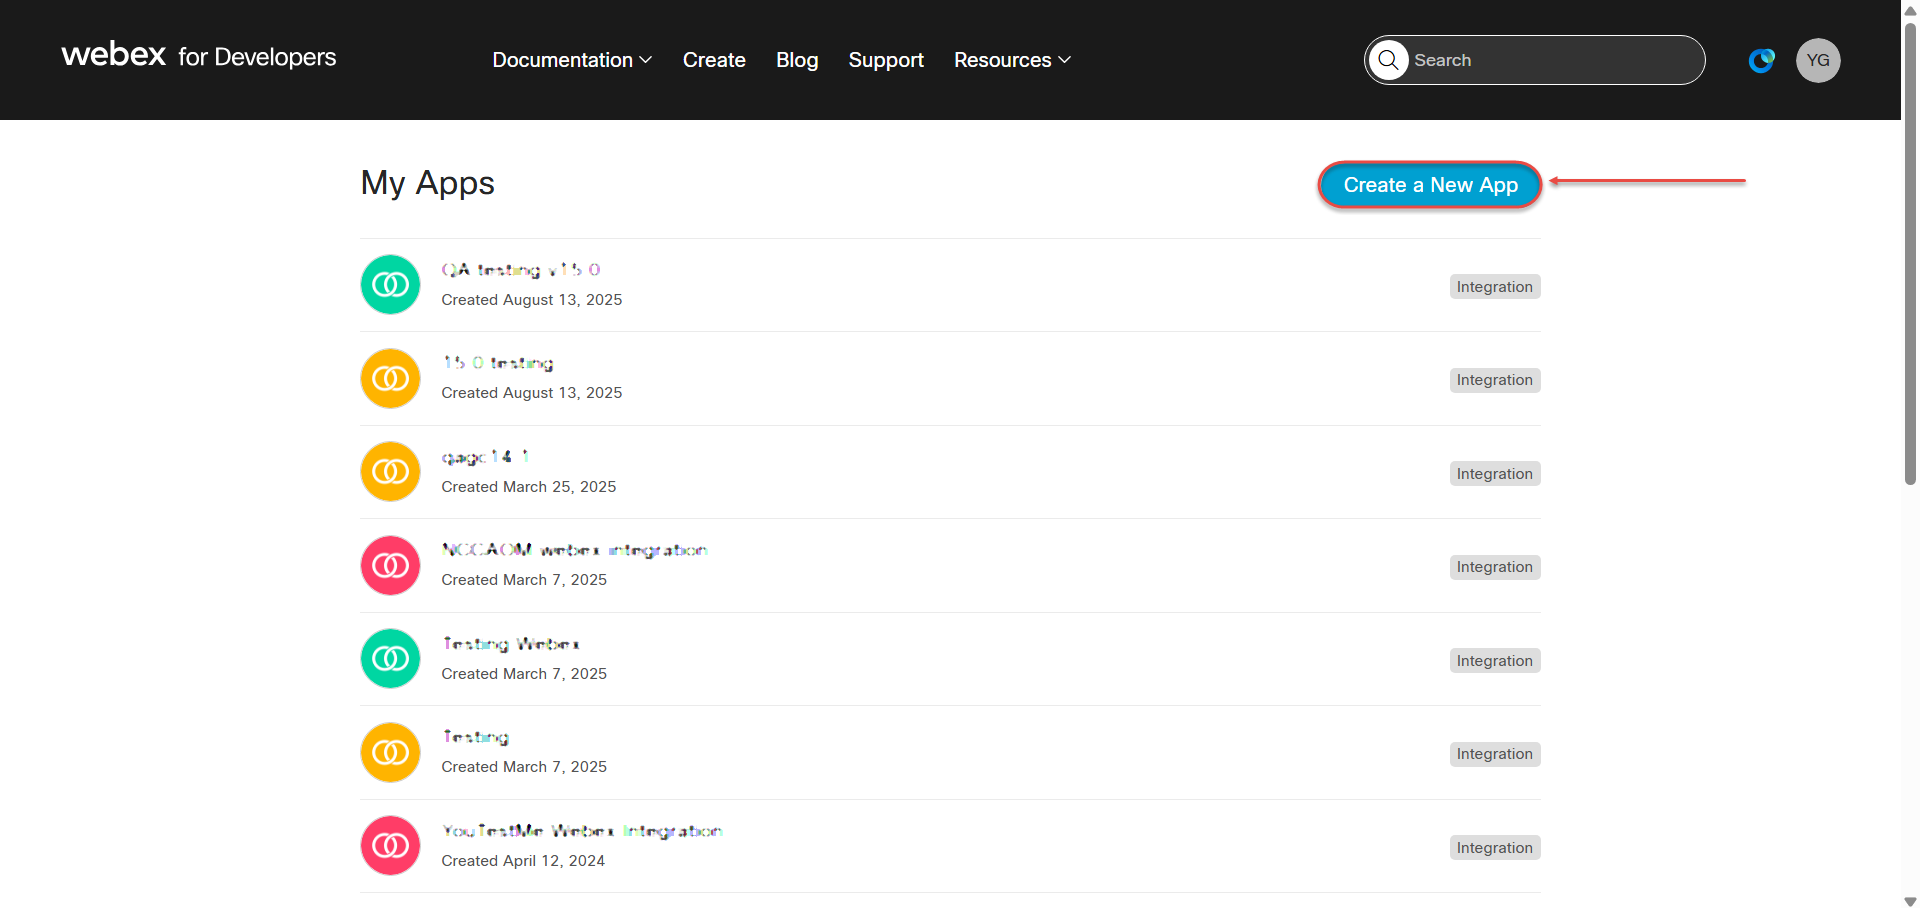
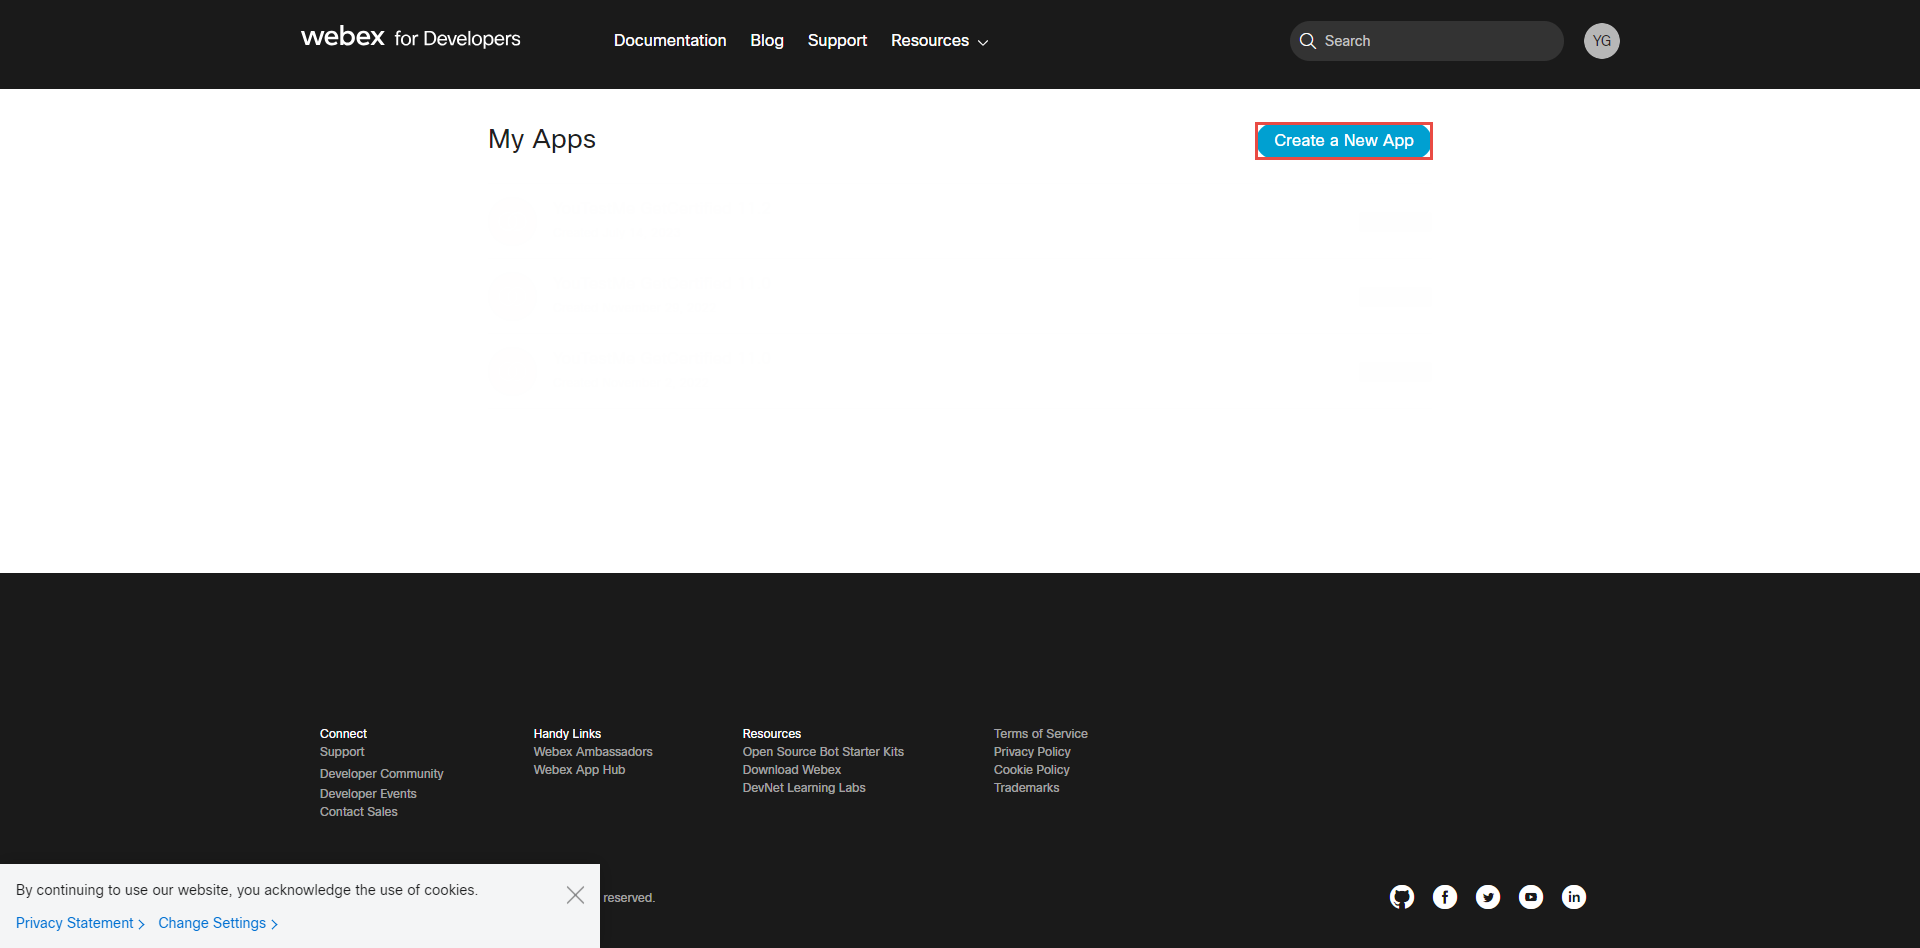
After logging into the application, select the My Webex Apps button and click the Create a New App button.
 Select the Create an Integration button.
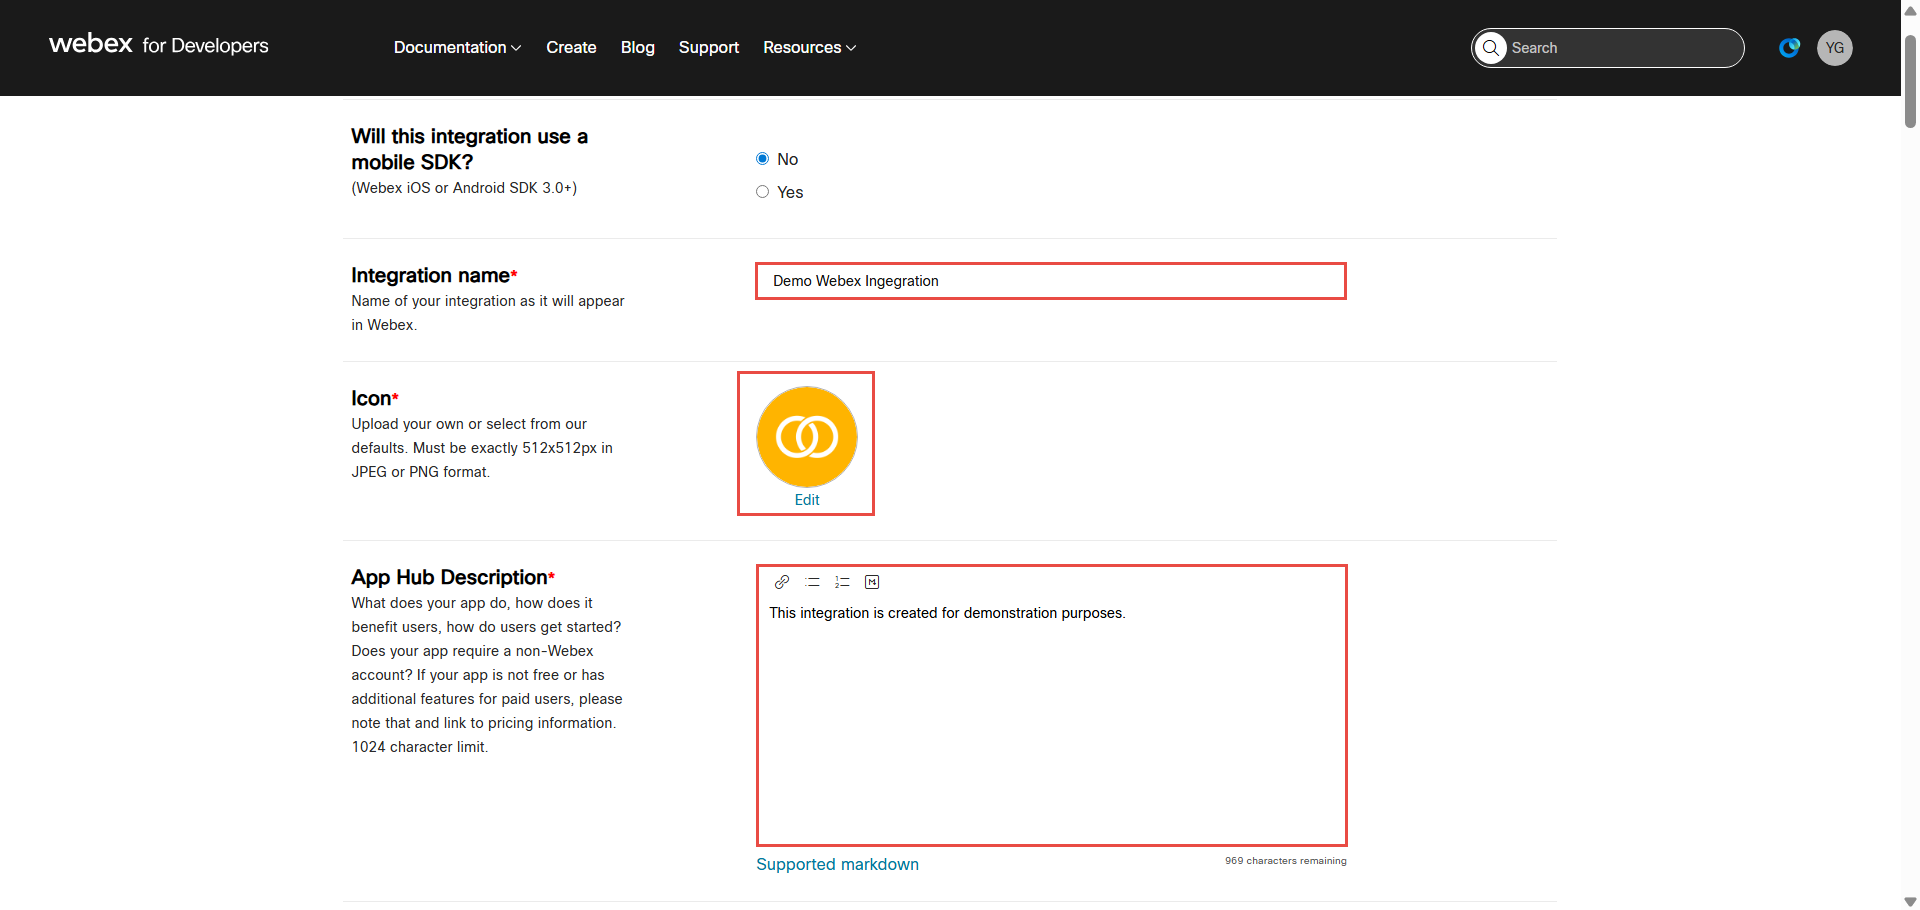
 Fill in the following fields: integration name, choose integration icon, and app hub description.
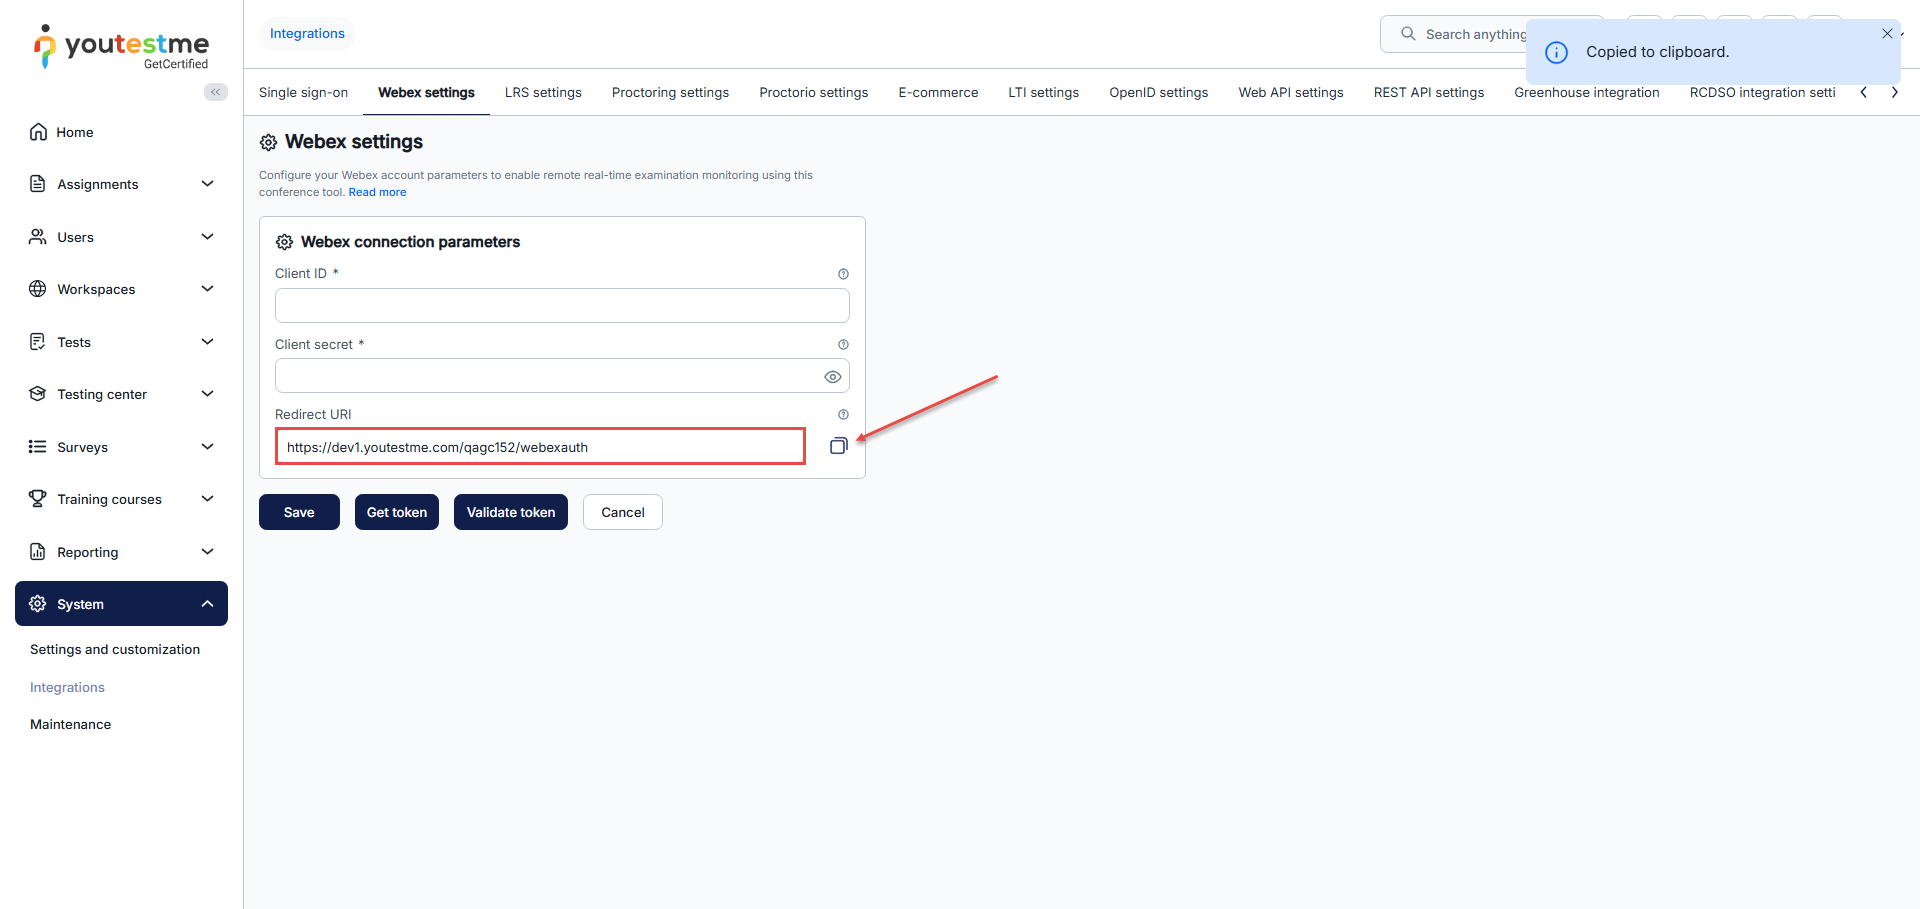
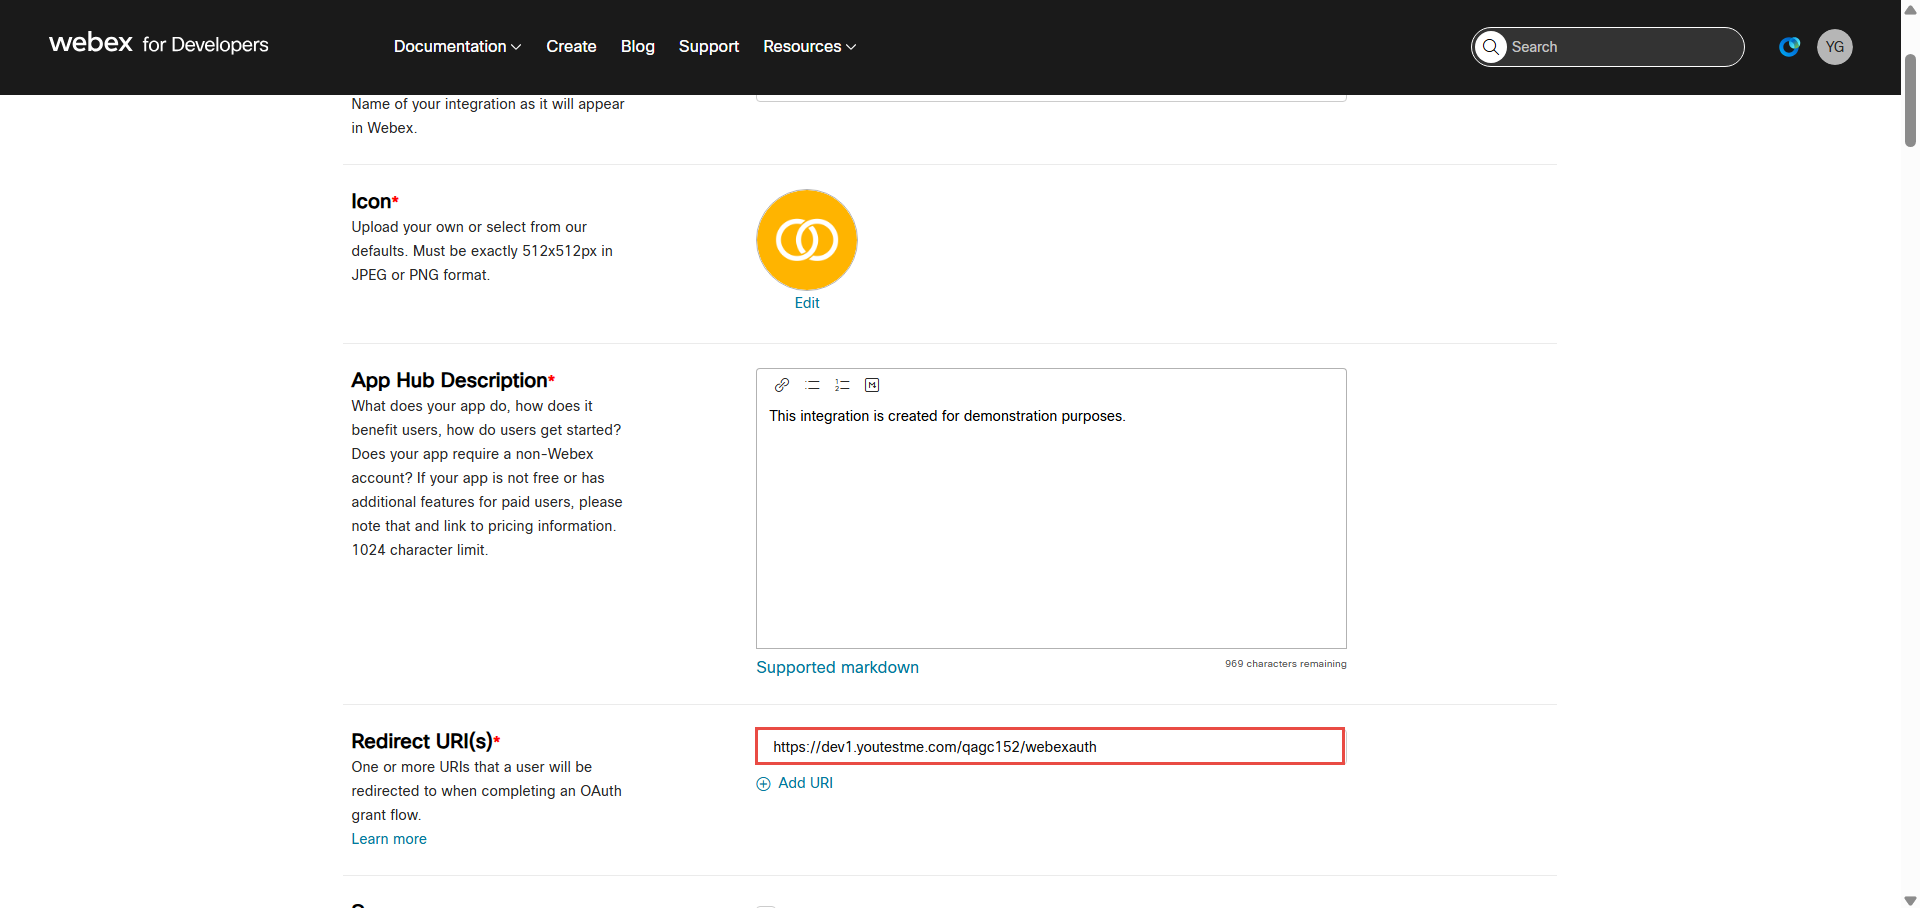
 Copy the Redirect URL from YouTestMe application.
And paste it into the newly created integration on Webex:
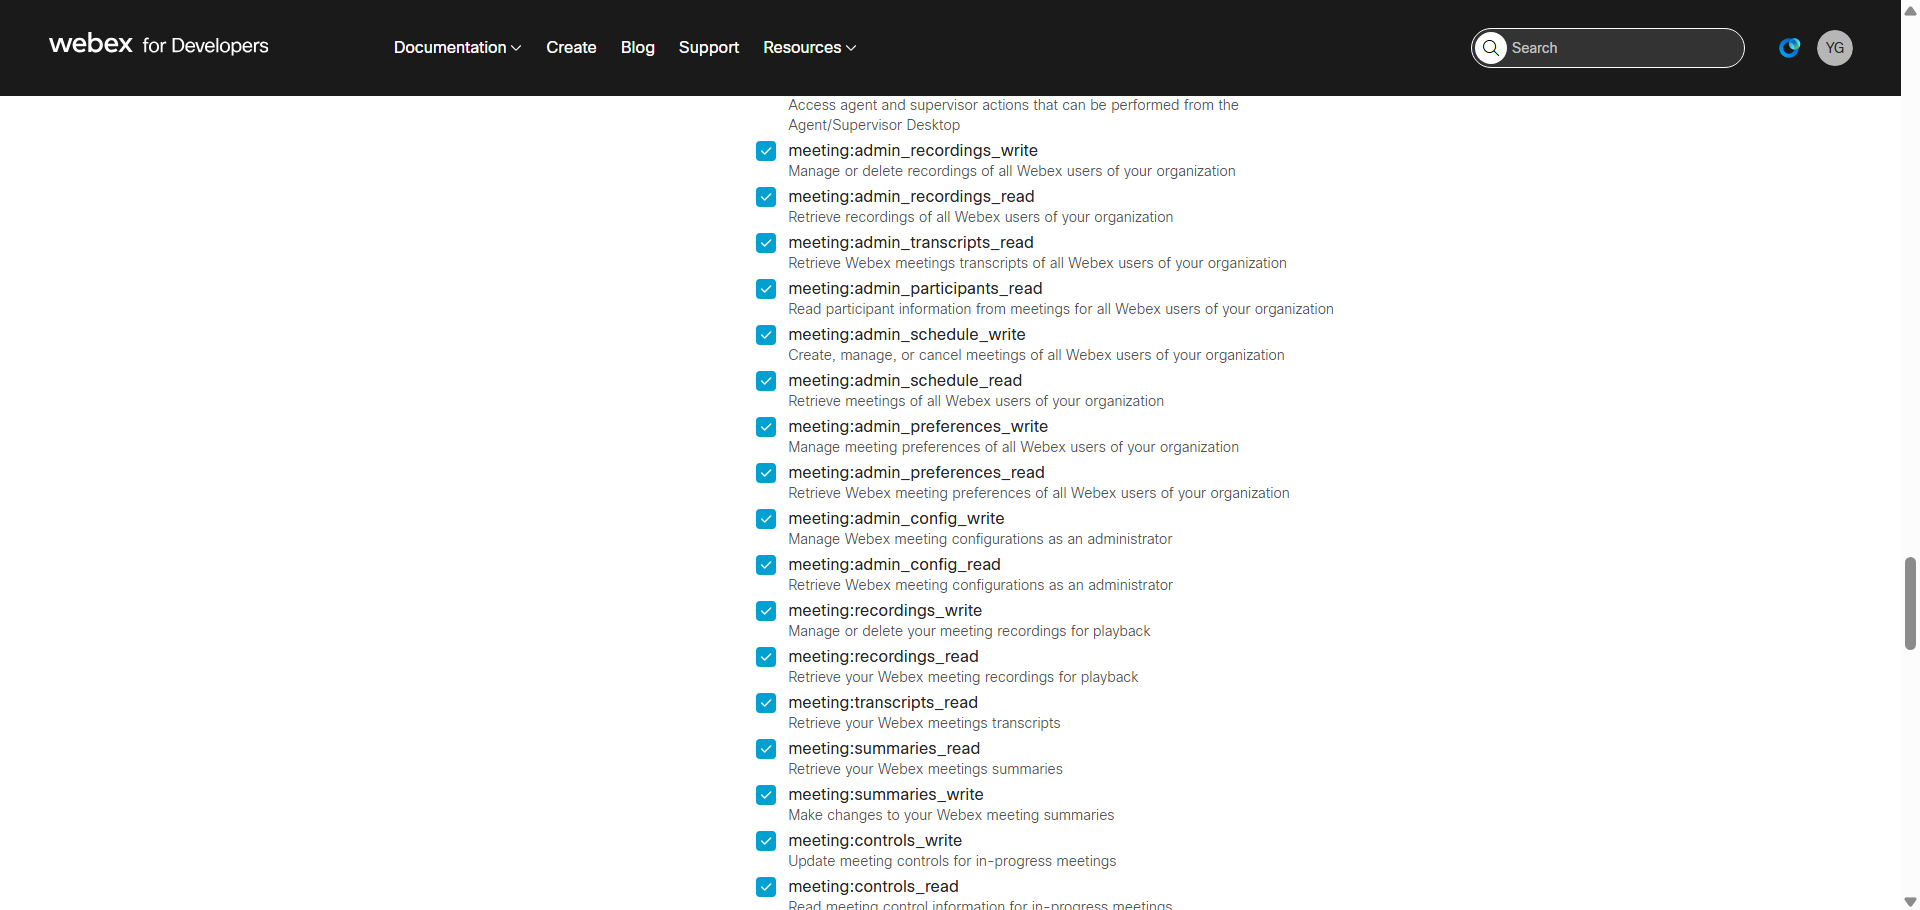
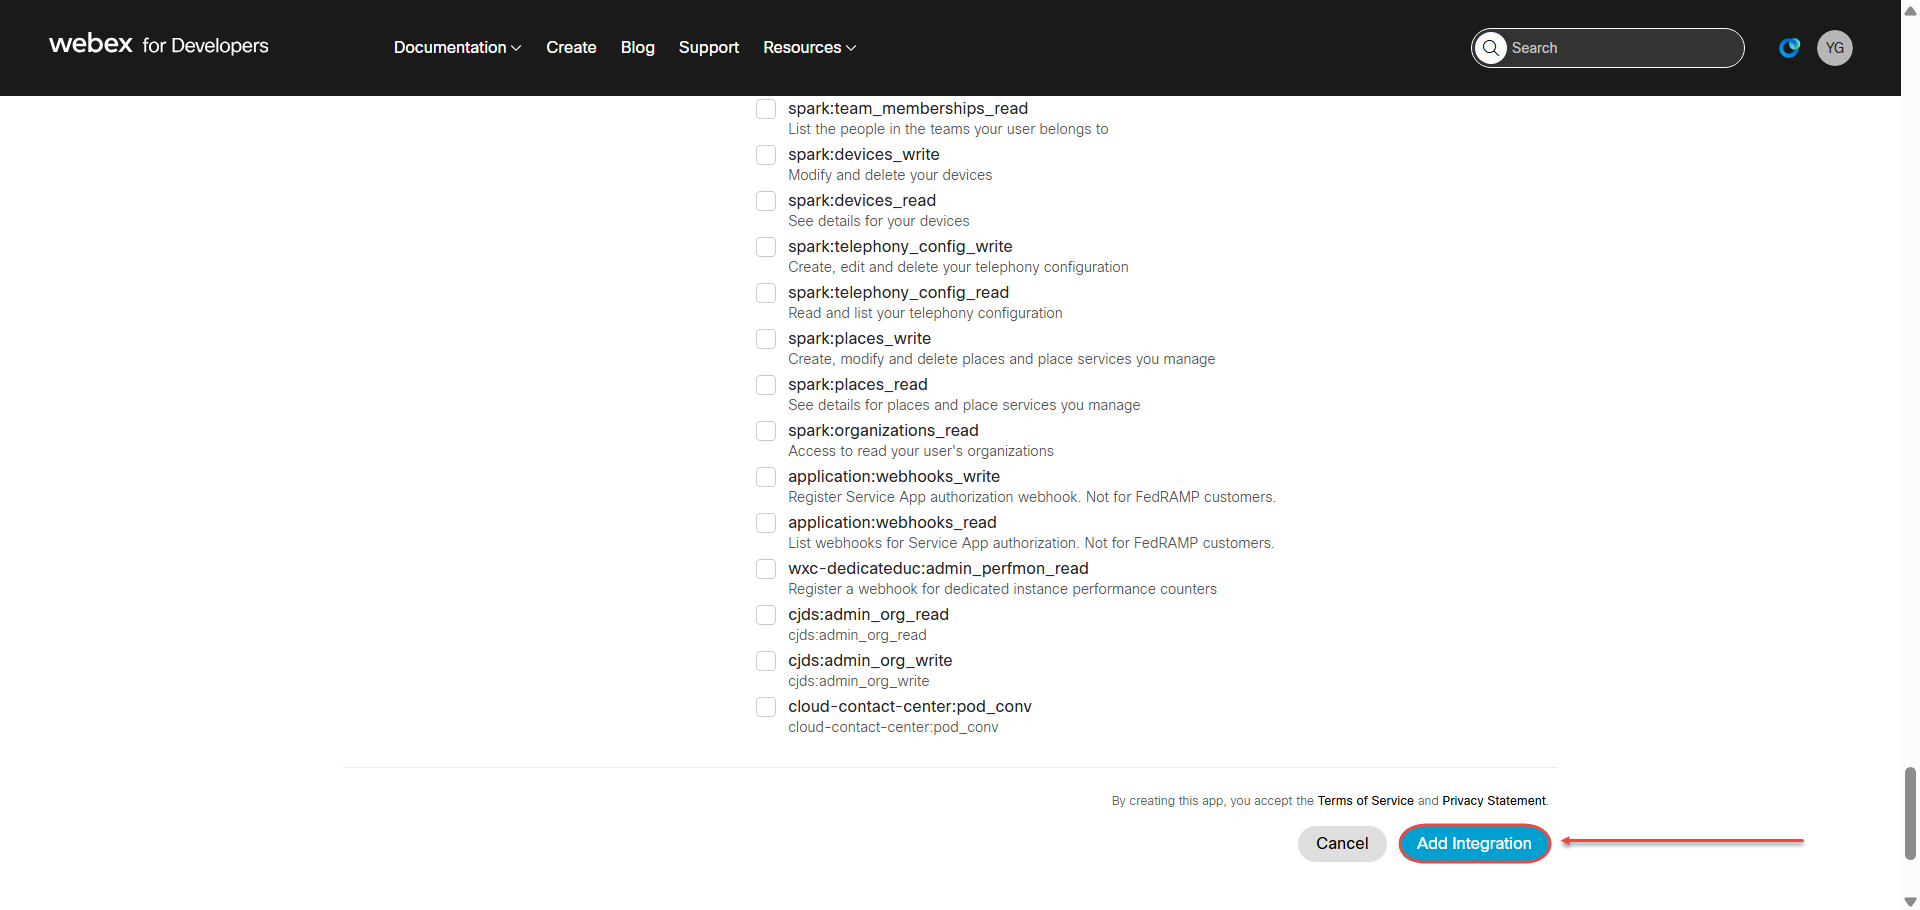
Next, scroll down and select all Meetings Scopes. (Scopes that start with meeting:).
Select the Add Integration button to create the integration.
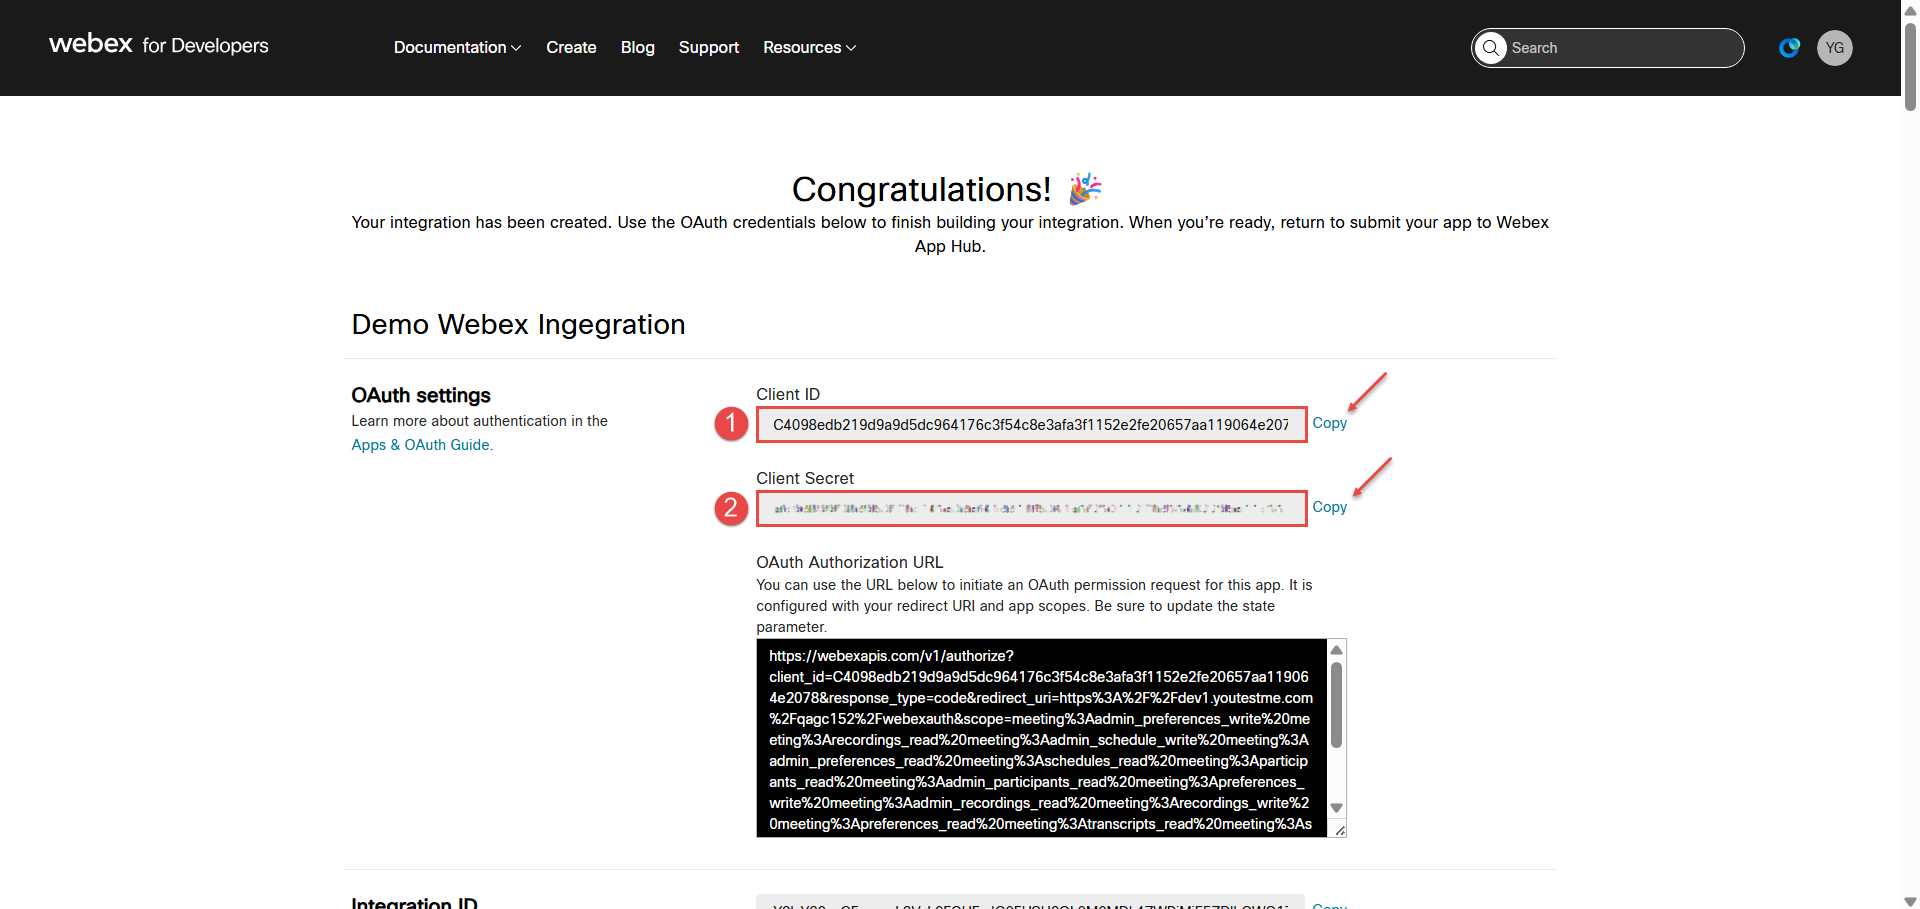
Once you create an integration, you will get:
- The Client ID.
- The Client Secret.
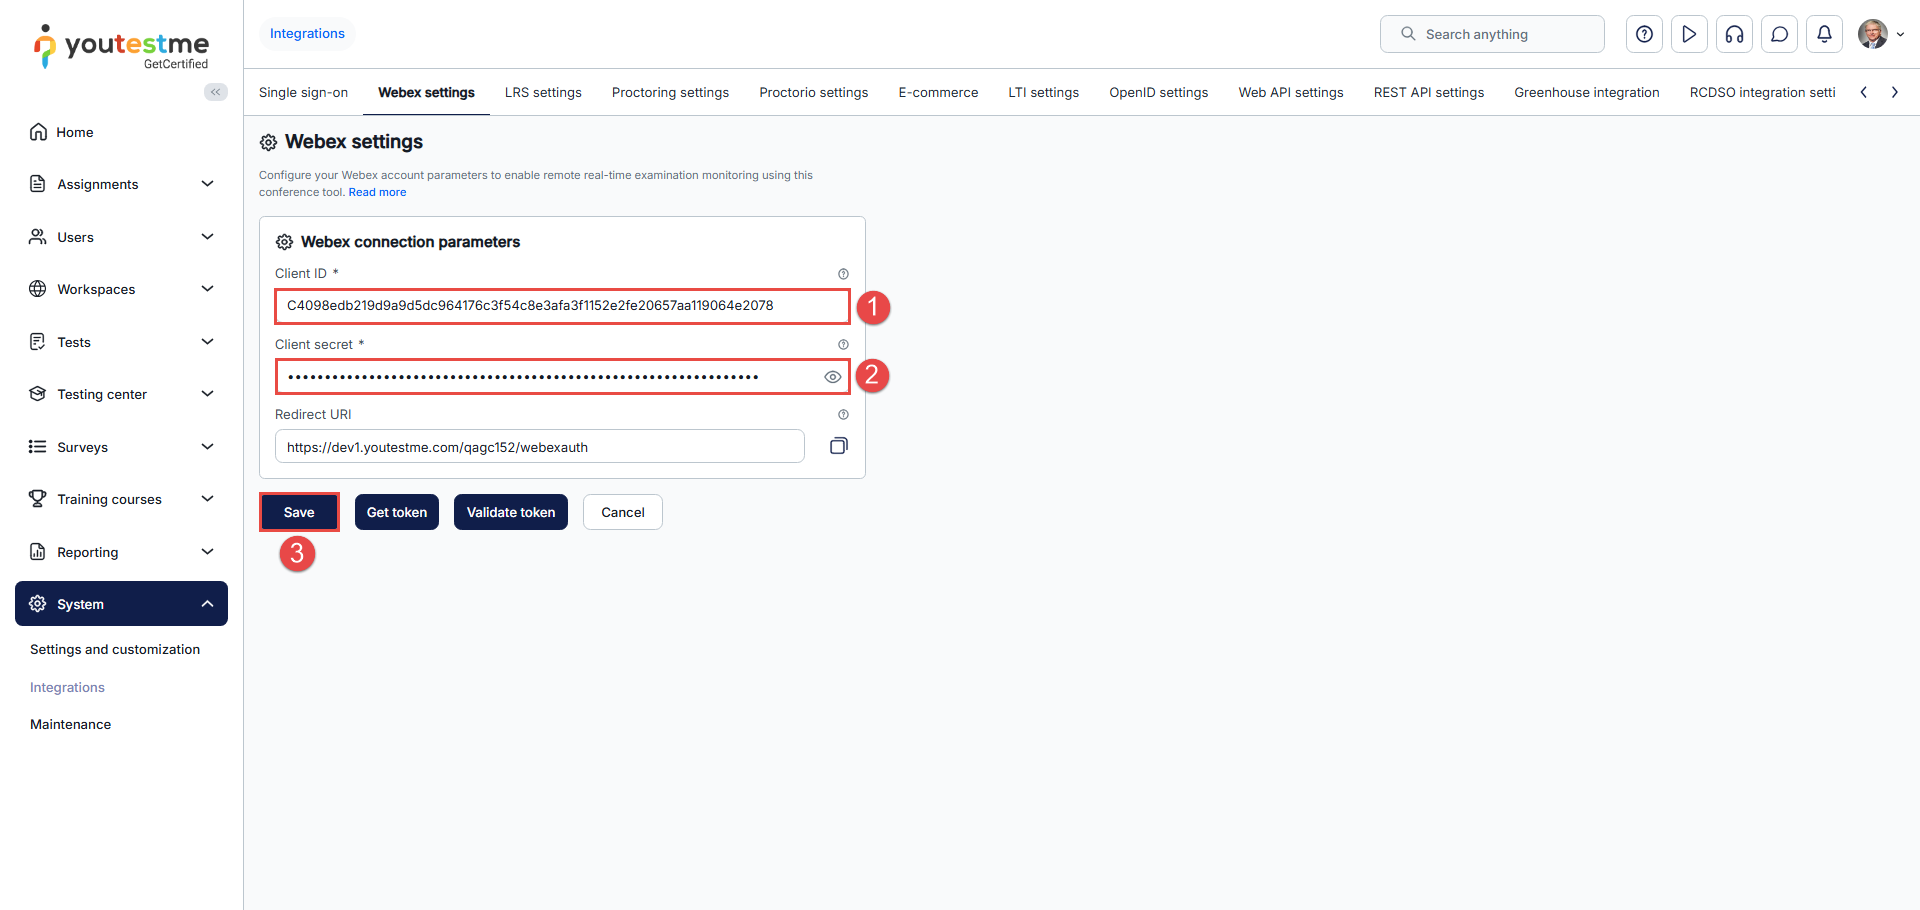
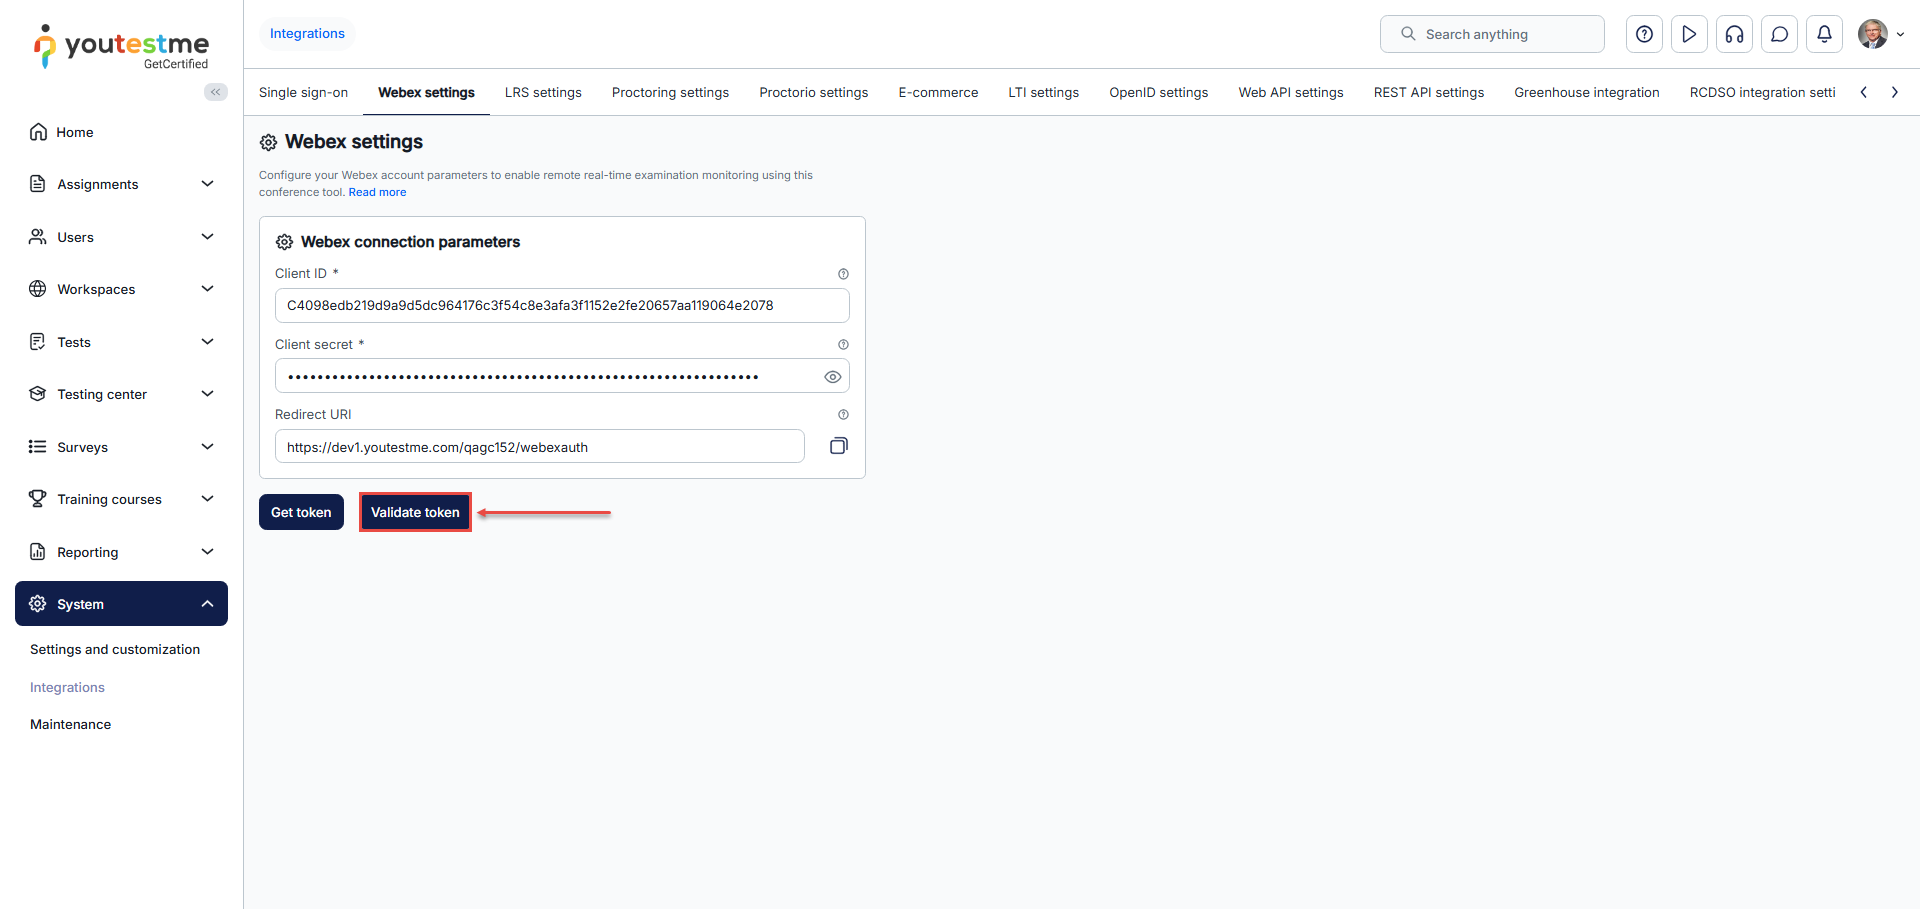
- Copy the Client ID from the Webex website and paste it in the ClientID field of the GetCertified application, under the Webex settings tab.
- Copy the Client Secret from the Webex website and paste it in the Client Secret field of the GetCertified application, under the Webex settings tab.
- Click the Save button.
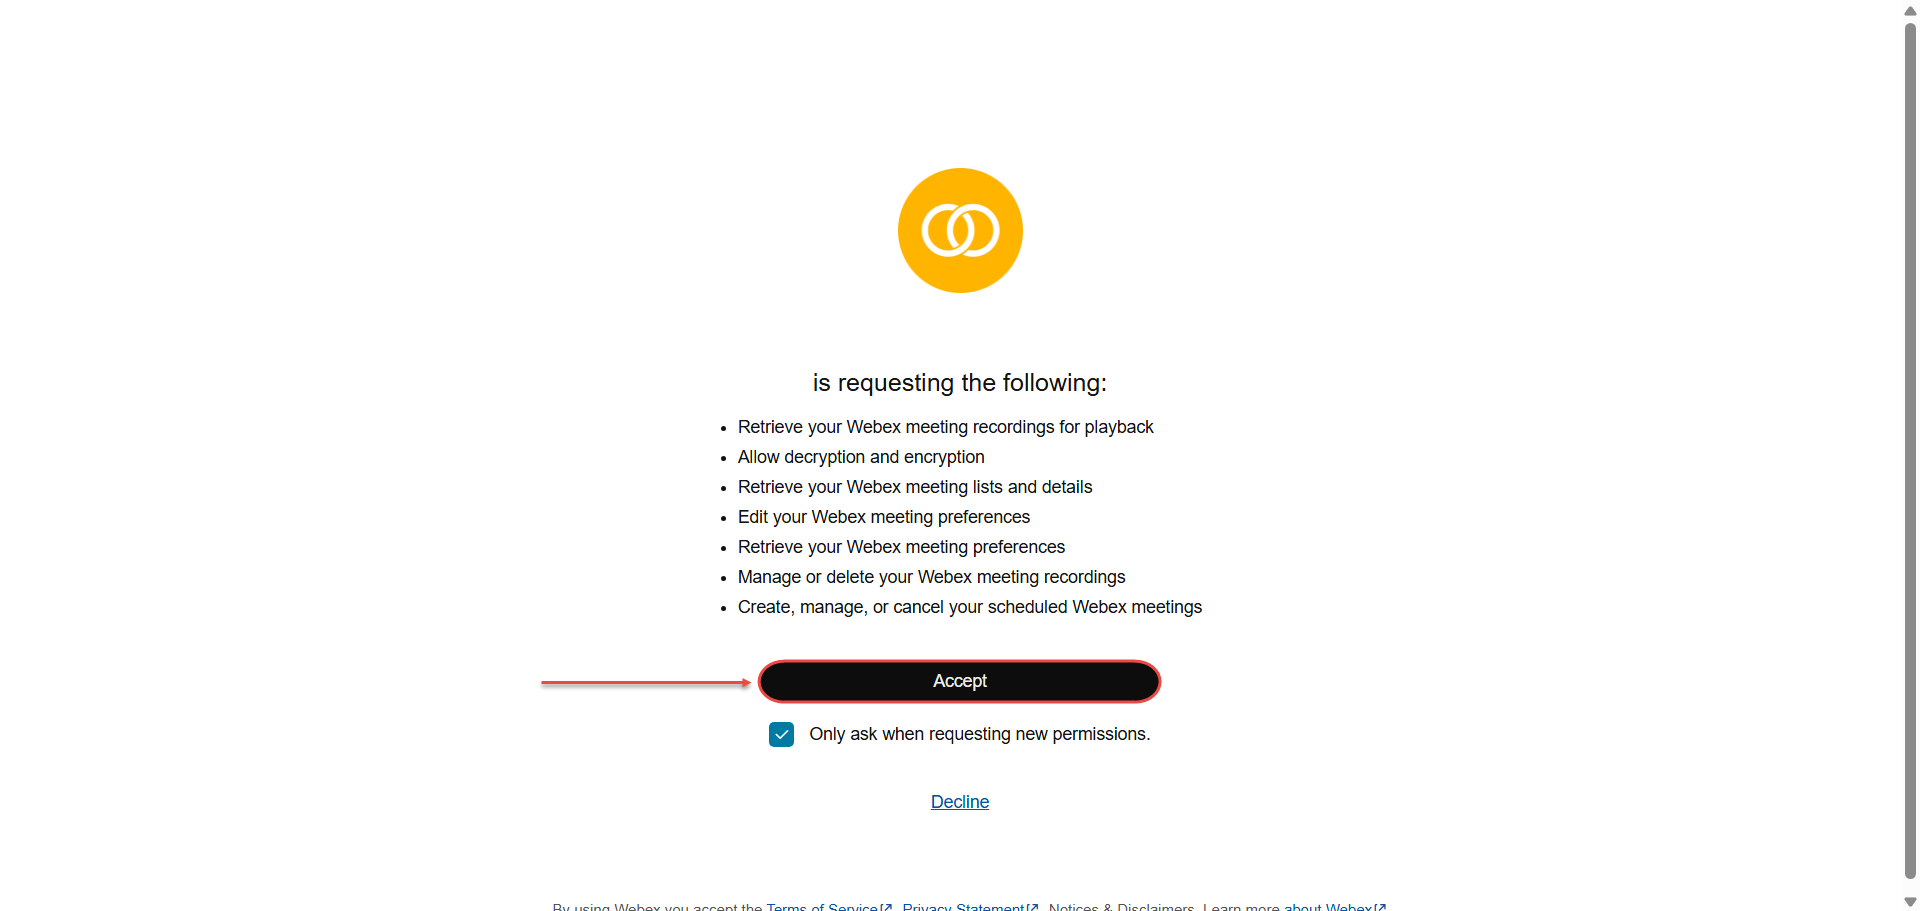
 Click on the Get token button, and you will be redirected to the Webex page, where you should log in again with the hosting Webex account. Once you are logged in, click the Accept button.
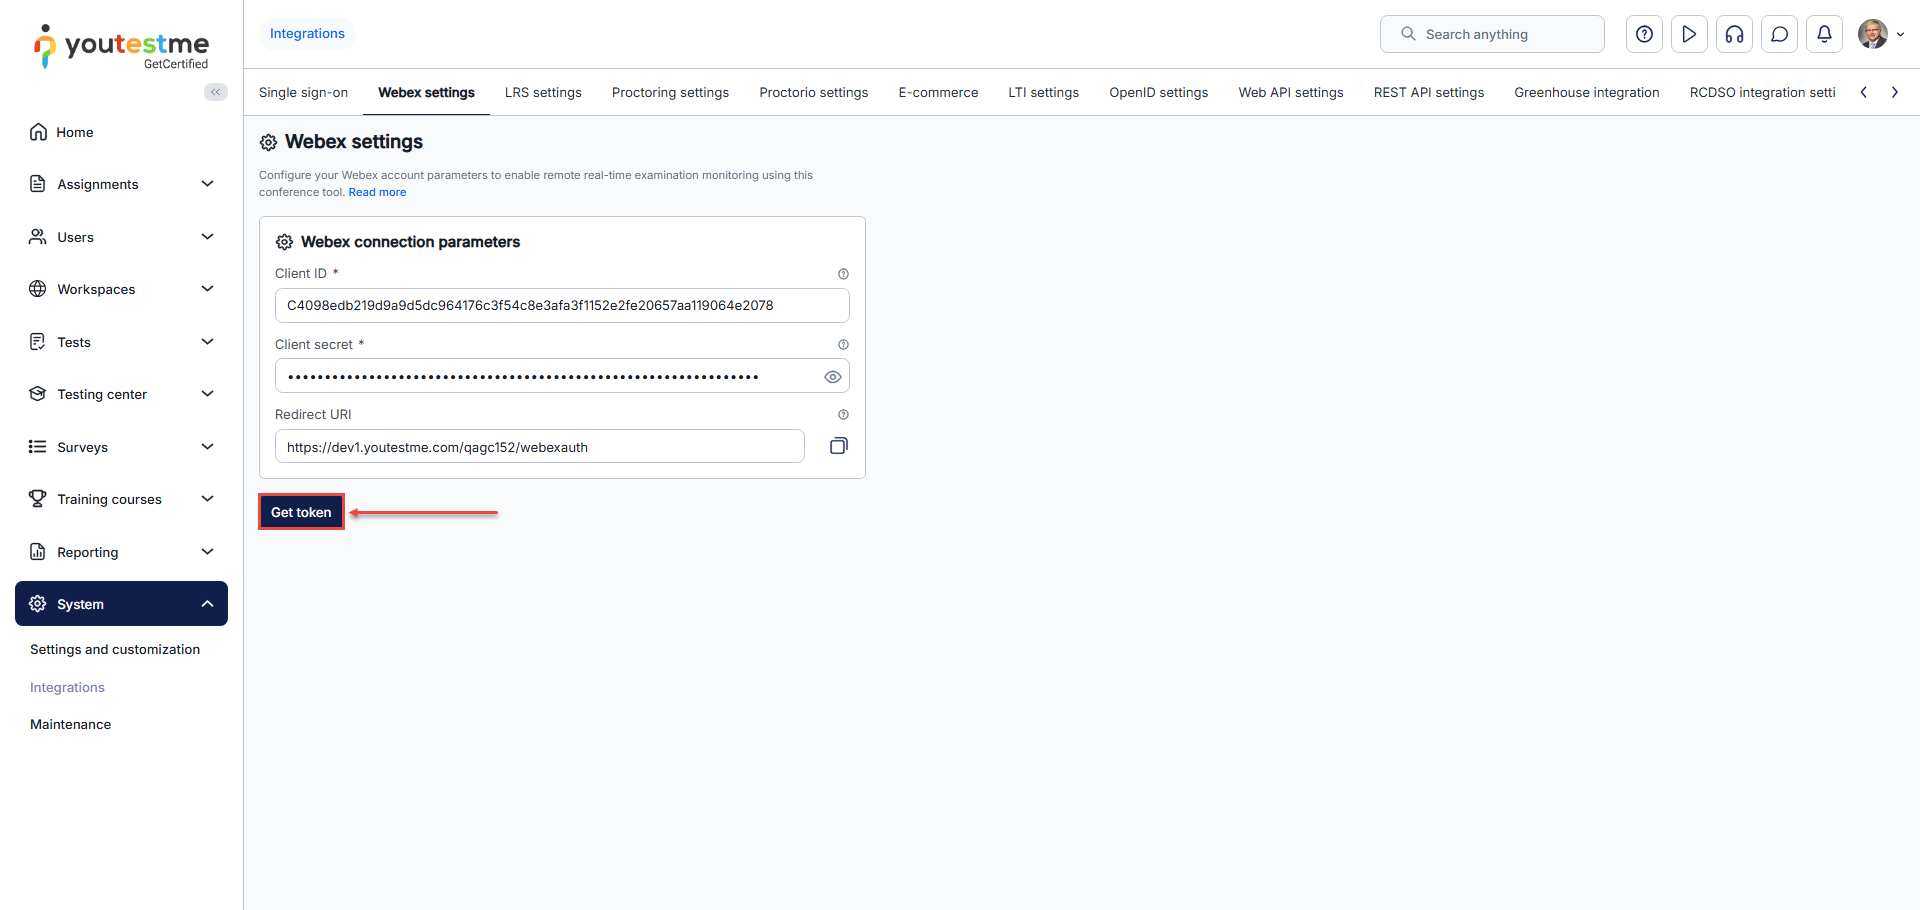
Once you accept, the Validate token button will appear in the GetCertified application, indicating that you have access to this token.
Creating a testing session
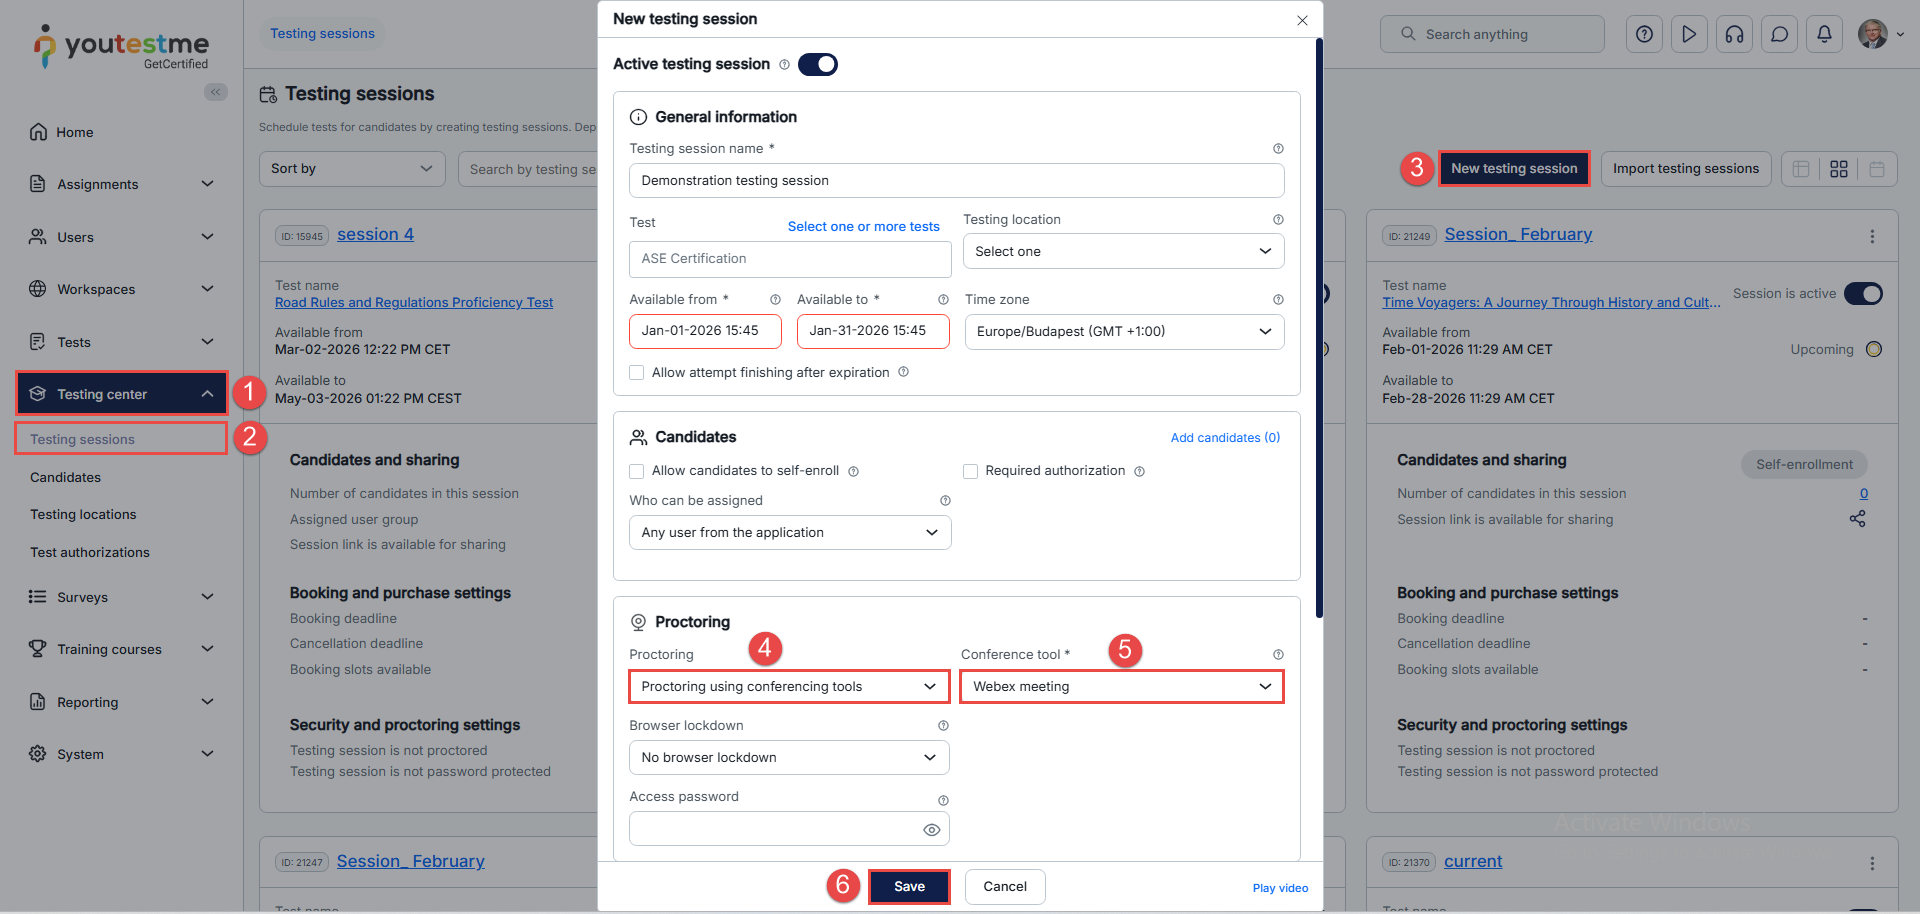
To create a testing session for Webex:
- Select the Testing center
- Under the Testing center menu, select the Testing sessions tab
- Select the New testing session button.
- In the New testing session dialog, scroll down to Proctoring session and choose Proctoring using conferencing tools option.
- Under the Conference tool option, choose Webex meeting.
- Click on the Save button to create the session.
Proctoring using Webex
Please see the links below for more information on how proctoring using Webex works.
Test from the proctor’s perspective
Test from a candidate’s perspective
For more useful instruction materials, please check the following links:
