Article verified for Release 14.1 on April 4, 2025.
In this article, we will guide you through how to configure tax settings in the E-commerce tab, explain the difference between static and dynamic taxes, and show how these settings affect the candidate’s experience during checkout.
How to Configure Stripe Integration
Before setting up taxes, you need to configure your Stripe account integration. This includes entering your Stripe Account ID, Secret Key, and Publishable Key in the appropriate fields. For a detailed walkthrough, refer to this article.
How to Configure Static Taxes
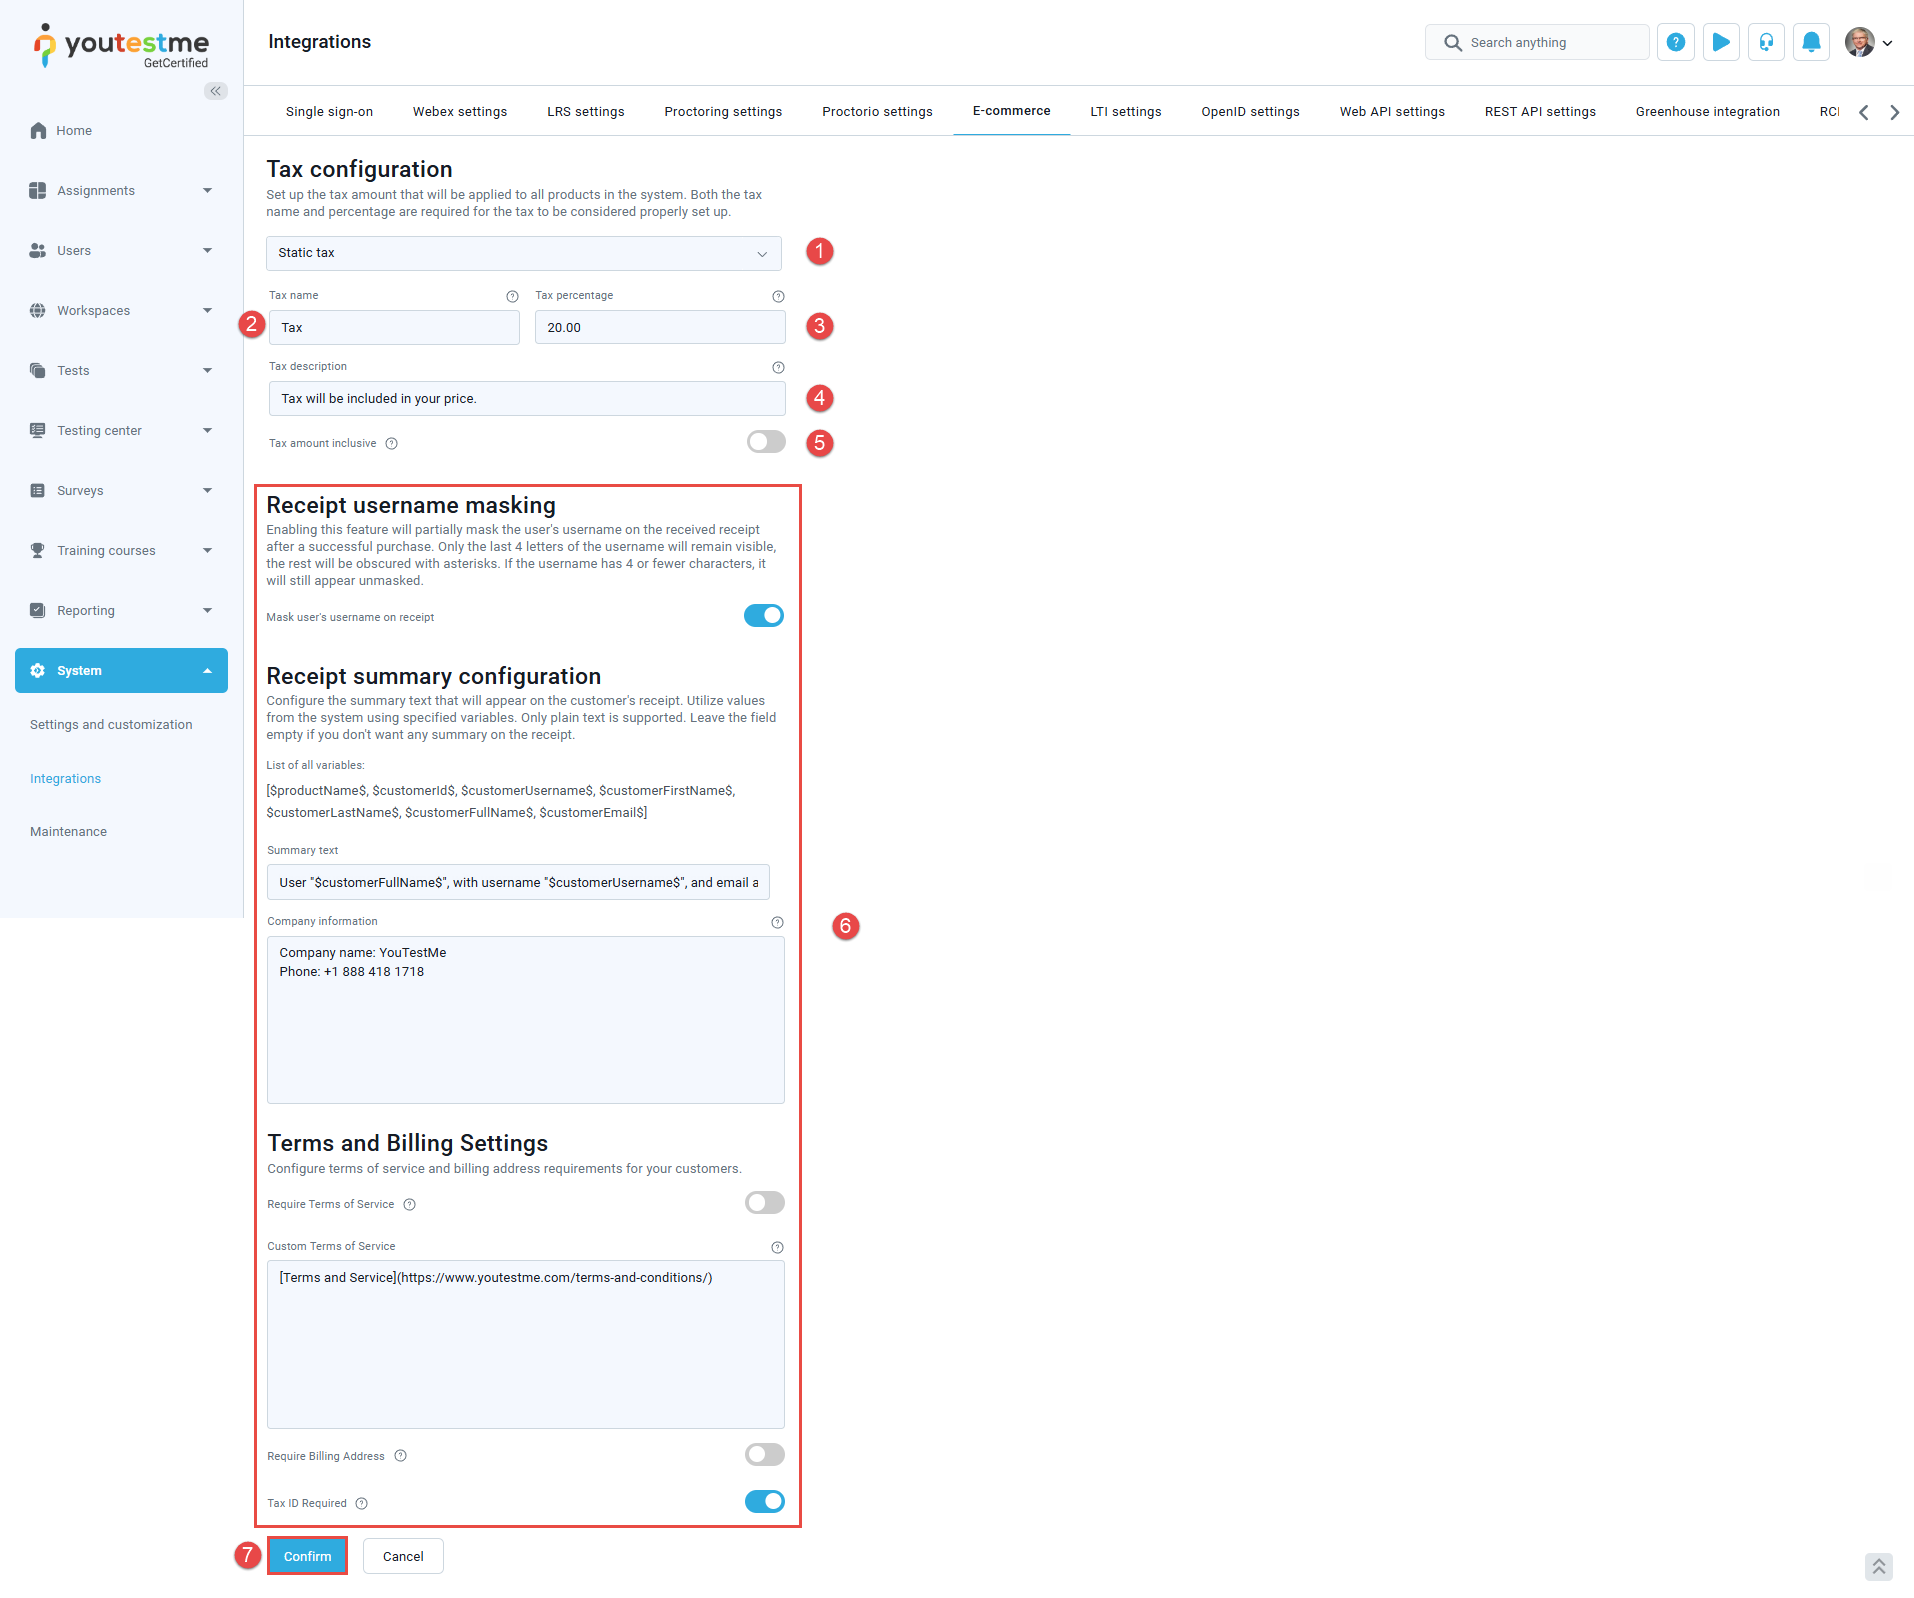
To configure static taxes, follow these steps:
- In the Tax Configuration section, select Static Tax from the dropdown menu.
- Tax Name – The name of the tax that users will see during checkout and on their receipts.
- Tax Percentage – The percentage of the product price that will be applied as tax.
- Tax Description – A short explanation of the tax is displayed next to the tax name at checkout and on the receipt.
- Tax Amount Inclusive – Specify whether the tax is included in the product price or added to it.
- Additional options – The following settings can be configured to enhance the checkout experience.
Terms and Billing Settings will be visible to the candidate during checkout. For more details on these options, please refer to this article. - Once configured, confirm the changes.
Candidate’s Perspective
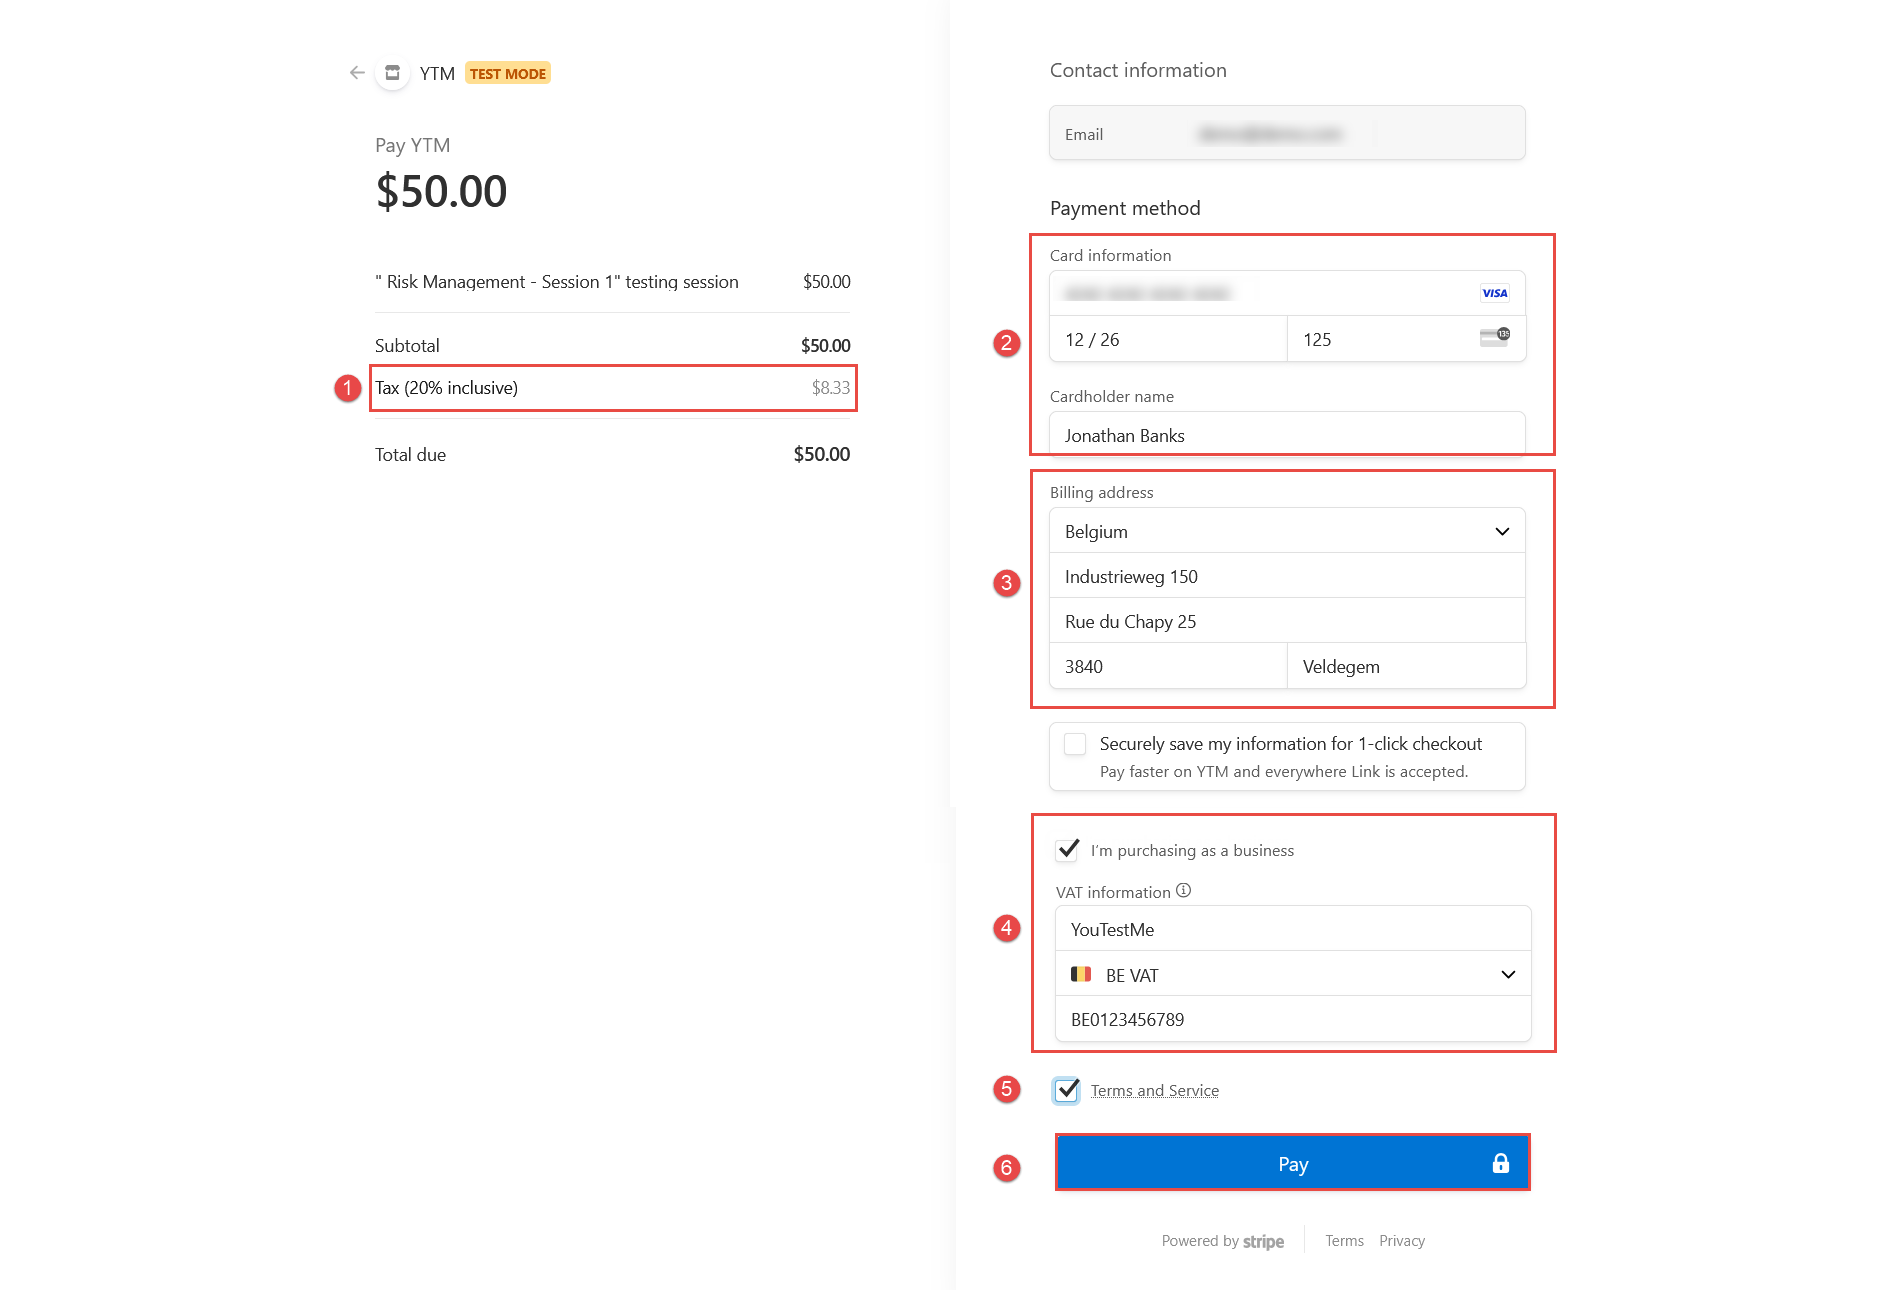
During checkout, the candidate will see and interact with the following elements:
- Tax amount – If the tax is inclusive, it will be part of the product price. If not, it will be added to the price.
- Card information – The candidate must enter valid card details to complete the purchase.
- Billing address – If enabled in the E-commerce settings, the candidate will be required to provide their billing address.
- Purchasing as a business – If Tax ID collection is enabled, the candidate will be prompted to enter a company name and a Tax ID that matches the billing address.
Note: Tax ID collection is only available for Stripe-supported countries. See the official list here: Supported Tax ID Countries. - Terms and Service – If this option is enabled, the candidate must acknowledge the Terms and Services before completing the checkout.
- Complete the Purchase – Once all required information is entered, the candidate can confirm and complete the purchase.
Once the purchase is completed, the candidate can download the receipt by navigating to My Profile > Balance and selecting the corresponding receipt to download. Receipts can be customized using language bundles. For detailed instructions, please refer to this article.
The Test Manager can view who purchased a test by navigating to the Payment Log. For more details, please refer to this article.
How to Configure Dynamic Taxes
To configure dynamic taxes, follow these steps:
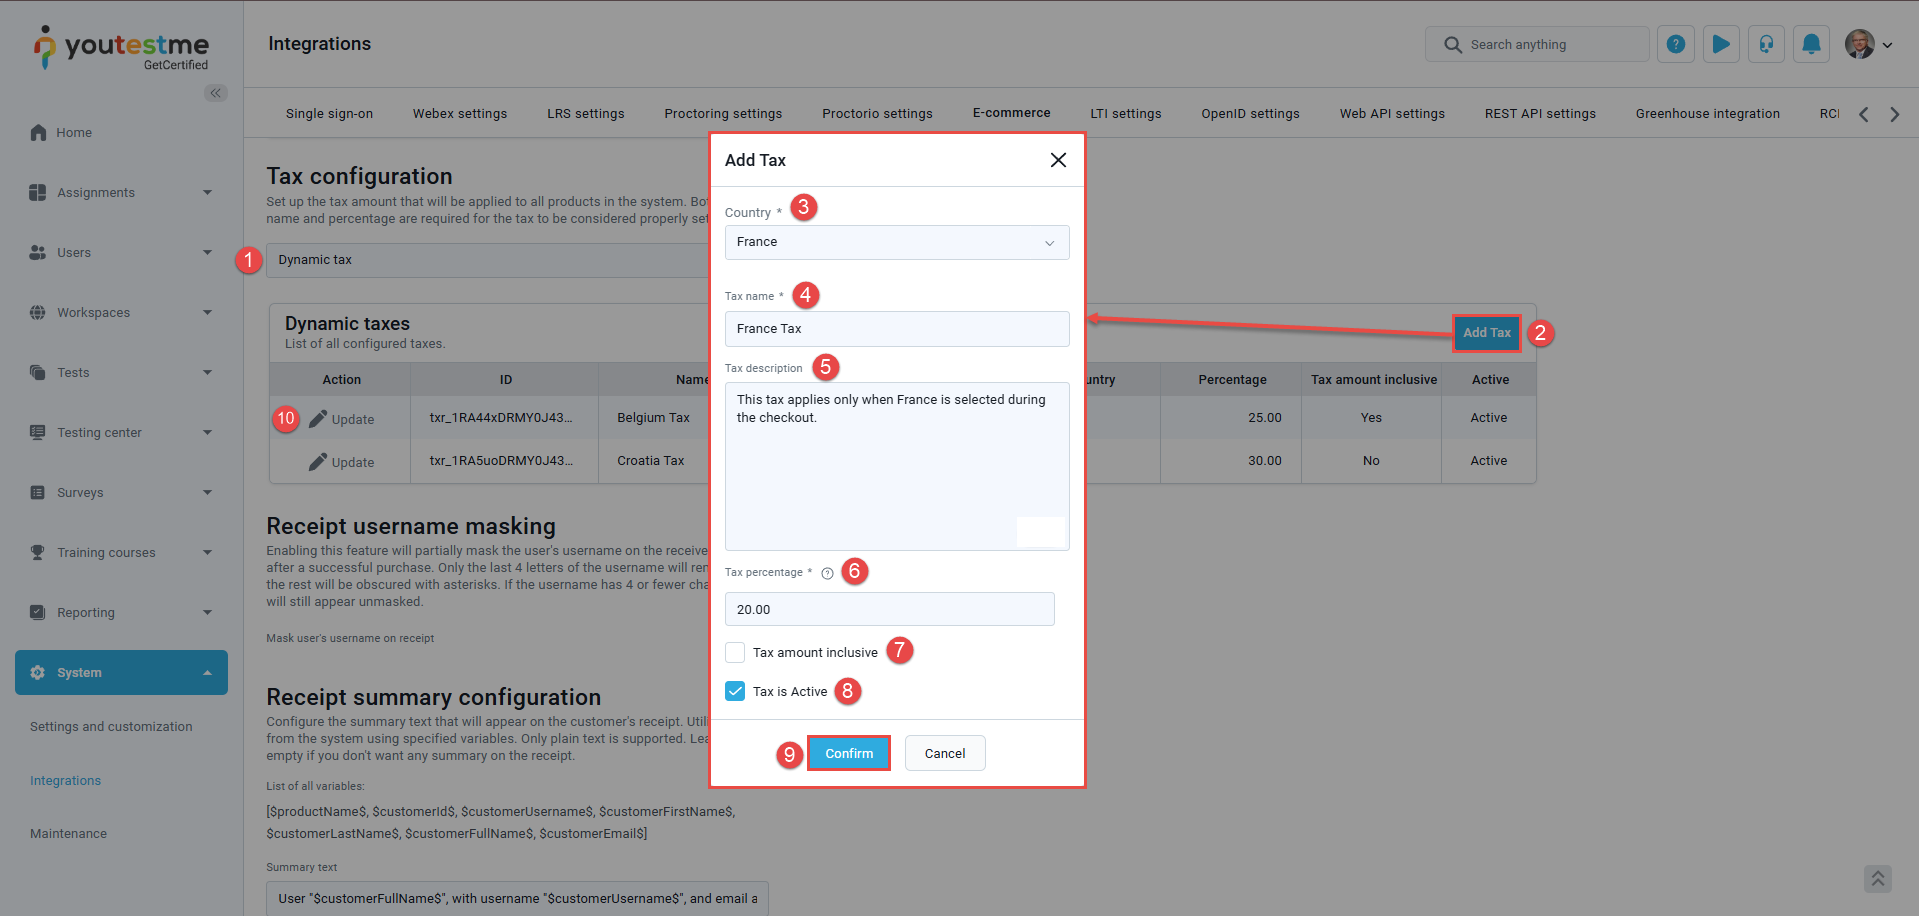
- In the Tax Configuration section, select Dynamic Tax from the dropdown menu.
- Click Add Tax to create a new tax entry.
Note: Dynamic taxes are only available for Stripe-supported official countries. See the full list here: Supported Tax Rate Countries. - Country – Select the country to which the tax will apply.
Note: For a country to appear in the selection menu, it must be enabled in the Country Settings. For more information, refer to this article. - Tax Name – The name that will appear to users during checkout and on their receipts.
- Tax Description – A brief description of the tax.
- Tax Percentage – The percentage of the product price that will be applied as tax.
- Tax Amount Inclusive – Specify whether the tax is included in the product price or added to it.
- Tax is Active – Enable this to activate the tax after saving.
- Once all fields are filled, confirm the changes.
- To modify the status later, use the Update button to toggle the Active column for that tax.
Additional options are available for Dynamic Tax as well. For more details, please refer to this article. Once the configuration is complete, make sure to confirm the changes to apply them.
Note: The billing address is required for dynamic taxes, even if it is disabled in the E-commerce settings.
Candidate’s Perspective
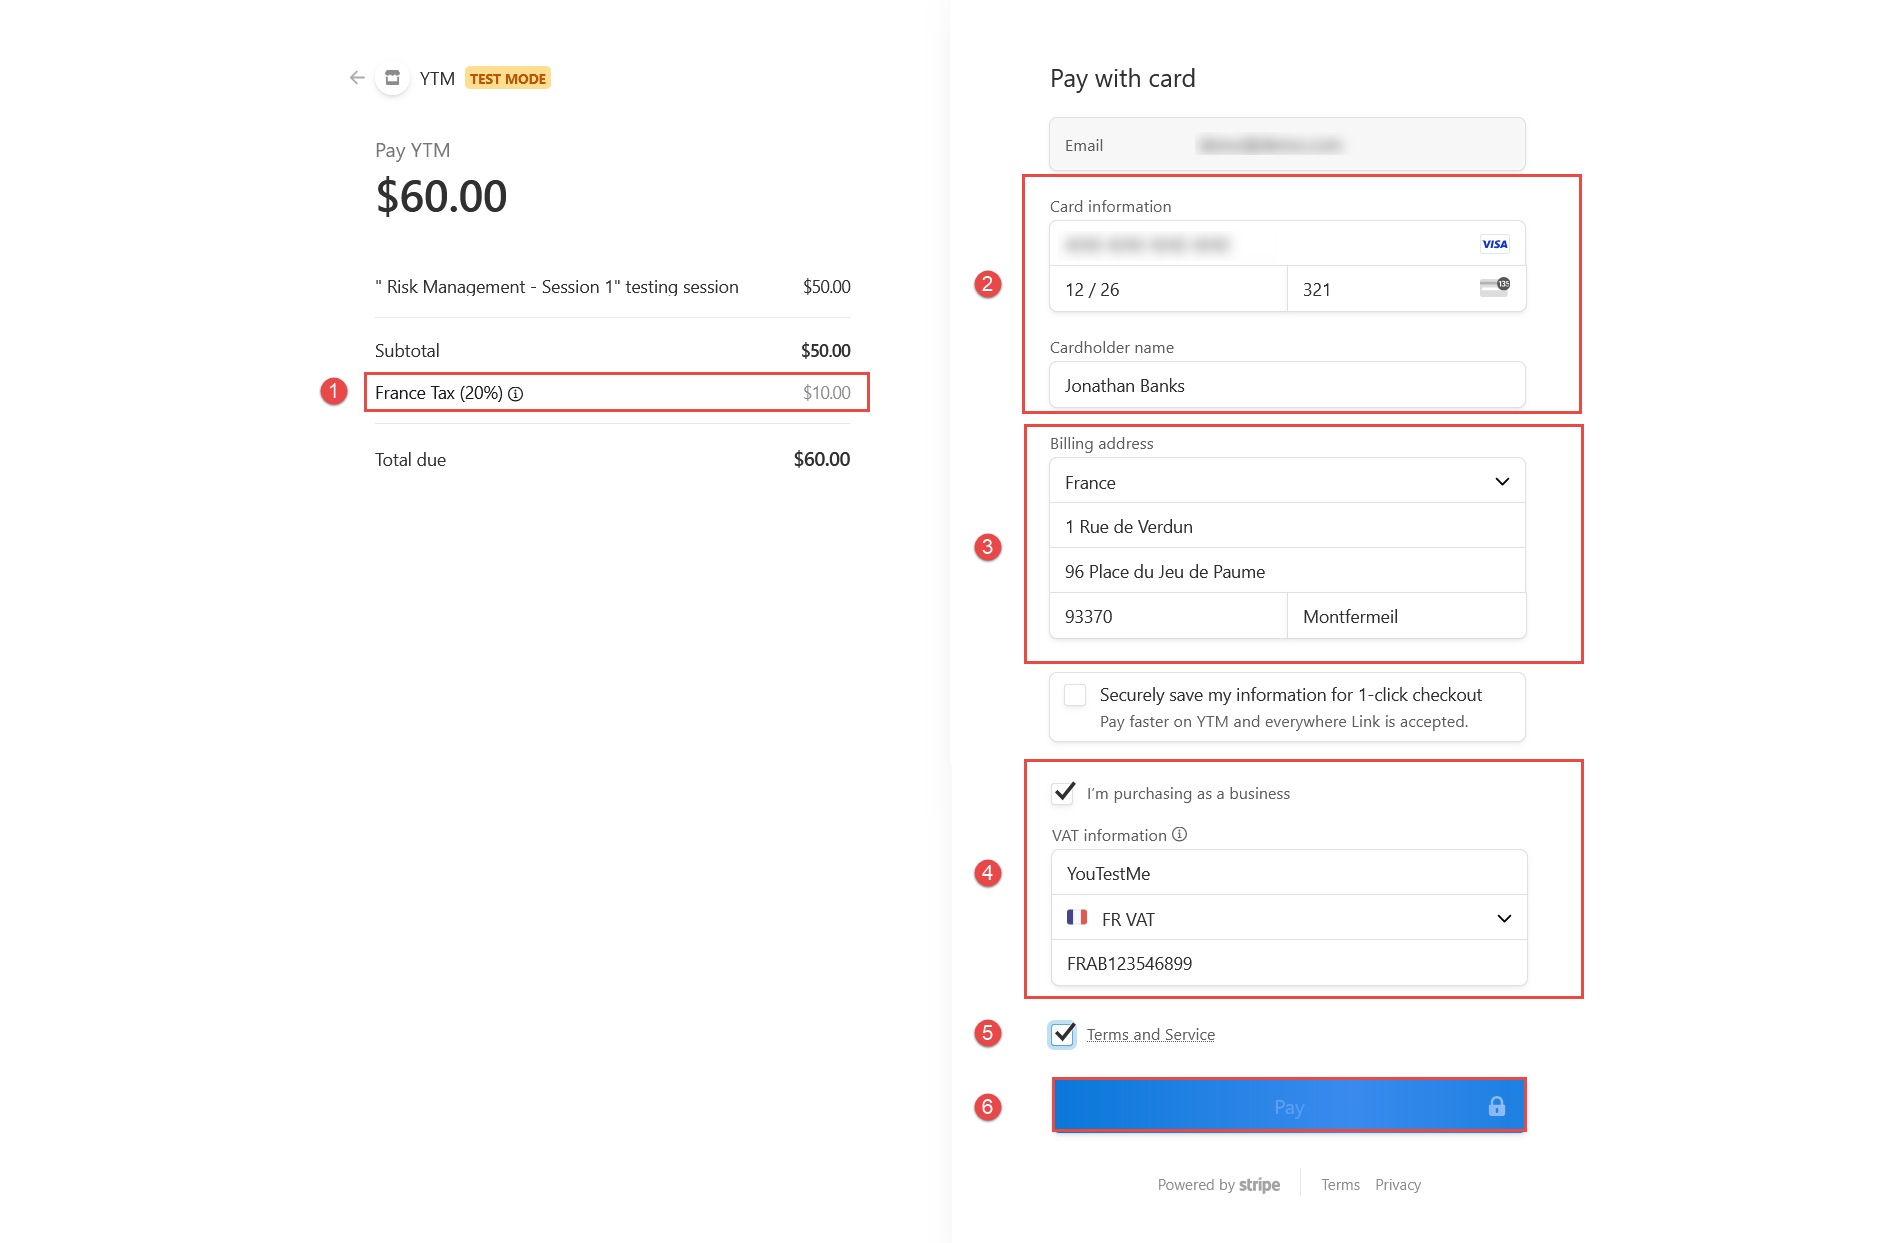
During checkout, the candidate will see and interact with the following elements:
- Tax Amount – If the tax is inclusive, it is part of the product price. If not, it is added to the price. The displayed tax is based on the billing address.
- Card information – The candidate must enter valid card details to complete the purchase.
- Billing address – If enabled in the E-commerce settings, the candidate will be required to provide their billing address.
- Purchasing as a business – If Tax ID collection is enabled, the candidate will be prompted to enter a company name and a Tax ID that matches the billing address.
Note: Tax ID collection is only available for Stripe-supported countries. See the official list here: Supported Tax ID Countries. - Terms and Service – If this option is enabled, the candidate must acknowledge the Terms and Services before completing the checkout.
- Complete the Purchase – Once all required information is entered, the candidate can confirm and complete the purchase.
Once the purchase is completed, the candidate can download the receipt by navigating to My Profile > Balance and selecting the corresponding receipt to download. Receipts can be customized using language bundles. For detailed instructions, please refer to this article.
The Test Manager can view who purchased a test by navigating to the Payment Log. For more details, please refer to this article.


