
Article verified for Release 15.2 on December 26, 2025.
The article explains how to create a proctored test, enable the manual rating of video recordings, and rate the test attempt.
Enabling Manual Rating for a Proctored Test
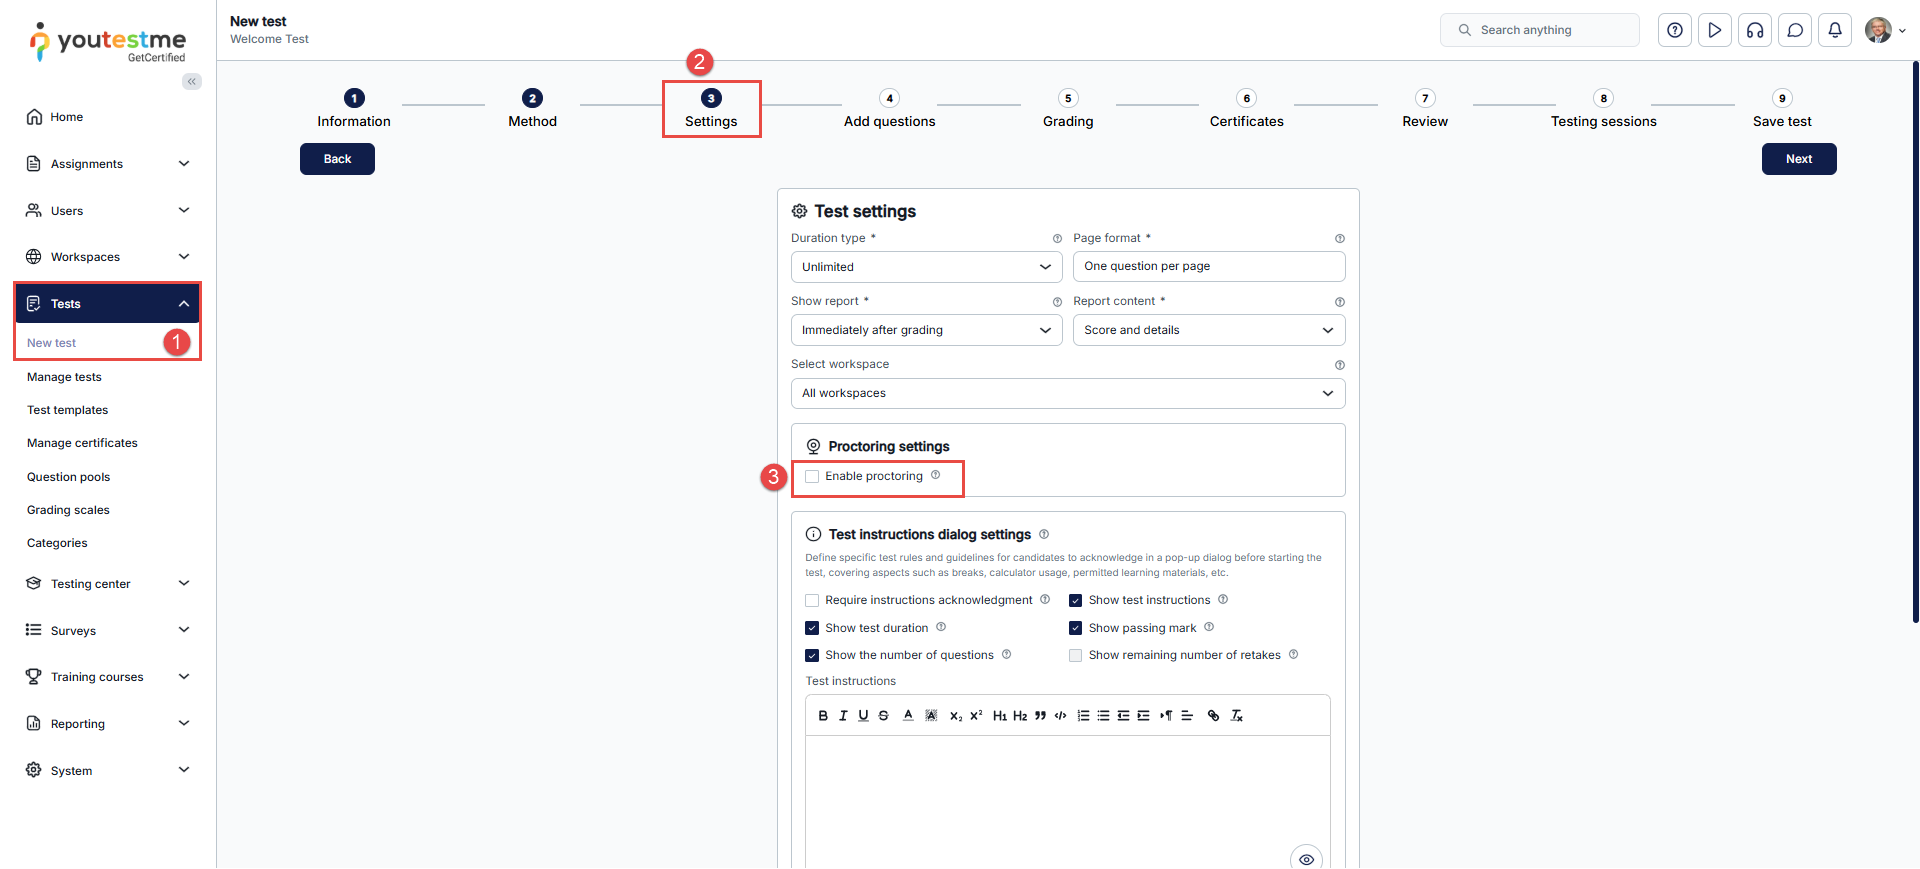
To allow manual rating of a proctored test (that is, to request human review and grading of candidates’ behavior during the exam), you first need to enable proctoring mode. Follow these steps:
- In the left-side menu, go to the Tests tab, select New Test, and start the Test Wizard.
- Proceed to the third step of the wizard — Settings.
- Tick the checkbox next to Enable Proctoring.
Require Positive Proctoring Report
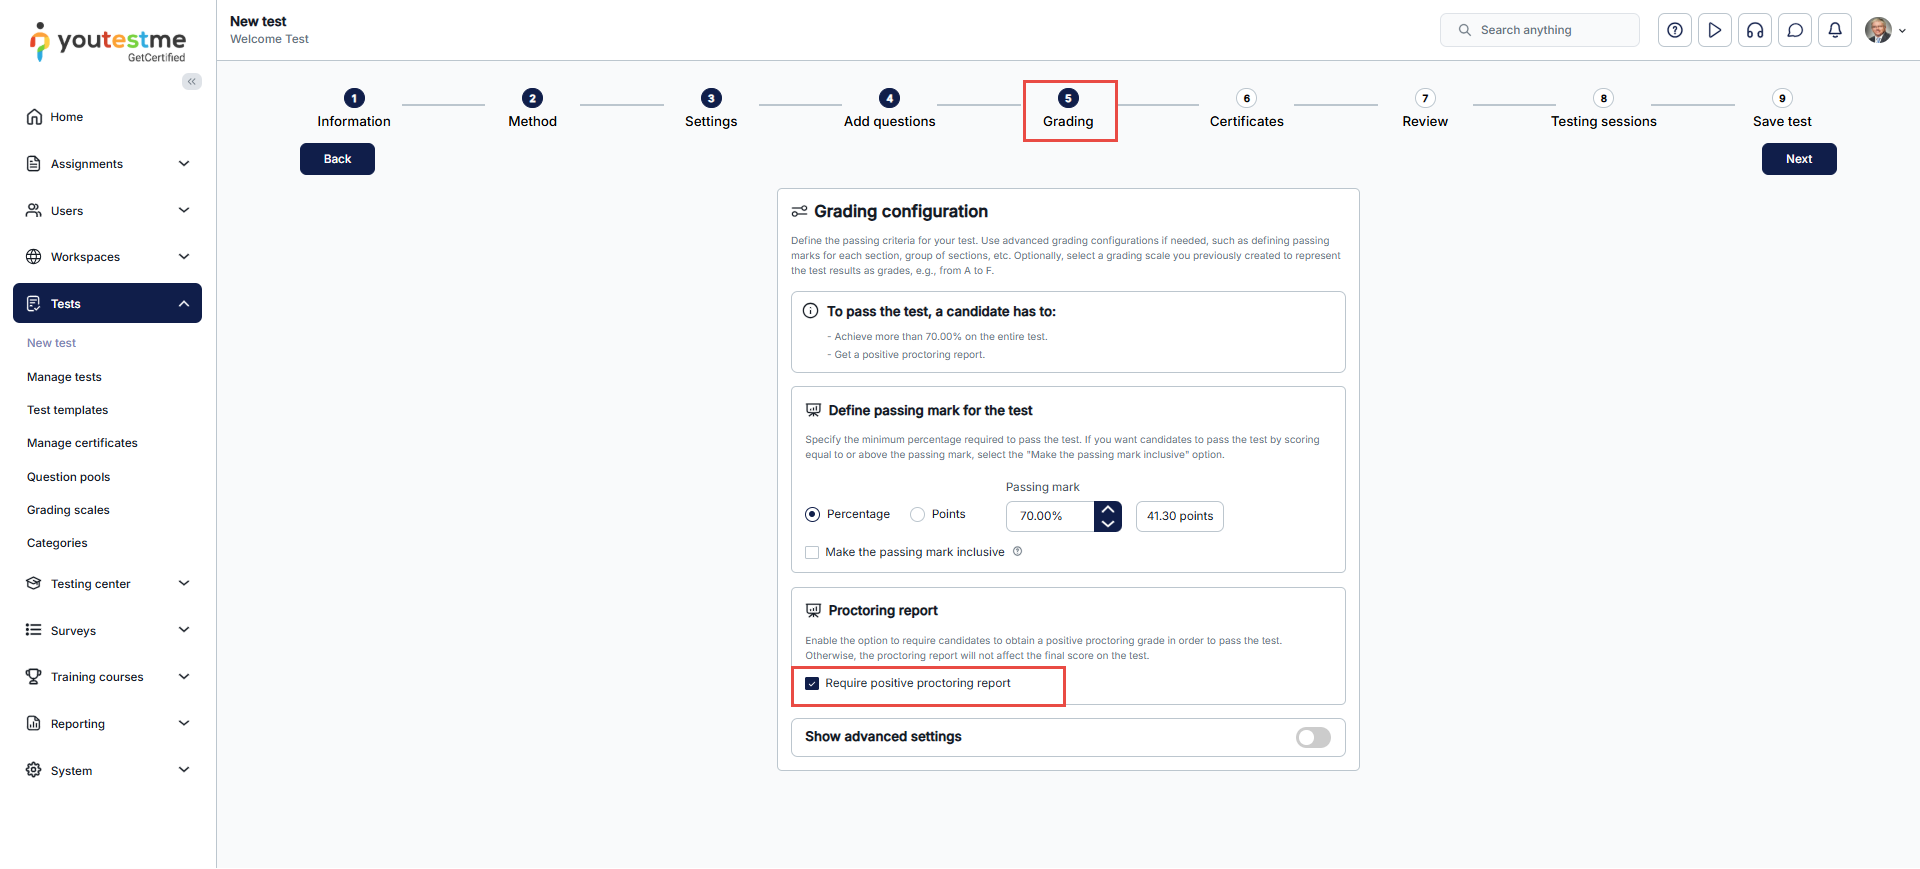
In the fifth step of the Test Wizard Grading, you can enable the Require Positive Proctoring Report option.
This option does not affect how the proctor rates the recording. It only determines how the system calculates the final test result based on the combination of the rating and the test score.
When this option is enabled, the system applies the following logic:
- Positive rating + passing score → Passed
- Negative rating → Failed, regardless of the test score
- Not rated → The result will not be released until the recording is reviewed and rated as Positive or Negative
This ensures that the final outcome of the test depends not only on the candidate’s score but also on the review of their behavior during the proctored session.
Complete the remaining steps, including optionally attaching a certificate, selecting the test creation method, and adding questions. For detailed guidance on each step, refer to the following article.
Resolving the proctored test report
After the proctor opens a video recording in the proctoring software and rates the test attempt, a proctored test report is created.
The proctoring software allows the test to be rated as “Positive,” “Negative,” or “Not Rated,” and automatically generates PDF and ZIP reports that summarize the candidate’s behavior during the proctored session.
To preview the recording of a proctored test and resolve the test report, follow these steps:
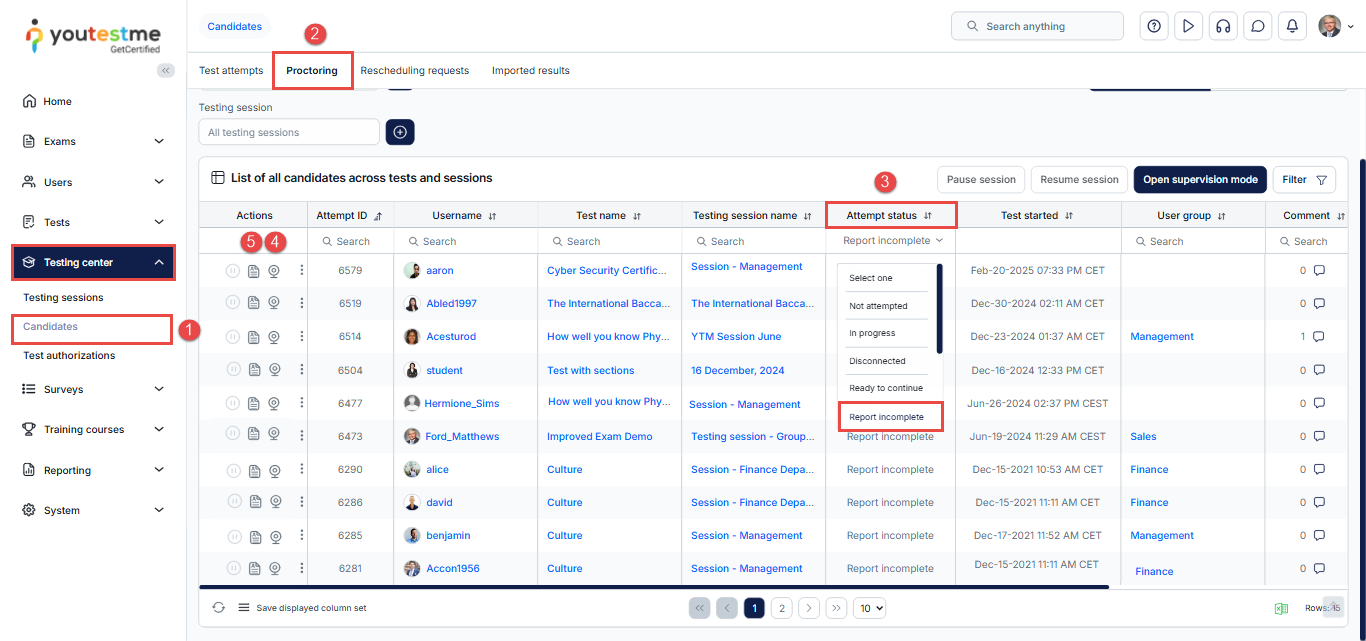
- Navigate to the Testing Center and select Candidates.
- Go to the Proctoring tab.
- From the Attempt Status filter dropdown, select Report incomplete to filter unreviewed recordings.
- Click the Video Recording icon to review the candidate’s behavior during the exam.
- After reviewing the recording, complete the Proctoring Report by selecting the appropriate rating.
After clicking on the Video recording button, you will be redirected to the proctoring software. There you can:
- Watch the recording of the whole test-taking process.
- Rate the proctored test session.
- Download a proctored report as a PDF and ZIP file.
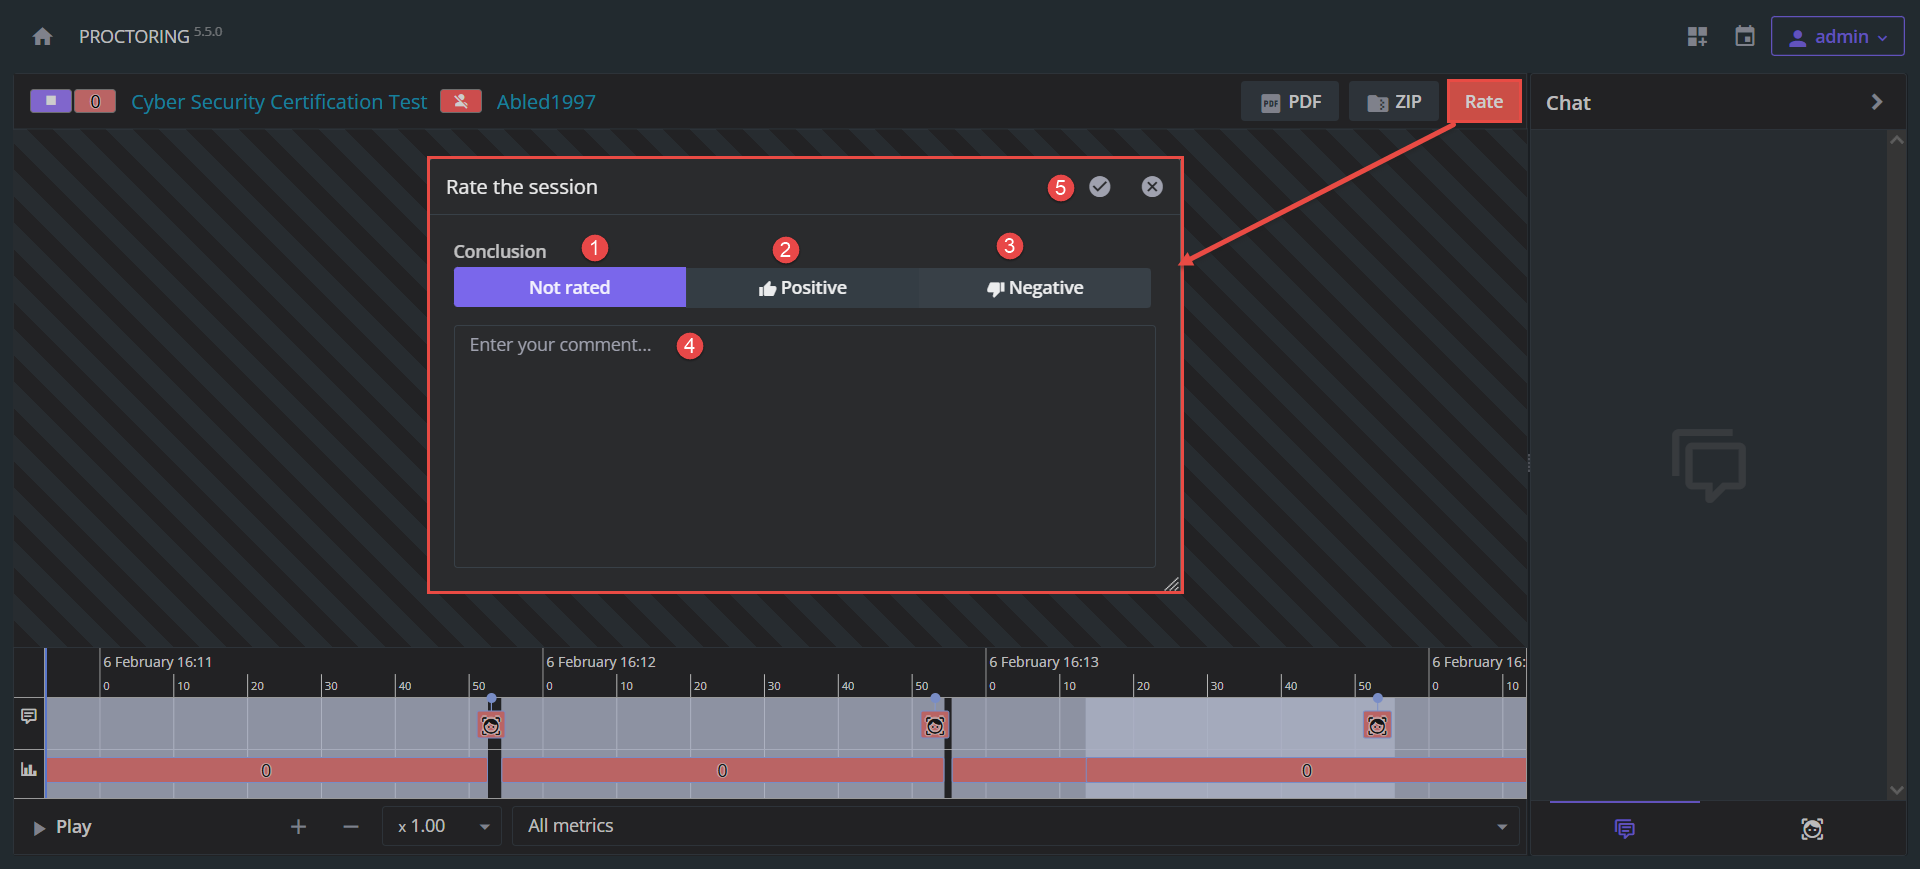
To rate the proctored test session, click the Rate button, and a pop-up window will open. In the pop-up window, you can perform the following actions:
- Click the “Not rated” button to leave the proctored session unrated.
- Click the “Positive” button to rate the proctored session as positive (e.g., if the candidate behaved according to the defined rules and did not cheat).
- Click the “Negative” button to rate the proctored session as negative (e.g., if the candidate did not behave according to the defined rules and cheated on the exam).
- Optionally, enter your comment to justify the rate.
- Click the checkmark icon to save the changes.
Note: Only the user with the proctor role can rate the recording directly from the proctoring software. The proctor must be assigned to the testing session BEFORE candidates attempt the test. The “Error saving data” message occurs when the recording is rated by a user who is not allowed to do so.
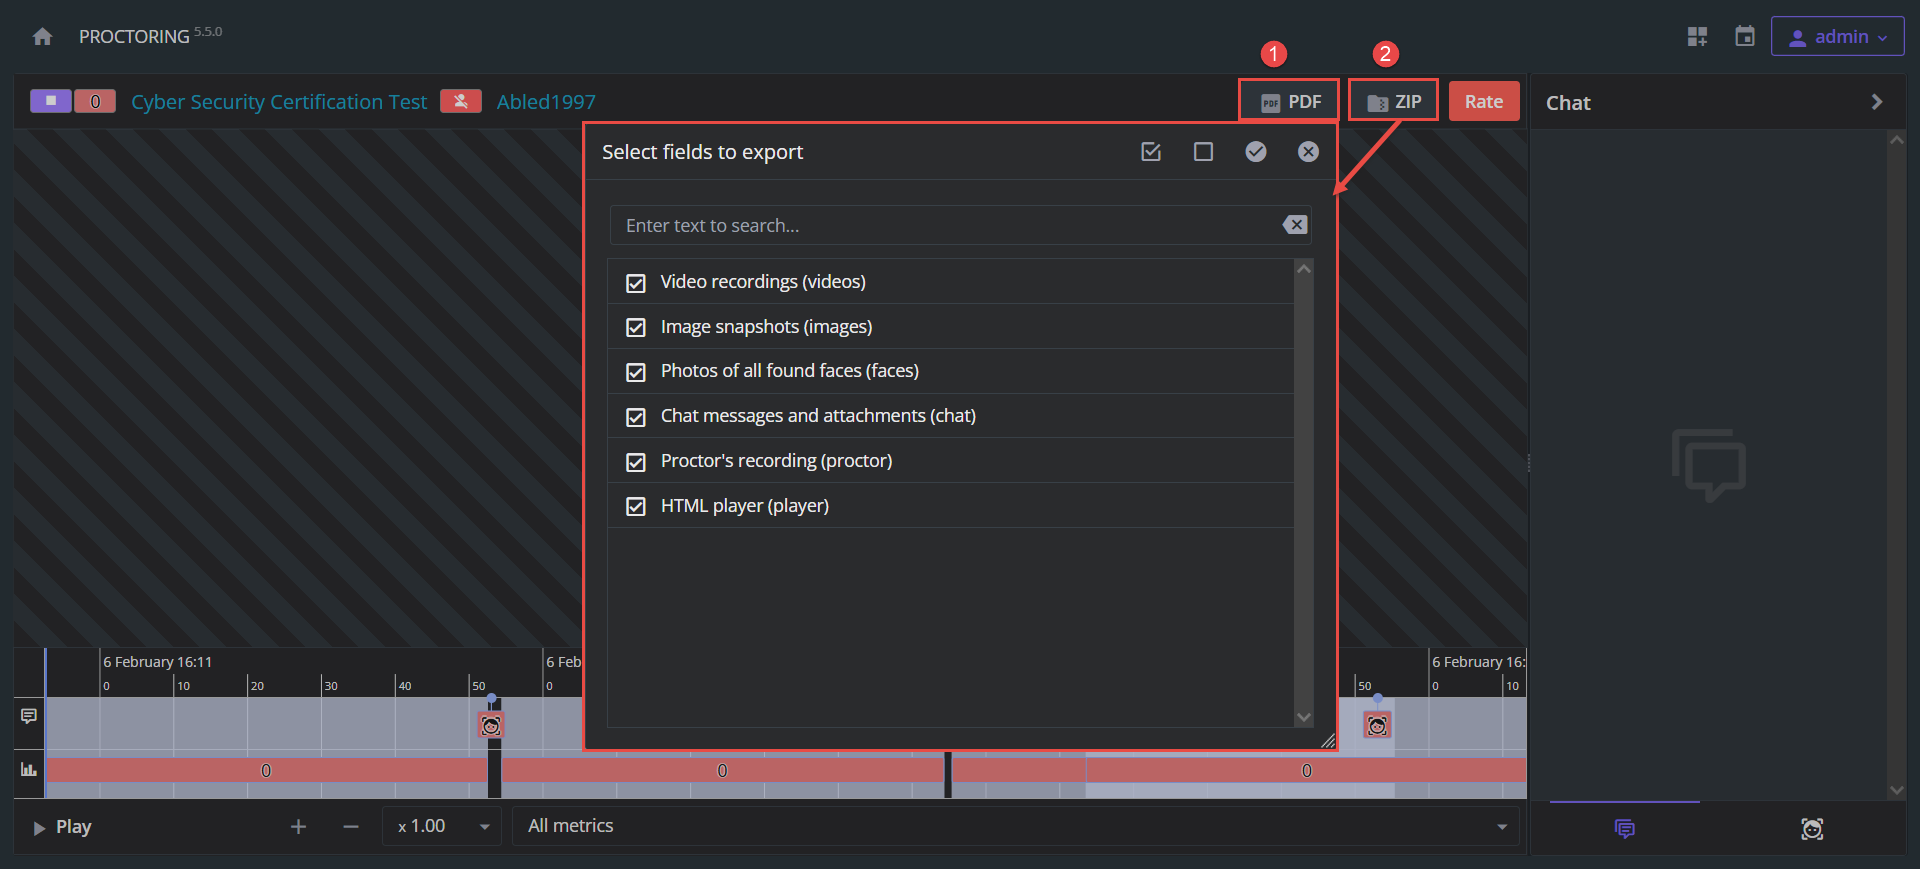
Once the proctored session is rated, you can export the report as:
- PDF file
- ZIP file – A pop-up window will appear, allowing you to select the options to include in the report.
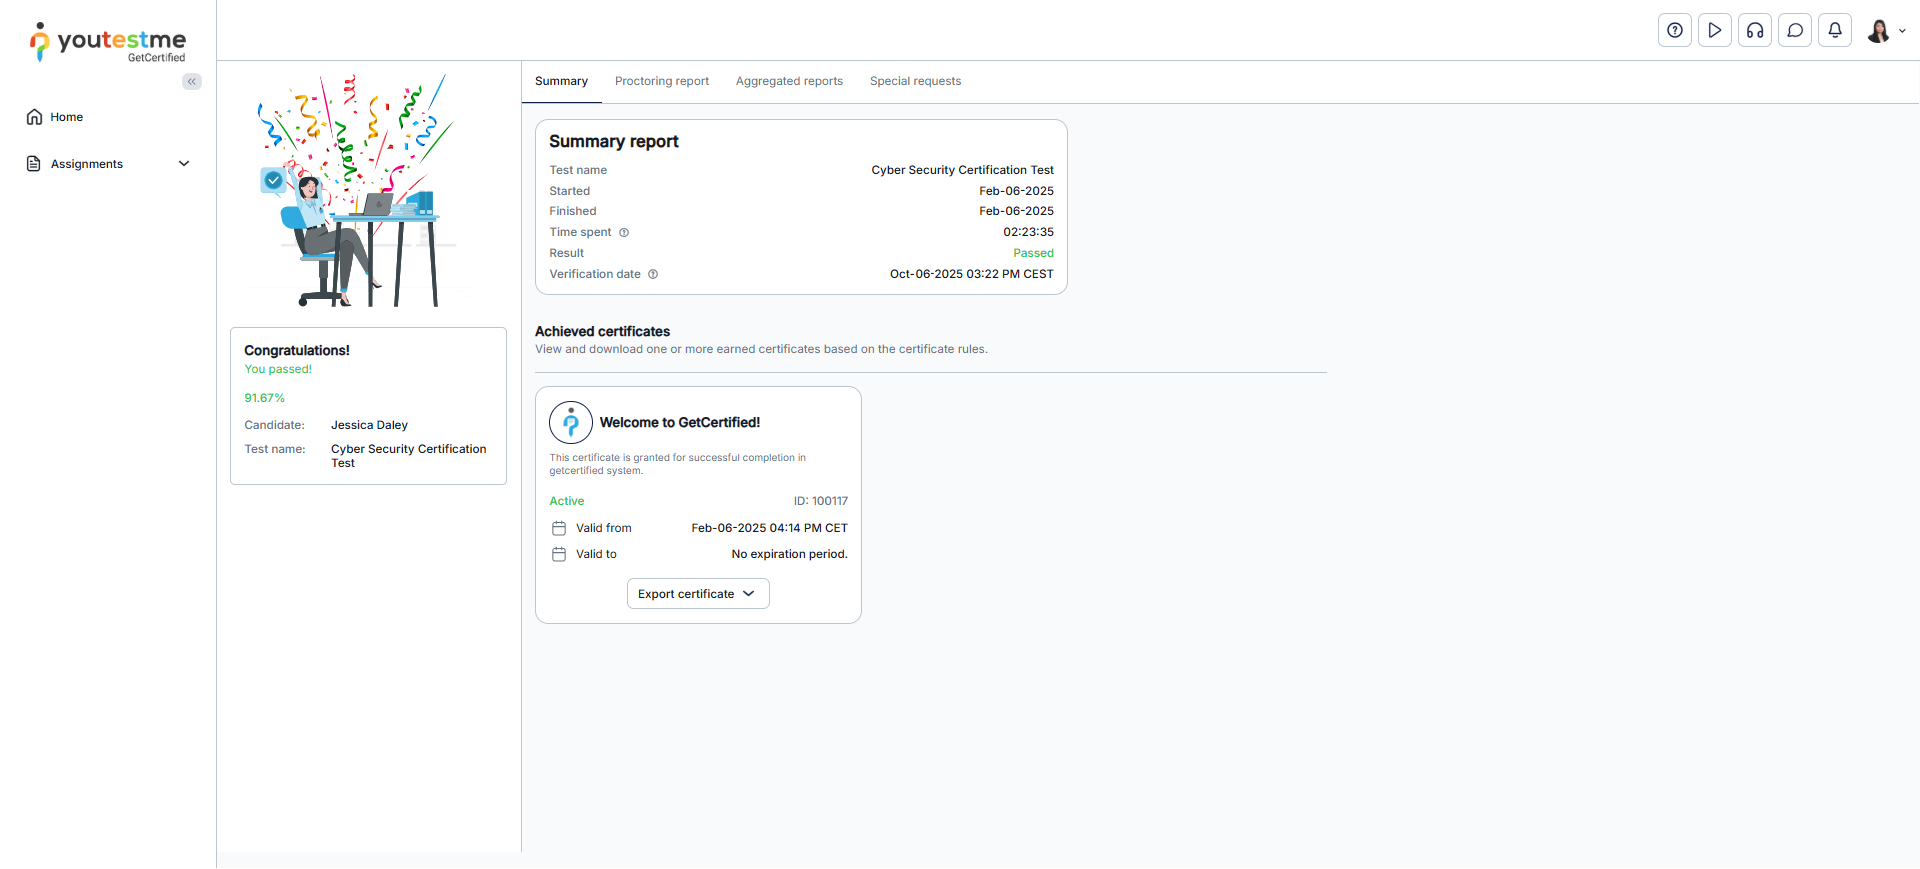
The resolved personal report from the test manager’s perspective
You can notice that the test result is Passed and that the Proctoring report conclusion is Positive.

The resolved personal report from the candidate’s perspective
For a video tutorial on how to create and monitor proctored tests, please watch the video.
For more related instructional materials, please visit:
