This article explains how to quickly check the list of all candidates who have purchased or canceled a particular testing session. In the Payment log report all necessary information is included.
Accessing the Payment Log Report
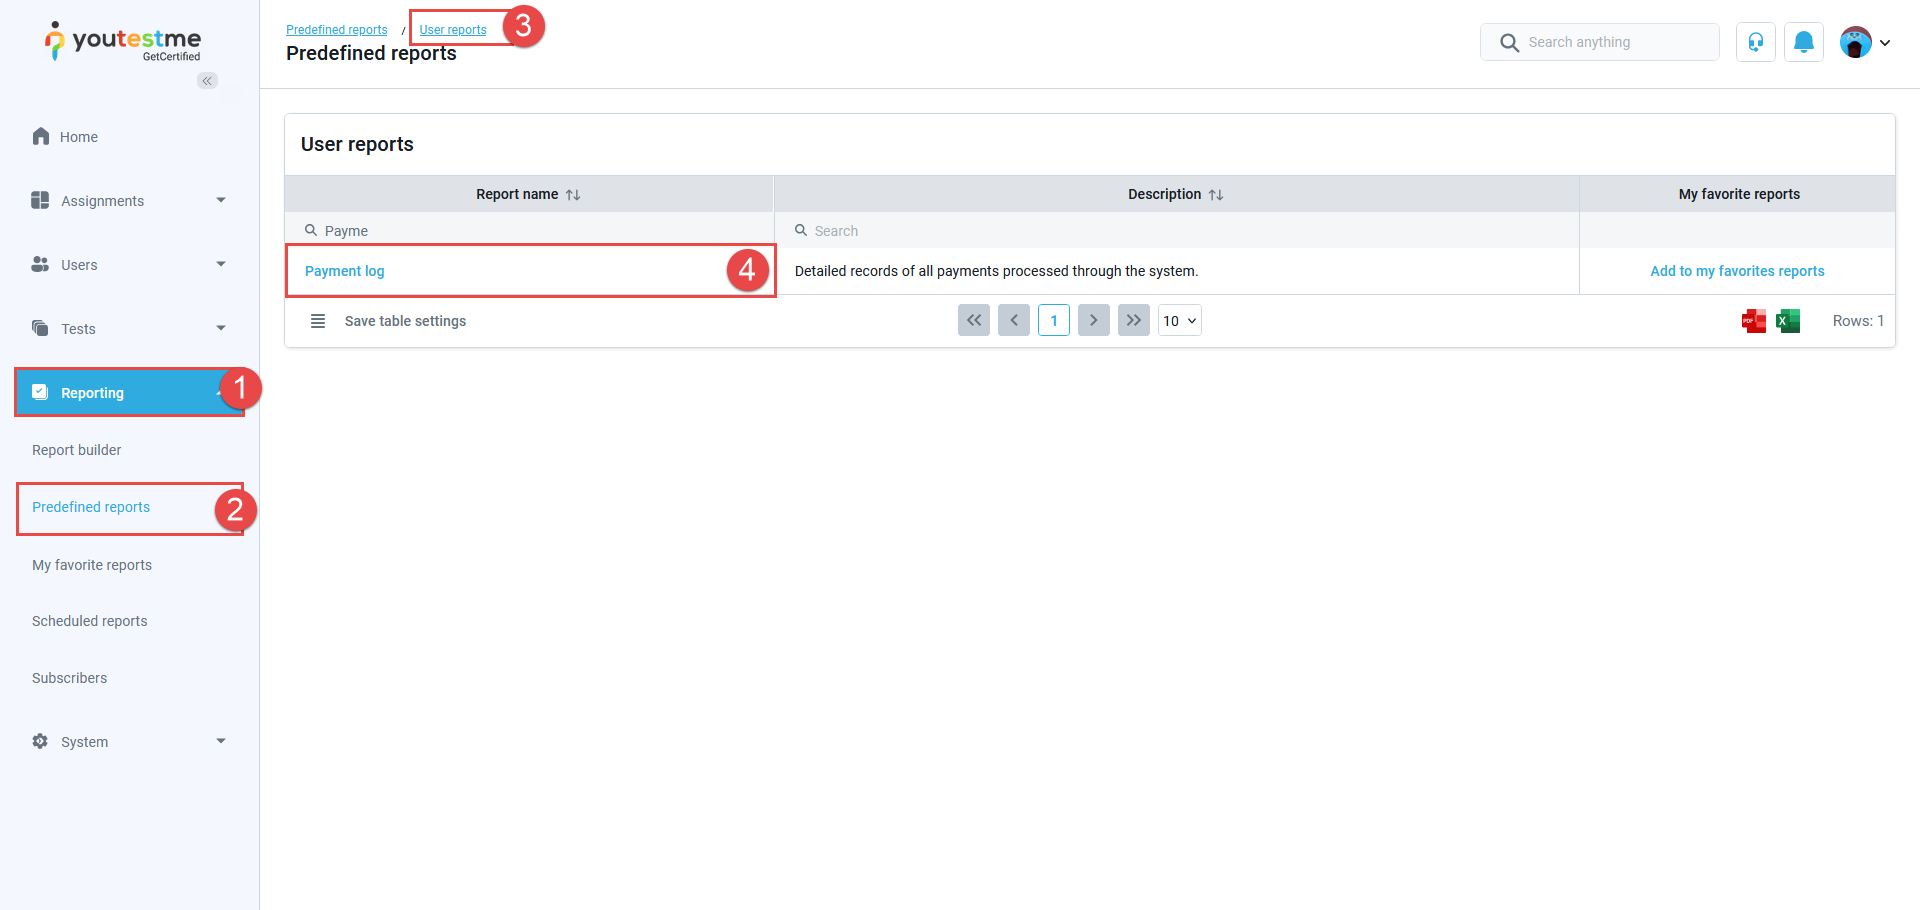
To access the desired report:
- Click the Reporting tab in the main menu
- Select Predefined reports.
- On the Predefined reports categories page, click on User reports.
- When the User reports page appears, navigate to the Payment log report, and click it.
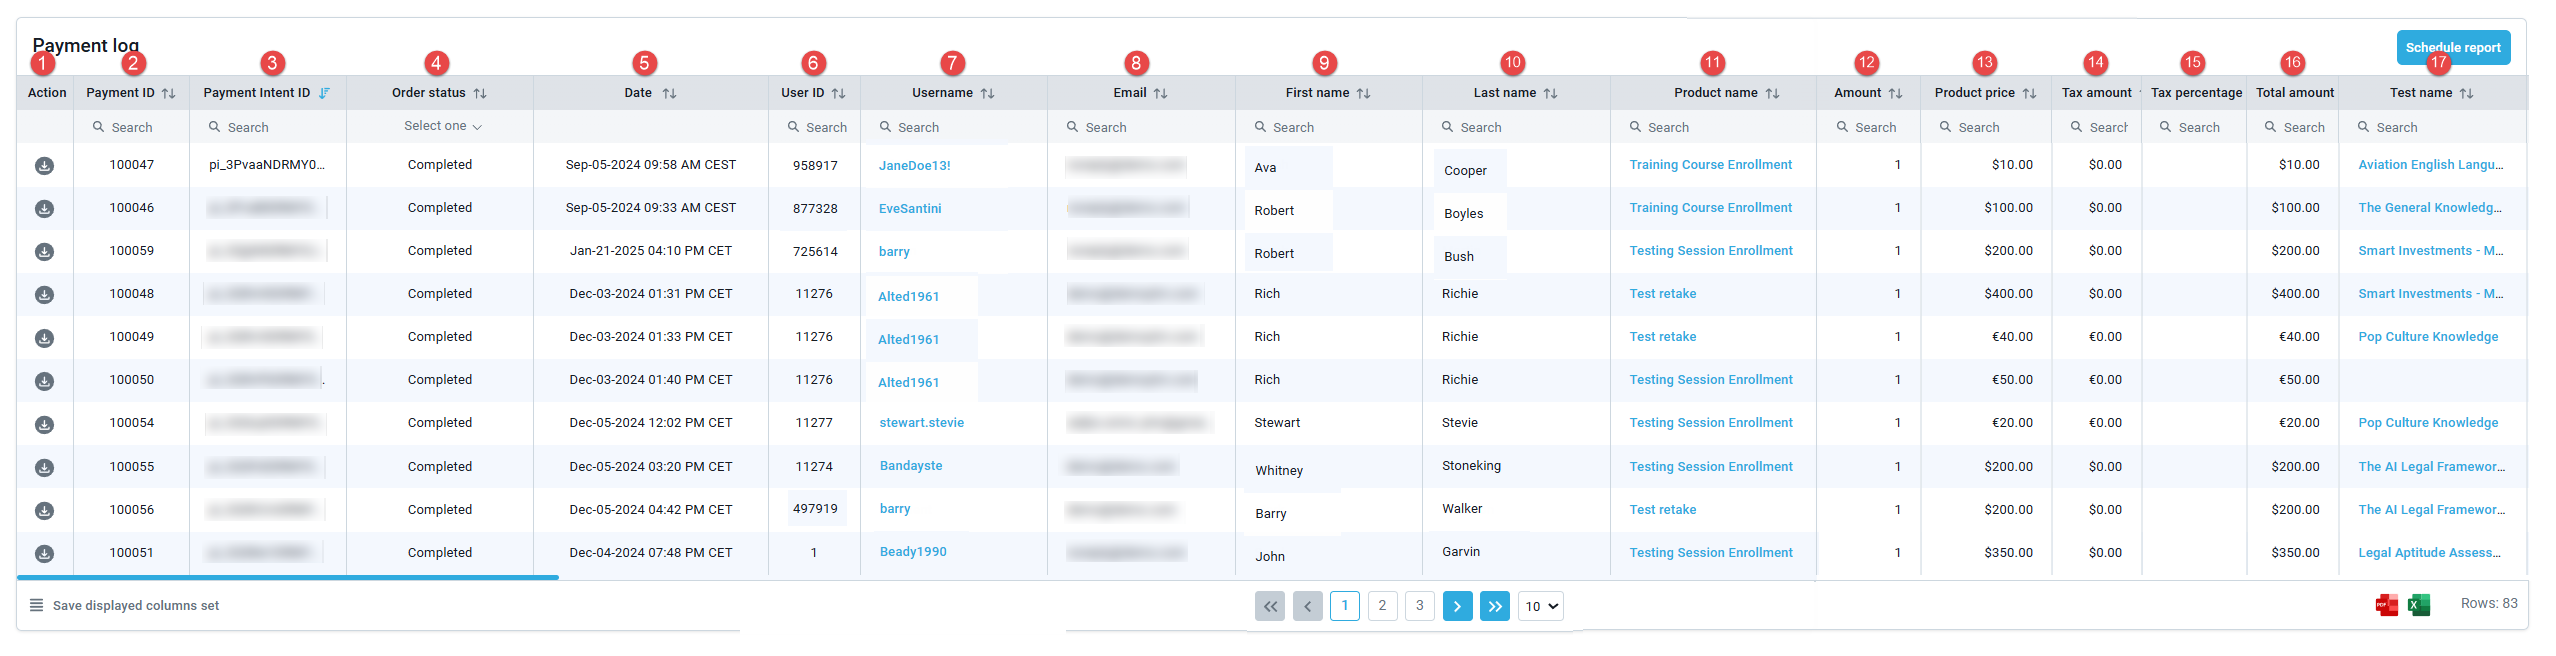
When the Payment log report opens, the following information about each candidate who purchased the testing session will be available:
- Action – Option to download the payment receipt.
- Payment ID – Unique identifier for the payment transaction.
- Payment Intent ID – Used to track the payment process in Stripe.
- Order Status – Current status of the order (e.g., pending, completed).
- Date – The date when the transaction occurred.
- User ID – Unique identifier of the user who made the transaction.
- Username – The username of the person who made the payment.
- Email – The email address associated with the user.
- First name
- Last name
- Product Name – The name of the product or service purchased.
- Amount
- Product Price – The base price of the product before taxes.
- Tax amount – The portion of the product price added as tax based on the tax percentage.
- Tax Percentage – The percentage of tax applied to the transaction.
- Total Amount – The total amount paid, including product price and tax.
- Test Name – The name of the test or exam linked to the transaction.
- Training course ID – ID of purchased training course.
- Training course name – Name of the purchased training course.
- Payout ID – Unique identifier associated with the payout.
- Payout Date – Date and time when the payout was processed.
- Payout Amount – The total amount in the payout, including all related payments.
- Payout Fee – The processing fee associated with the payout.
- Payout Trace ID – A transaction tracking identifier within the Stripe system.
- Payout Charge IDs – A list of charge identifiers included in the payout.
- Billing Country – Country used for billing purposes.
- Billing Address Line 1 – Primary address line for billing.
- Billing Address Line 2 – Secondary address line for billing (optional).
- Billing City – City of the billing address.
- Billing State – State/Province/Region for the billing address.
- Billing Postal Code – Postal or ZIP code for the billing address.
- Service Terms Accepted – Indicates whether the customer accepted the service terms.
- Tax ID – Tax identification number.

YouTestMe and Stripe Integration via Payment Intent ID
Log in to your Stripe account and go to the Transactions page. Open the desired transaction.
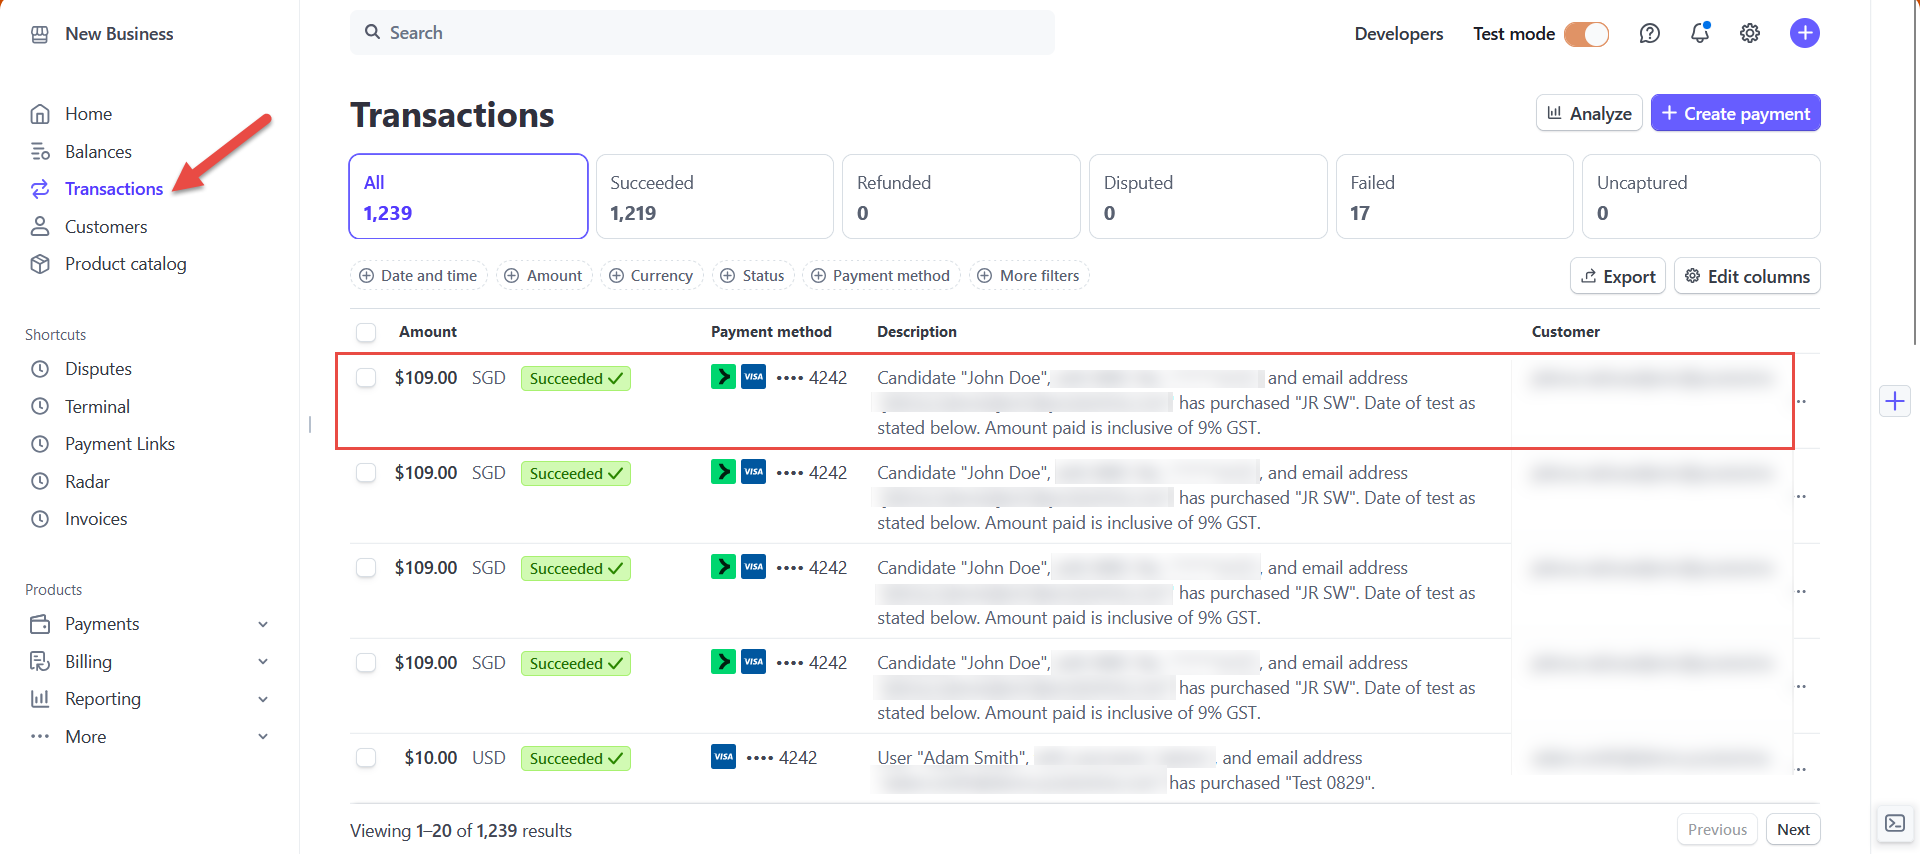
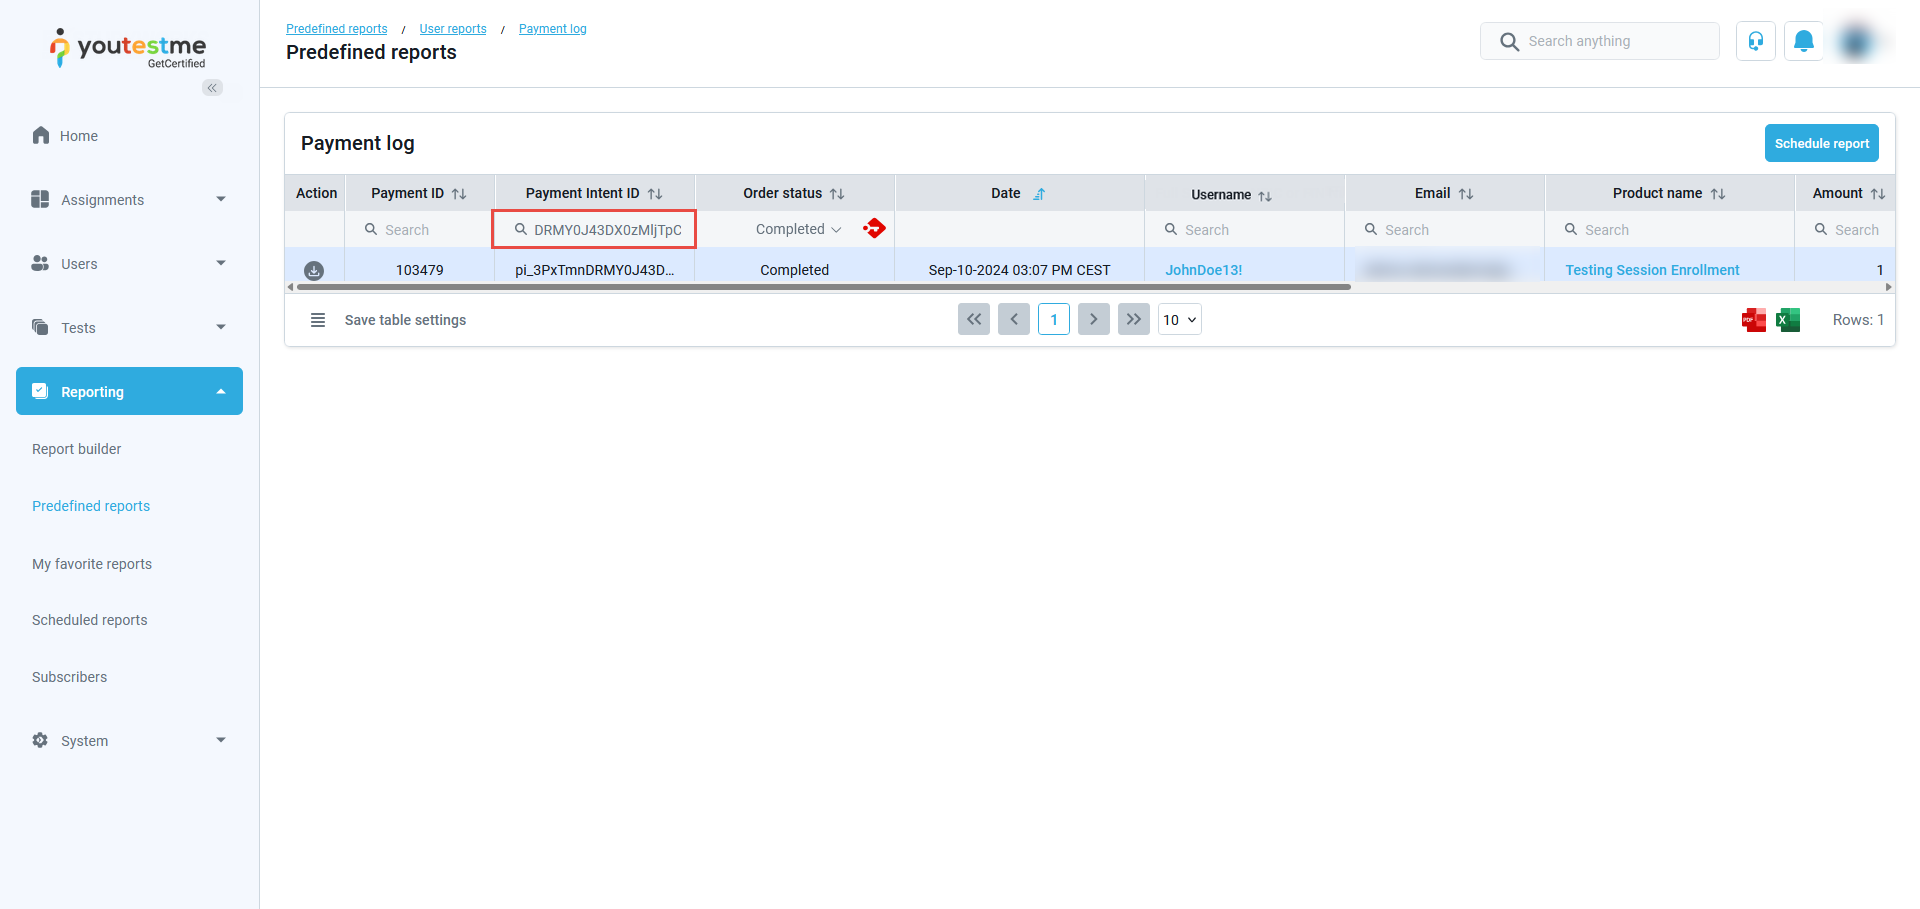
When you enter the transaction details, in the top right corner you will see the Payment Intent ID you can copy.
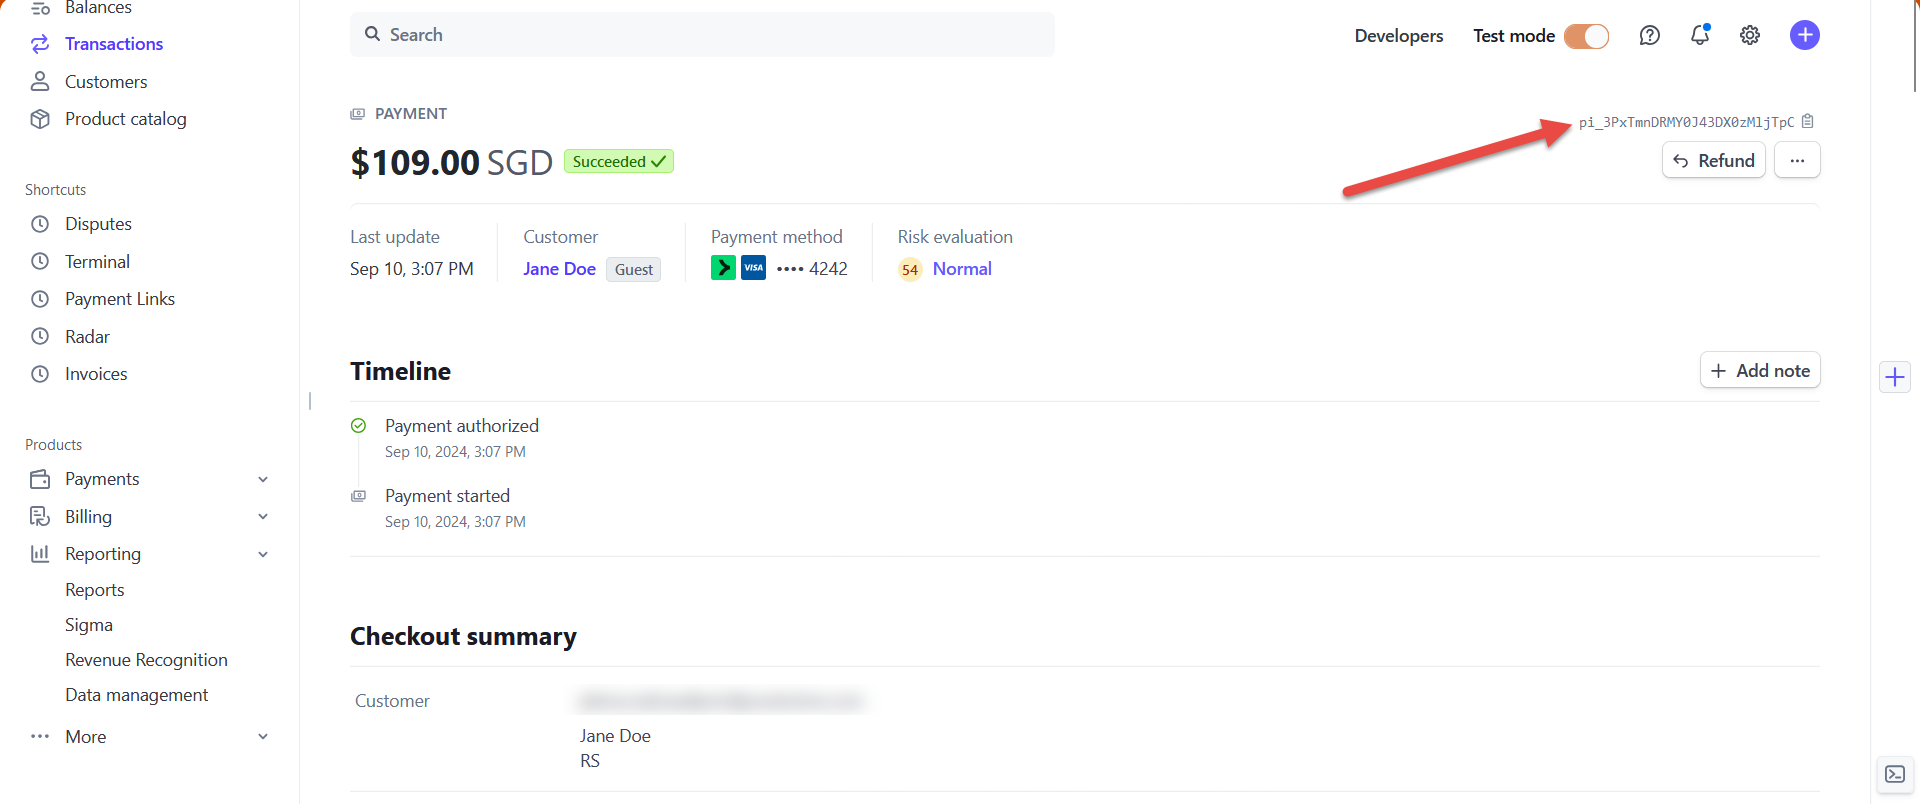
Now, navigate to the application and locate the desired transaction by pasting the copied ID from Stripe into the Payment Intent ID search field in the Payment log.
In this way, you can check all transactions.
Send Payment Log Reports with Only New Records Included

For more useful instructional materials, please check:


