Article verified for Release 15.1 on December 9, 2025.
This article explains how to create a proctored test.
In the YouTestMe platform, test creators can offer proctored tests with two distinct monitoring options. They can choose live proctored tests, where a human proctor supervises test-takers in real time to ensure compliance with test rules and maintain integrity. Alternatively, they can opt for AI-proctored tests, where artificial intelligence monitors the test. Using advanced algorithms and machine learning, the AI system detects and prevents potential cheating or misconduct. Both options uphold high standards of test integrity while catering to different supervision needs.
Creating a proctored test
To set up a proctored test, you need to activate the proctoring security feature either in the test settings or the session settings.
The main difference between enabling proctoring at the test level and the session level is that when it is enabled in test settings, it becomes the default security setting for all associated sessions unless manually turned off in session settings.
On the other hand, if proctoring is not enabled at the test level, users can still activate it for a specific session. This allows the test to be proctored only for test-takers scheduled to take it during that session.
Enabling Proctoring During the Test Creation
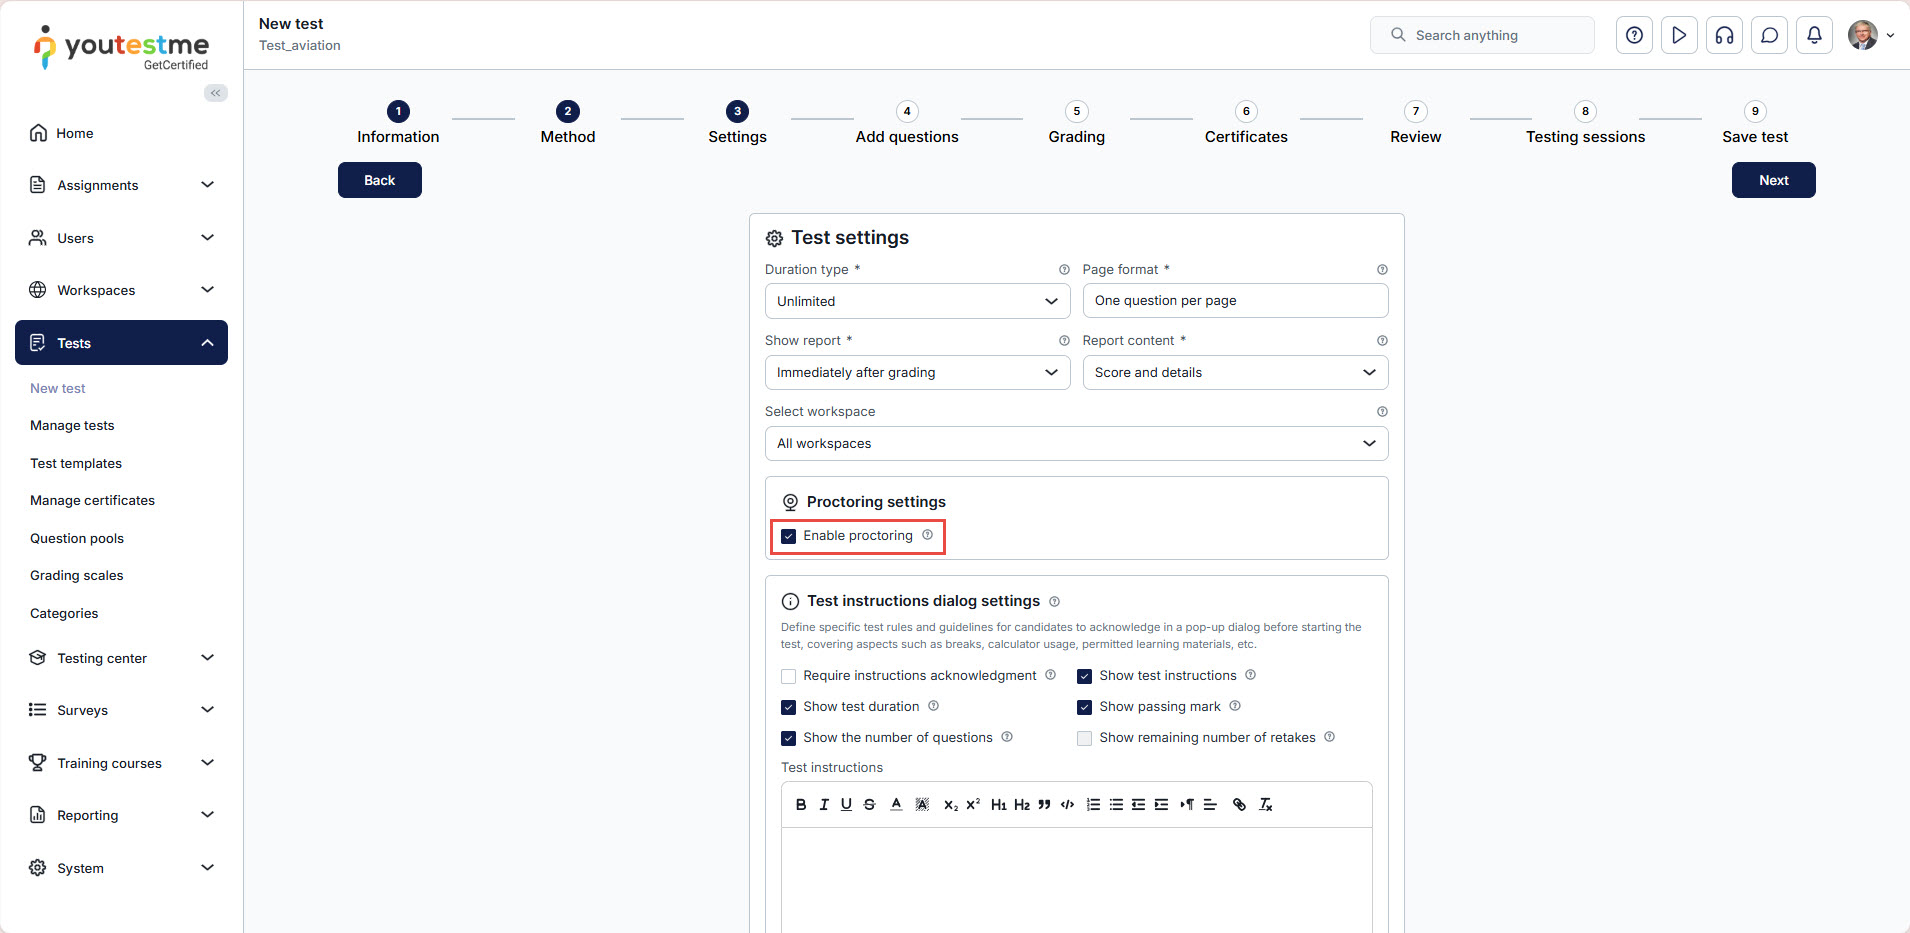
Proctoring can be enabled during the “Settings” step of the test creation wizard. To enable it, simply check the “Enable Proctoring” option within the proctoring settings section.
Please refer to the following article for more information about the test creation process.
Enabling Proctoring From the Test Settings
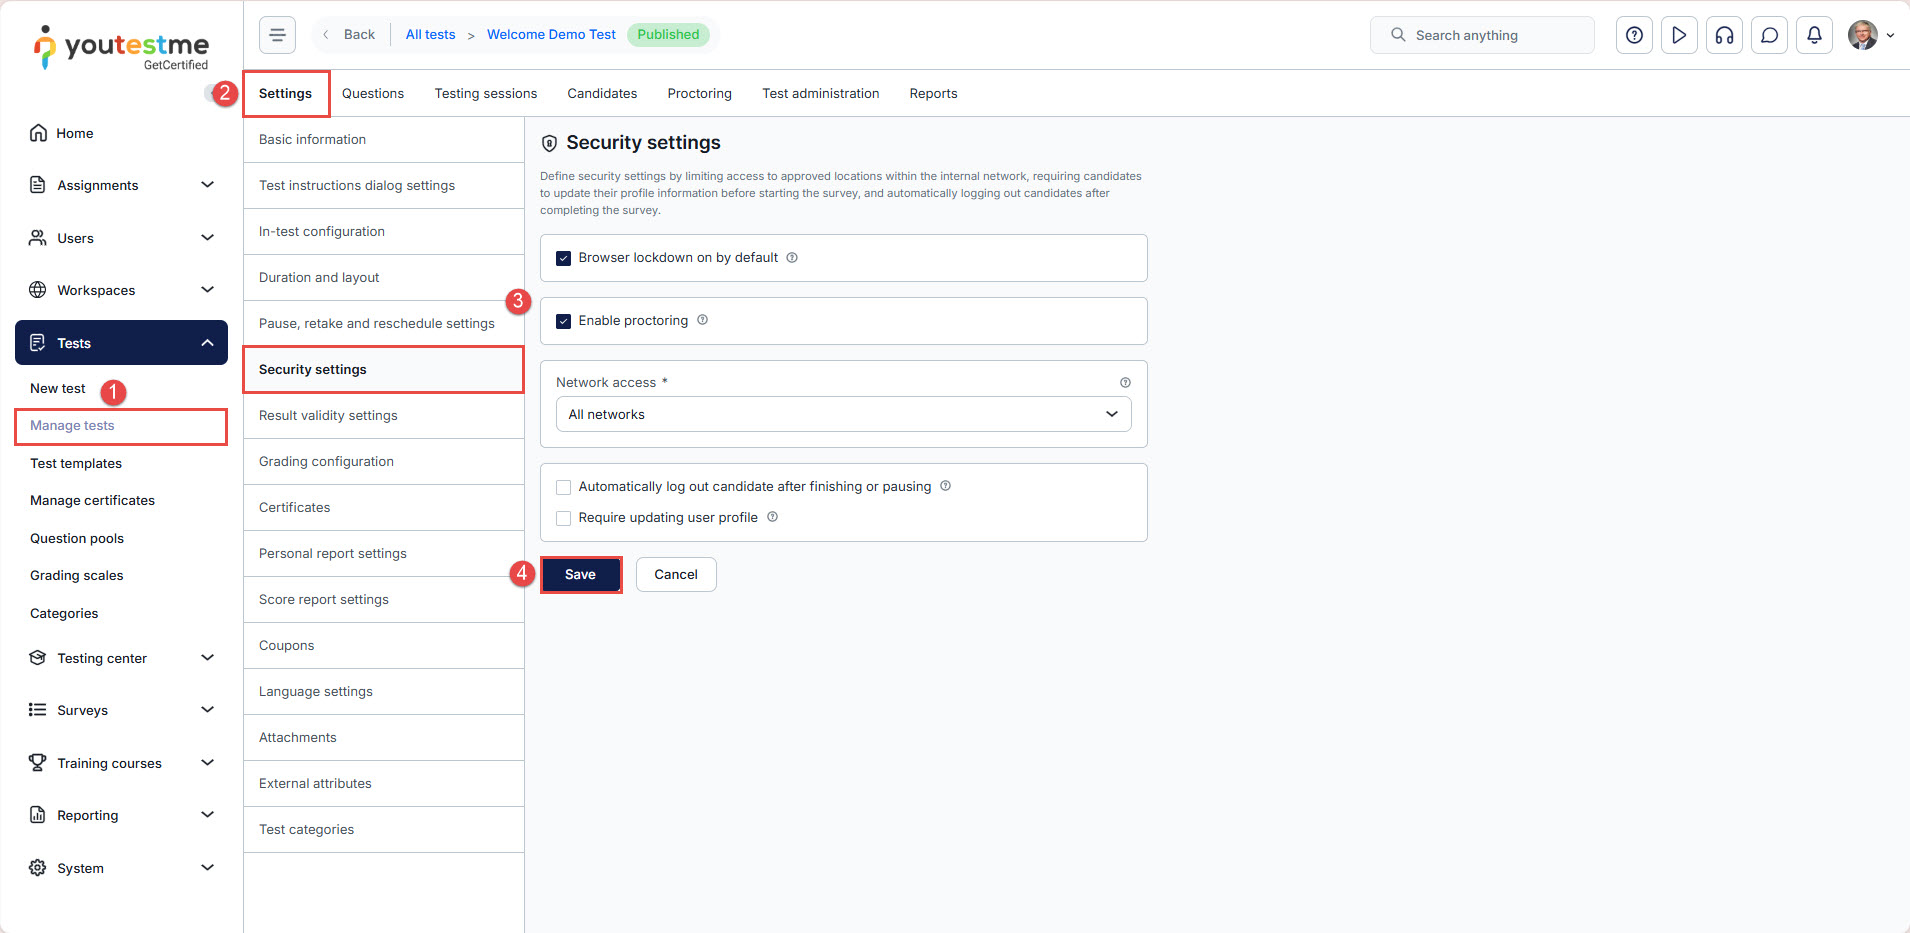
To enable proctoring for a created test, follow the steps below:
- Navigate to Manage Tests and select the desired test.
- From the Settings tab, navigate to the Security Settings.
- Check the “Enable Proctoring” option.
- Click the “Save” button to apply the changes.
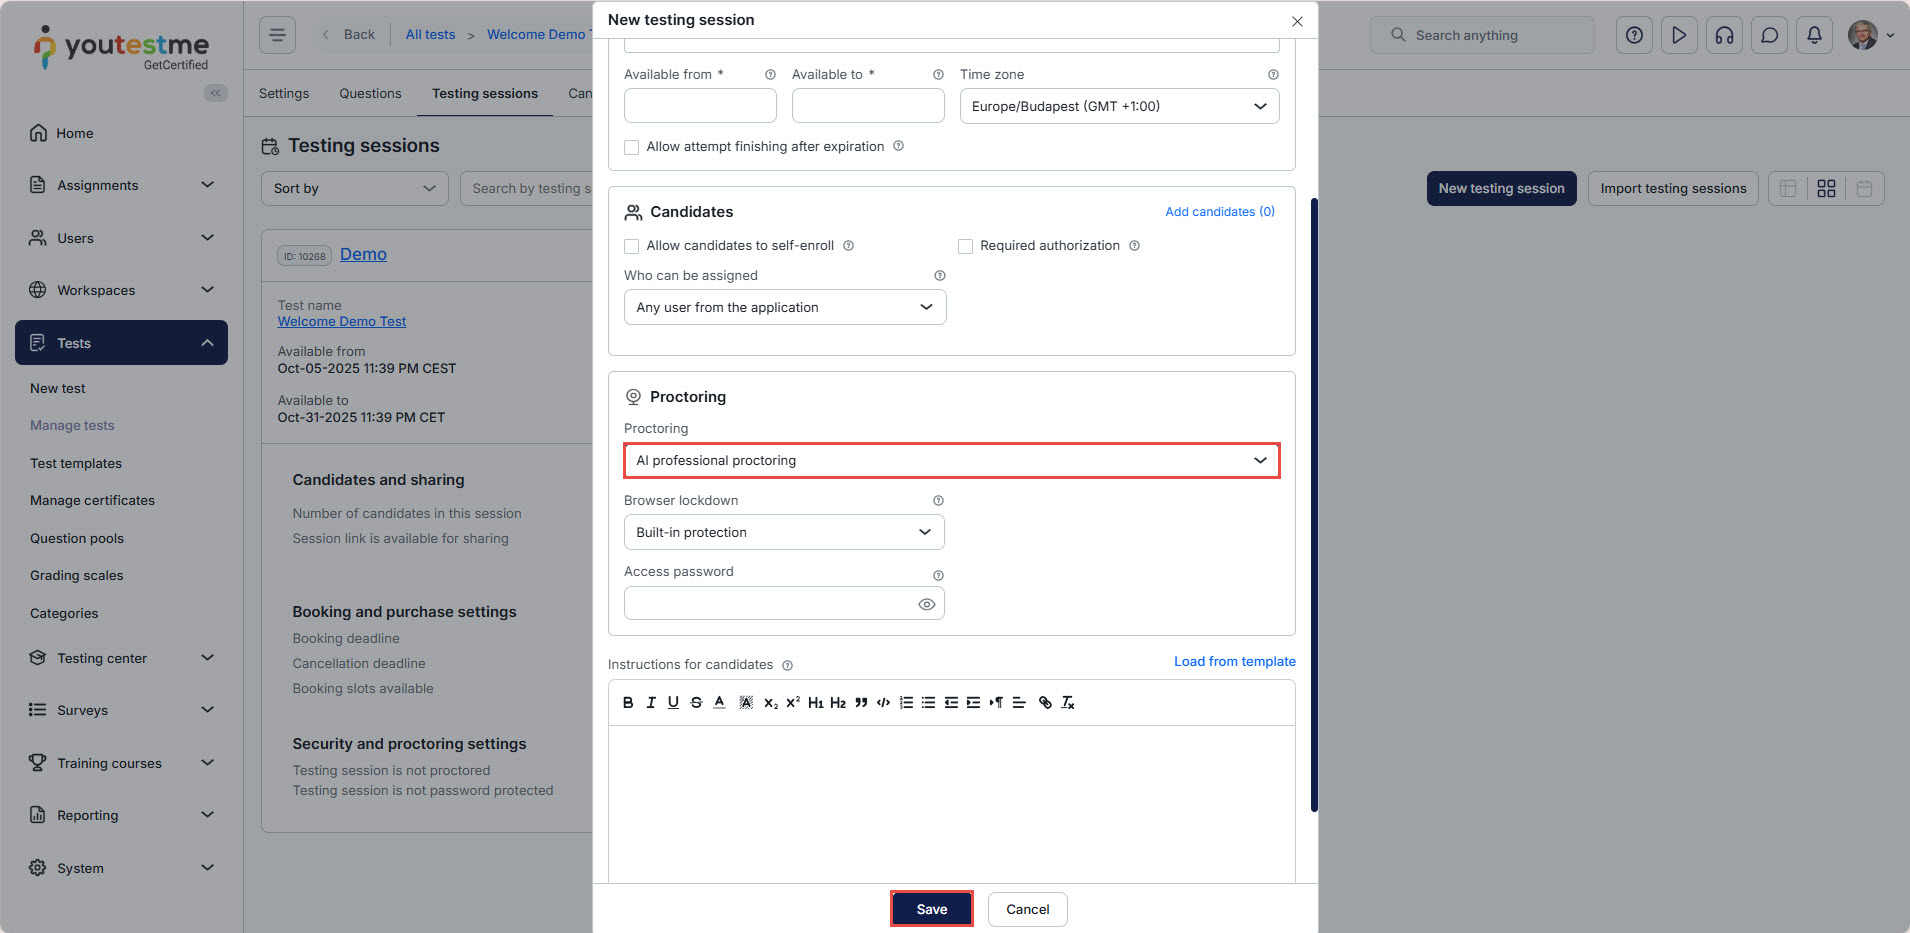
Enabling Proctoring At the Session Level
To enable proctoring for a specific session, fill in the required details, navigate to the Proctoring section in the session creation dialog, select “AI professional proctoring” from the drop-down menu, and click “Save” to apply the settings. Please refer to the following article for more information about session creation settings.
Assigning Proctors
Whether it’s a live proctored test or an AI-proctored test, assigning proctors is required. This ensures that the user with the proctor role can either monitor the live test or access the test recording and generate the proctoring report.
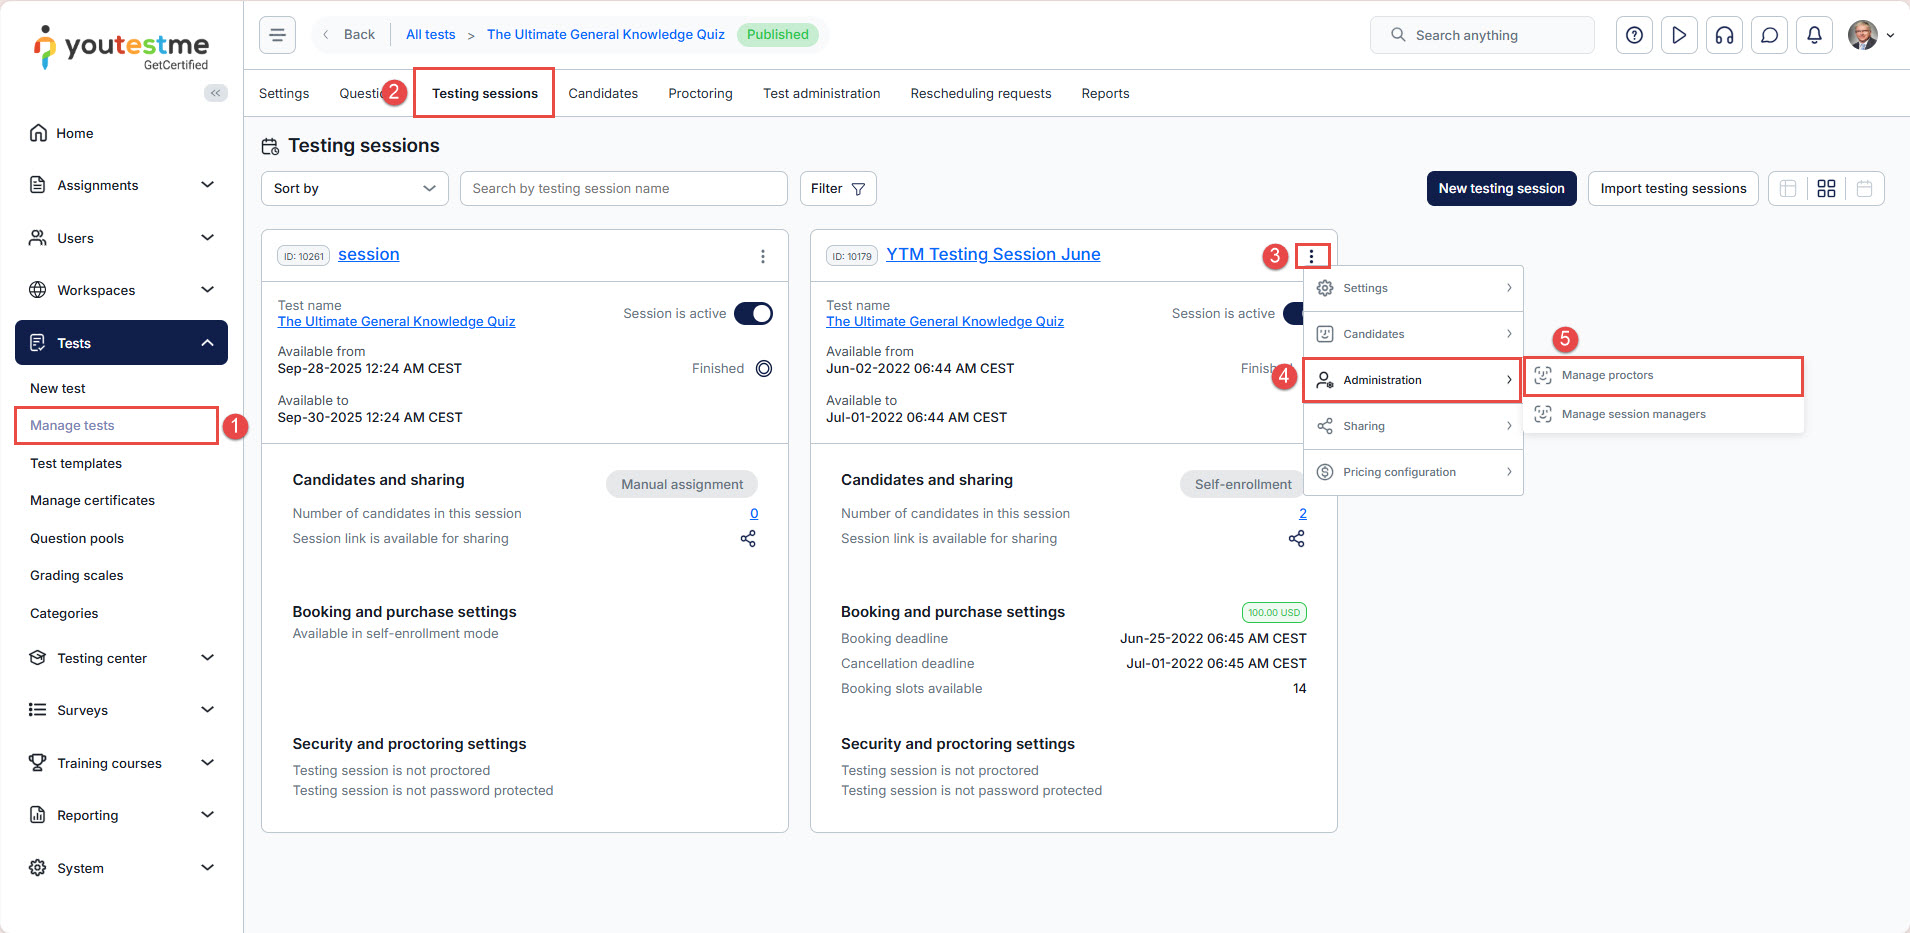
Using the admin account, you can assign proctors by following the steps below:
- Navigate to the Manage Tests tab.
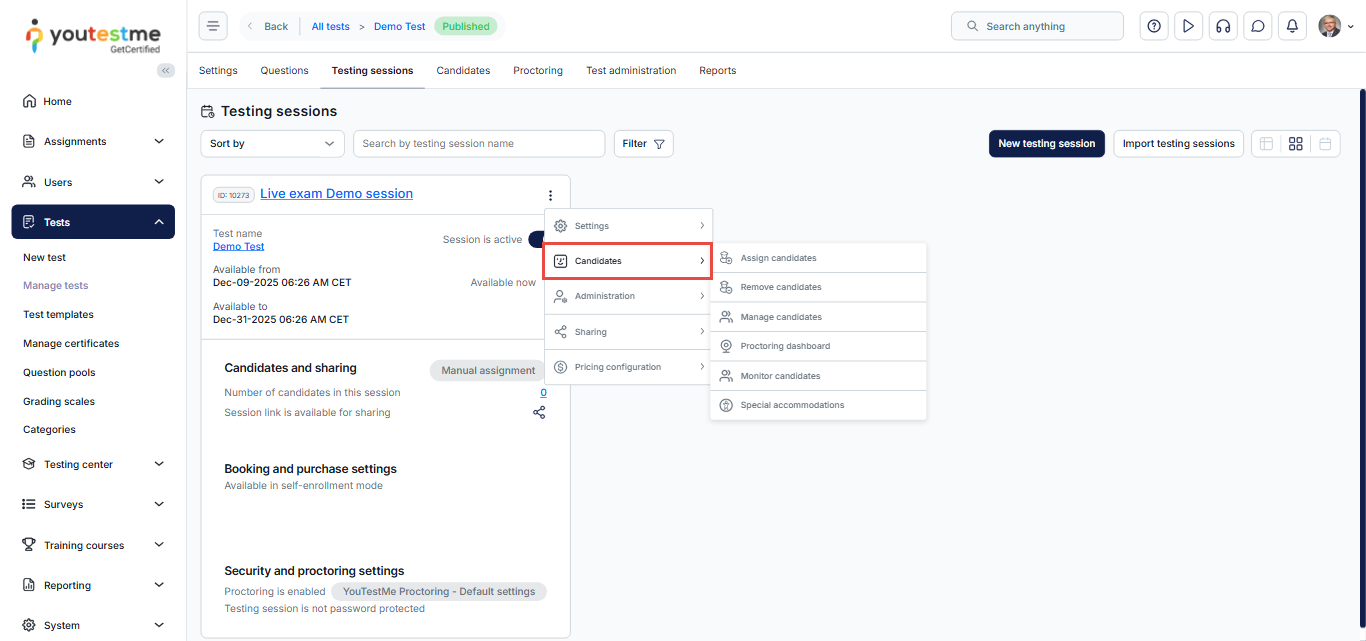
- Select the desired test and navigate to the Testing Sessions tab.
- Click the three vertical dots next to the desired session.
- Hover over Administration.
- Select the Manage Proctors option.
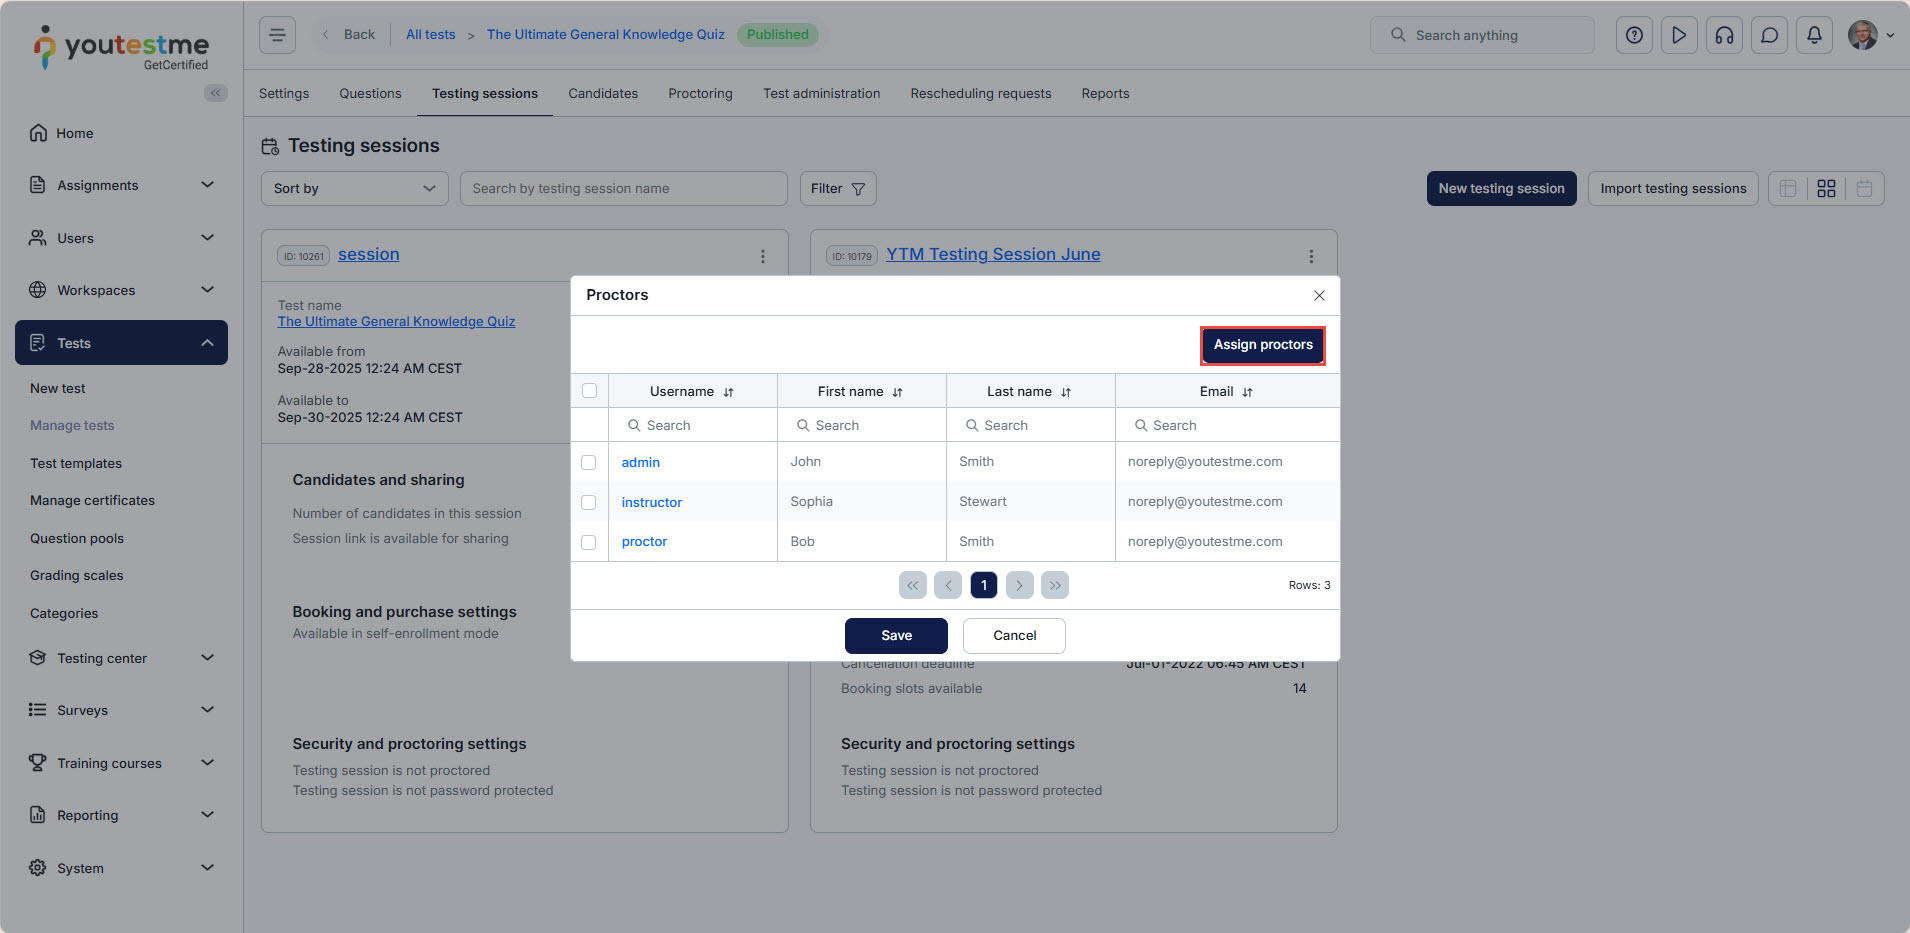
Click on the Assign Proctors button to open the selection window.
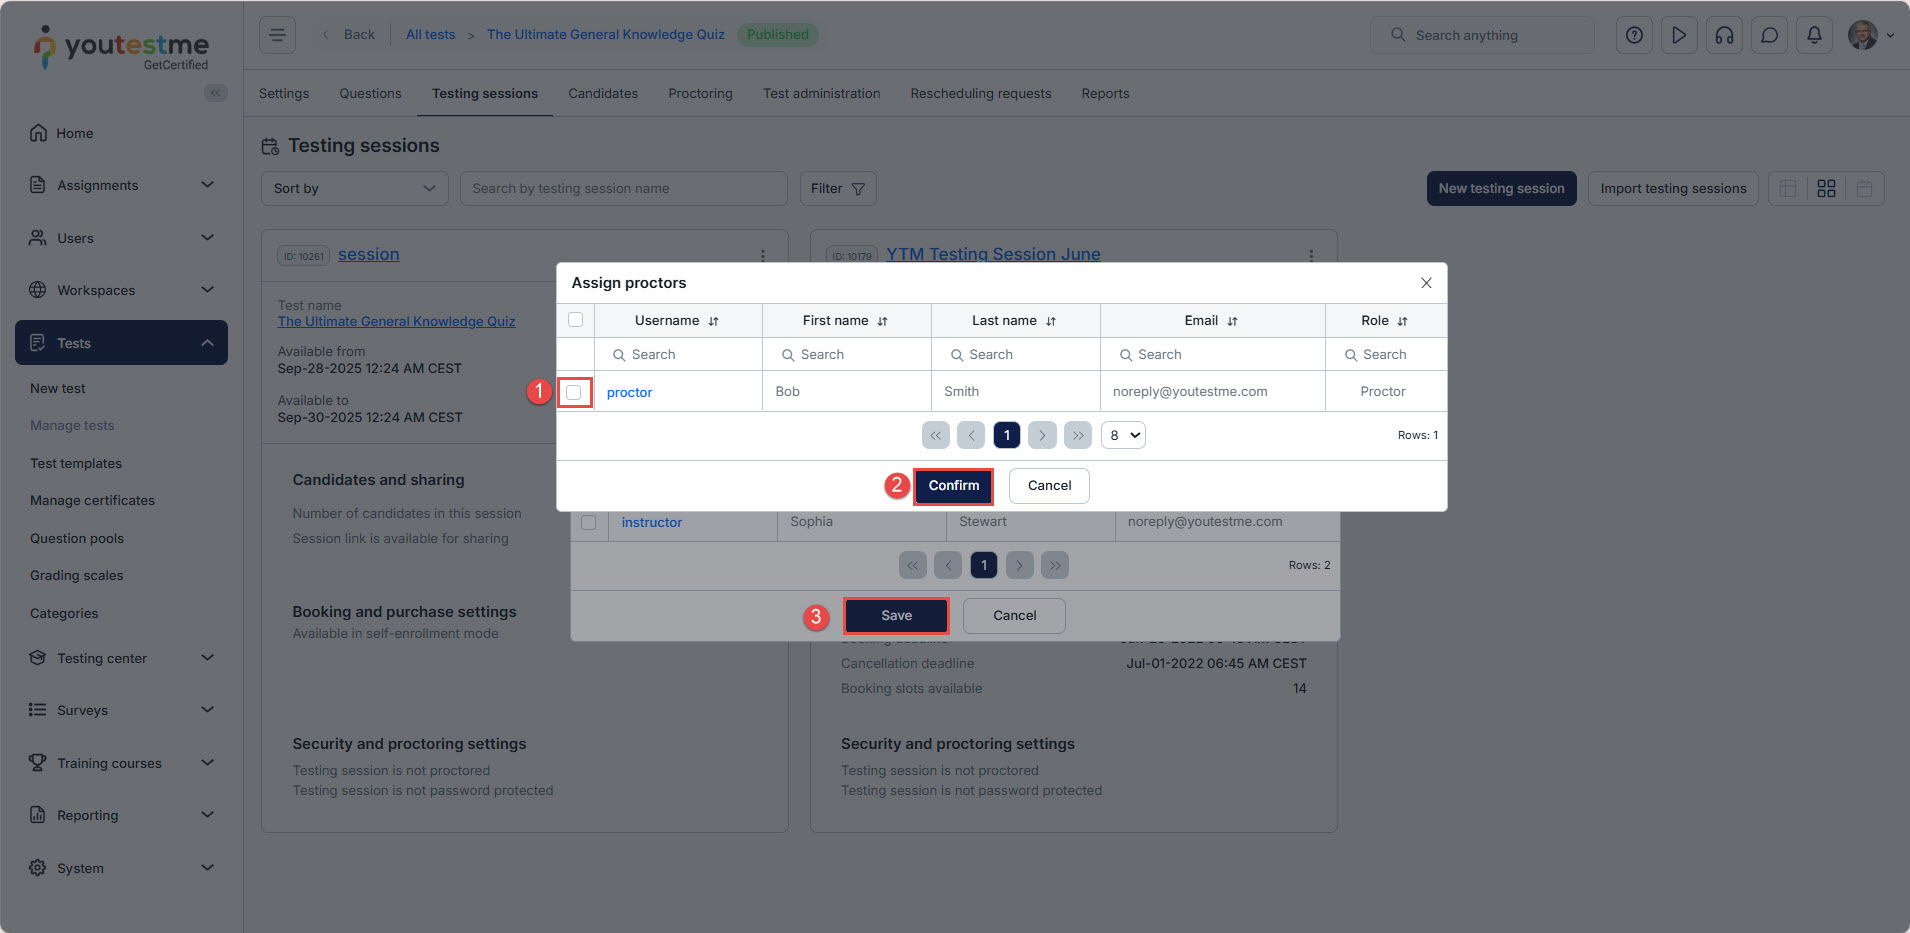
- Select the desired proctors by checking the boxes next to their names.
- Click Confirm to apply your selection.
- Press Save to finalize and assign the proctors.
Please refer to this article for more details on the different methods of assigning proctors.
Understanding the Proctor’s Role
Live Proctored Tests
During the live proctored tests, the proctor is responsible for the following tasks:
- Pause the test Session: Pause the session and enter the welcome message that will be shown to test-takers when they access the test.
- Verify Identity and Test Environment: Verify the test-taker’s identity and ensure their test environment meets the required conditions.
- Communicate with Test-Takers: Greet test-takers, remind them of the test rules, and communicate with them via chat, microphone, or camera as needed.
- Resume the Test for Compliant Test-Takers: Allow compliant test-takers to start their test only after confirming they meet all test conditions.
- Monitor Test-Takers During the Test: Observe test-takers throughout the test and interact with them as needed to prevent violations of test rules.
- Submit Proctoring Reports: Enter a proctoring report for each candidate after the test.
AI-Proctored Tests
AI-proctored tests are recorded and available in the application. Assigned proctors must:
- Review each test taker’s recording to ensure the test rules were followed.
- Write and submit a proctoring report for each candidate.
How to Require Positive Proctor Feedback to Pass the Test
The proctoring report provides the proctor’s feedback on each candidate’s behavior during the test. This feedback can be set as a requirement for passing the test.
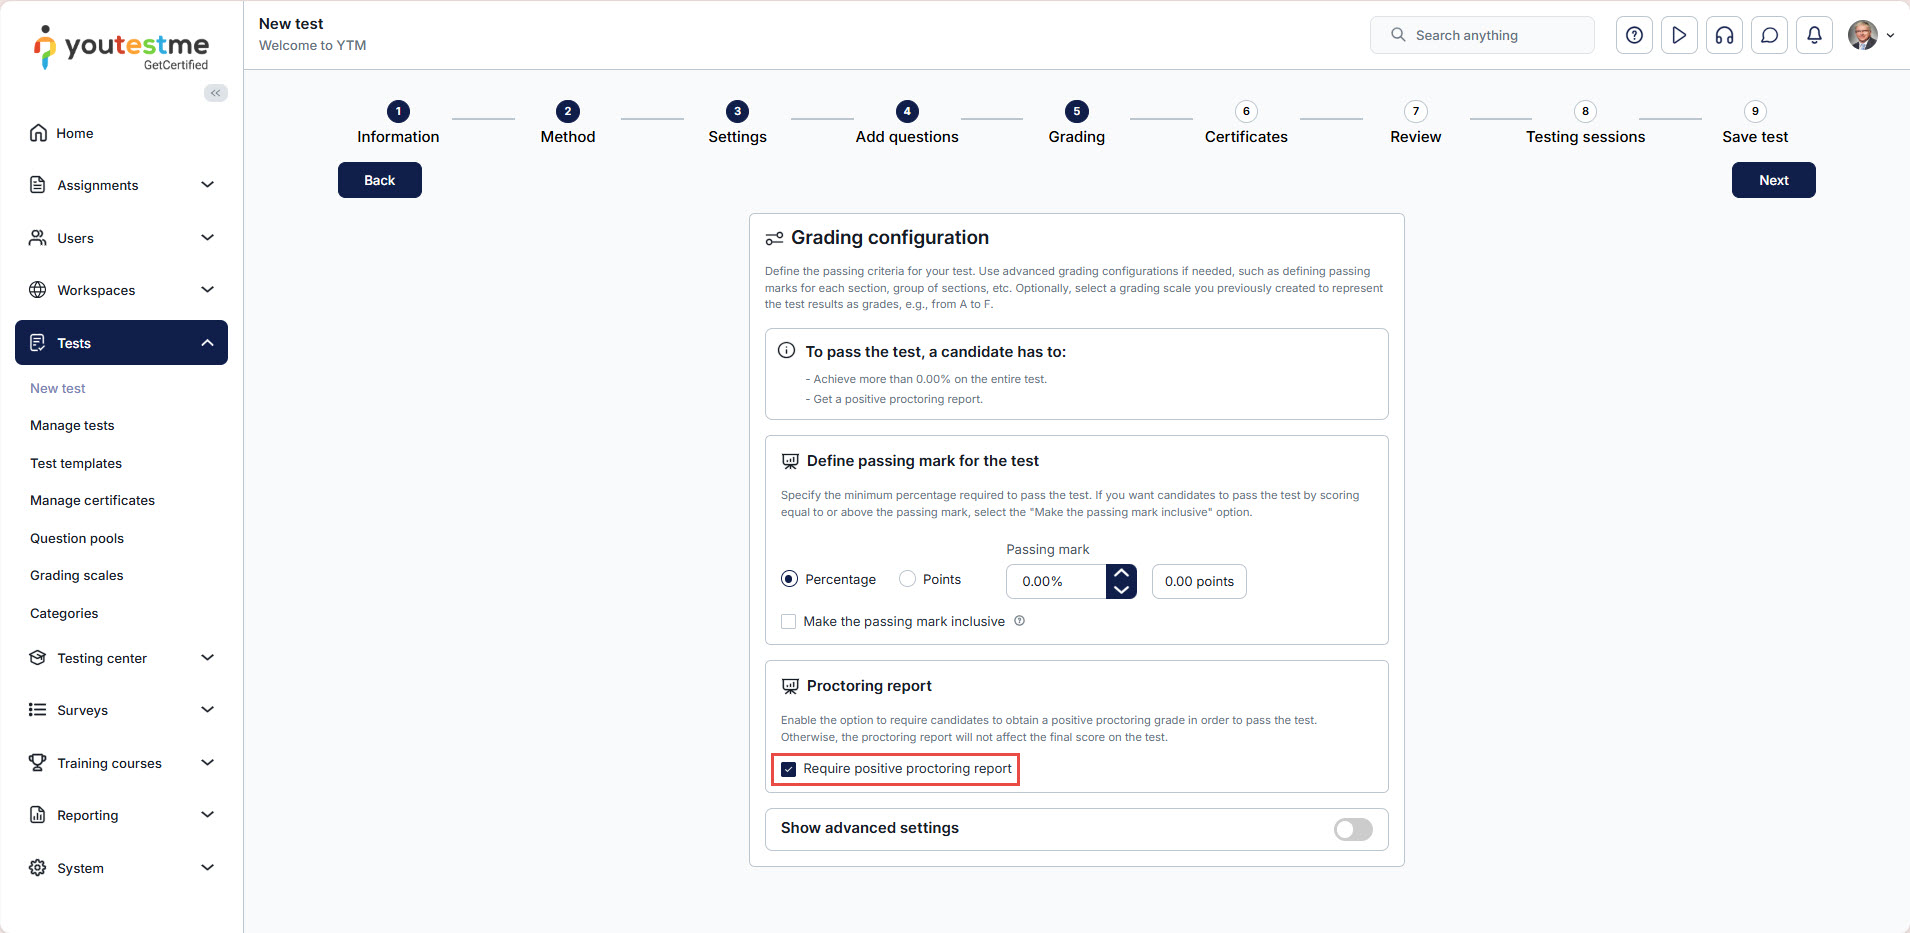
To enable this feature during test creation, check the box next to “Require Positive Proctoring Report” at the Grading step of the test creation process.
For an existing test, navigate to the Grading configuration tab under the test settings and enable the “Require Positive Proctoring Report” option.
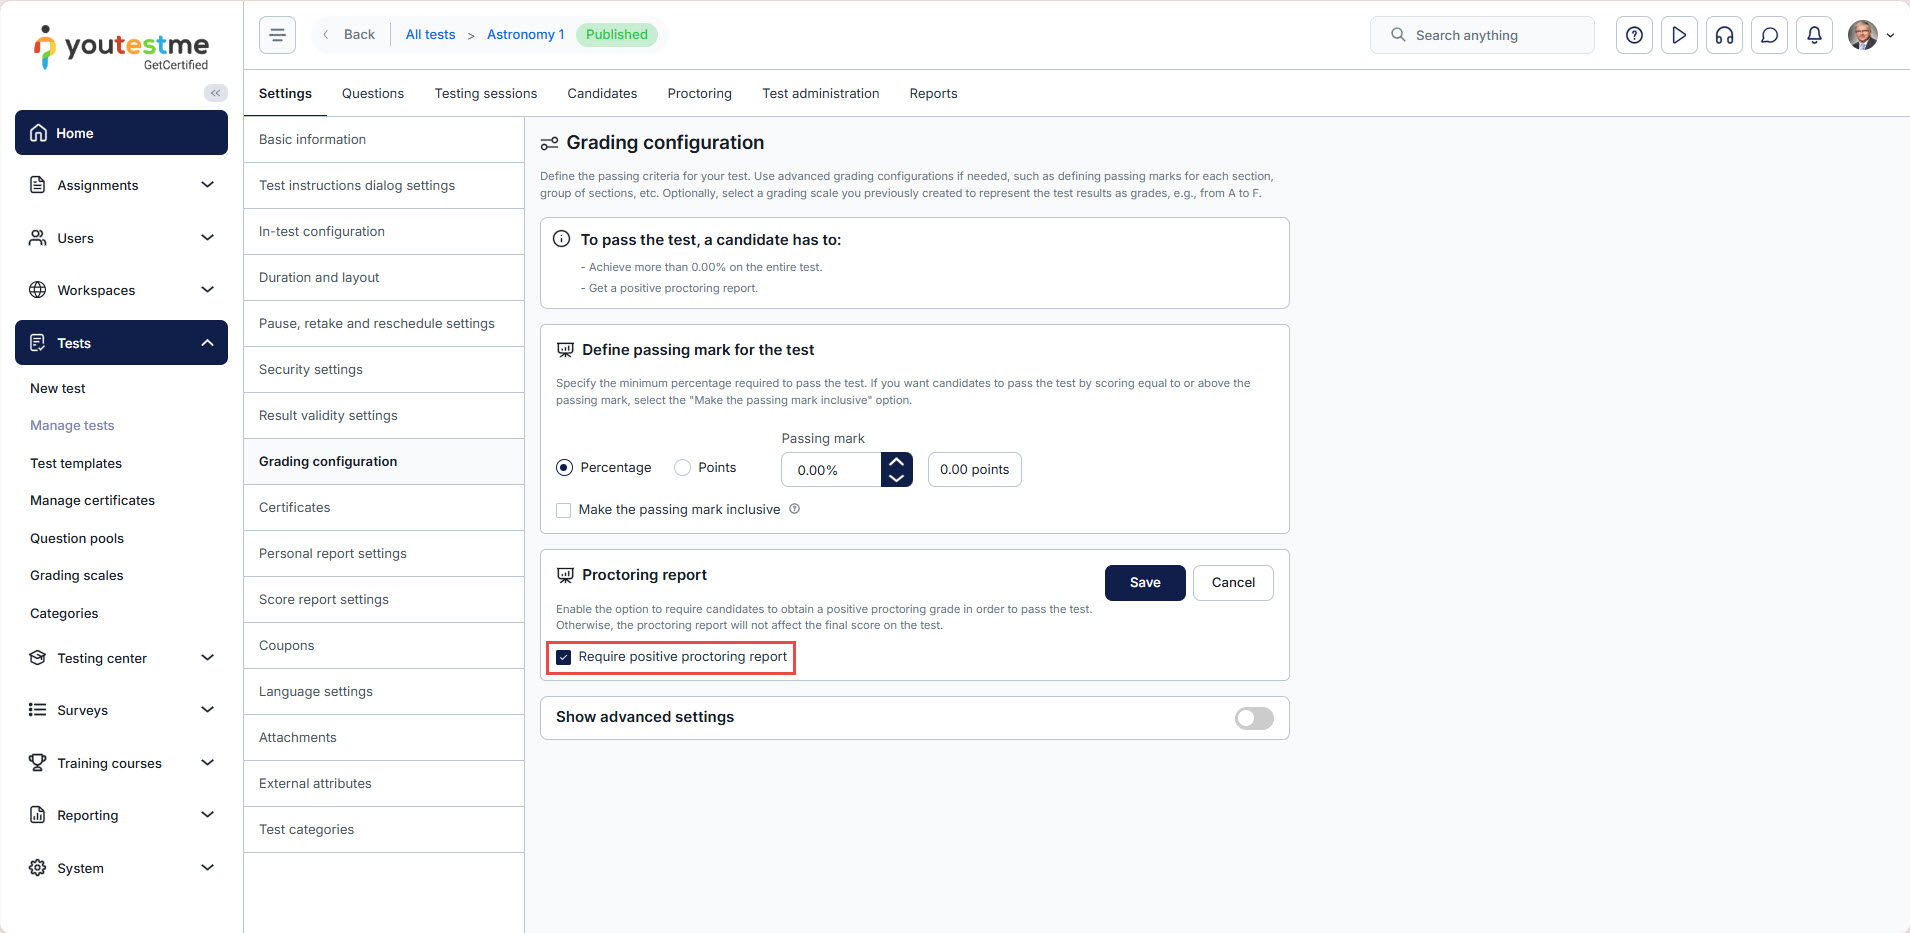
This ensures that candidates must receive positive feedback in their proctoring report to pass the test.
Candidates’ Assignments
Depending on the session settings, candidates may need to be manually assigned to the session. If manual assignment is enabled. For detailed instructions on how to assign candidates to a test session, please refer to this article.
Once candidates are assigned, an automatic email notification will be sent to them.
Admins can customize this notification by following the steps below:
- From the main menu, navigate to System, then select Settings and Customization.
- Open the Notifications tab.
- Locate the Upcoming Assignment notification and enable it.
- Click Edit to customize the notification content as desired.
For more detailed information, please refer to this article.

Viewing Proctor Reports After the Session
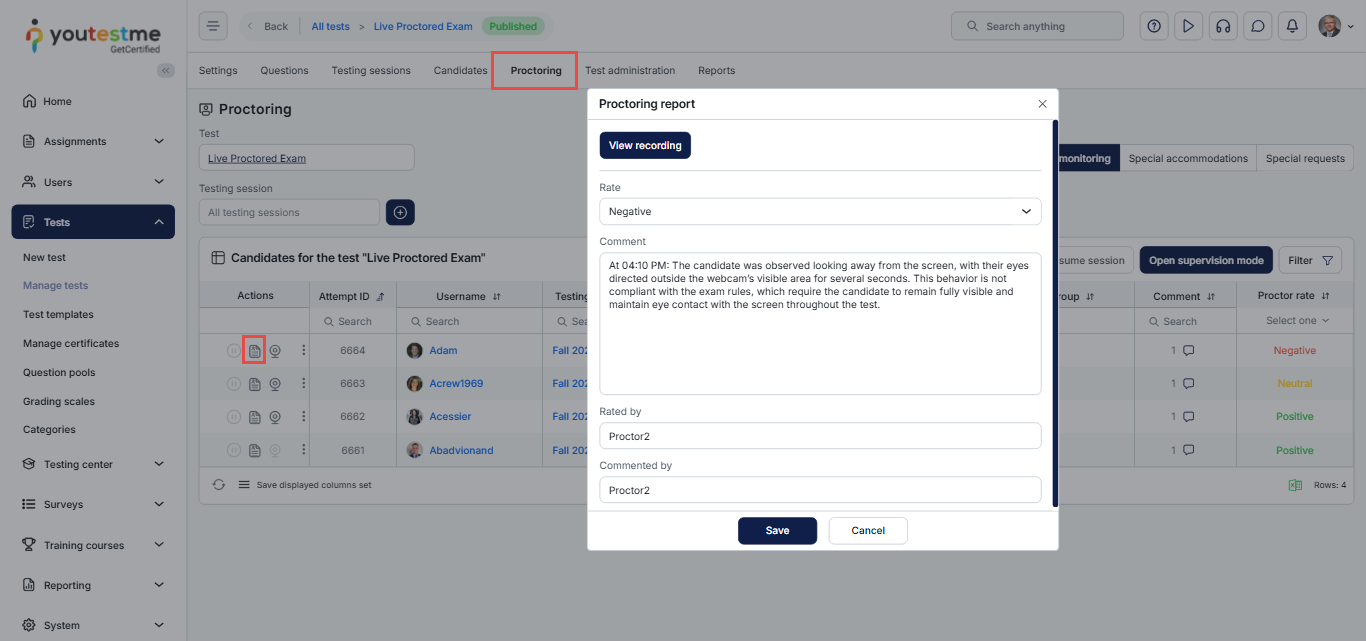
After the live proctored session concludes, admins can review the proctoring reports and any ratings assigned by the proctor. These reports help validate the candidate’s behavior during the exam and support the final decision-making process if further evaluation is required.
To access the proctoring reports:
- Navigate to the Proctoring tab in the main menu.
- Locate the completed session.
- Click the Report icon to view the proctoring report or make adjustments if necessary.
For more detailed information, please visit this article.
For more information on organizing and monitoring proctored tests, refer to the following links:


