

Article verified for Release 15.2 on February 9, 2026.
This article explains how to secure a testing session so that only candidates with the provided password can access it.
Setting a Testing Session Password During Session Creation
Detailed instructions on how to create a testing session can be found in this article.
To secure the testing session and restrict access to authorized candidates only, a password must be entered in the specified field during the session creation process.
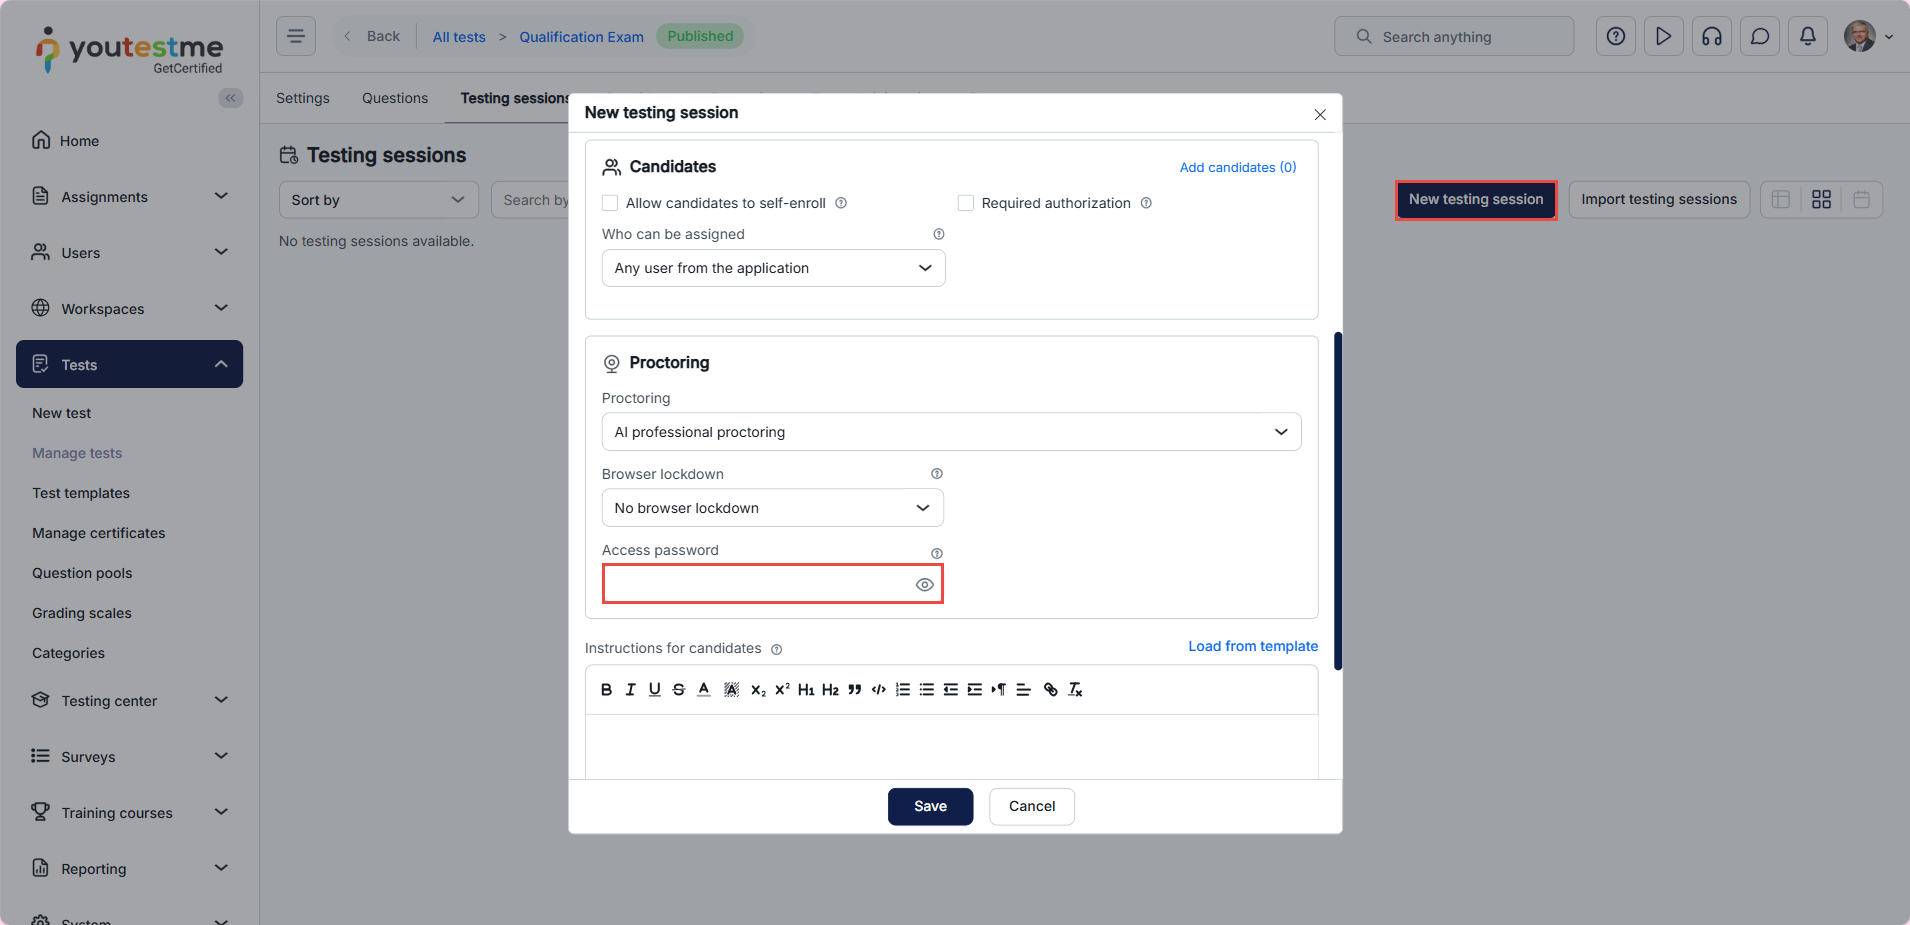
The session access password must be manually entered in the Access Password field within the session’s settings. If you prefer to automate this process, the system offers an option to generate passwords and schedule automatic password renewals. This functionality is available through the Manage Testing Session Password settings, which will be explained in detail in the next chapter.
Managing the Access Password of an Existing Testing Session
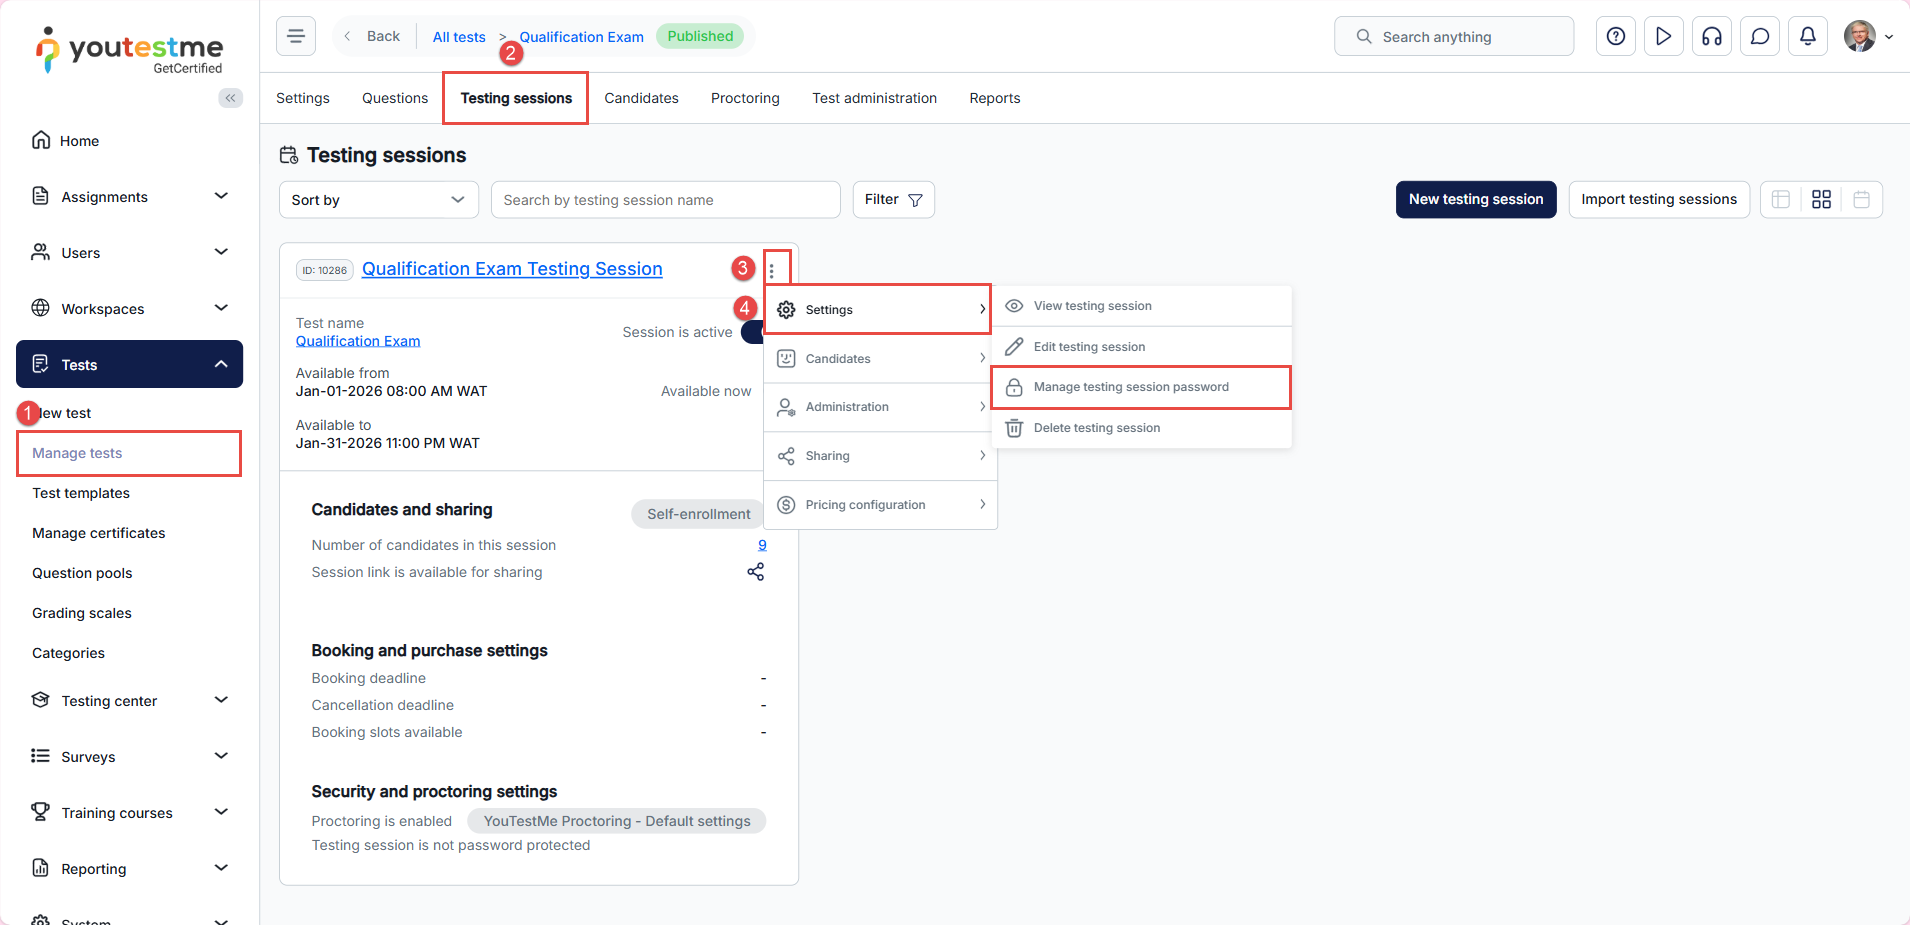
To manage the access password settings, follow the steps below:
- In the main menu, select Tests and navigate to the Manage Tests module.
- Click the desired test name, then go to the Testing Sessions tab.
- Click the kebab menu (three vertical dots) next to the session name.
- Select Settings, then click Manage Testing Session Password.
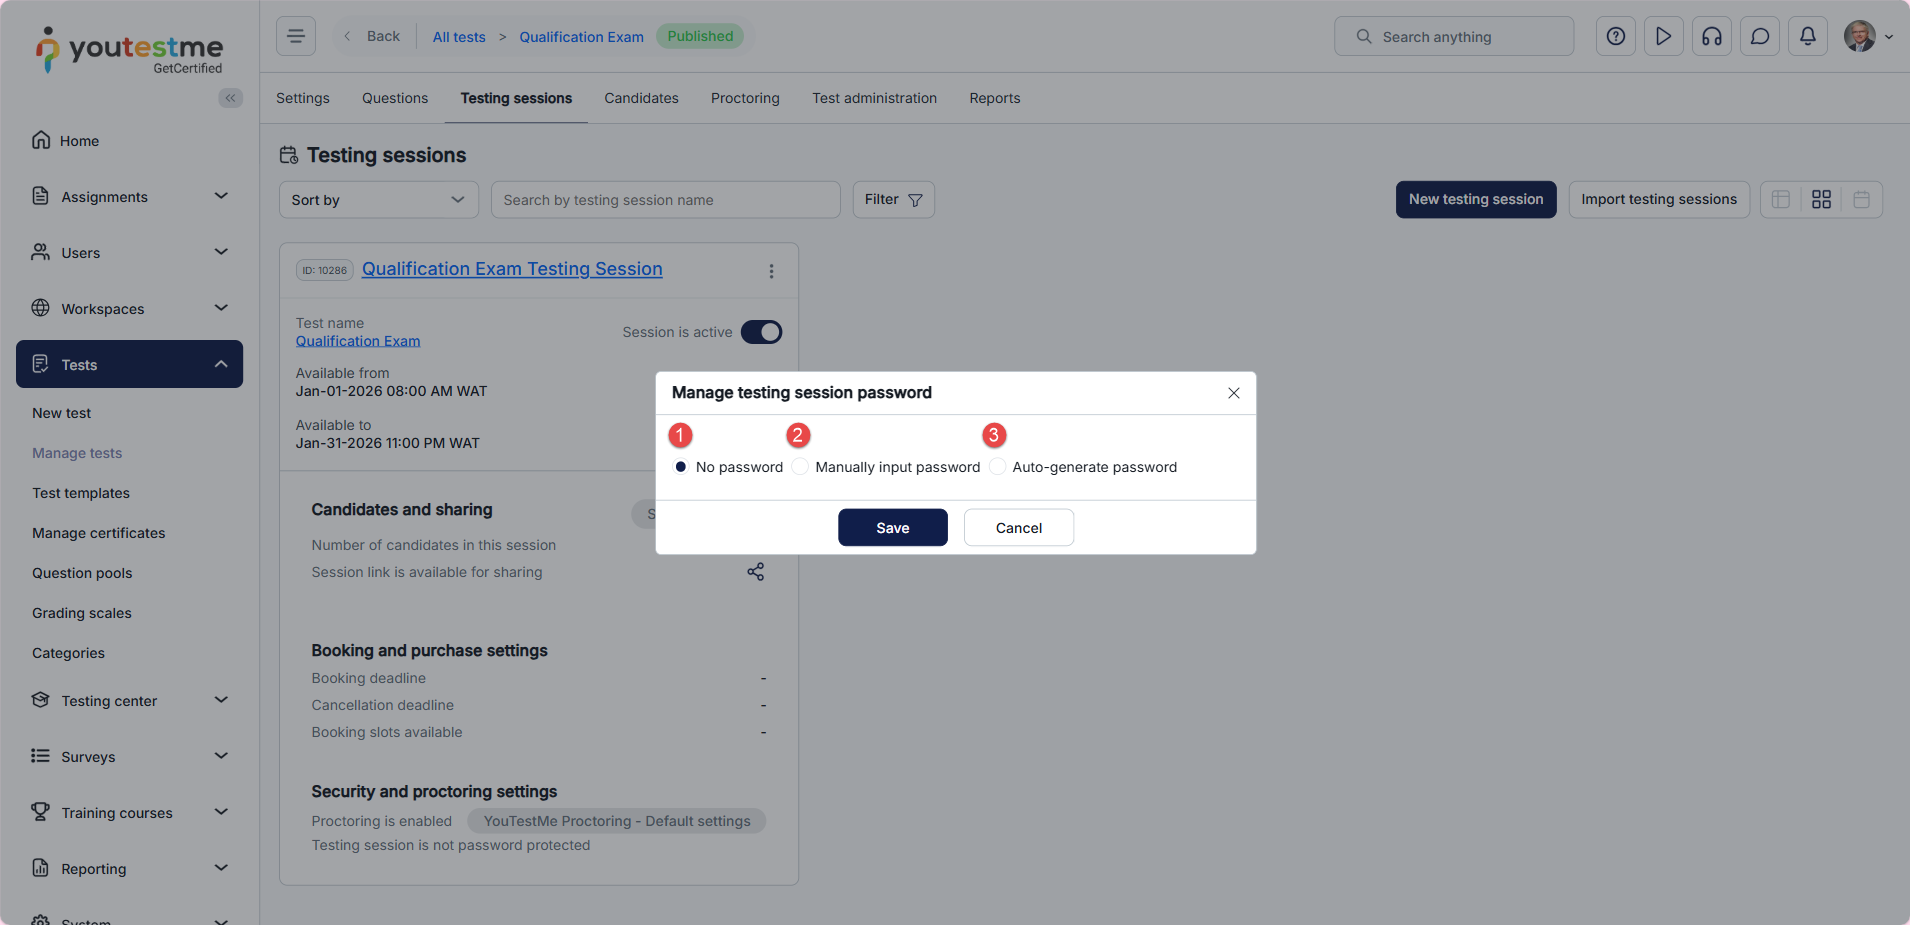
You will be prompted to choose from the following options:
- No passwords: When selected, candidates will not be required to enter a password to start the test.
- Manually input password: When selected, you should manually enter a password that will remain the same until you decide to update it or switch to one of the two other options (No passwords or Auto-generate password).
- Auto-generate Password: When enabled, the testing session password is automatically generated and updated according to predefined frequency settings and password criteria.
Session Password Auto-Generation Settings
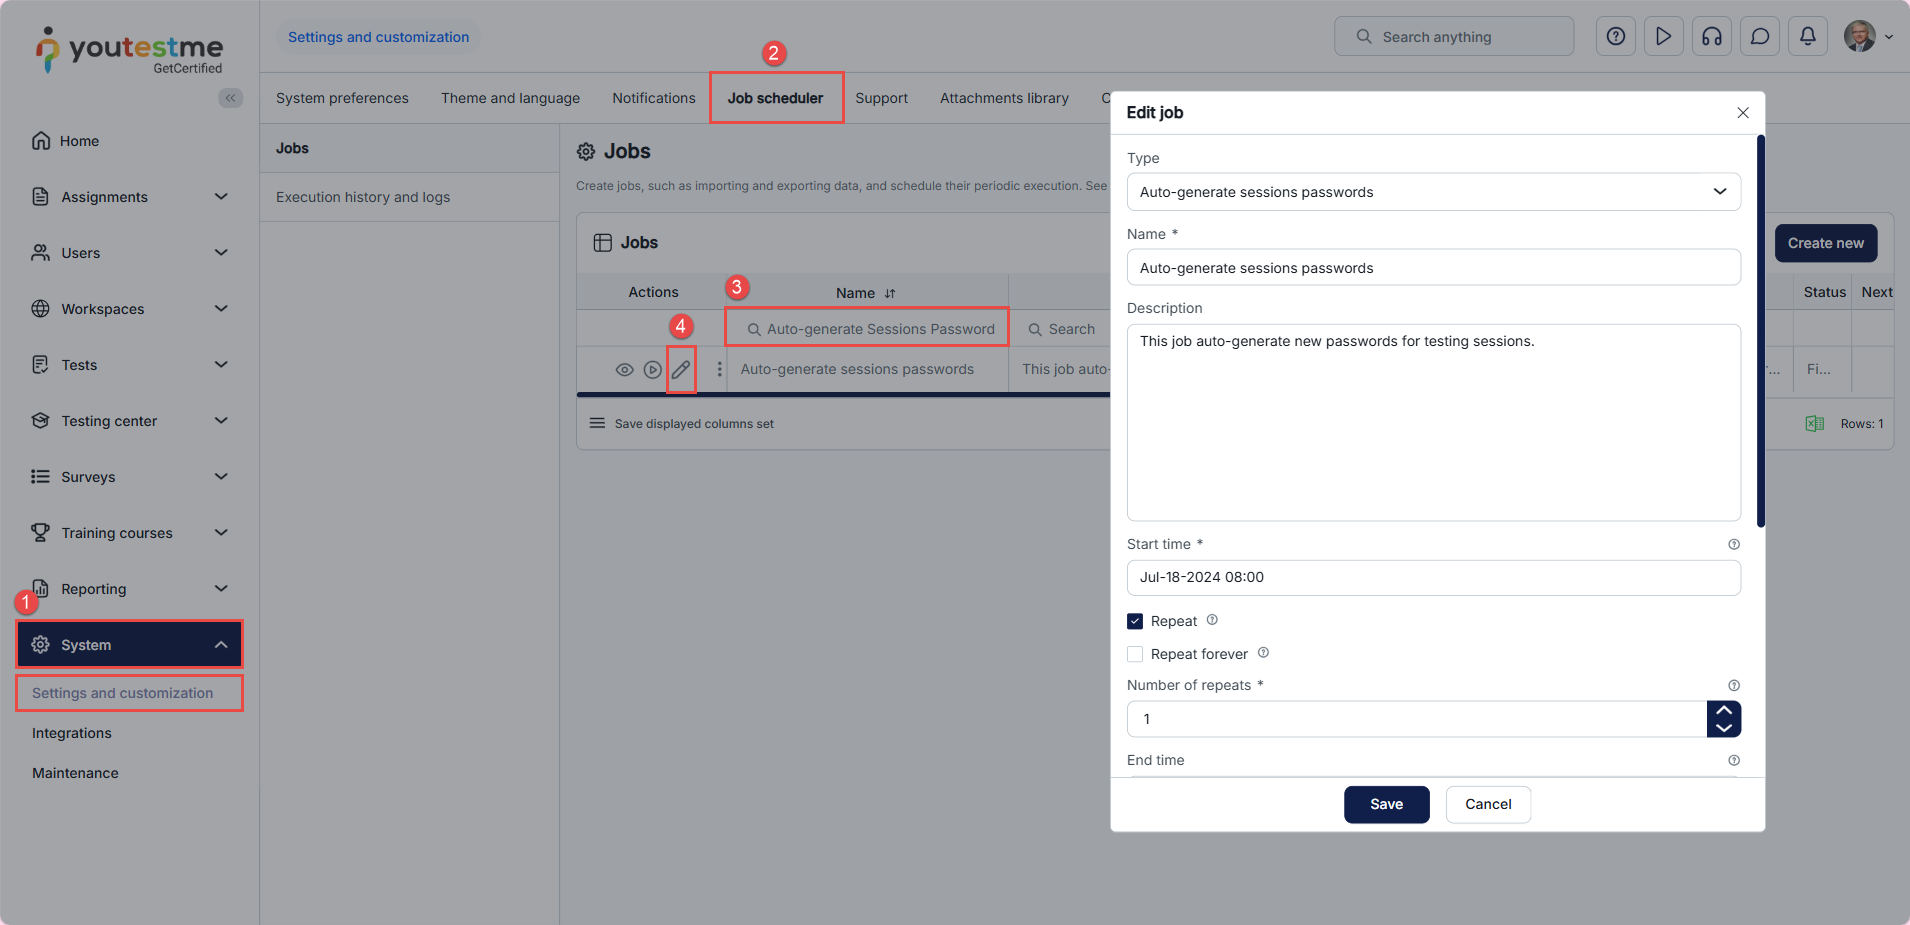
To change the password auto-generating settings, follow these steps:
- In the main menu, select System and click Settings and Customization.
- Go to the Job Scheduler tab.
- In the search field, enter the name of the job responsible for passwords: Auto-generate Sessions Passwords.
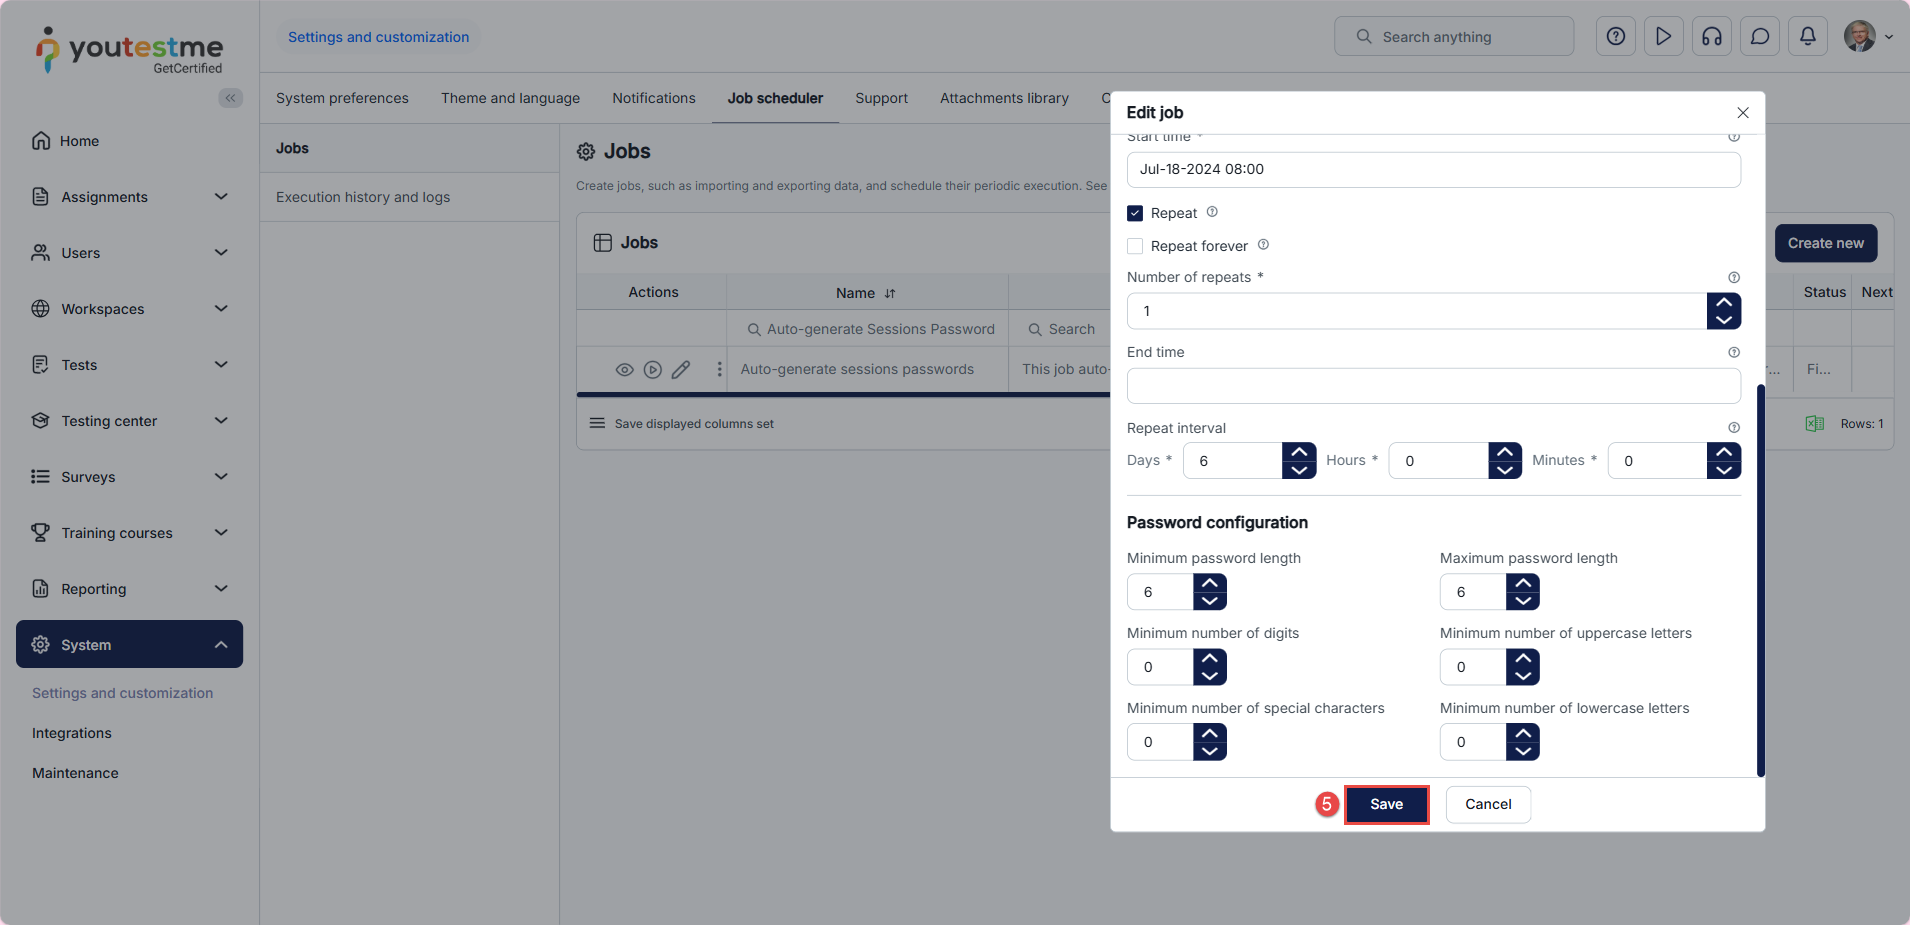
- Click on the pencil icon and customize the job by configuring the following:
- Type: This is set to Auto-generate Sessions Passwords and cannot be changed, as there must always be exactly one job of this type.
- Name: Provide a name for the job.
- Description: Optionally, enter a job description.
- Start time: Specify the initial execution time. If the chosen start time is in the past, the first execution will occur the next time according to the schedule (considering the Repeat interval if the job repeats), or it will not occur at all if the job does not repeat.
- Repeat: Check this option to schedule the job to run periodically at equal intervals after the Start time. If unchecked, the job will execute only once at the Start time.
- Repeat forever: Check this option to schedule the job to run indefinitely, or until the End time is specified.
- Number of repeats: If Repeat forever is unchecked, choose the number of repeats after the first job execution at the start time. For example, if you choose three times, the job will be repeated at equal intervals after the start time, for a total of 4 executions.
-
- End time: Optionally, choose the End time. After the specified time, the job will no longer be executed, even if there are remaining repeats.
- Repeat interval: Specify the Repeat interval, which is the time between two consecutive job executions. It should be at least 1 minute.
- Password configuration: Define the length and complexity requirements for automatically generated passwords.
- Click the Save button.
Note: The responsibility for sharing the session password lies with the test administrator or the person managing the tests. Passwords can be shared with candidates via email, written instructions, or any other preferred communication method. Please note that there is no automated process in place for sending passwords through the application.
Additional useful material:
