Article verified for Release 14.1 on March 11, 2025.
This article will guide you through the process of selecting and configuring a camera and microphone for proctored tests, ensuring that your equipment is ready for use.
Note: It is recommended to use a personal laptop for the exam, as work-provided devices often have security restrictions that can block access to the camera and microphone or prevent changes to their settings.
Configuring the Camera/Microphone in Google Chrome (Windows & macOS)
Turn on and Verify Permissions
- Click the icon on the right side of the address bar.
- Ensure that the camera/microphone is turned on.
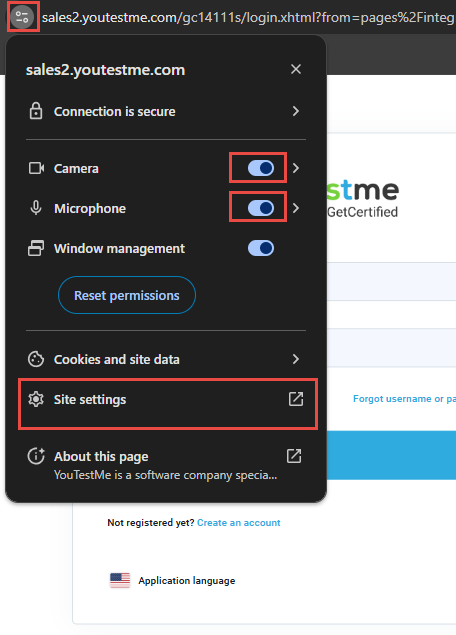
- Click Site settings (on Windows) or Manage multimedia device settings (on macOS) and, in the drop-down menu, choose Allow for camera or microphone permissions.
Using a USB Device (Camera or Microphone)
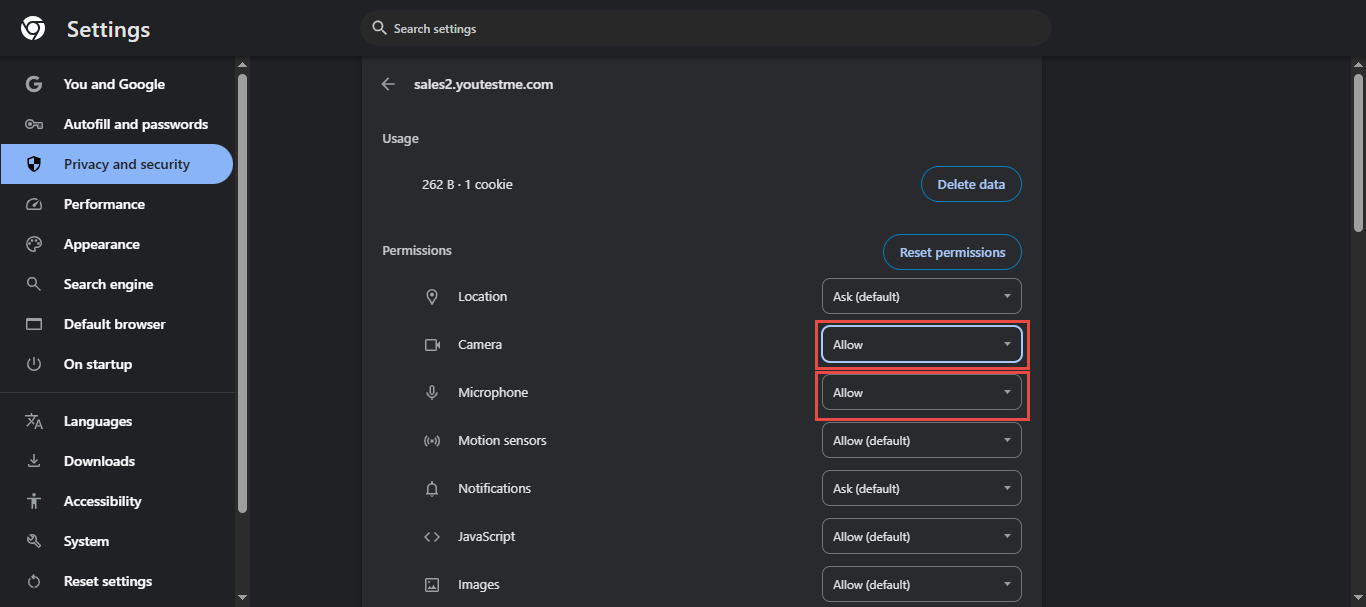
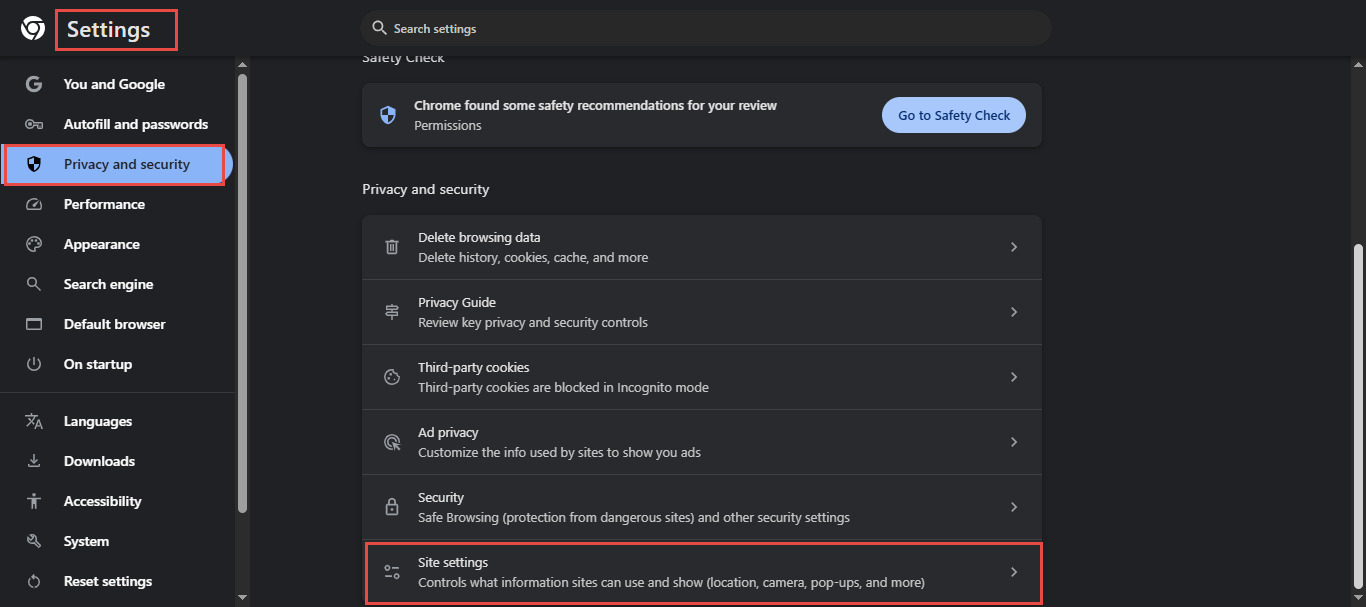
- Open Google Chrome Settings.
- Navigate to Privacy and Security > Site settings.
- In the permissions panel, select Camera or Microphone.

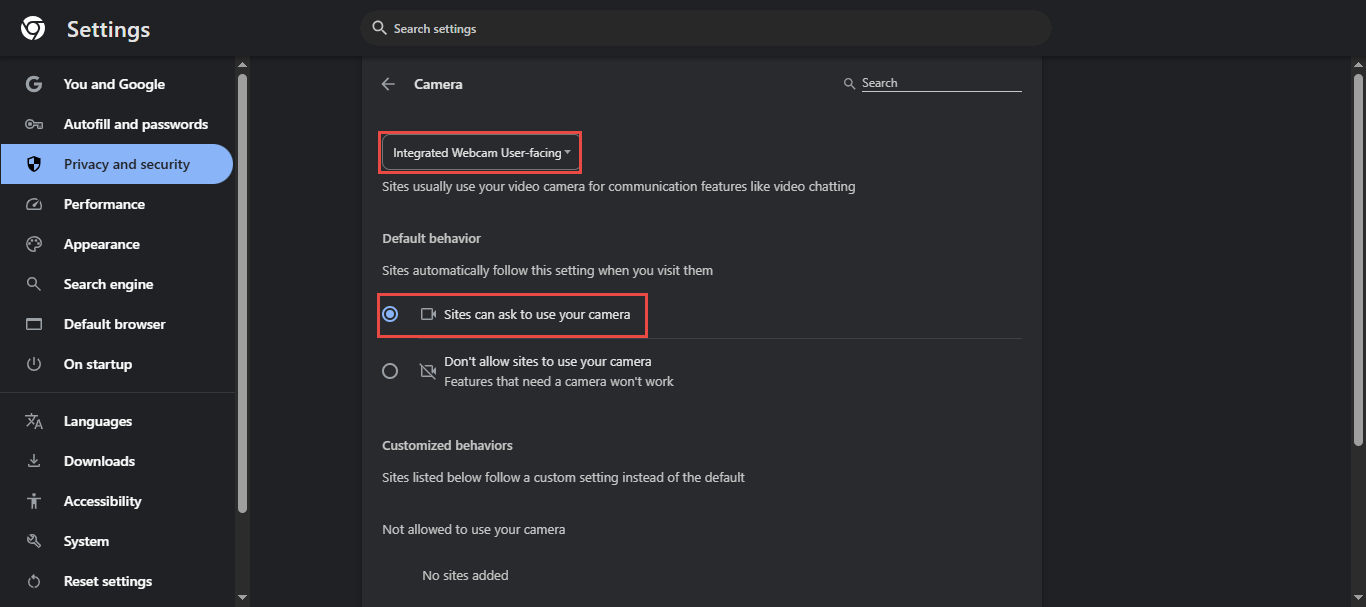
- In the default behavior section, choose the option Sites can ask to use your camera/microphone.
- From the drop-down menu, choose the desired USB device.
- Refresh the exam page for the changes to take effect.
Configuring Camera and Microphone Permissions in Mozilla Firefox (Windows & macOS)
Accessing Site Permissions
- Navigate to the exam page that requires camera or microphone access.
- Click the padlock icon on the left side of the address bar.
- In the drop-down menu, click the right arrow next to “Connection secure” to expand the site information.

- Click More Information to open the Page Info window.
Modifying Permissions
- In the Page Info window, select the Permissions tab.
- Scroll down to Use the Camera and Use the Microphone.
- Uncheck Use Default for each device to customize settings.
- Check the Allow box to grant the website access to your camera and microphone.

Selecting Specific Devices (When Multiple Are Connected)
- When a site requests access to your camera or microphone, Firefox will prompt you to select which device to use if multiple are available.
- Choose your preferred device from the drop-down menu in the permission prompt.
- Optionally, check “Remember this decision” to save your preferences for future visits.
- Close the Page Info window.
- Refresh the exam page to ensure the new settings take effect.
How to Check Your Equipment Before the Exam
Before starting the exam, you can ensure your equipment is functioning properly by performing an equipment check. To do this, follow these steps:
- Navigate to the Exams or Assignments section.
- Select the My Test section.
- On the My Test page, click the Check Equipment button.

- This will open a new window. Click on Start Equipment Check.

- Based on the settings configured by the administrators, the system will check the status of your webcam, microphone, screen sharing, and network.

- If any issues are detected with the equipment, the system will notify you.
By performing this check, you can ensure your equipment is ready before starting the exam.
Note: It is recommended to perform the equipment check before the exam to avoid any technical issues during the test.
Troubleshooting Equipment Issues
In case you encounter any issues with your camera or microphone during the equipment check, please refer to the following troubleshooting articles for detailed steps:
- How to Troubleshoot Camera Issues During a Proctored Exam
- How to Troubleshoot Microphone Issues During a Test
These articles will help you resolve common issues and ensure your equipment is ready before the exam.
Please watch the video for more information on how the test-taking process looks from the candidate’s perspective.
To see frequently asked questions about proctored tests, please see the FAQ.
For additional related topics, please refer to the following articles:


