

Article verified for Release 15.1 on November 8, 2025.
This article provides a step-by-step guide on adding attachments to tests, test sections, and individual questions.
Within our platform, three distinct types of attachments can be added at different levels:
- Test Attachments: These attachments are accessible to students either from the test instructions or throughout the entire test.
- Section Attachments: In a test with sections, adding different attachments to each section is possible. These attachments can be accessed by students from the section instructions or throughout the entire section.
- Question Attachments: Linked directly to individual questions, these attachments help students better understand and answer each question effectively.
Attachment Types in YouTestMe
The YouTestMe system supports adding 11 different attachment types to questions, tests, test sections, and training courses. These attachments can either be uploaded and stored in the library for future use or directly uploaded while creating questions, tests, or training courses. The available attachment types are:
- Picture: Multimedia files in PNG, JPG, JPEG, and GIF formats, with a maximum file size of 5 MB.
- Video (MP4): Video files in MP4 format.
- Audio (MP3): Audio files in MP3 format.
- Text: Text written in a built-in text editor.
- PDF: PDF documents.
- Archive: ZIP archives or compressed folder files.
- Google Doc: Embedded Google Docs links.
- YouTube Video: Embedded YouTube video links.
- Vimeo Video: Embedded Vimeo video links.
- Link: Links to external locations. Only embedded links are supported for link attachments.
- SCORM package: compressed file containing e-learning content.
These attachments help to enhance the content and interactivity of the tests and training courses, providing various media formats for a more dynamic learning experience.
Test Attachment
You can add an attachment to the test either during test creation or after creating the test from the test settings.
Adding attachments during the test creation
To add an attachment while creating the test, follow the steps below:
- Click the Show Advanced Settings in the first step of the test creation wizard.
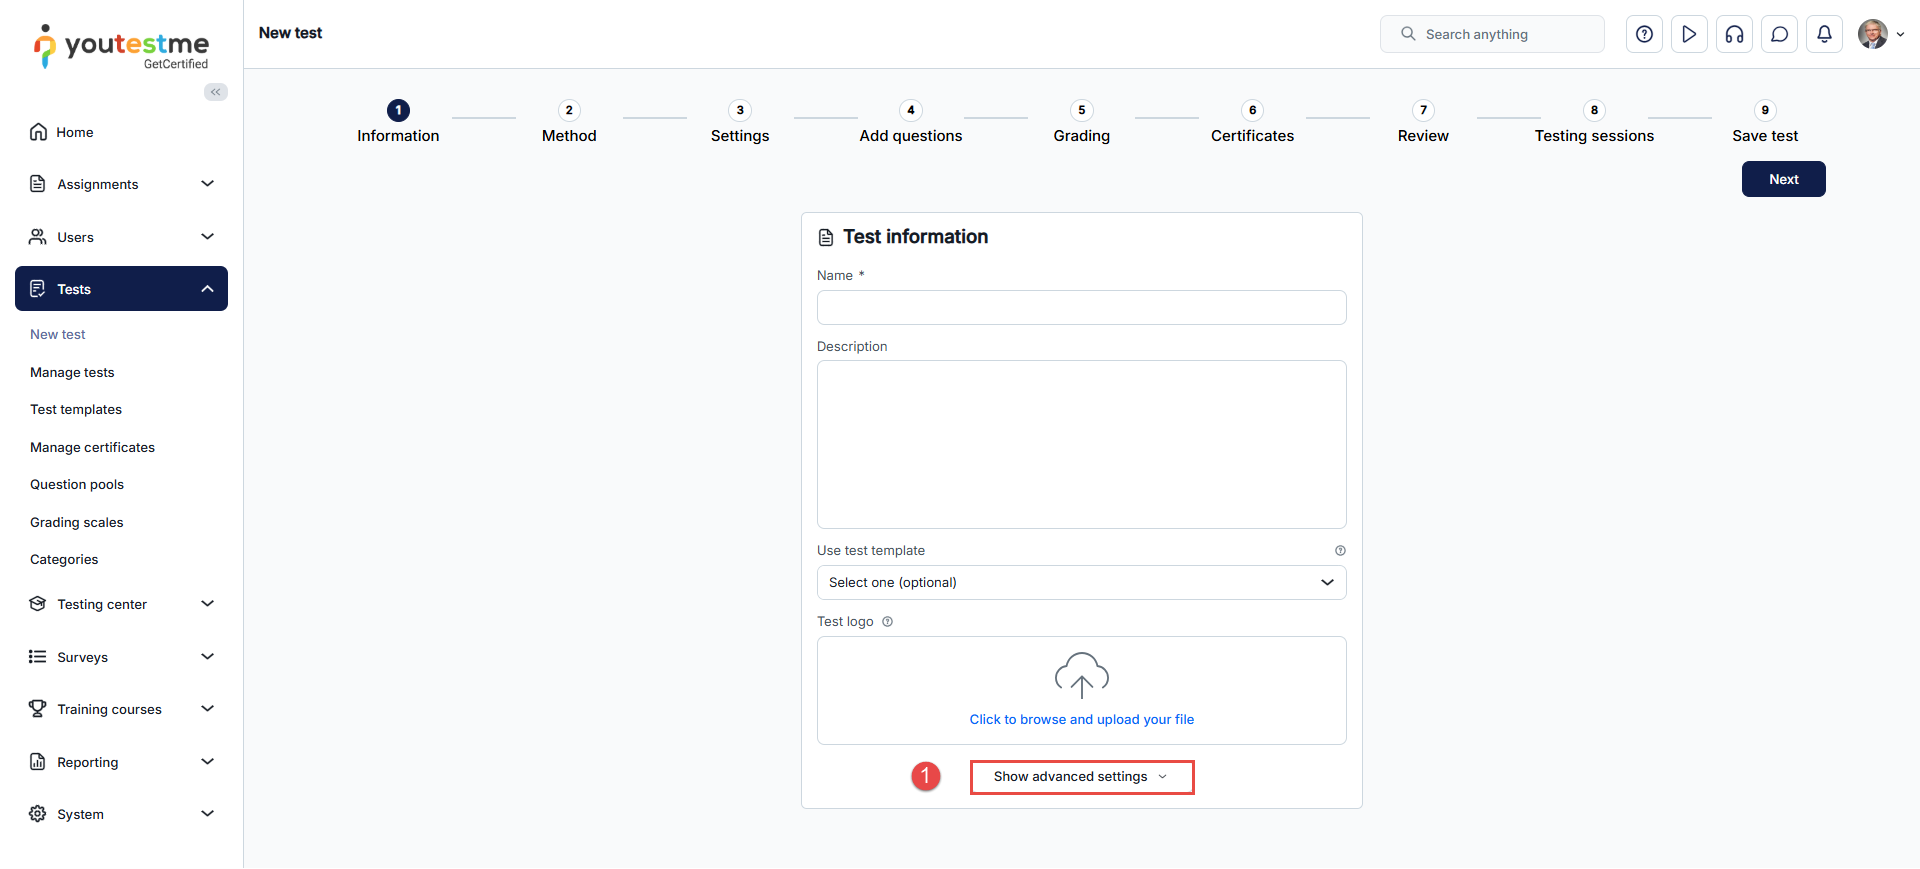
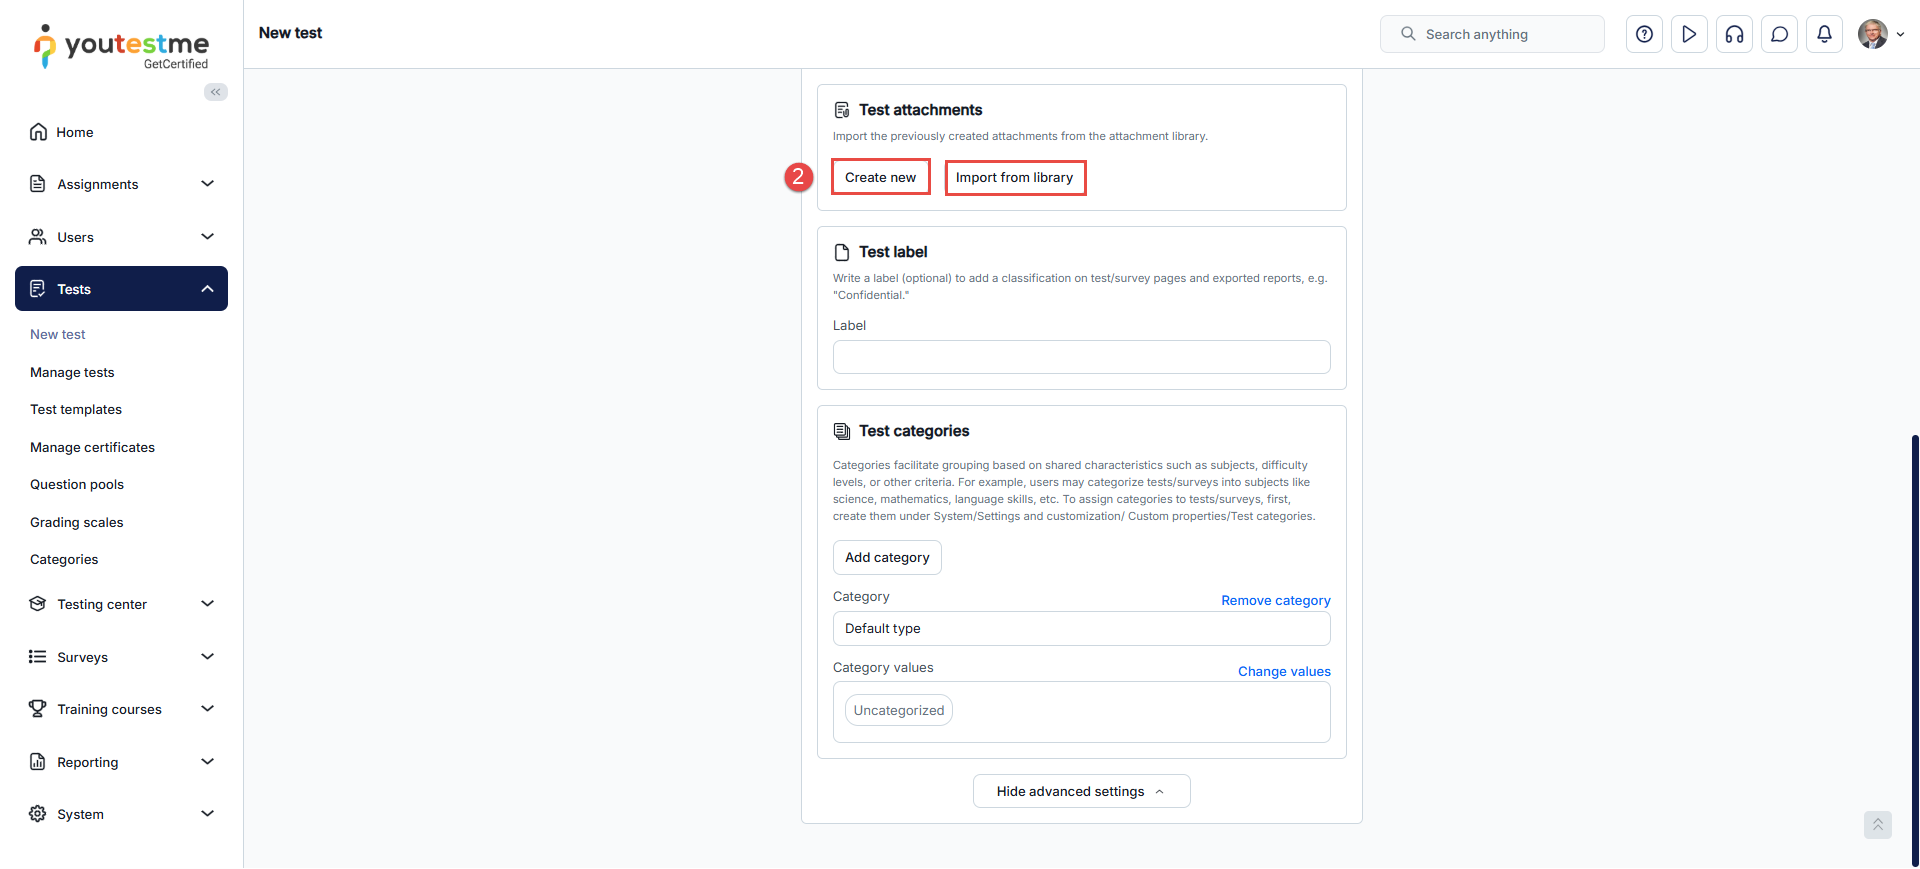
- Navigate to the Attachments section and use the Create New button to upload an attachment from your device or the Import From Library button to select an attachment already saved in the platform.
Managing attachments of a created test
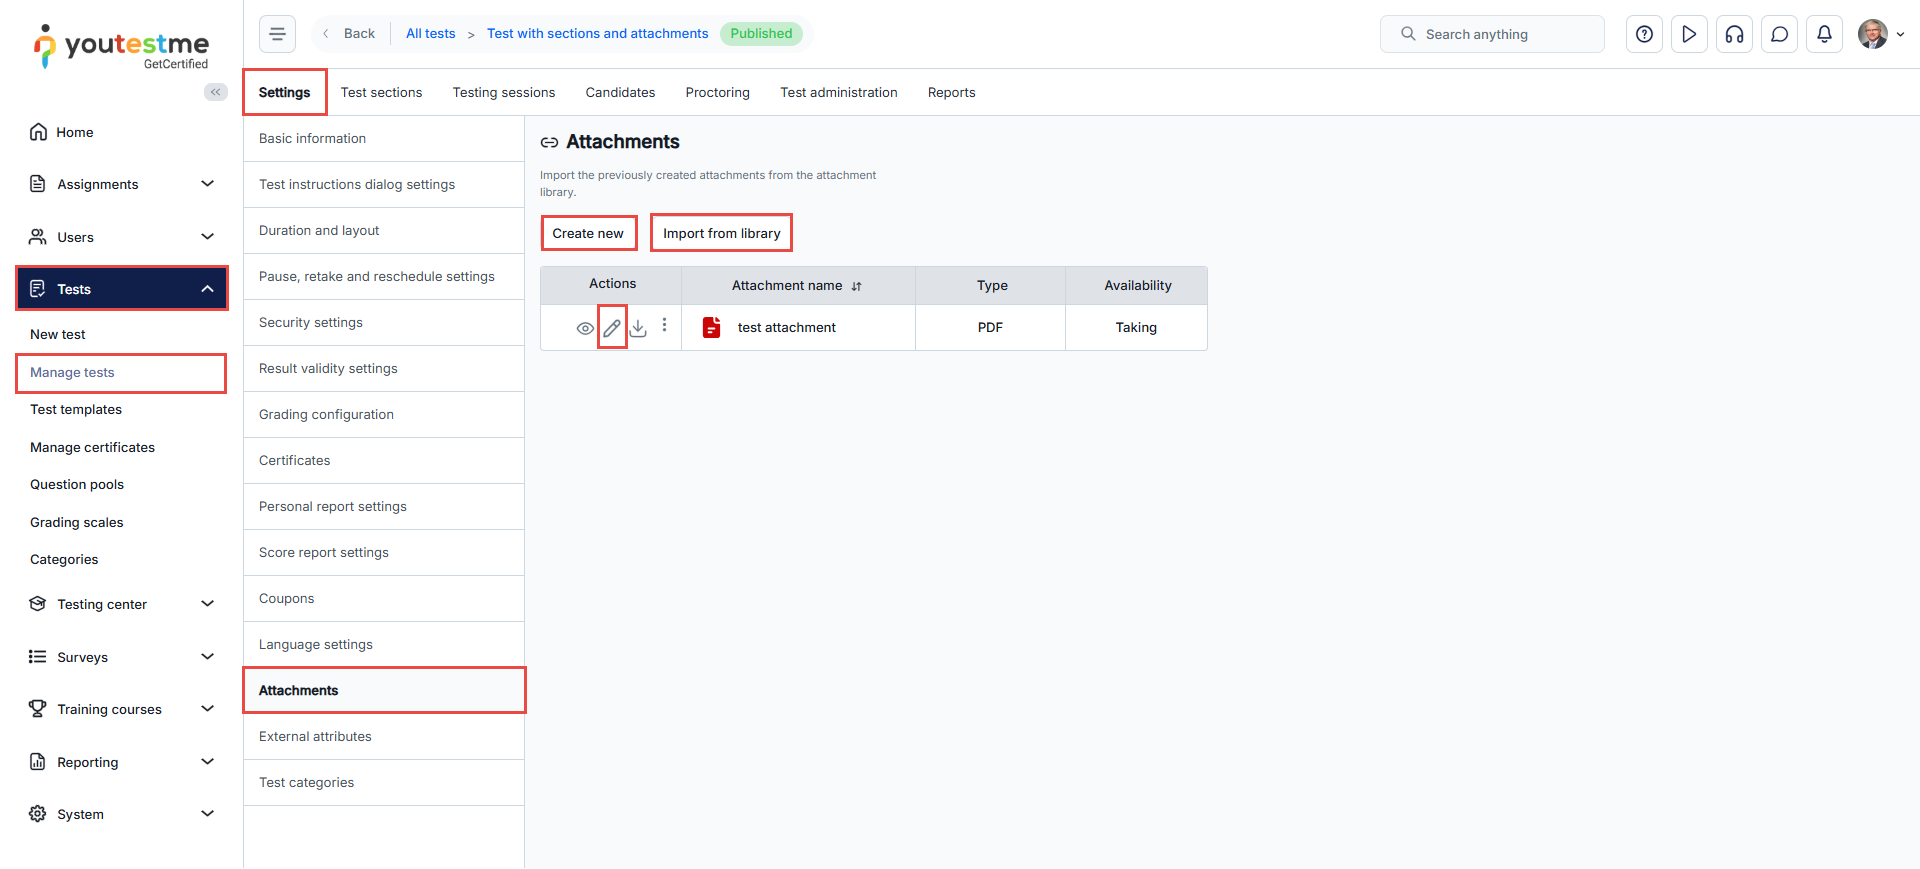
To add an attachment to a published test, navigate to the settings of the desired test and select the Attachment tab, where you can manage the test attachments and upload new ones or import them from the library.
Section Attachment
You can add section attachments while creating the test or from the section settings of a created test.
Adding attachments during the section creation
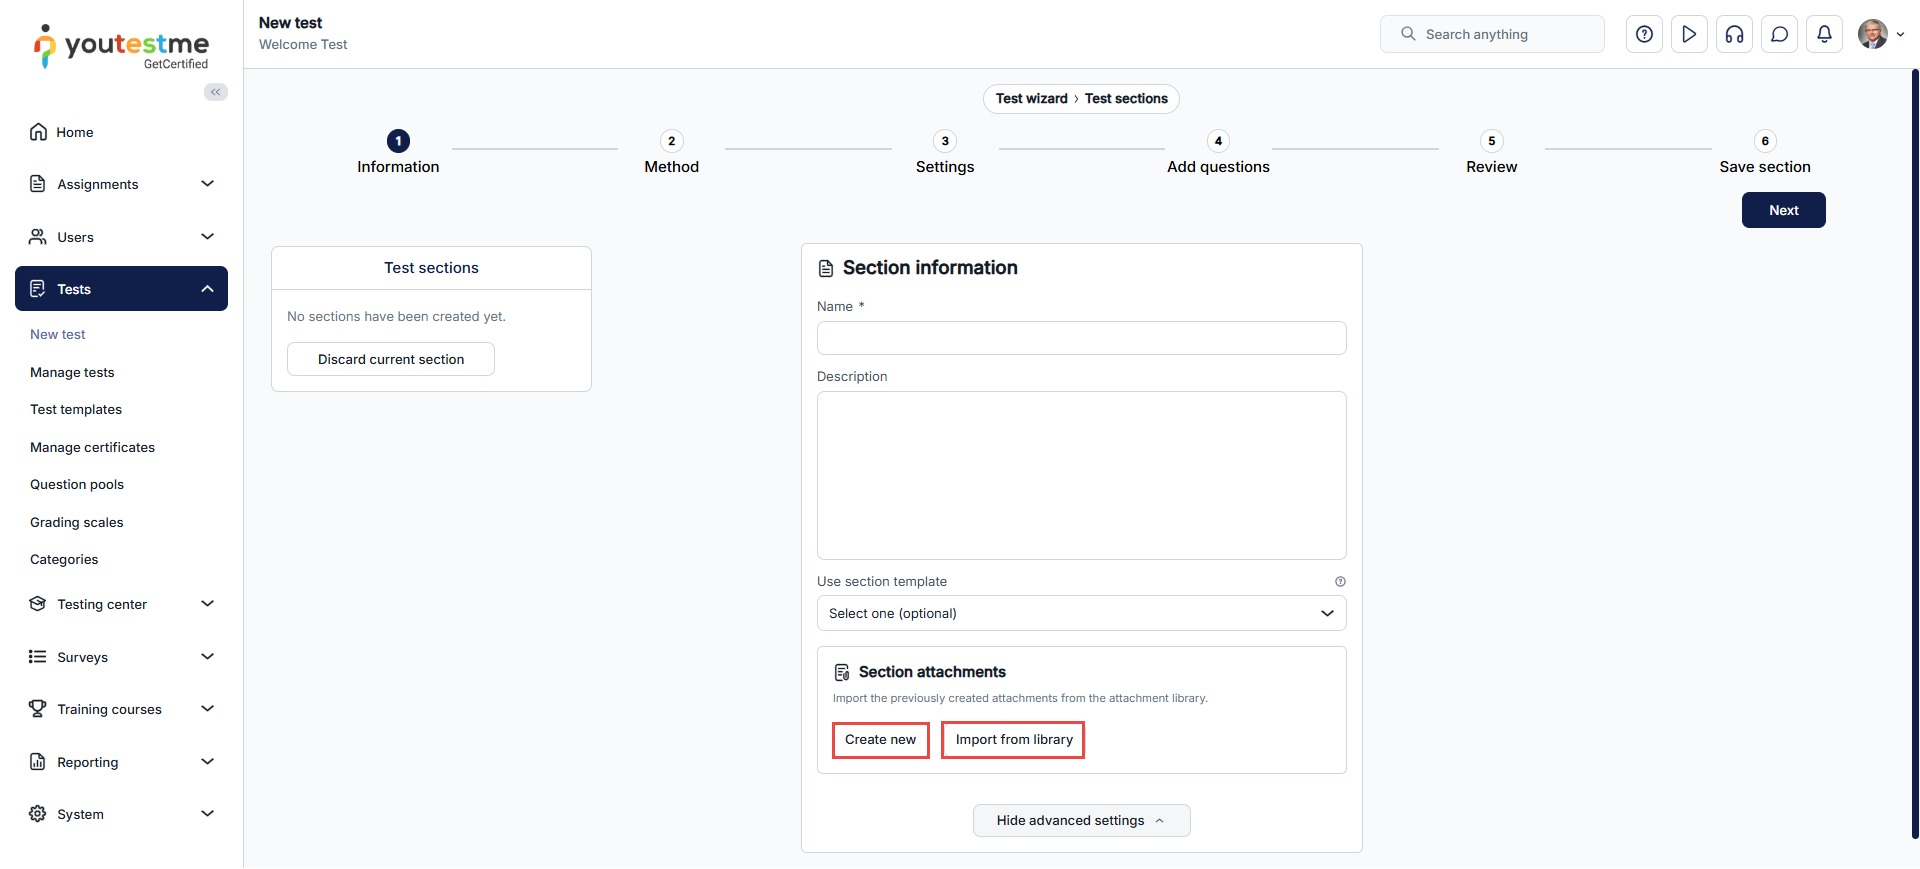
To add a section attachment in the test creation wizard, complete the process of adding test information. Then, when adding a new section, utilize the Create New button to upload an attachment from your device. Alternatively, use the Import from the Library button to utilize a previously saved attachment.
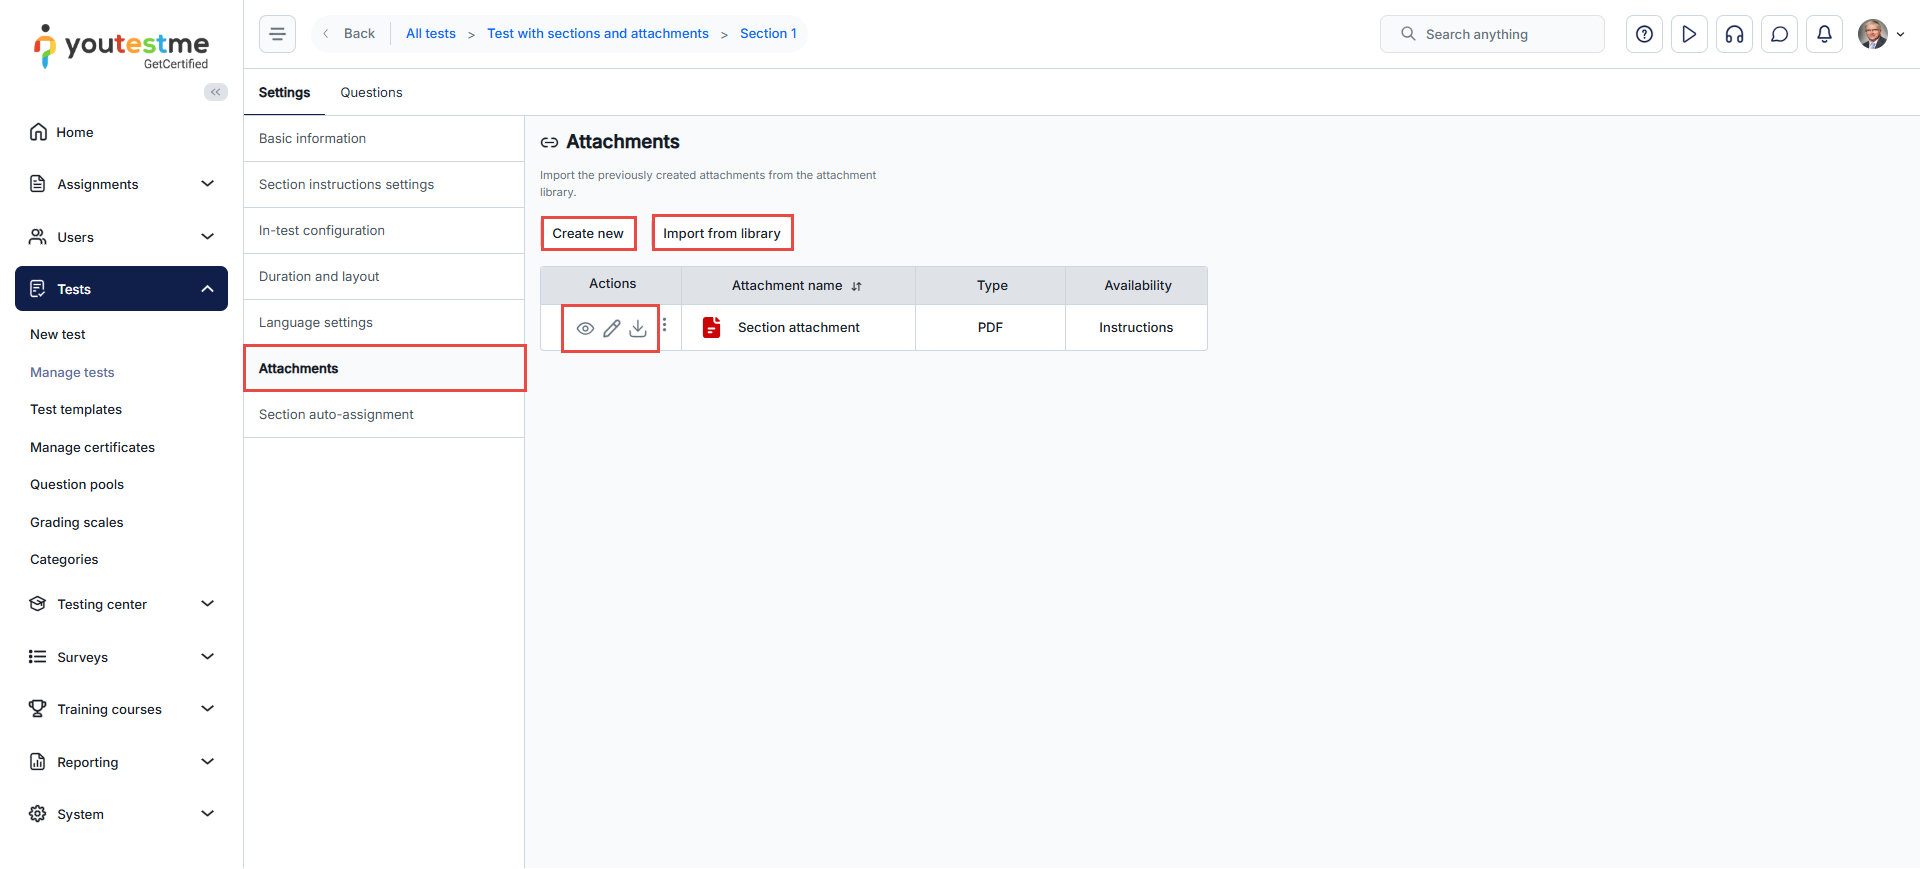
Managing attachments of a created section
- To add a section attachment to a published test, navigate to the Test Section tab of the desired test and click the Details button next to the section name.
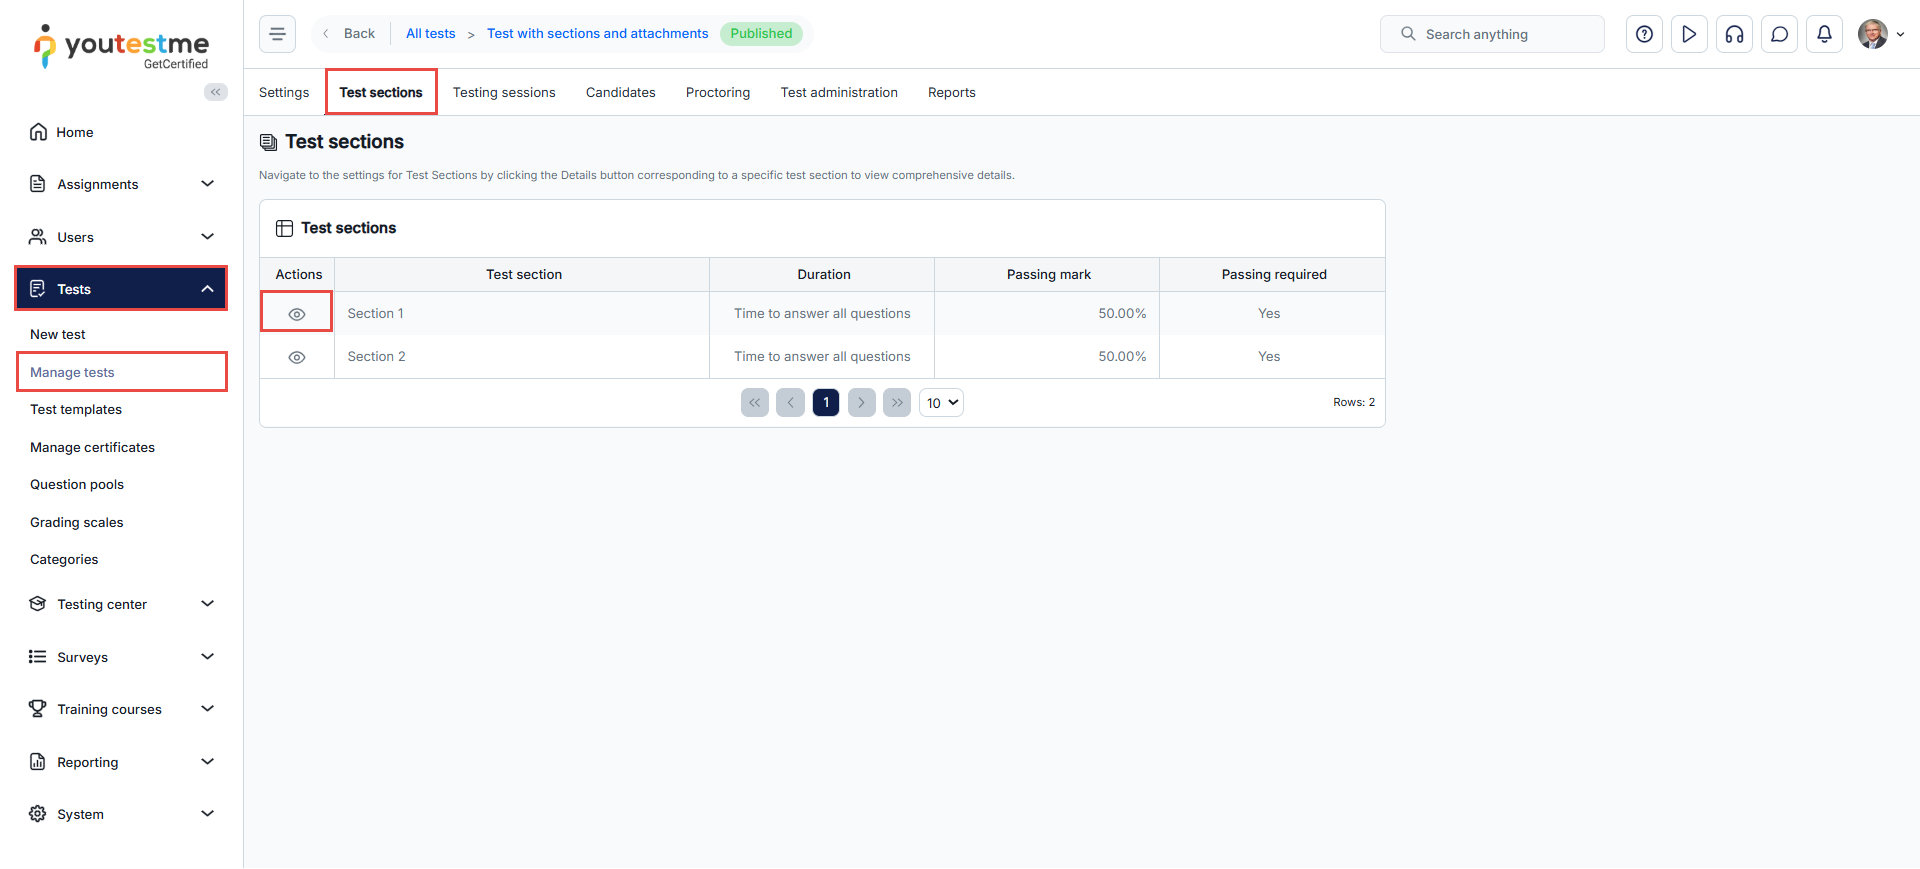
- Select the Attachments tab, where you can manage the section attachments, upload new ones using the Create New button, add an attachment from the library using the Import from Library button, or edit, view, or download the existing ones.
Question Attachment
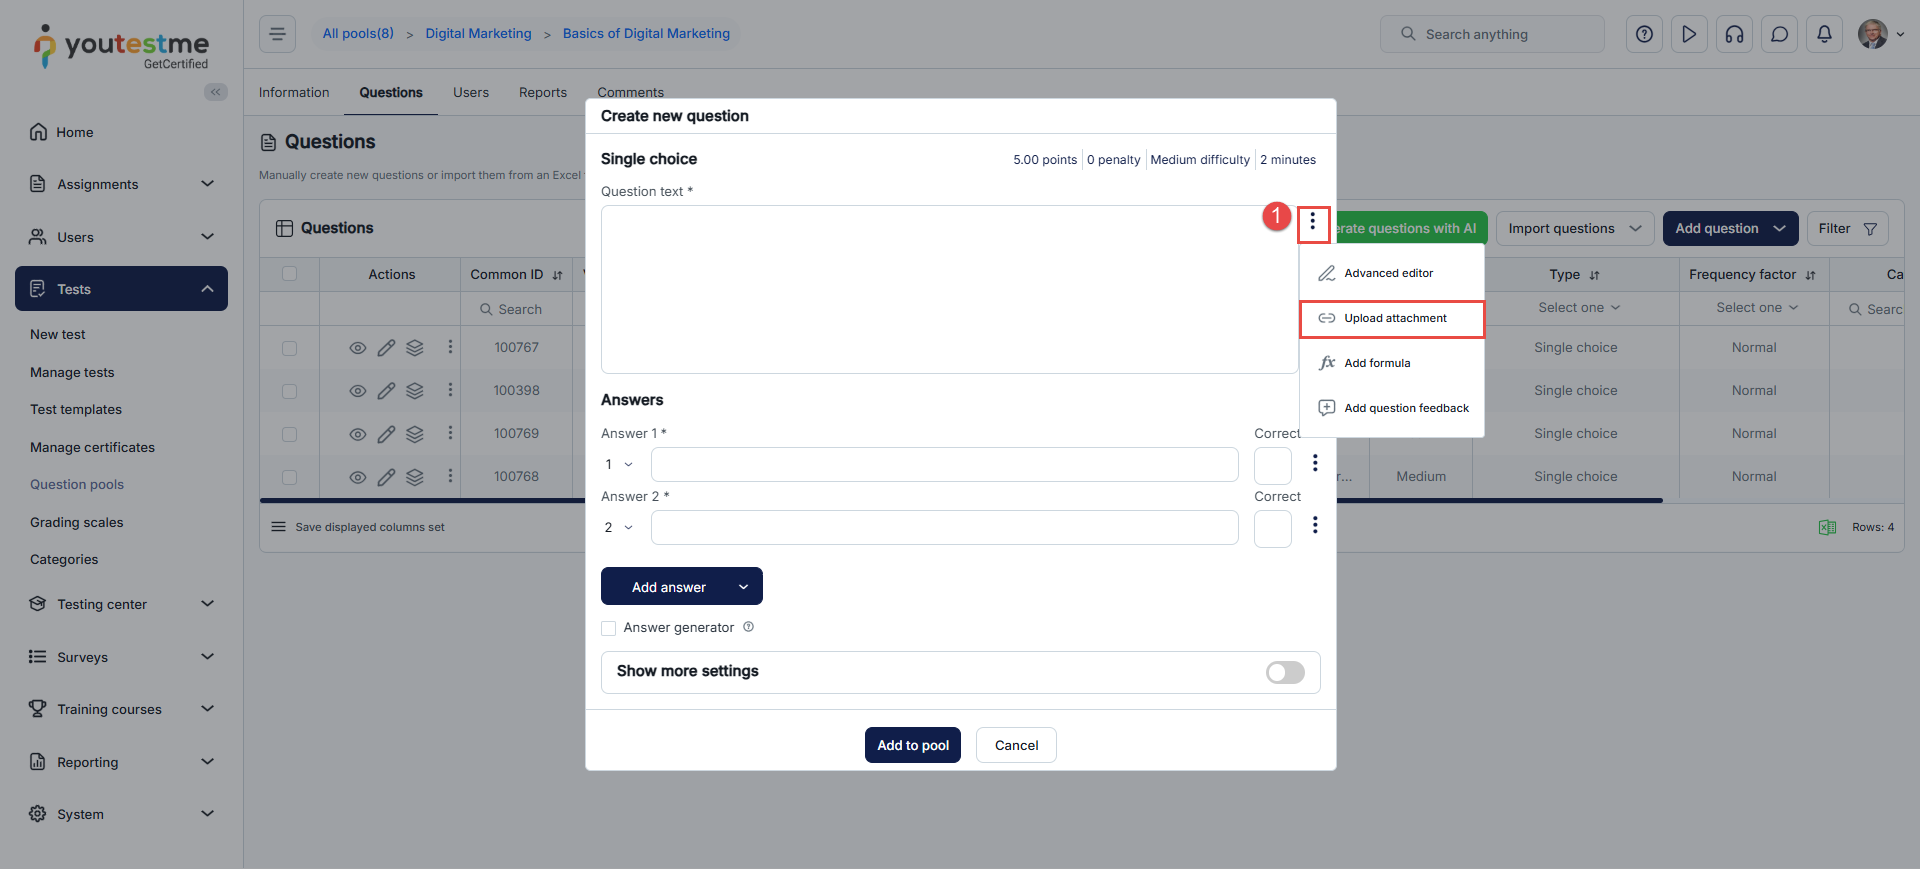
Adding attachments during the question creation
When manually creating a question in the question pool, users have the option to add attachments to both the question and its individual answers. Users can also attach files to the entire question, providing further resources and context for the test-taker. This flexibility allows for a more comprehensive and enriched testing experience. To know how to create a question manually, please read this article.
- Question attachment:
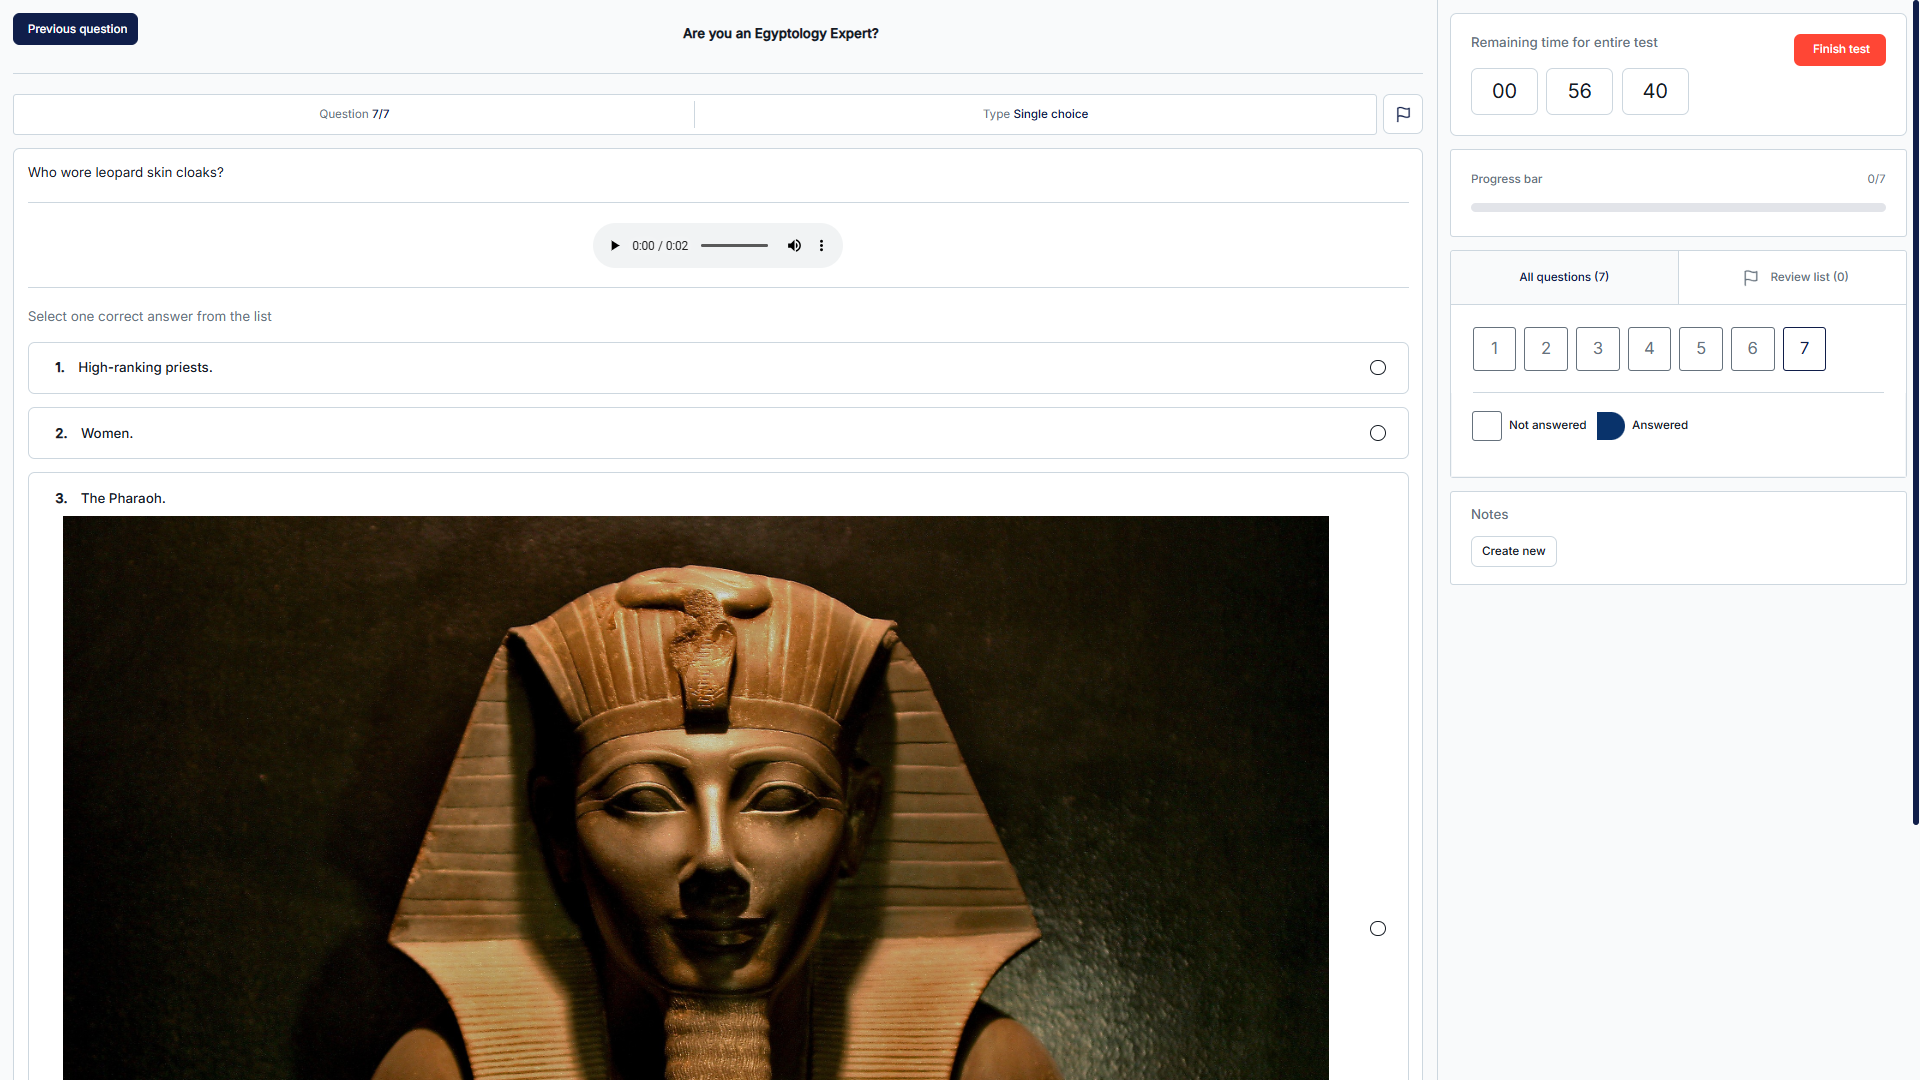
This option allows you to add an attachment that will be displayed below the question text.
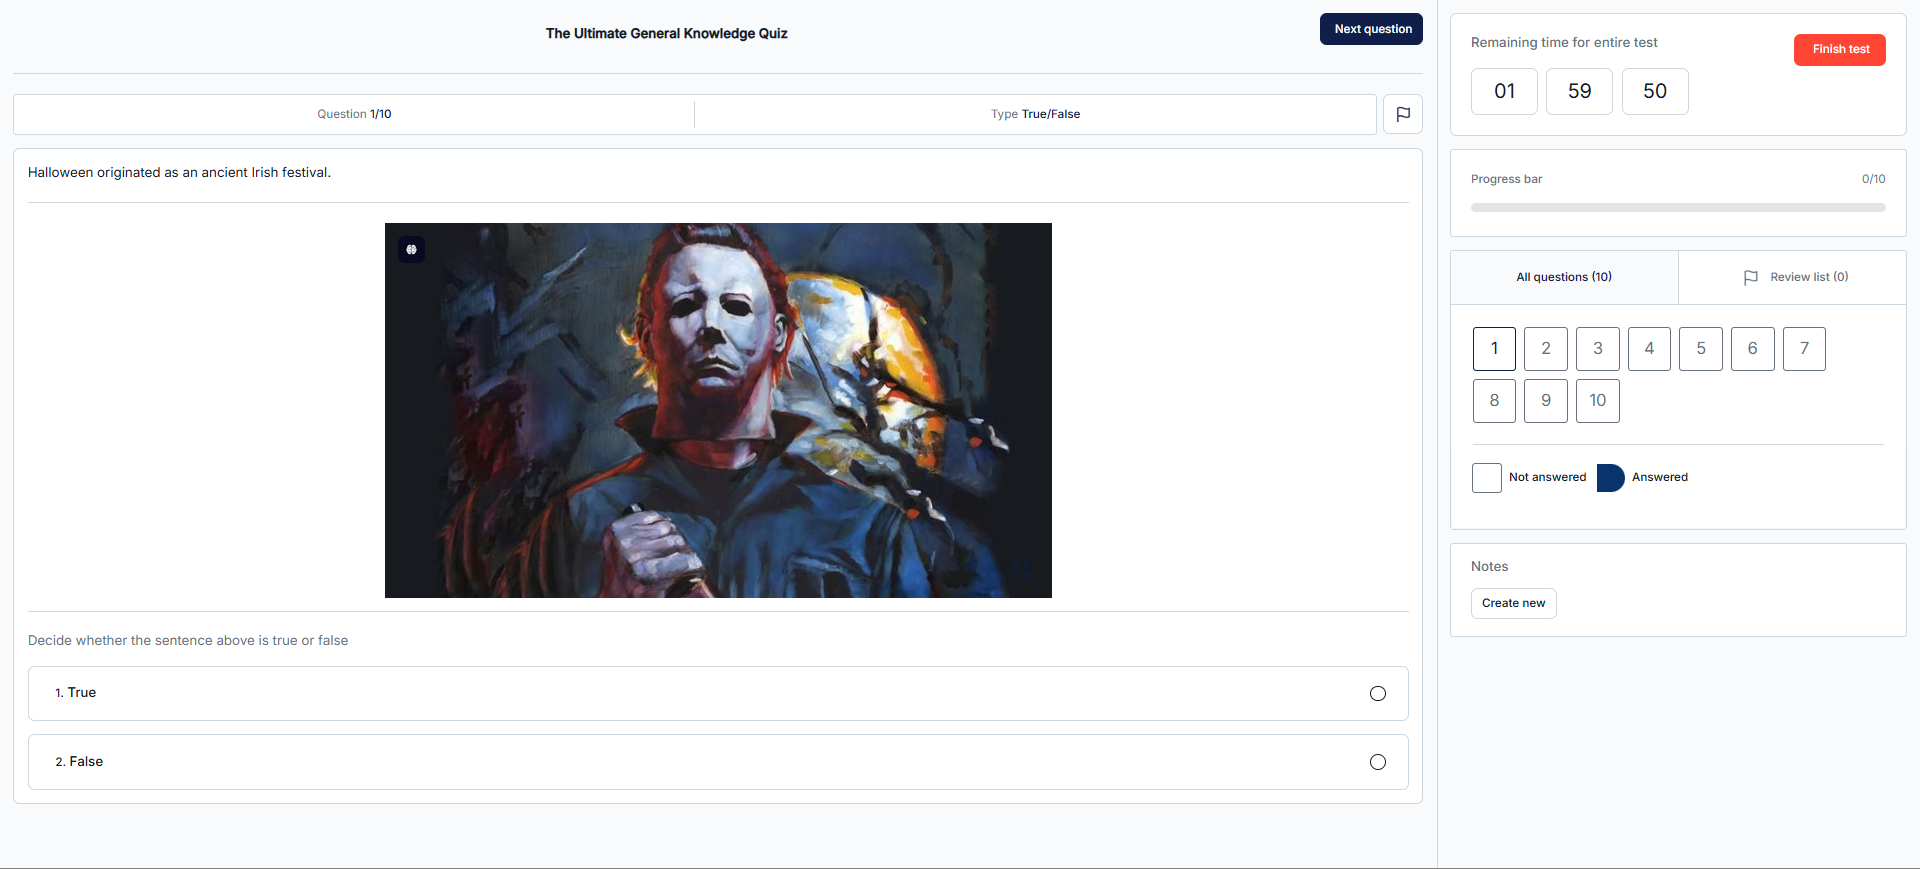
The question from the candidate’s perspective will be displayed in the picture below.
- Answer attachment
This option allows adding an attachment displayed below the answer text.

From the candidate’s perspective, the picture will appear below the answer text.
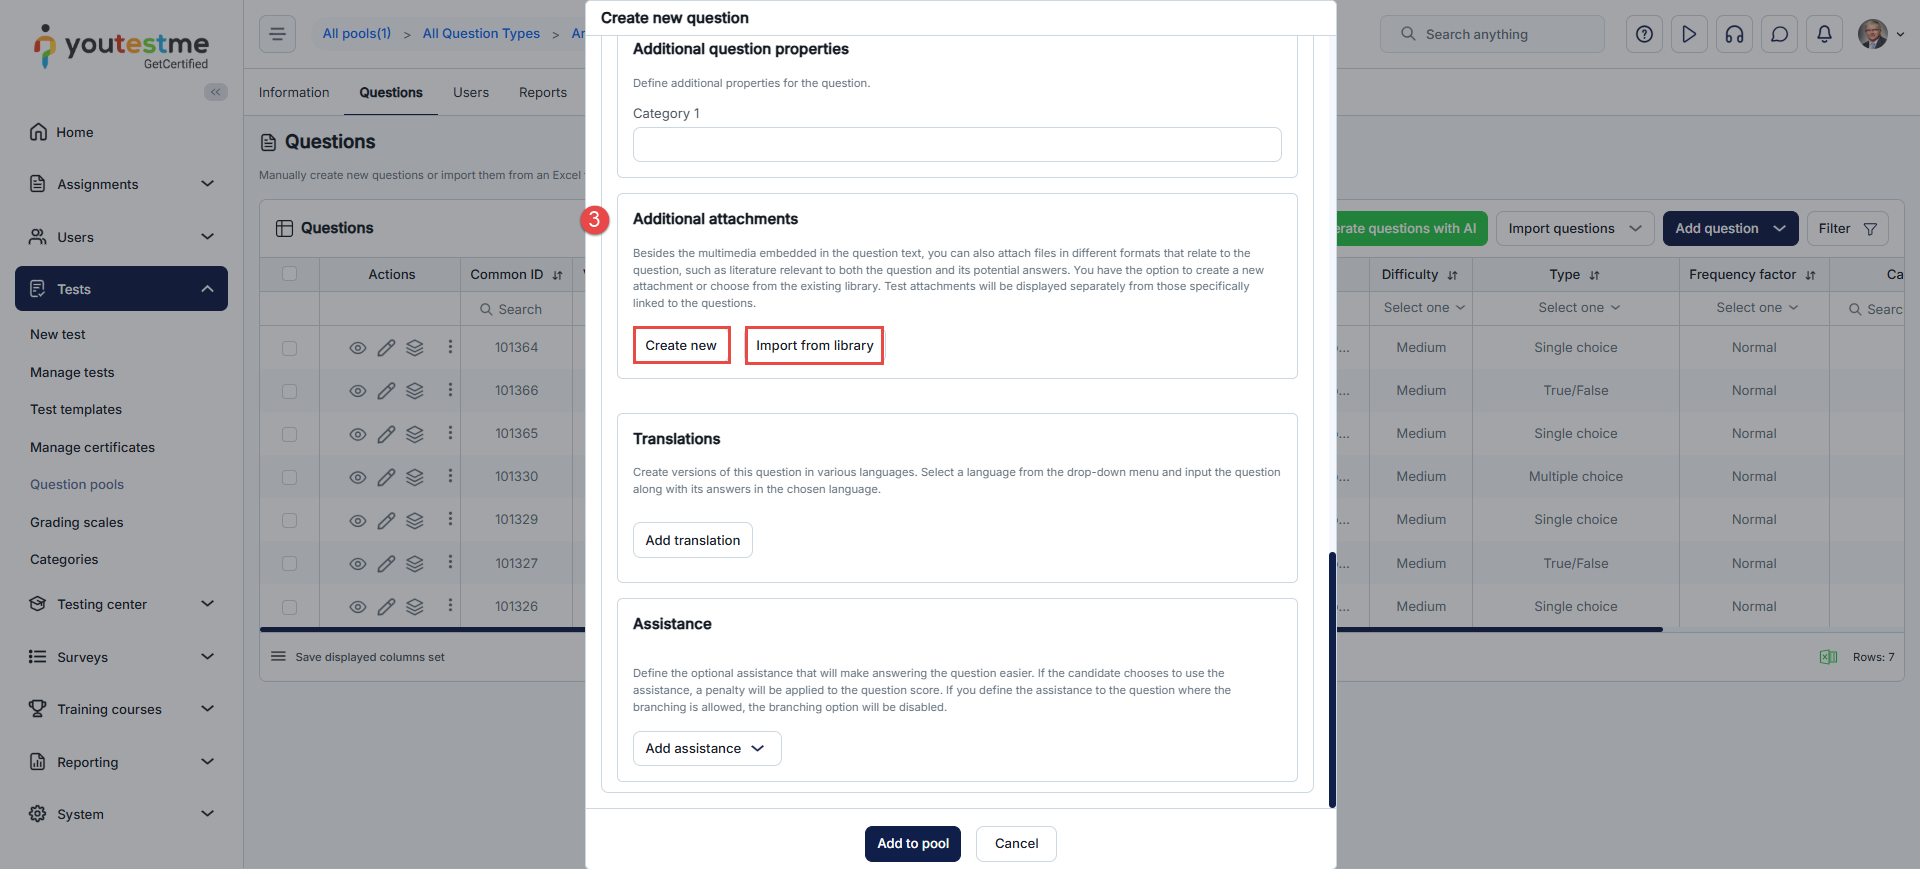
- Additional attachment
Besides the multimedia embedded in the question text, you can also attach files in different formats that relate to the question, such as literature relevant to both the question and its potential answers. You have the option to create a new attachment or choose from the existing library. Test attachments will be displayed separately from those specifically linked to the questions.
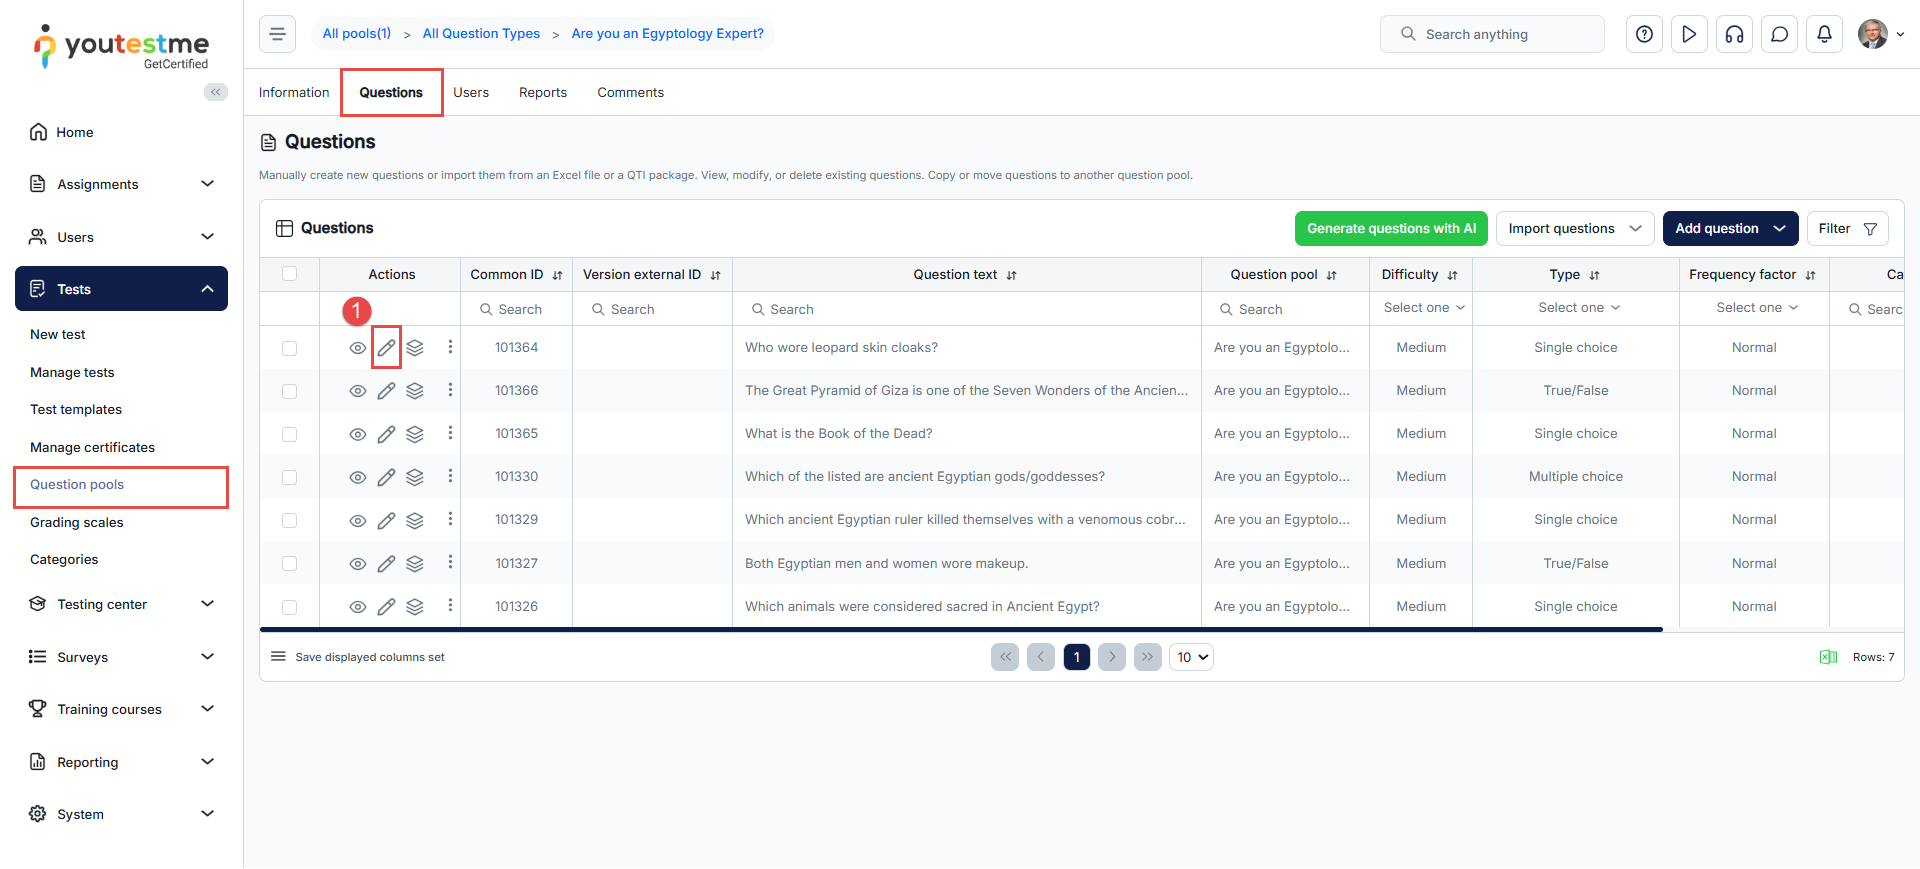
Adding an attachment to a created question
It is possible to add different types of multimedia to a single question. To add an attachment to a created question, please follow the steps below:
- Navigate to the desired question pool or create a new one in the Question Pools sub-menu. Then, create a new question using the Add Question button, or click the Edit button next to an existing question if you want to modify it.
- Click the three dots next to the question text field and select Upload Attachment. Use the Save button to update the question.
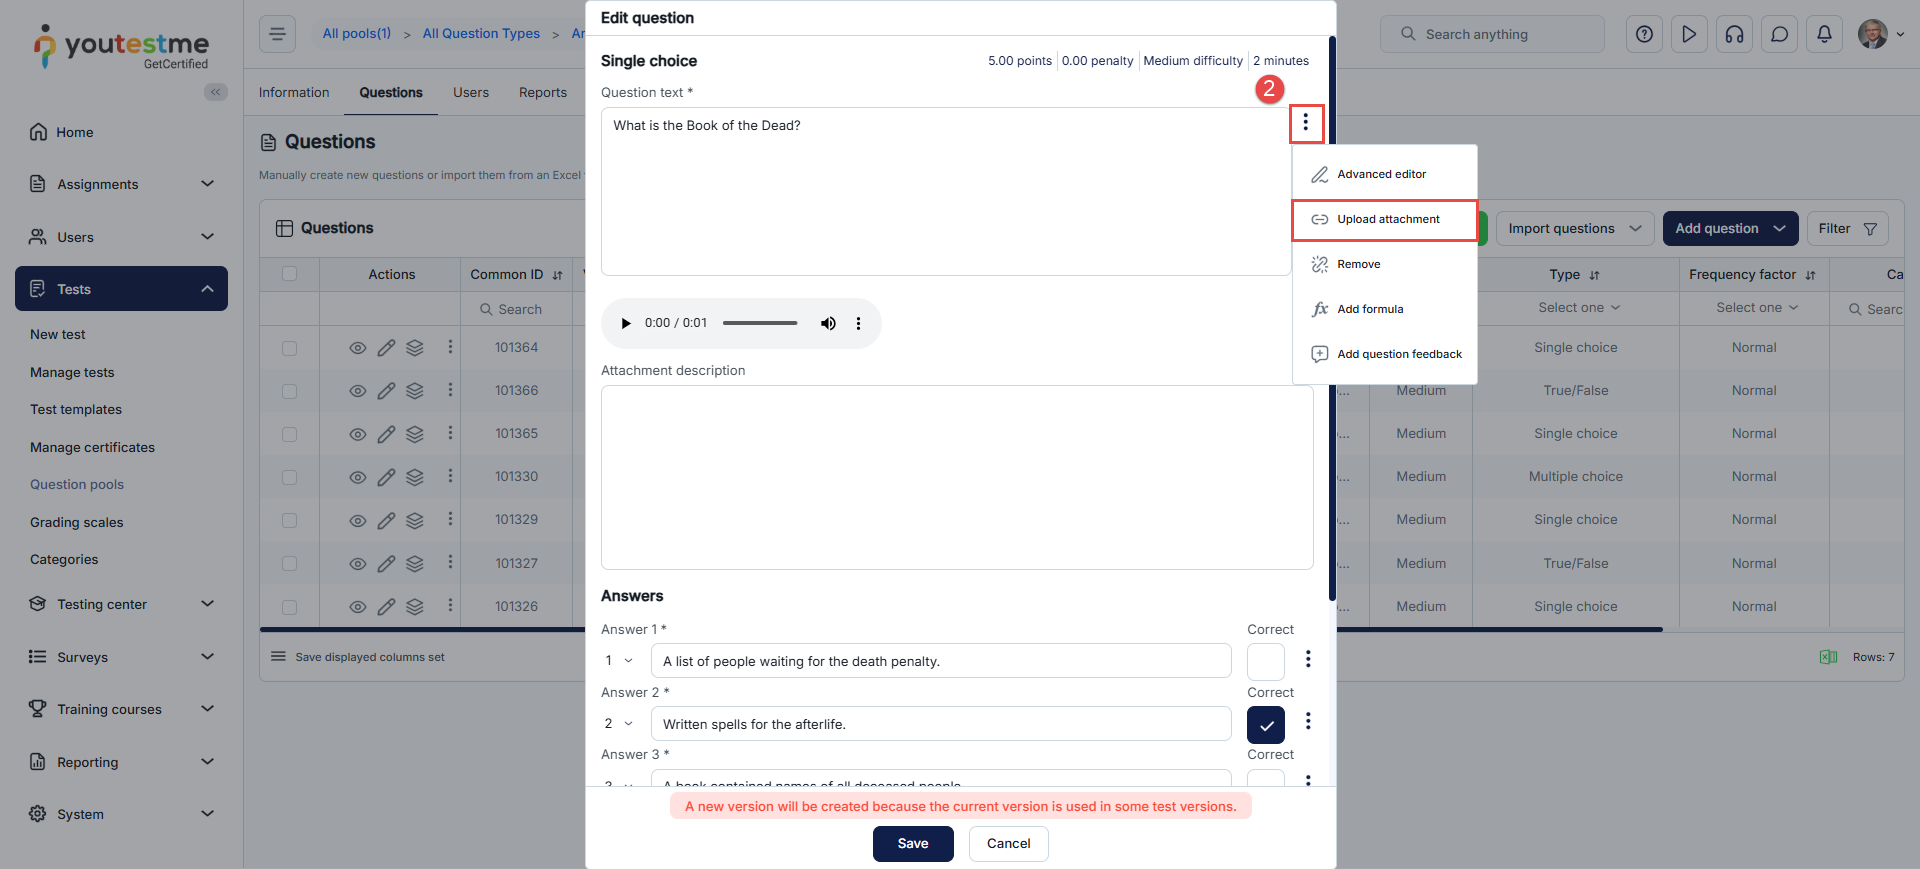
Besides the multimedia embedded in the question text, you can also attach files in different formats related to the question, such as literature relevant to both the question and its potential answers. You can create a new attachment or choose from the existing library. Kindly check this article for more details regarding the question attachments.
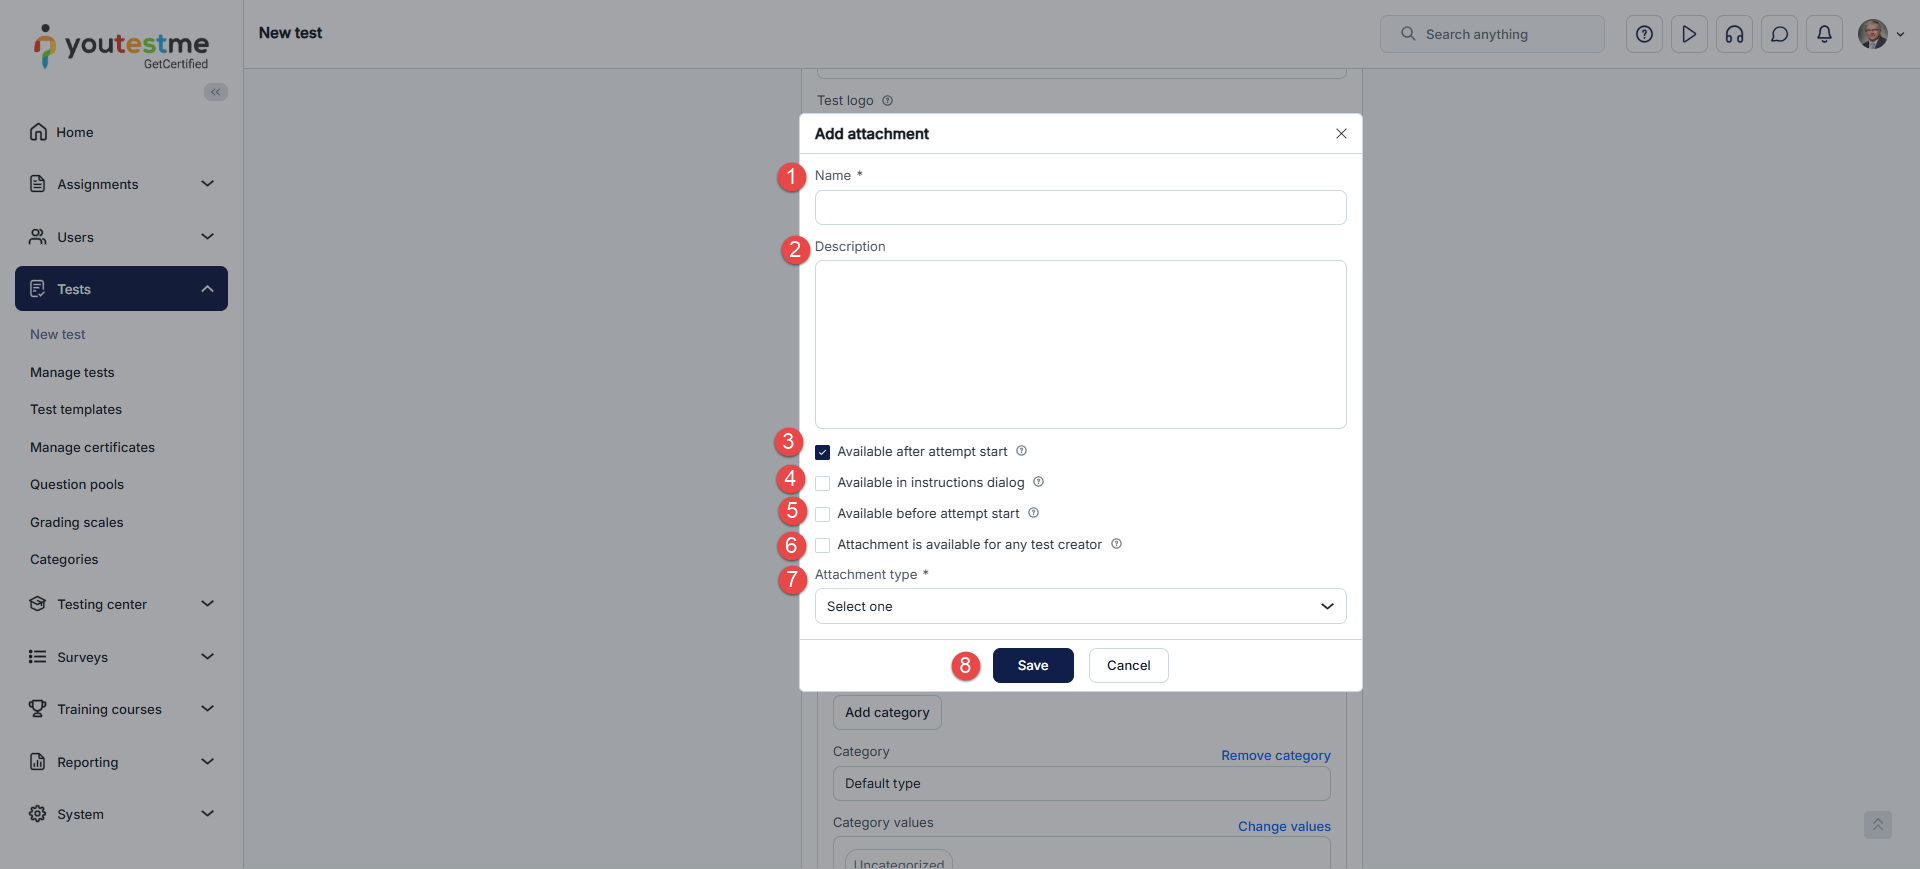
The Add Attachment Dialog
Whether you are creating a test attachment or a section attachment, the Add Attachment dialog is the same.
- Name – Enter the name of the attachment in this field.
- Description – Enter the attachment description.
- Available After Attempt Start – Enable this option to make the attachment accessible to candidates only after they begin the test.
- Available in Instructions Dialogue – If checked, the candidate can preview the attachment directly from the Instructions Dialogue before starting the test.
- Available Before Attempt Start – Enable this option to make the attachment accessible to candidates before they begin the test.
- Attachment Is Available for Any Test Creator – Enable this option to allow other test creators to use the attachment. Specify whether the attachment will be:
- Private – accessible only by you.
- Public – available to any test creator. Other users can preview it, but cannot edit or delete it.
- Attachment Type – Select the attachment type from the dropdown list and click the Upload button.
- Click the Save button to finish creating the attachment.
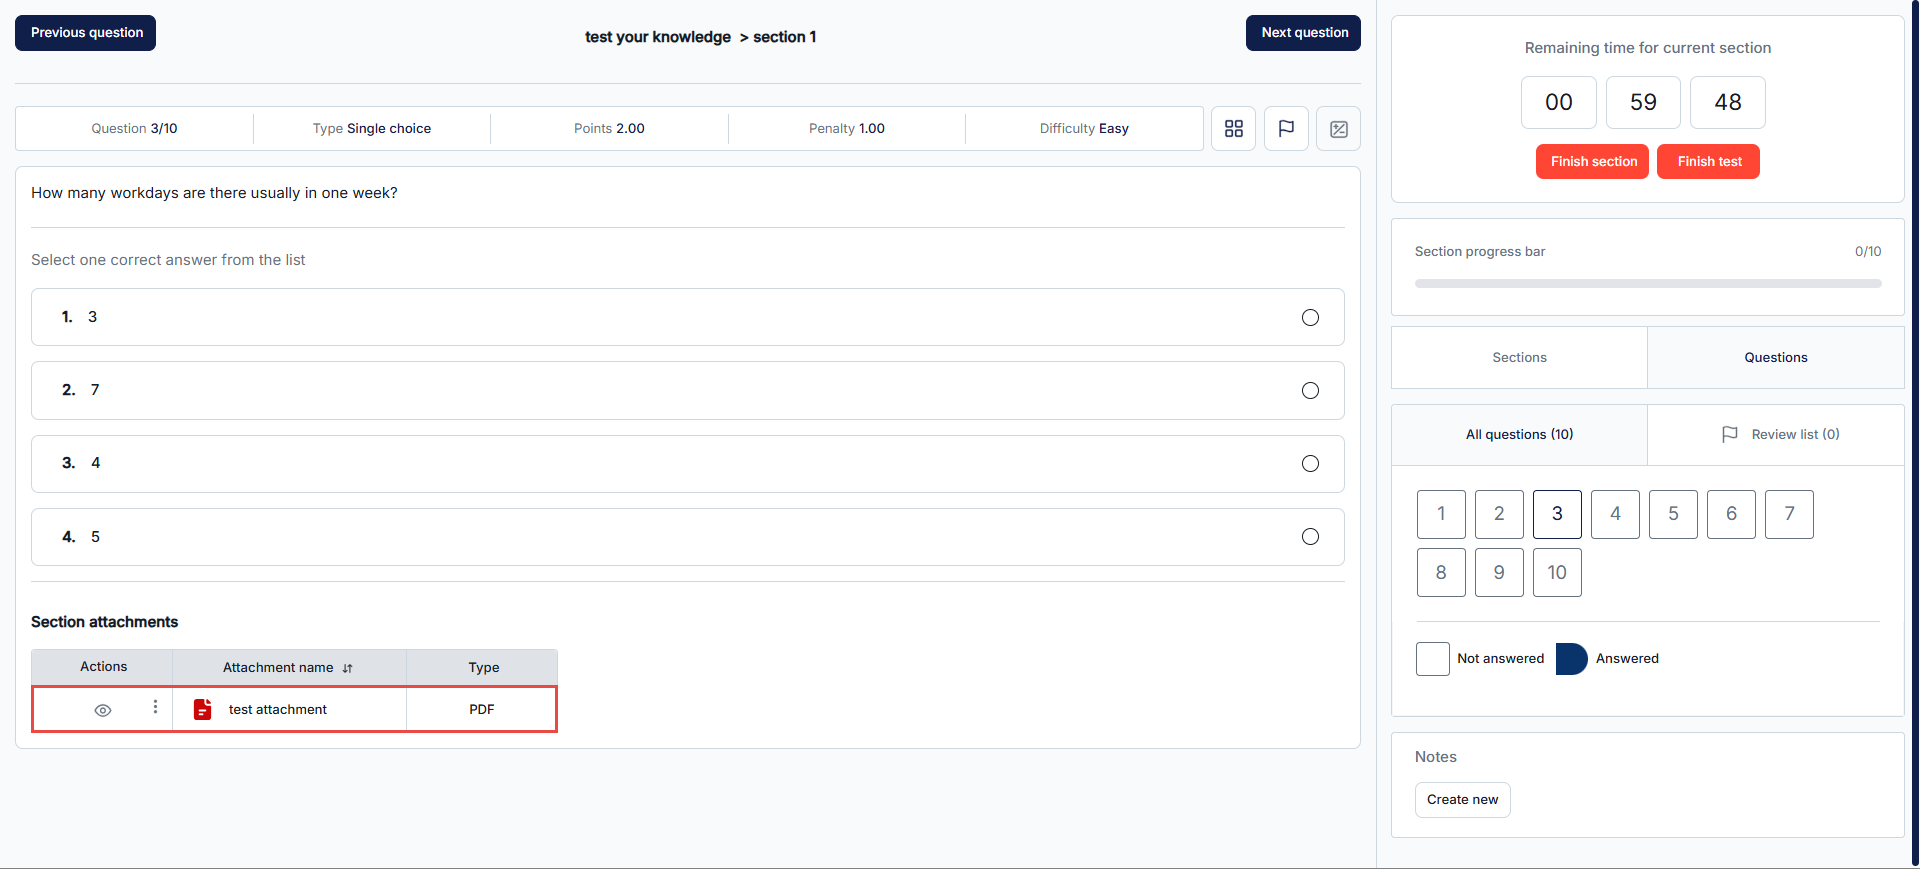
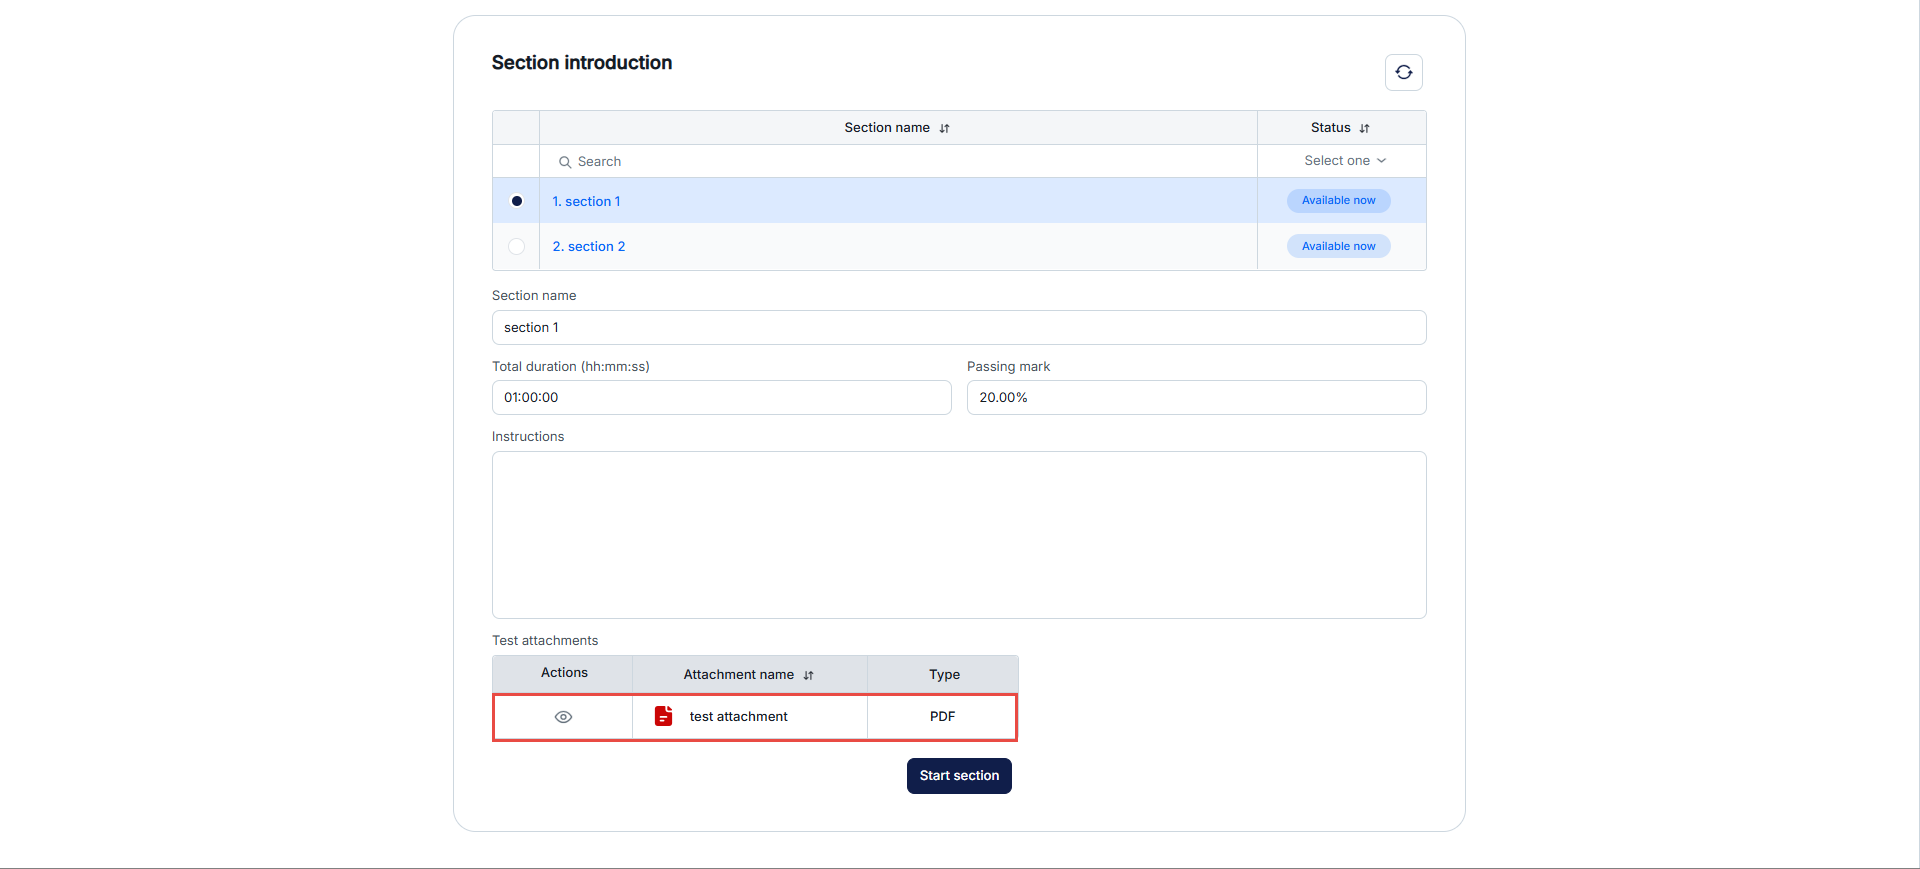
Candidate’s perspective of the test with attachments
The test and/or section attachments are available by default throughout the test/section, unless limited to instructional dialog or before the attempt starts.
For more related instructional material, please see these links:
