Article verified for Release 14.1 on March 15, 2025.
This article provides a guide on how candidates can access the Personal report after finishing the test. The personal report offers thorough details on a candidate’s performance and activity during a test. It includes information about the score, questions, time taken, earned certificates, and more. Below, you’ll find explanations for each tab in the personal report.
Accessing the Personal Report
- Navigate to Assignments panel and choose My tests.
- To access a personal report for a test, candidates can filter the test by Status and find Completed tests.
- Alternatively, to access a personal report for a test, candidates can enter the test name in the search bar.
- Click the Personal report button to be redirected to the personal report of the test.
Personal Report Preview
When you click the Personal report button, the report will open. The content of the Personal report depends on the Personal report settings approved by the test administrator to be visible to the candidate. In other words, the information and data included in the report that is provided to the candidate are determined by the choices and configurations made by the test administrator. These settings define what specific details, scores, feedback, or other information will be accessible and visible to the candidate when they access their Personal report. It essentially means that the test administrator has control over what the candidate can see in their report based on the settings they have chosen.
Various Tabs in Personal Report
Depending on the test settings, candidates can access various tabs:
- Summary Tab
The summary tab offers an overview of essential information regarding the test and the candidate’s results:
- Test name– The name of the test that the user has completed.
- Candidate– The name of the candidate who took the test.
- Started/Finished – The time when the user started and completed the test.
- Time spent – The total time taken to complete the test, including any pauses or interruptions that may have occurred during the test attempt.
- Passing score– The percentage that must be achieved to pass the test. Depending on the test settings, this passing score may or may not be inclusive. If the passing mark is inclusive, candidates will pass the test if they gain a score equal to or higher than the passing mark. You can check whether the passing score is inclusive or not in the tooltip next to the label name.
- Achieved score– The percentage achieved by the candidate.
- Achieved points– The total points earned by the candidate.
- Result– Indication of whether the candidate passed or failed the test.
- Verification date – The date when the test attempt has been verified. Once verified, changing the grading setting will not affect the candidate’s score.
- User groups – Names of user groups to which the user belongs. If there are no user group names listed, it means the candidate is not a member of any user group. If a user is a member of a subgroup, the complete path to the subgroup will be shown.
- Achieved certificates – Displays the certificates that the candidate has earned.
Additionally, the options that can be performed on this page include:
- Export certificate as PDF.
- Export certificate as image.
- Proctoring report
Proctoring report tab displays results of proctoring sessions for the attempt. If a positive proctoring report is required to pass the test and any proctoring session is rated negative, the attempt is automatically rated as failed. The following information can be displayed:
- The time when the user started the test.
- The time when the user finished the test.
- If the proctor grades the report, the proctoring grade will be displayed. It can be one of the following: Neutral, Positive, or Negative.
- Proctoring rate – represents the percentage of correct behavior or compliance exhibited by the candidate during the test-taking process. In this context, a higher rate indicates that the candidate had fewer violations or incidents flagged by the AI proctoring system, demonstrating a higher level of compliance and integrity during the test.
- The comment from the proctor will be displayed if the proctor has entered it.
- Aggregated Reports Tab
Aggregated reports are classified into overall test statistics and statistics at the test section level (if the test contains sections). These reports provide a breakdown of test attempt scores based on various factors such as question pools, test sections, and section groups used in the test. These reports offer insights into how candidates performed in different aspects of the test. They may also include additional details depending on their availability, allowing for a more comprehensive test results analysis.
- Questions Tab
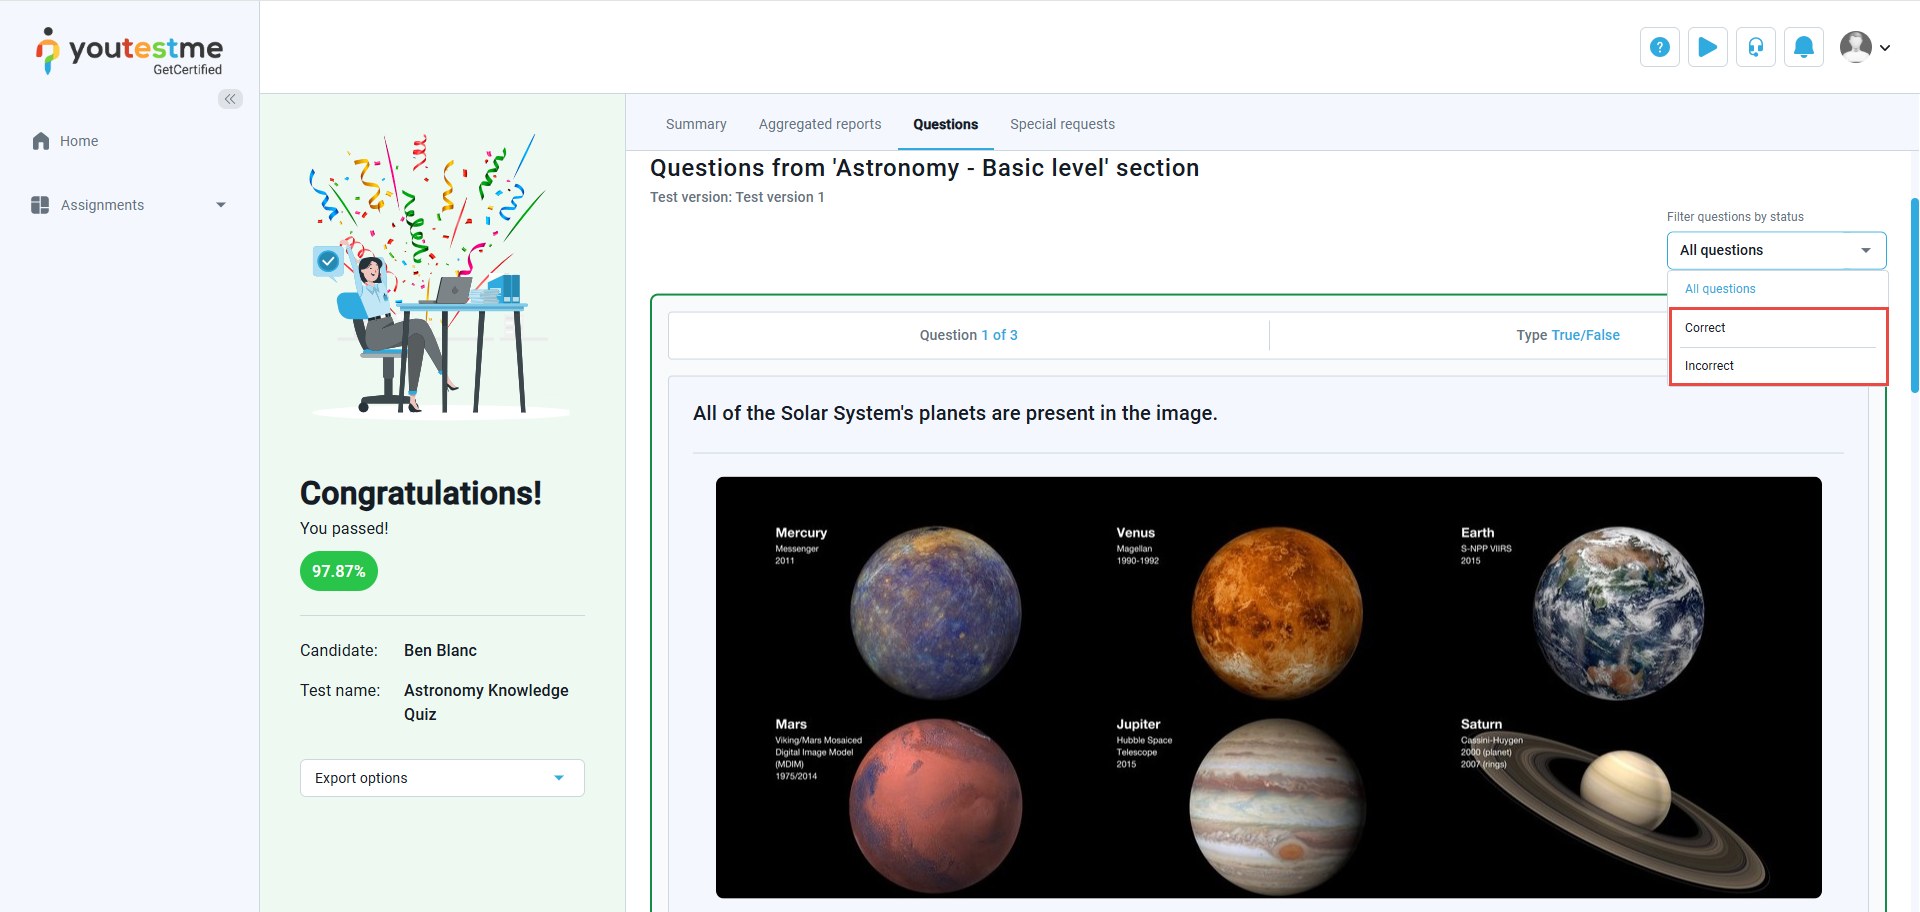
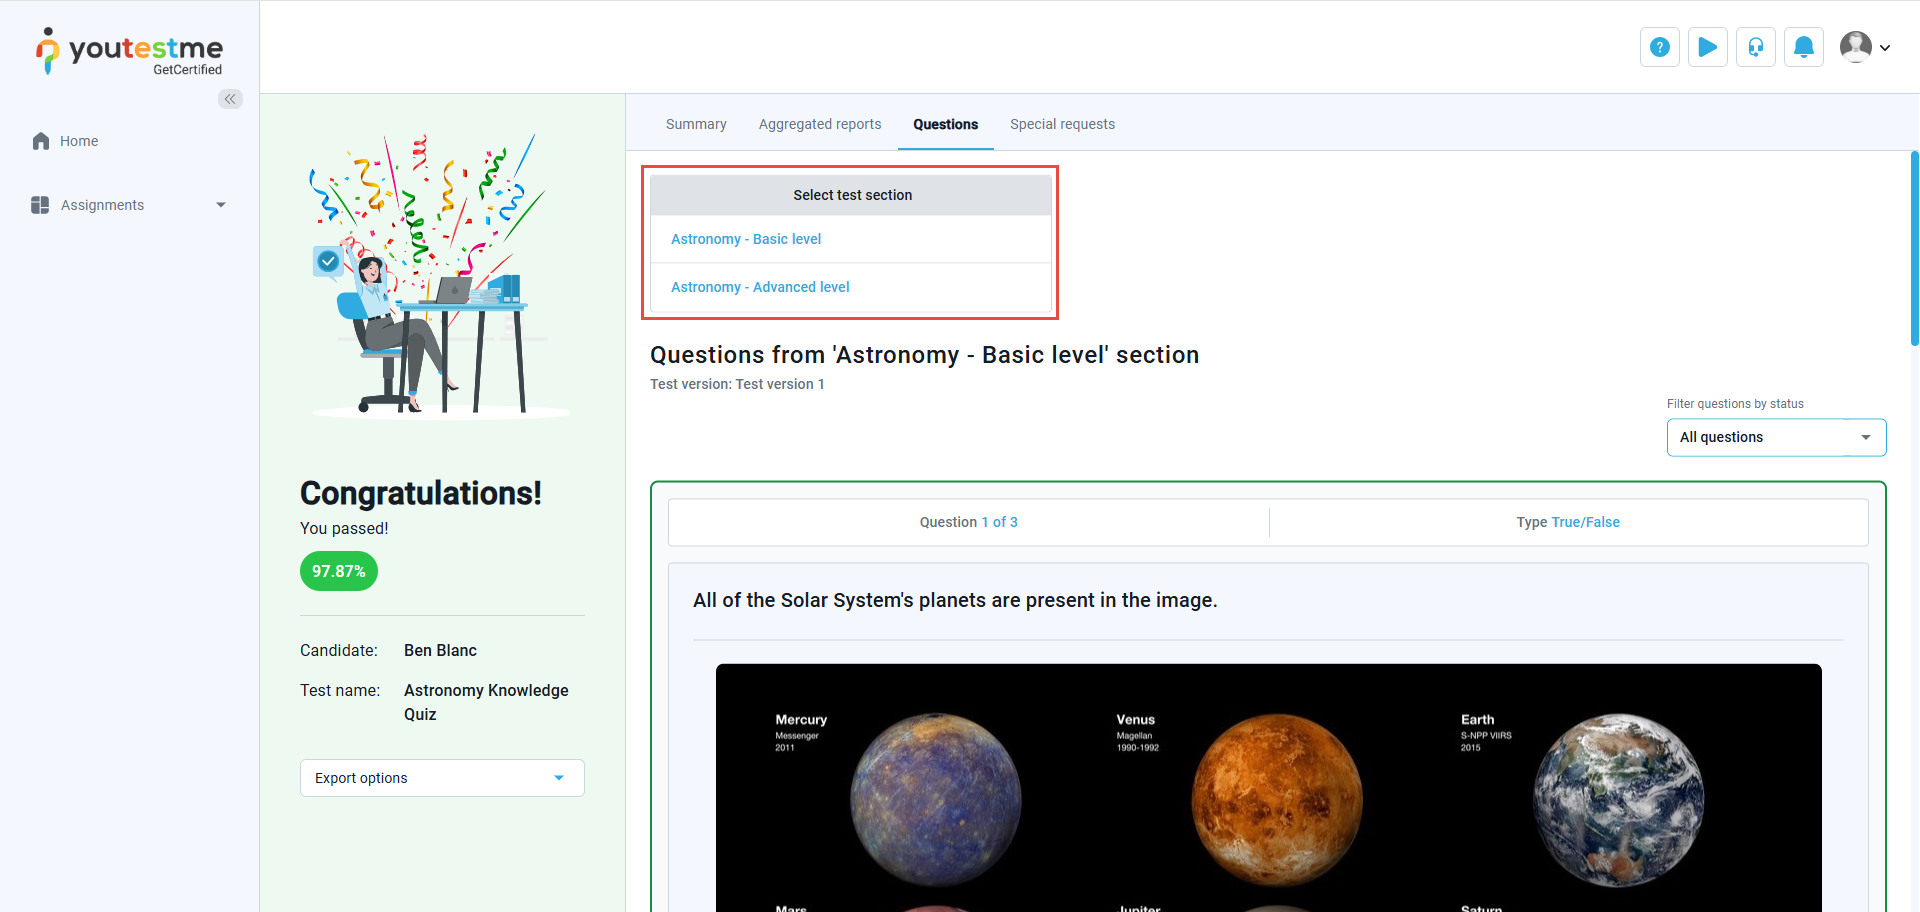
Question tab displays test questions along with both correct and incorrect answers. Users can filter questions, displaying only those with correct or incorrect answers.
If the test has sections, you’ll see a list of all sections. Click on a section name to open the questions for that specific section.
- Charts Tab
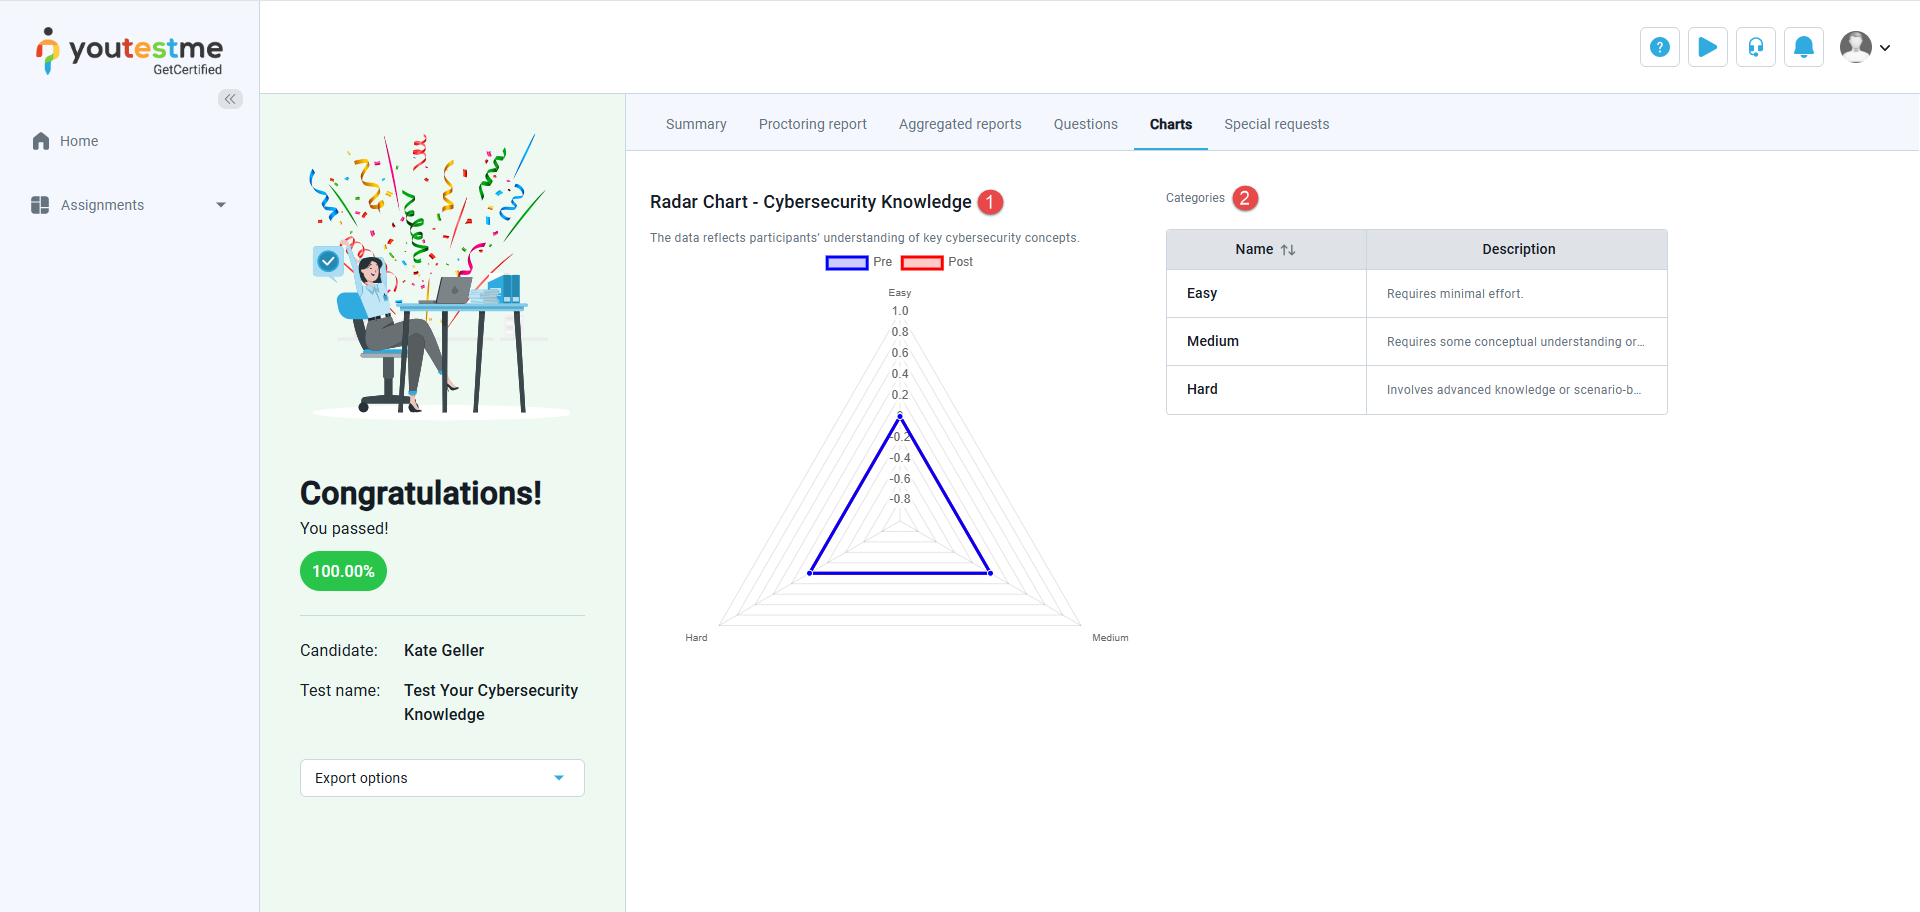
This tab displays a chart that shows the summarized or average scores based on the question categories assigned to each question. It becomes visible only when a chart has been generated for the test.
On this page, candidates will find the following information:
-
Chart Name – The title of the chart that has been generated.
-
Chart Categories – A table listing all the chart categories, along with their names and descriptions. These categories are linked to specific questions and visually represent the candidate’s performance, offering insights into their performance.
- Special Requests Tab
Special requests are used to request information or documentation from candidates, either before or after a test. For instance, if a candidate needs to provide an ID before a test, and it’s found invalid, the instructor can send a special request for a valid ID to avoid canceling the test attempt.
- Notes
In this tab, you can review all the notes you created. To preview a note, click the arrow icon.
For more related instructional materials, please visit:


