Article verified for Release 15.2 on December 27, 2025.
This article explains how to assign certificates to multiple users at once by uploading a predefined Excel template. This feature allows administrators to efficiently award certificates without assigning them individually.
Downloading the Excel Template
- Select the Users/User profiles tab.
- Select the Import button and then the User certificates option.
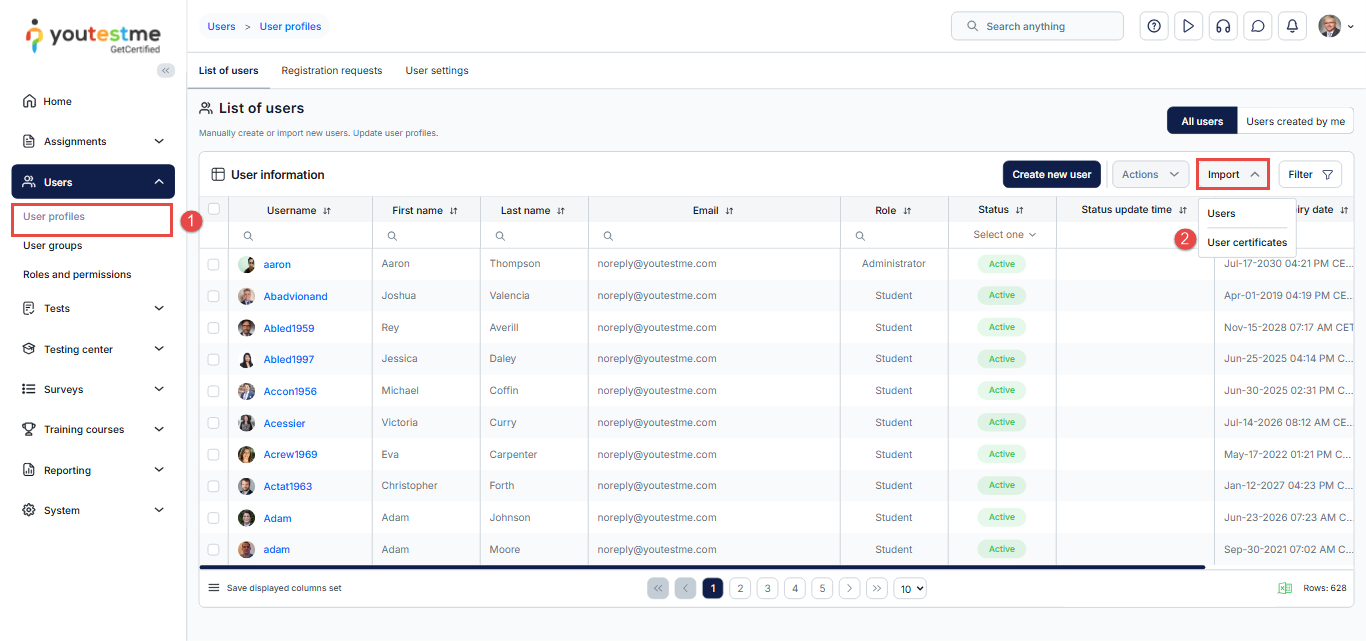
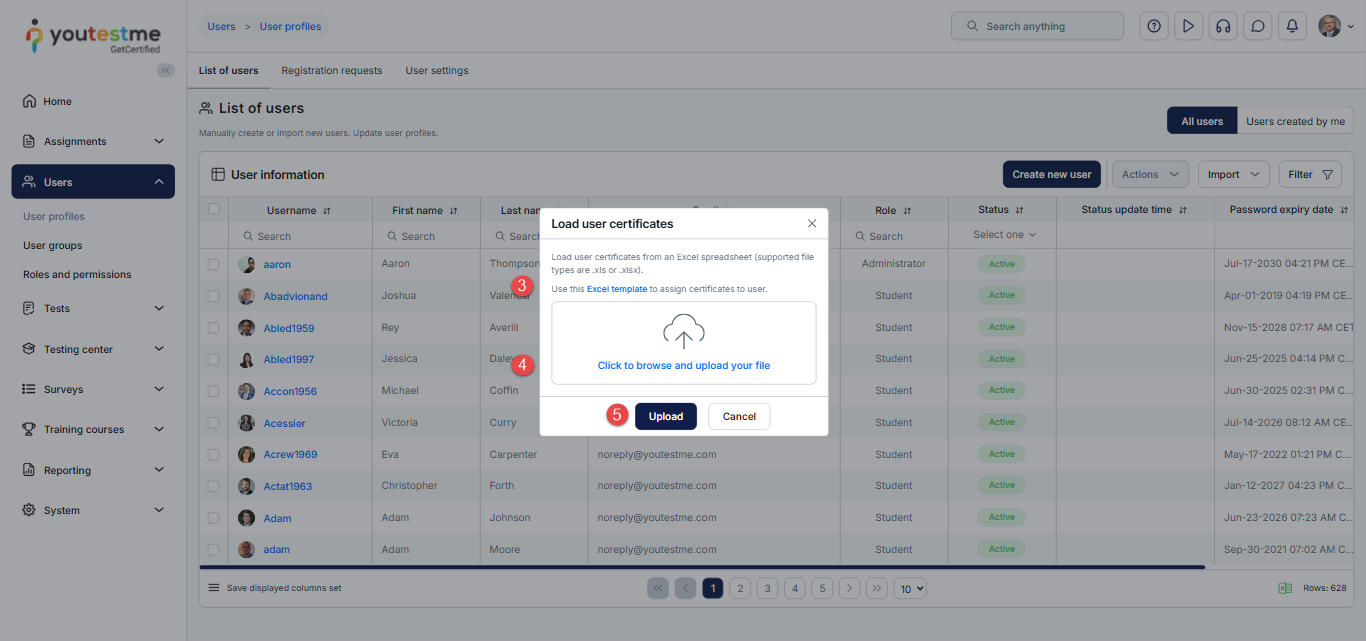
- Click on the Excel template to download it.
- After filling in the template, upload it, and select the Select file button.
- Click on the Upload button to upload the template.
Filling out the Excel Template
The Excel template consists of a single sheet with four columns:
- Username.
- Certificate ID – In this column, you should input the ID associated with a particular certificate.
- Valid from – This column designates the starting date when the certificate becomes valid.
- Valid to – This column specifies the expiration date after which the certificate is no longer considered valid. It denotes the end of the active period for the associated certification.
Here is an example of a filled-out Excel template with three records.

Note: Unlimited records can be stored in a single Excel file. We used three for simplicity.
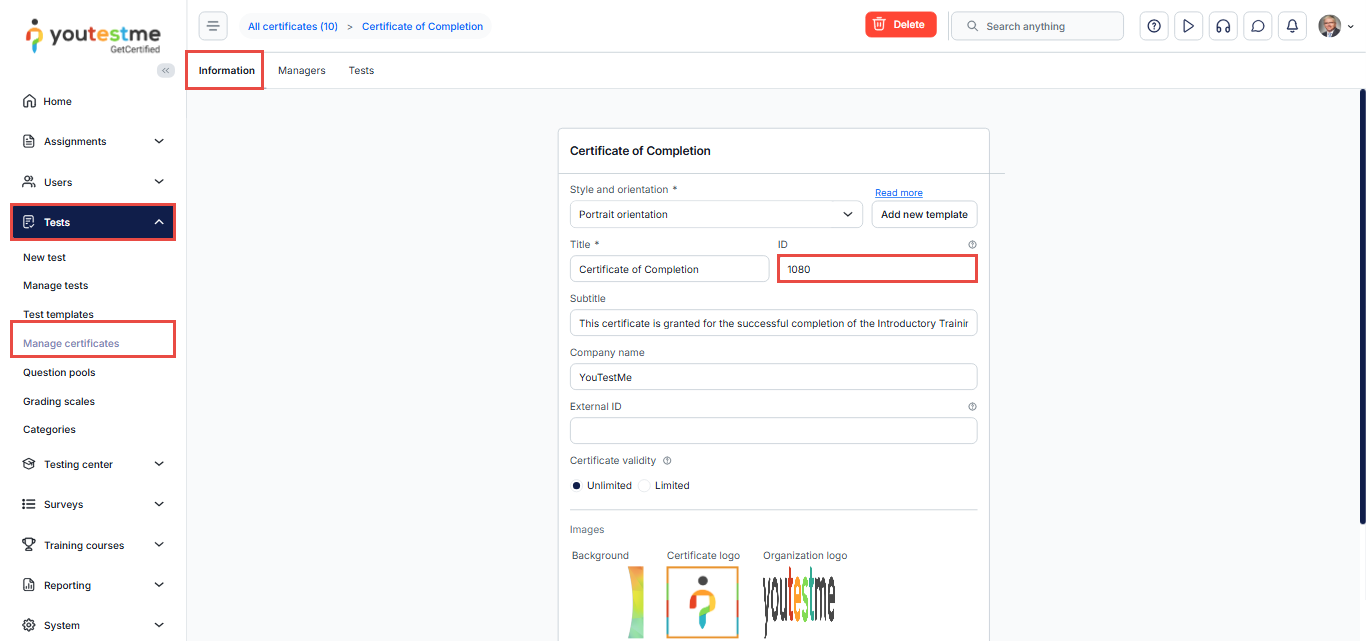
Finding the Certificate ID
To find the certificate ID, select the Tests/Manage certificates tab, select your certificate, and check the ID field.
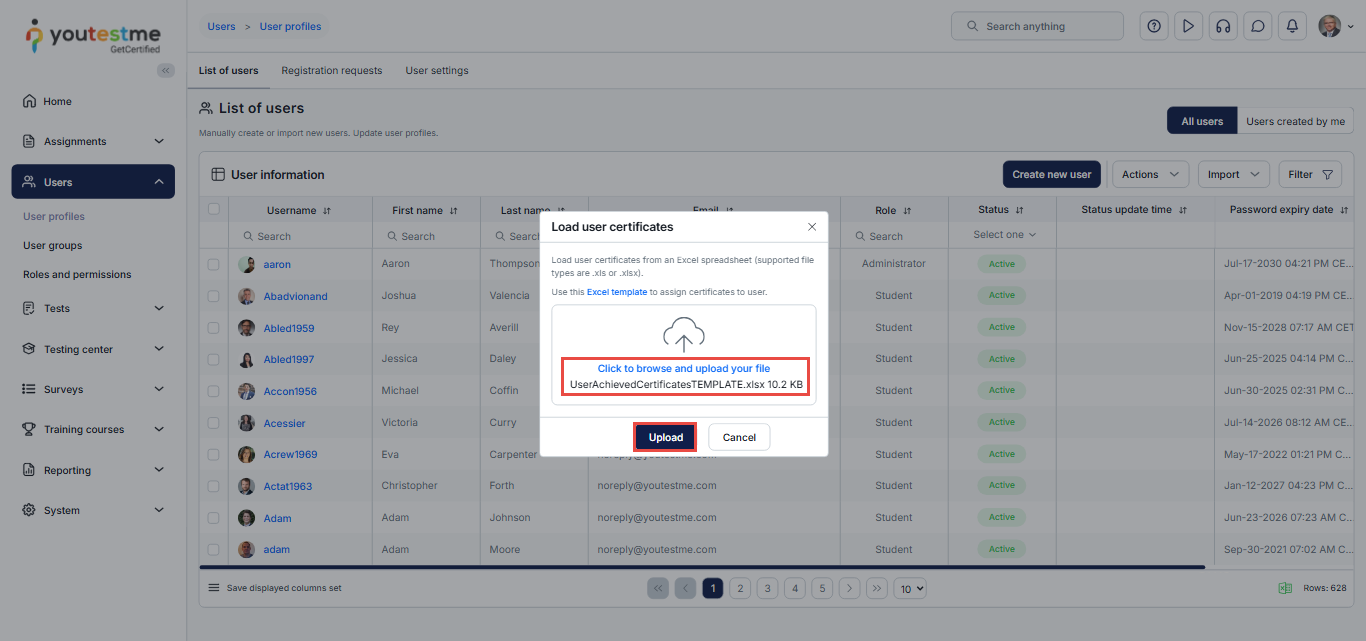
Uploading the Excel File
After filling in the Excel template, navigate back to the Load User Certificates page, click Upload your file, select your Excel template, and then click Upload.
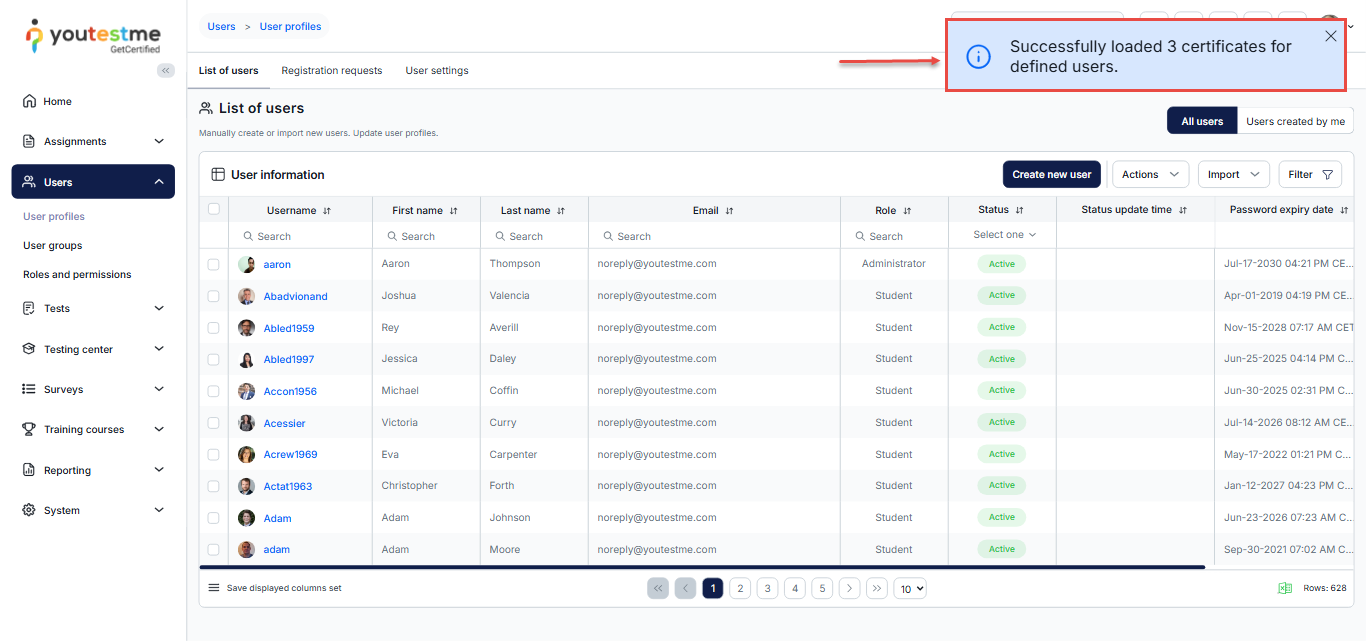
If you did everything right, you would see the following message:
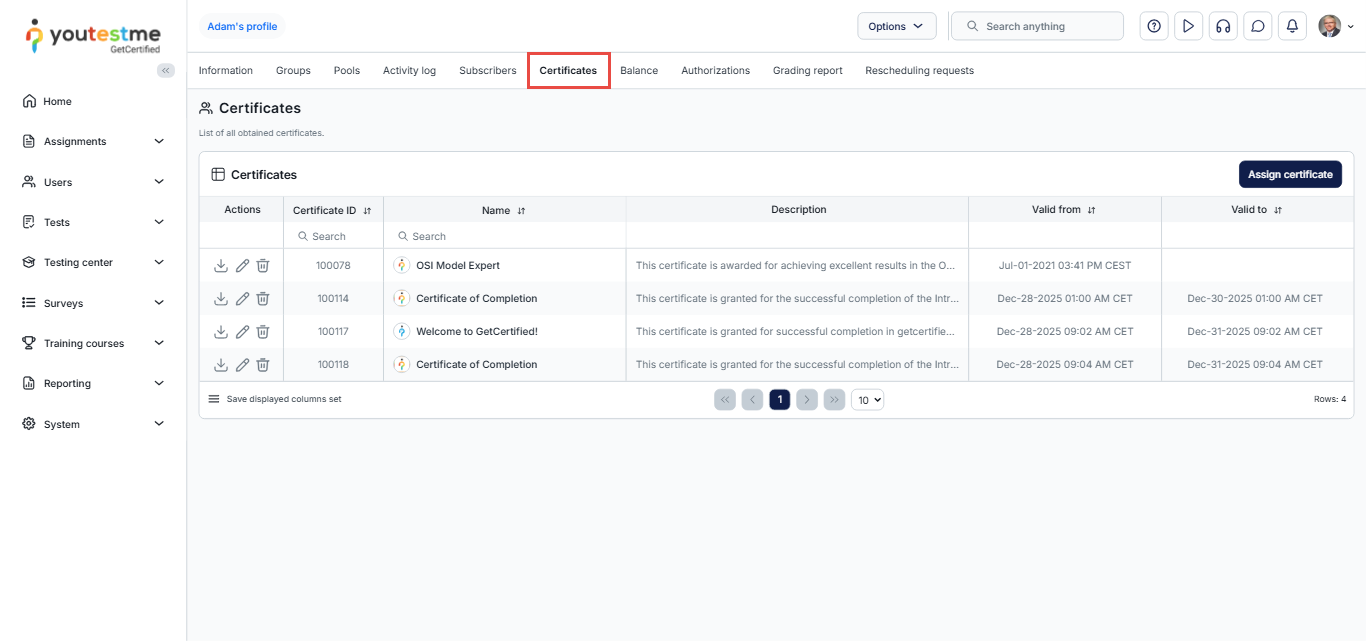
Checking the User Profile for the Assigned Certificates
To check the certificates you awarded to a single user, you can go to their profile and navigate to the Certificates tab.
For more useful instructional materials, please visit:


