YouTestMe GetCertified supports complete white-labeling.
This article explains how to change the application theme (interface colors) and the appearance of the login page, set your logo and favicon, customize both in-app and email notifications and configure your link.
Logo and Favicon
To change the logo and favicon:
- Click the System option in the main menu, then select “Setting and Customization.”
- Navigate to the Theme and Language tab.
- Choose Logo and Favicon.
- Click on the Change logo button to change the logo and upload your preferred logo. You can always revert the default logo by clicking the Reset to Default button.
- To personalize the favicon, click on Change favicon (The icon displayed in a browser address bar). You can always revert the default favicon by clicking the Reset to Default button.
- To save changes, click the Confirm button.
NOTE: The changes will become visible the next time you log in. To check them out immediately, please log out of the application. The logo will be waiting for you on the login page.
White Labeling – Web Browser’s tab Title
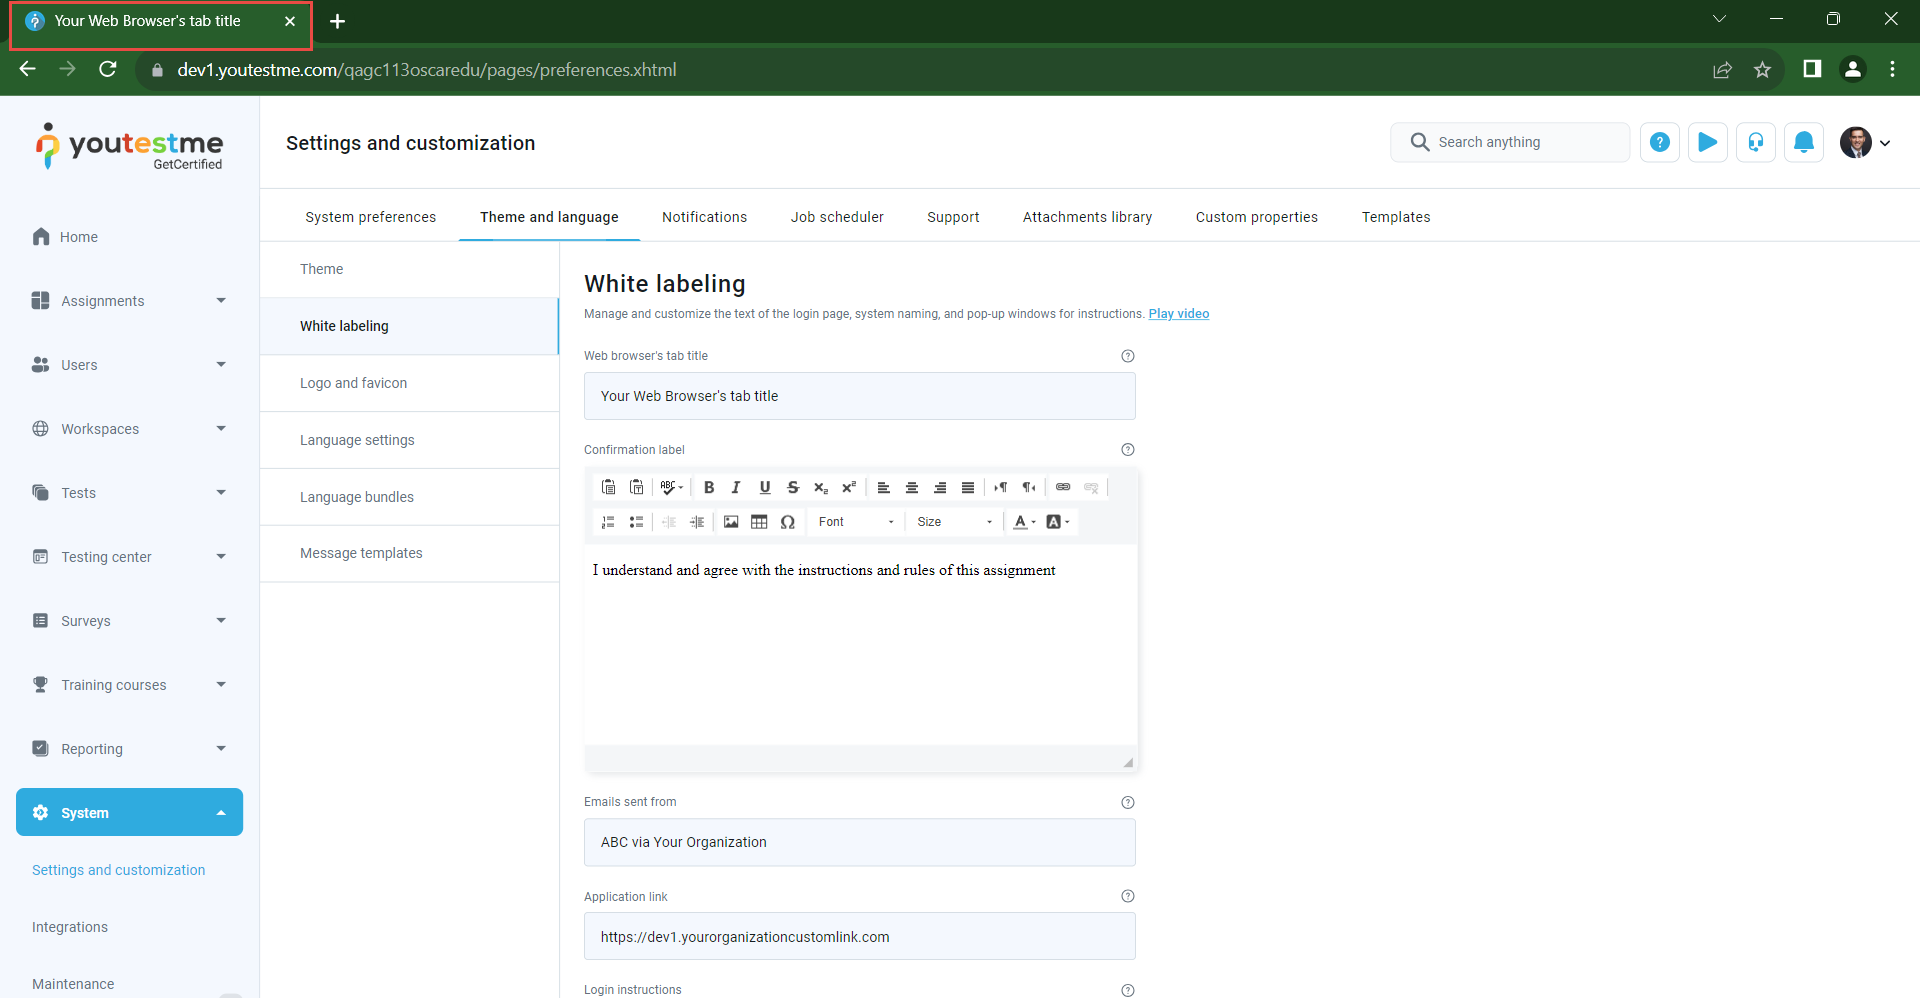
You have the ability to choose the title displayed in the web browser’s tab, which appears next to your favicon.
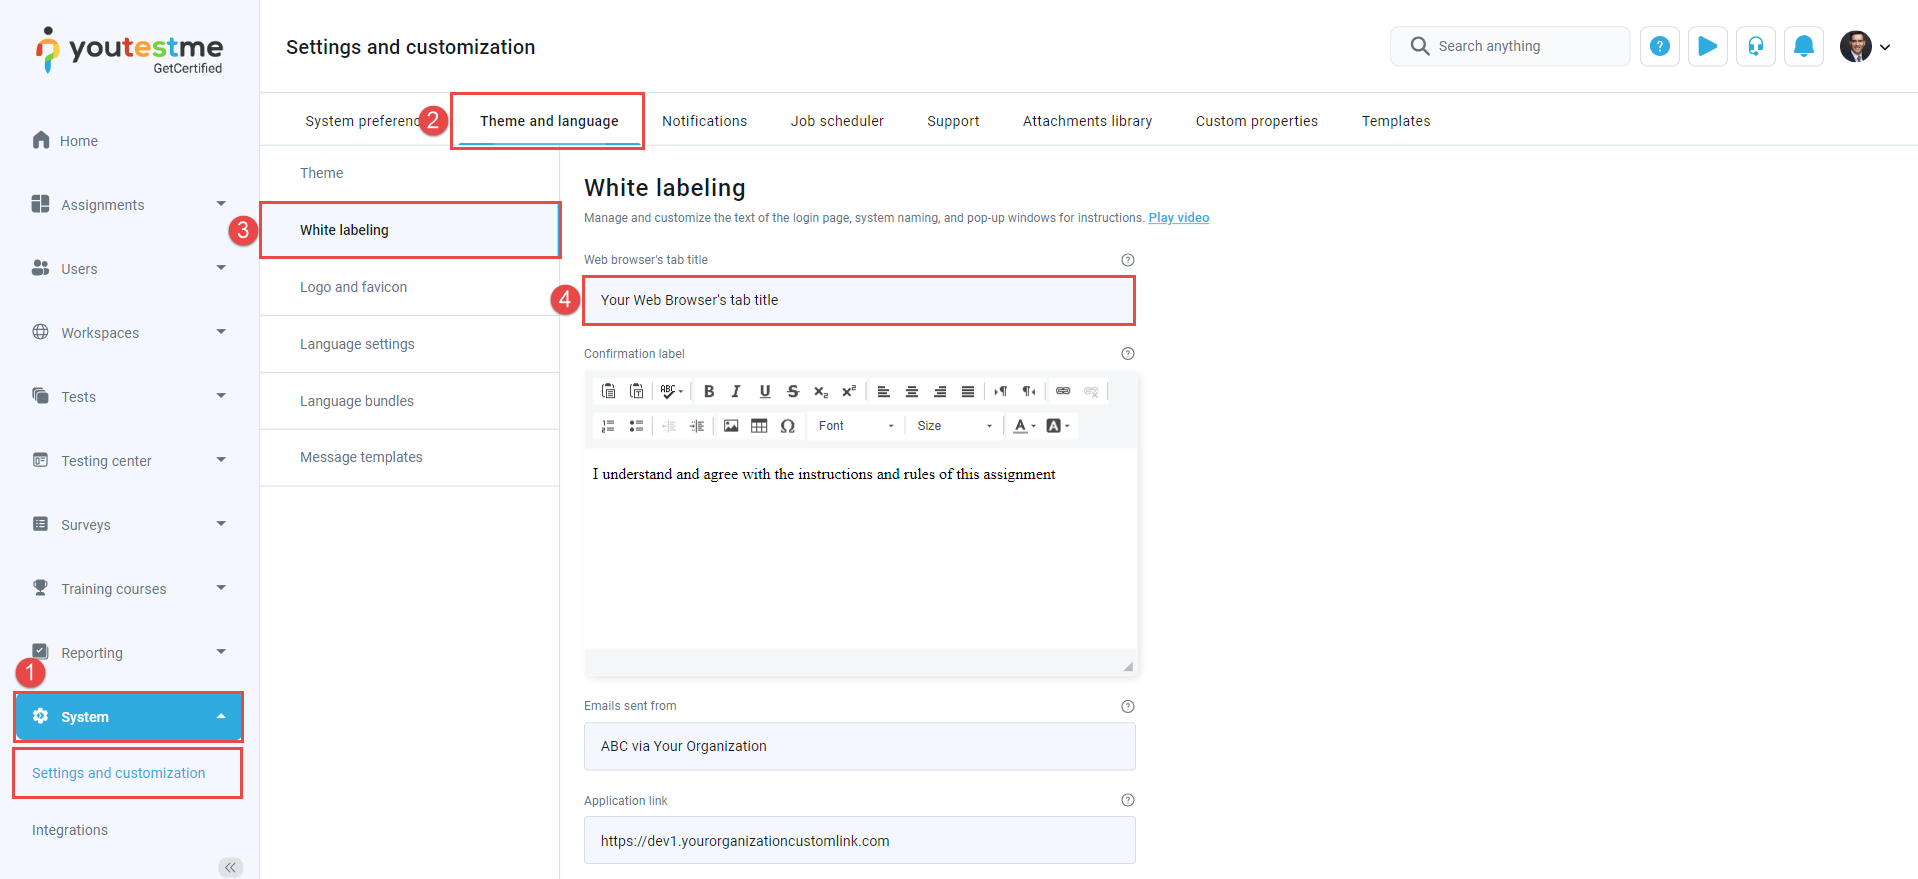
To personalize the web browser’s tab title, please follow these instructions:
- Click on the System option in the main menu, then select “Settings and Customization.”
- Navigate to the Theme and Language tab.
- Click on the White Labeling tab.
- Enter your desired title in the Web Browser Tab Title box.
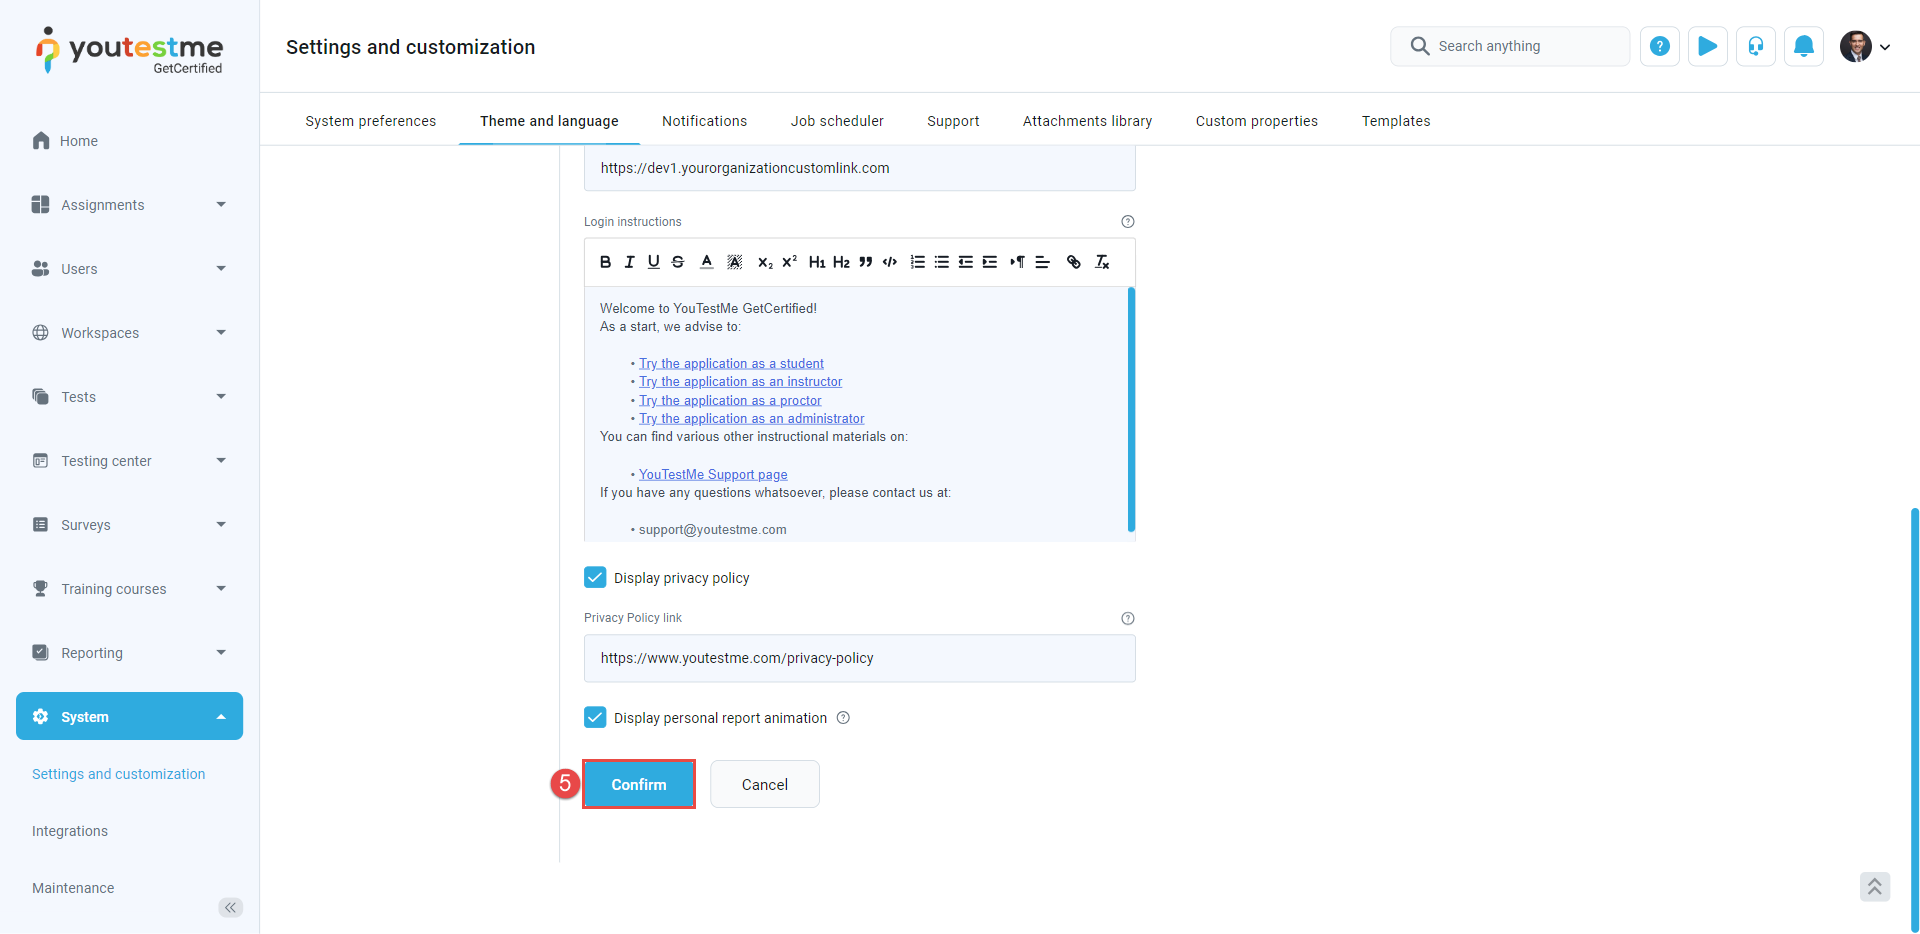
5. To save your changes, click the Confirm button.
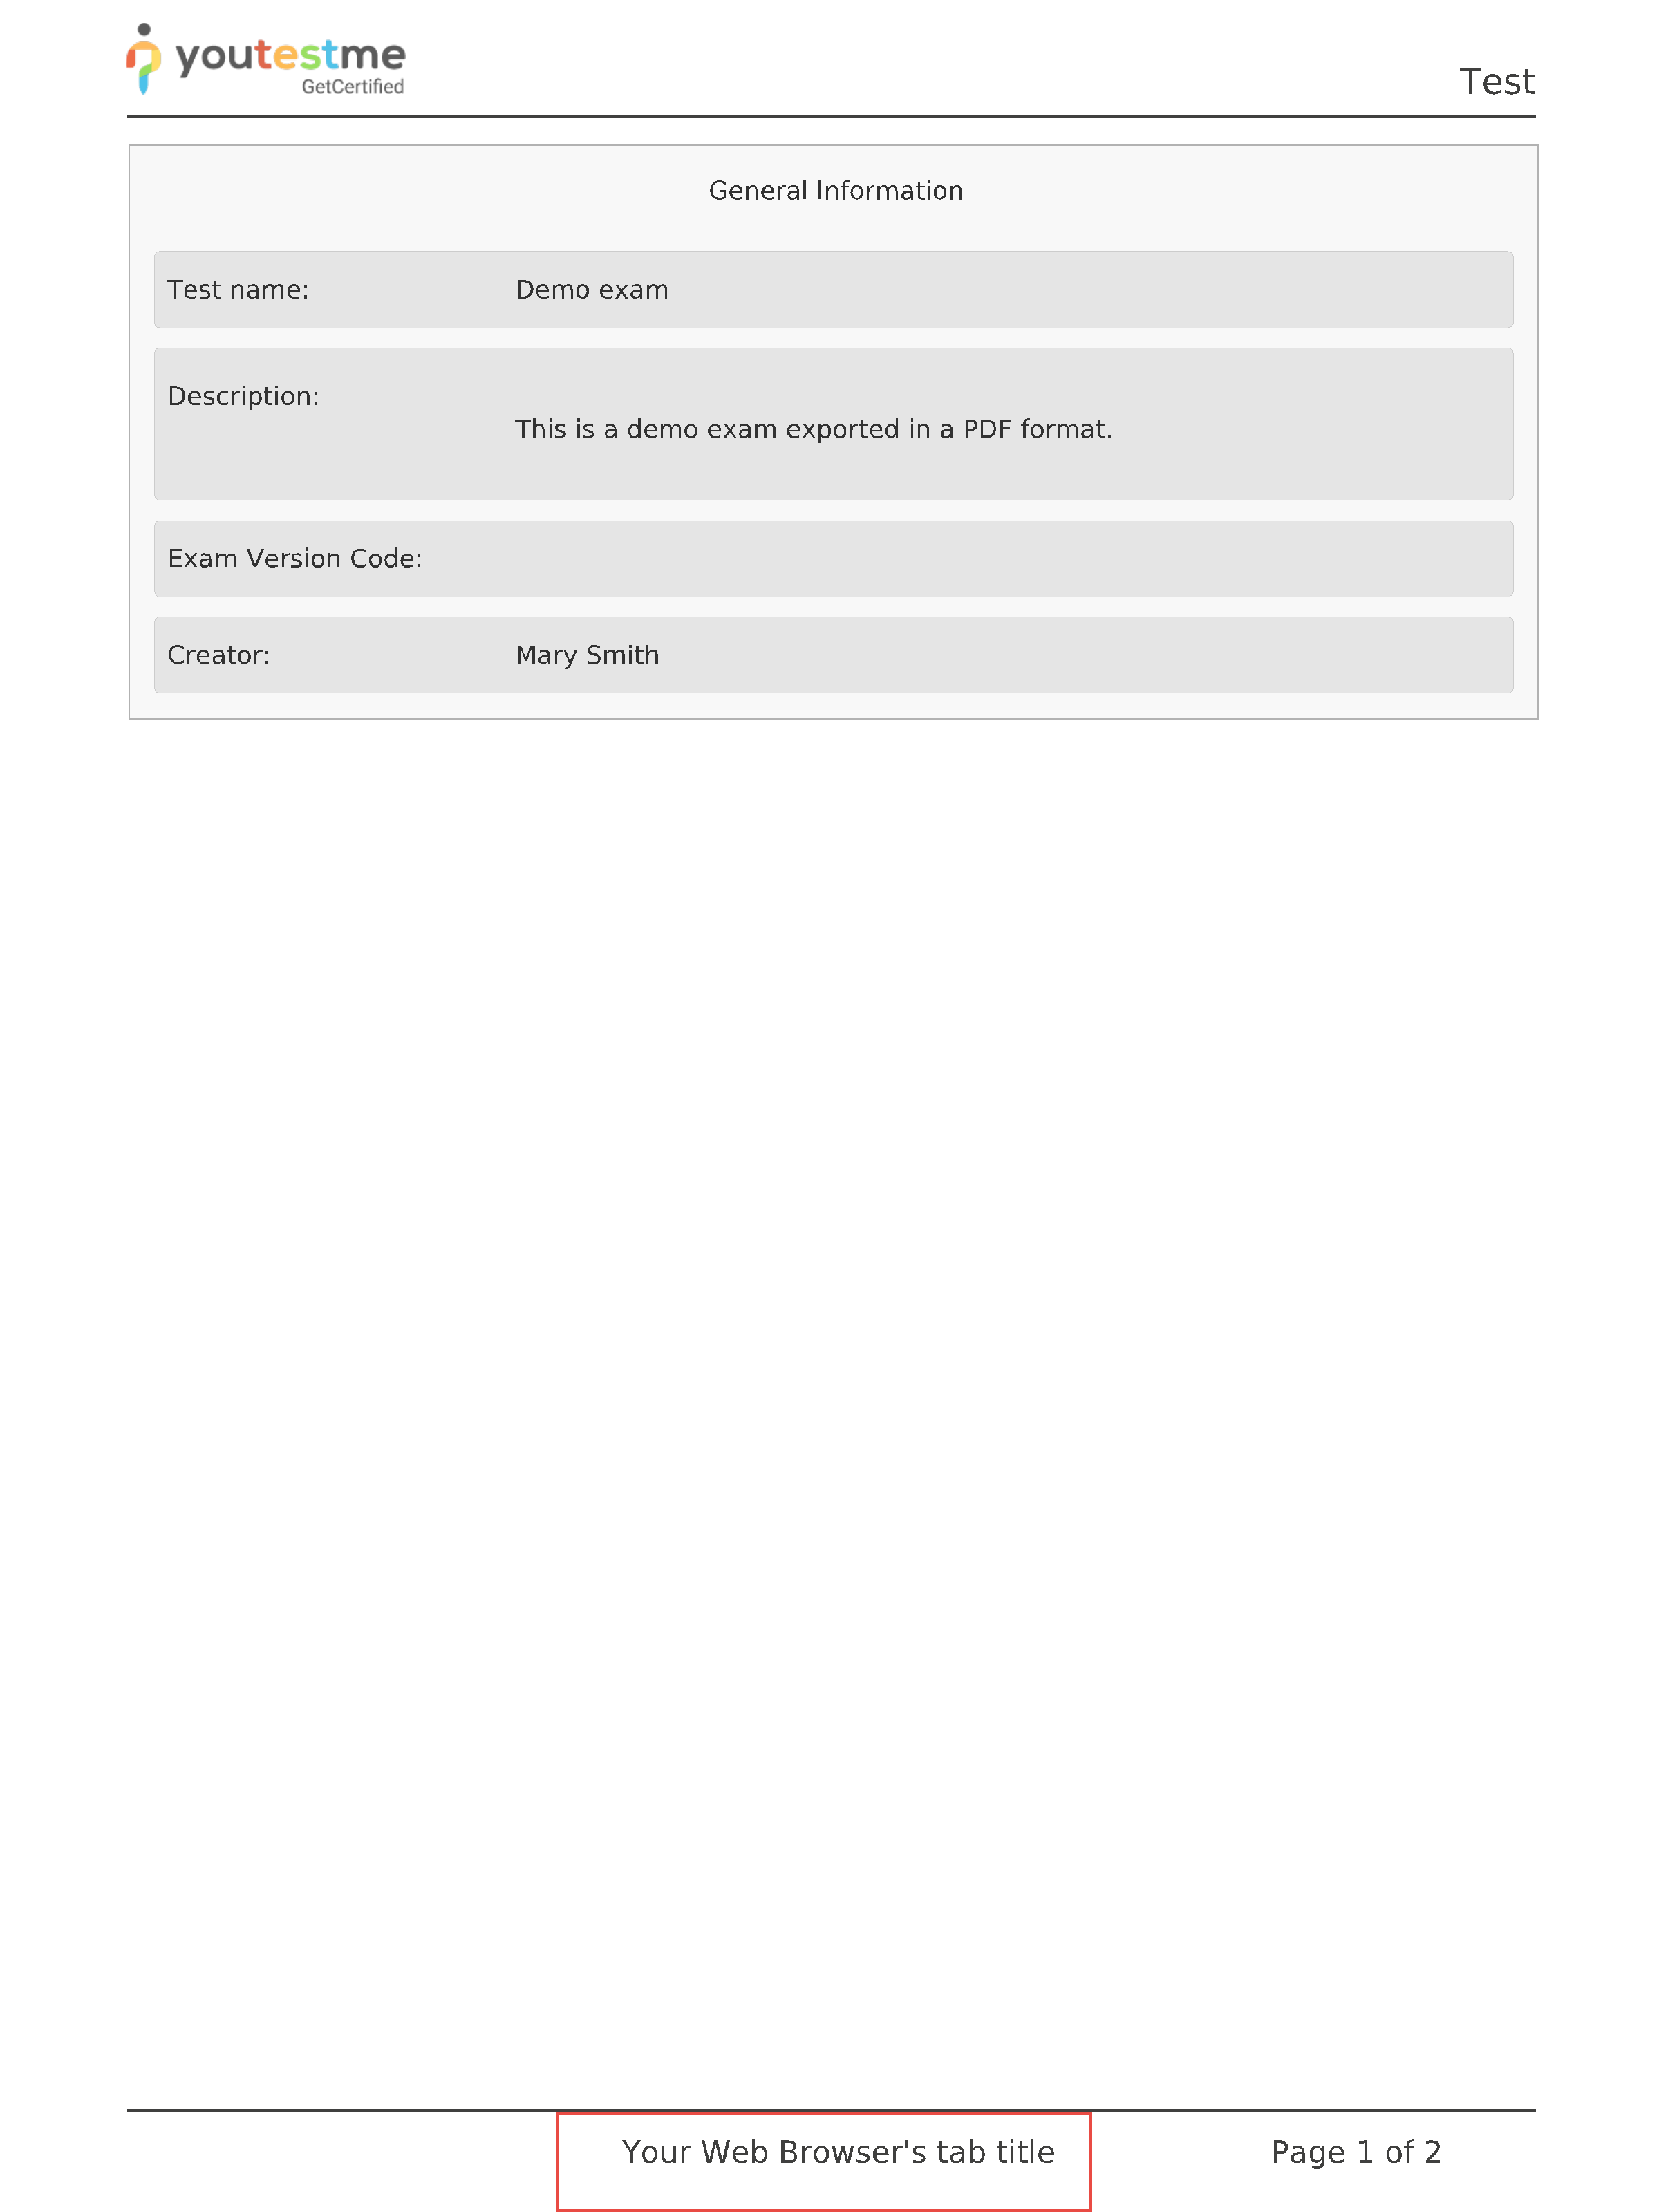
Please note that if you export the exam in PDF format, the web browser’s tab title will be shown in the PDF footer.
White Labeling – Application Link
In the white labeling module, you can also customize the application link displayed to users in the email notifications sent from the system. To do so, follow the instructions below:
- Navigate to the Application Link box and enter the desired link.
- To save changes, click the Confirm button.
White Labeling – Confirmation Label and Email Signature
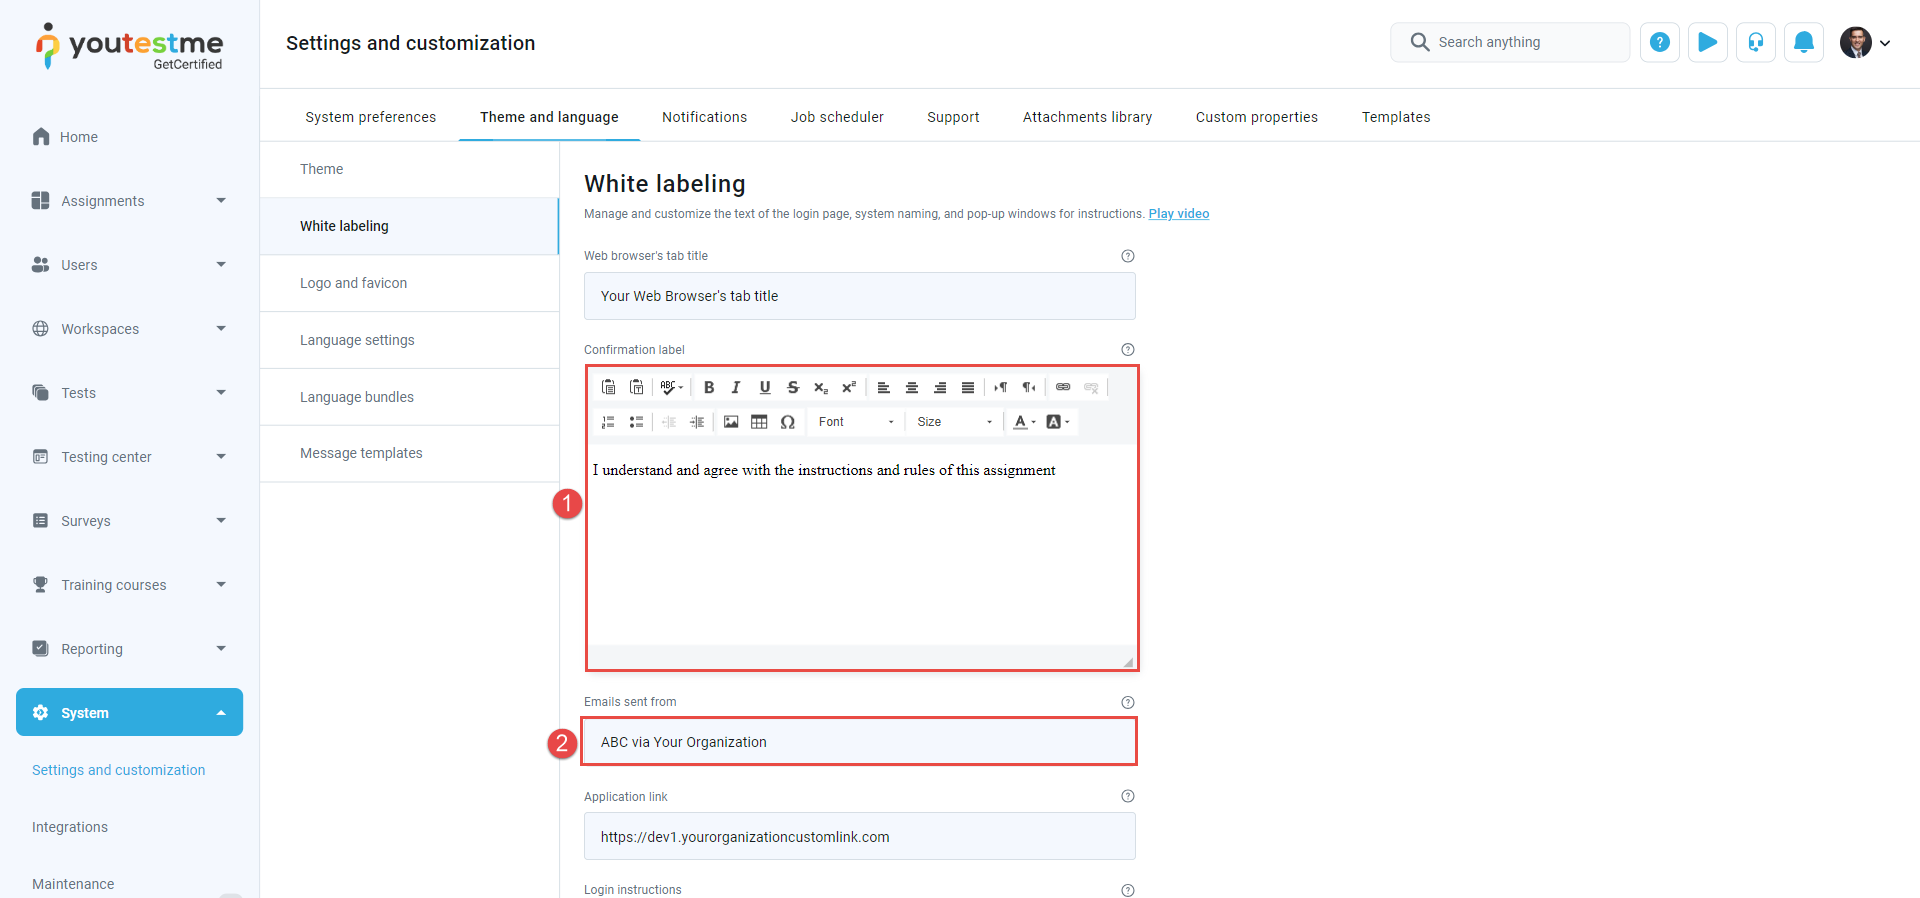
In the white labeling module, you can also customize the signature to be displayed in the email notifications sent to users by the system, as well as the confirmation label that candidates will see when accepting the exam instructions.
- To edit the confirmation label, navigate to the Confirmation Label box and enter the desired text.
- To edit the signature in the email notifications, navigate to the Email Sent From box and enter the desired text.
Theme
Theme refers to the color scheme of the application that can be changed by:
- Navigating to the System and choosing Settings and Customization.
- Click on the Theme and language tab.
- Choose the Theme tab.
- Click on the Create new button.
- Enter the name.
- Set as default.
- Activate the theme.
- Make the desired changes.
- Click on the Create button to save the changes.
- The created theme will be visible in the table above.
Legend with Examples
- Change primary color – The primary color is typically the dominant color used for buttons, links, and other key elements.
- Change info color – The color used for informative messages or elements.
- Change error color – Modify the color used to indicate errors or issues. Error colors are crucial for highlighting problems that need immediate attention.
- Change warning color – Adjust the color used to signal warnings. Warning colors are used for situations that may not be errors but still require user awareness.
- Change success color – Change the color used to indicate successful actions.
- Change grey color – Customize the shades of grey used in the application.
- Change menu color on the left side of the application.
- Change background color – Update the overall background color of the application.
- Change white color.
- Change white text color.
- Change white icon color – Change the color of white icons.
- Change accent color – Choose a new accent color.
- Change Selected accent color – Specify the accent color to be used when an element is selected.
- Change hover accent color – Set the accent color that appears when a user hovers their cursor over an interactive element. Hover effects can enhance user interactivity.
- Change Disabled accent color – Define the accent color used for disabled or inactive elements. It helps differentiate these elements from active ones.
- Change border color.
- Choose desired icon type – Select a specific style or set of icons to use throughout your application
- Select font size – Set the desired font size for text within application. Font size also affects readability.
- Save changes.
From our example above, an Error Message will look like this:
Warning Dialog:
Informative Message:
The application appearance can be configured only by the administrator role, while changes are visible to all system users.
Test Logo
Apart from branding the whole application with your logo, you can set a specific logo for each test you create. Here is how:
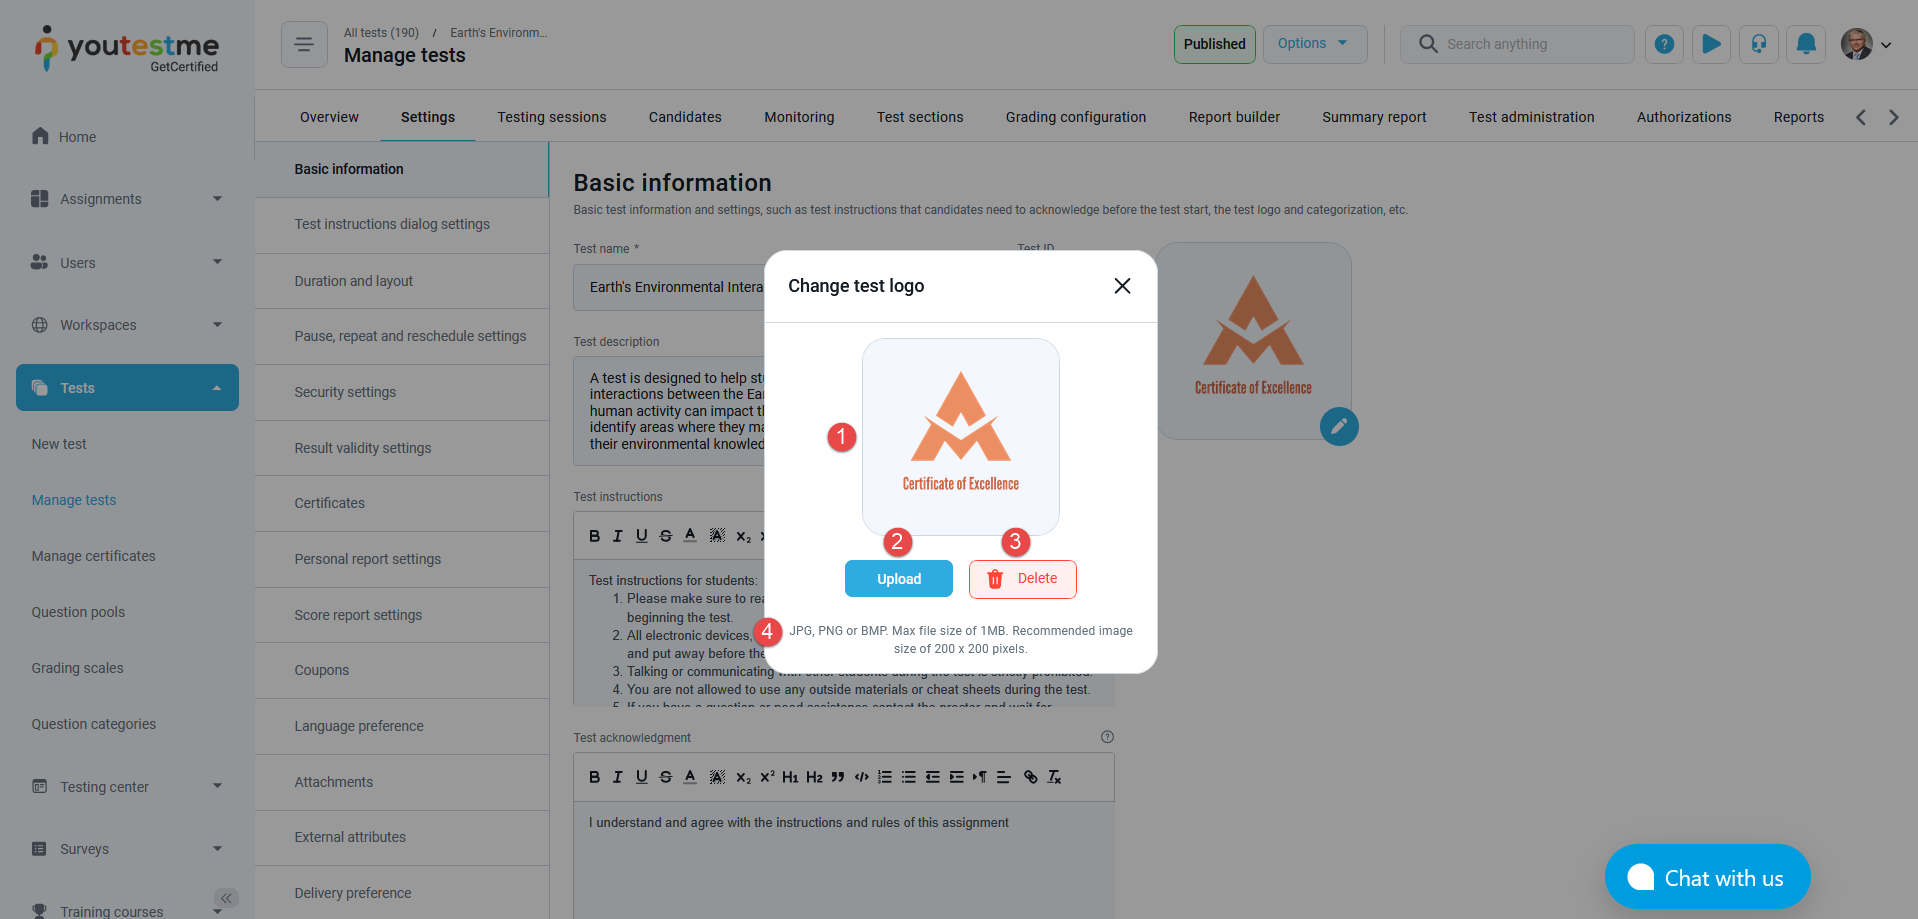
Navigate to your test’s Settings tab. In the Basic Information section, you will find the test logo box. Click on the pencil icon to edit the logo.
A new pop-up window with the following options will appear:
- The test logo is displayed here.
- Upload a new logo from your device.
- Delete the existing logo.
- Information on recommended logo size and type.
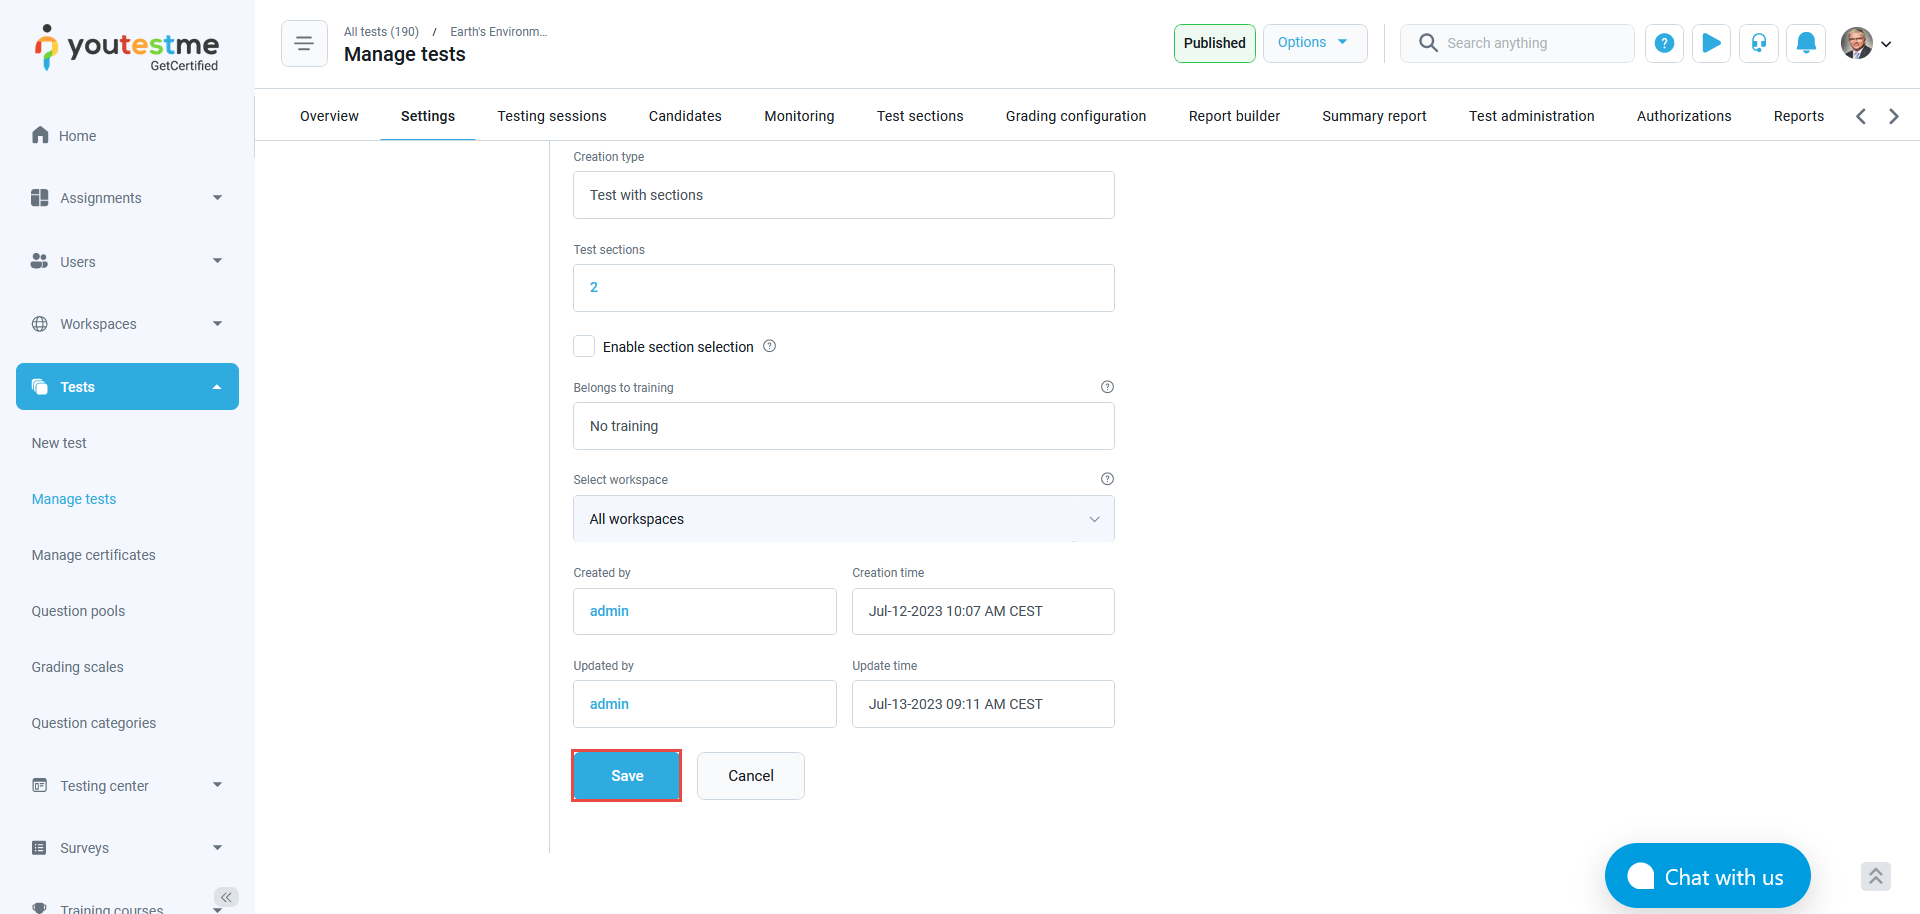
Save the changes you’ve made.
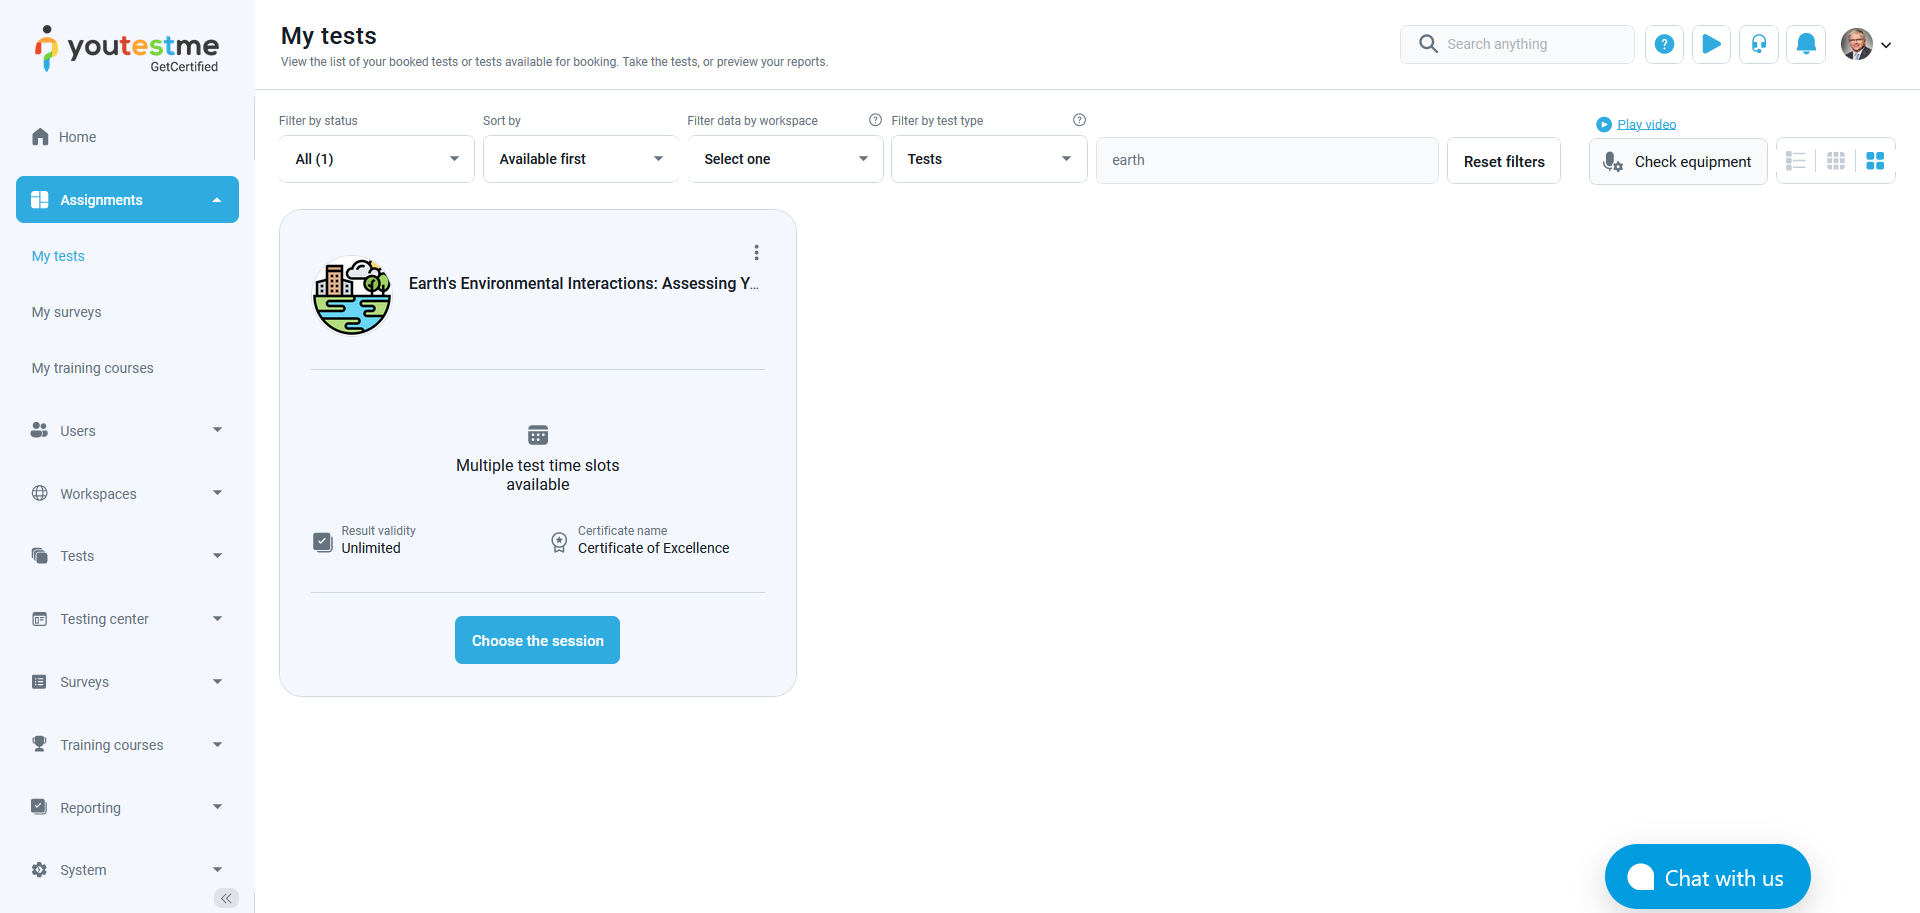
You can view the logo that has been set on the My tests page.
Set Up Your Support Contacts
The purpose of this article is to explain how to set up contacts that will be used for application support.
Set Up a Contact Email
Once you log in to the application:
- Select System on the left side menu, and choose Settings and Customization from the drop-down menu.
- Navigate to the Support tab. You will need to fill in the following fields to contact system support from the home page successfully:
- Purpose of mail – Describe the purpose of an email and phone call.
- Email – Provide the desired support email address. The first “Email” field is mandatory, and it will be the default email address.
- Phone number – Provide the desired support phone number.
- Additional info text– You can provide useful details about why you contacted the support. For example, what is the expected time for an email response to the customer’s issues or business hours when support is available, etc.
- Confirm – Save the changes.
You can add up to 3 contacts for users to select from. However, it is required to have one support contact configured.
For a video tutorial on how to set up contacts, please watch the video.
Customizing In-App and Email Notifications
The Notification tab contains email and in-application notification templates that are automatically sent when a particular action is made inside the application.
Notification templates are predefined but editable. To manage and edit notifications, follow the instructions below:
Hover over the System and choose the Settings and customization option.
Navigate to the Notifications tab.
- Find the notification you want to edit – search the list of all events for which there are notifications, and find the one you want to configure.
- Enable or disable Application notification – enable or disable application notifications for any listed notification event name.
- Click on Edit to customize Application notification – edit the template message shown in the application after the specific action is made.
- Enable or disable the Email notification – enable or disable email notifications for any listed notification event name.
- Click on Edit to customize Email notifications – edit the template message sent to users’ email after the specific action is made.
- Click on the Edit button to edit the email messages.
Once you click the Edit, the pop-up window will appear where you can:
- Change the Notification title. This text will be displayed as a notification title.
- Change the Notification text (body). You can customize the text except for the one between the $ signs. This part of the text cannot be modified as the system uses variables to insert user-related data.
- Click the Save button to save the template.
- Click the Cancel button to discard the template changes.
Please check out this article for more detailed instructions on how to modify the predefined notification.
Configuring Mail Server
This article explains configuring the mail server in the System settings on the Mail server tab.
Accessing the page
Once you log in to the application, select System on the left side menu and choose Settings and customization from the drop-down menu.
Once the System and preference page is previewed, choose the Mail server tab.
Configuring the mail server
The Mail server tab sets parameters for a mail server that will send notifications to administrators and users via email. There is no limit regarding the number of mail servers that can be set.
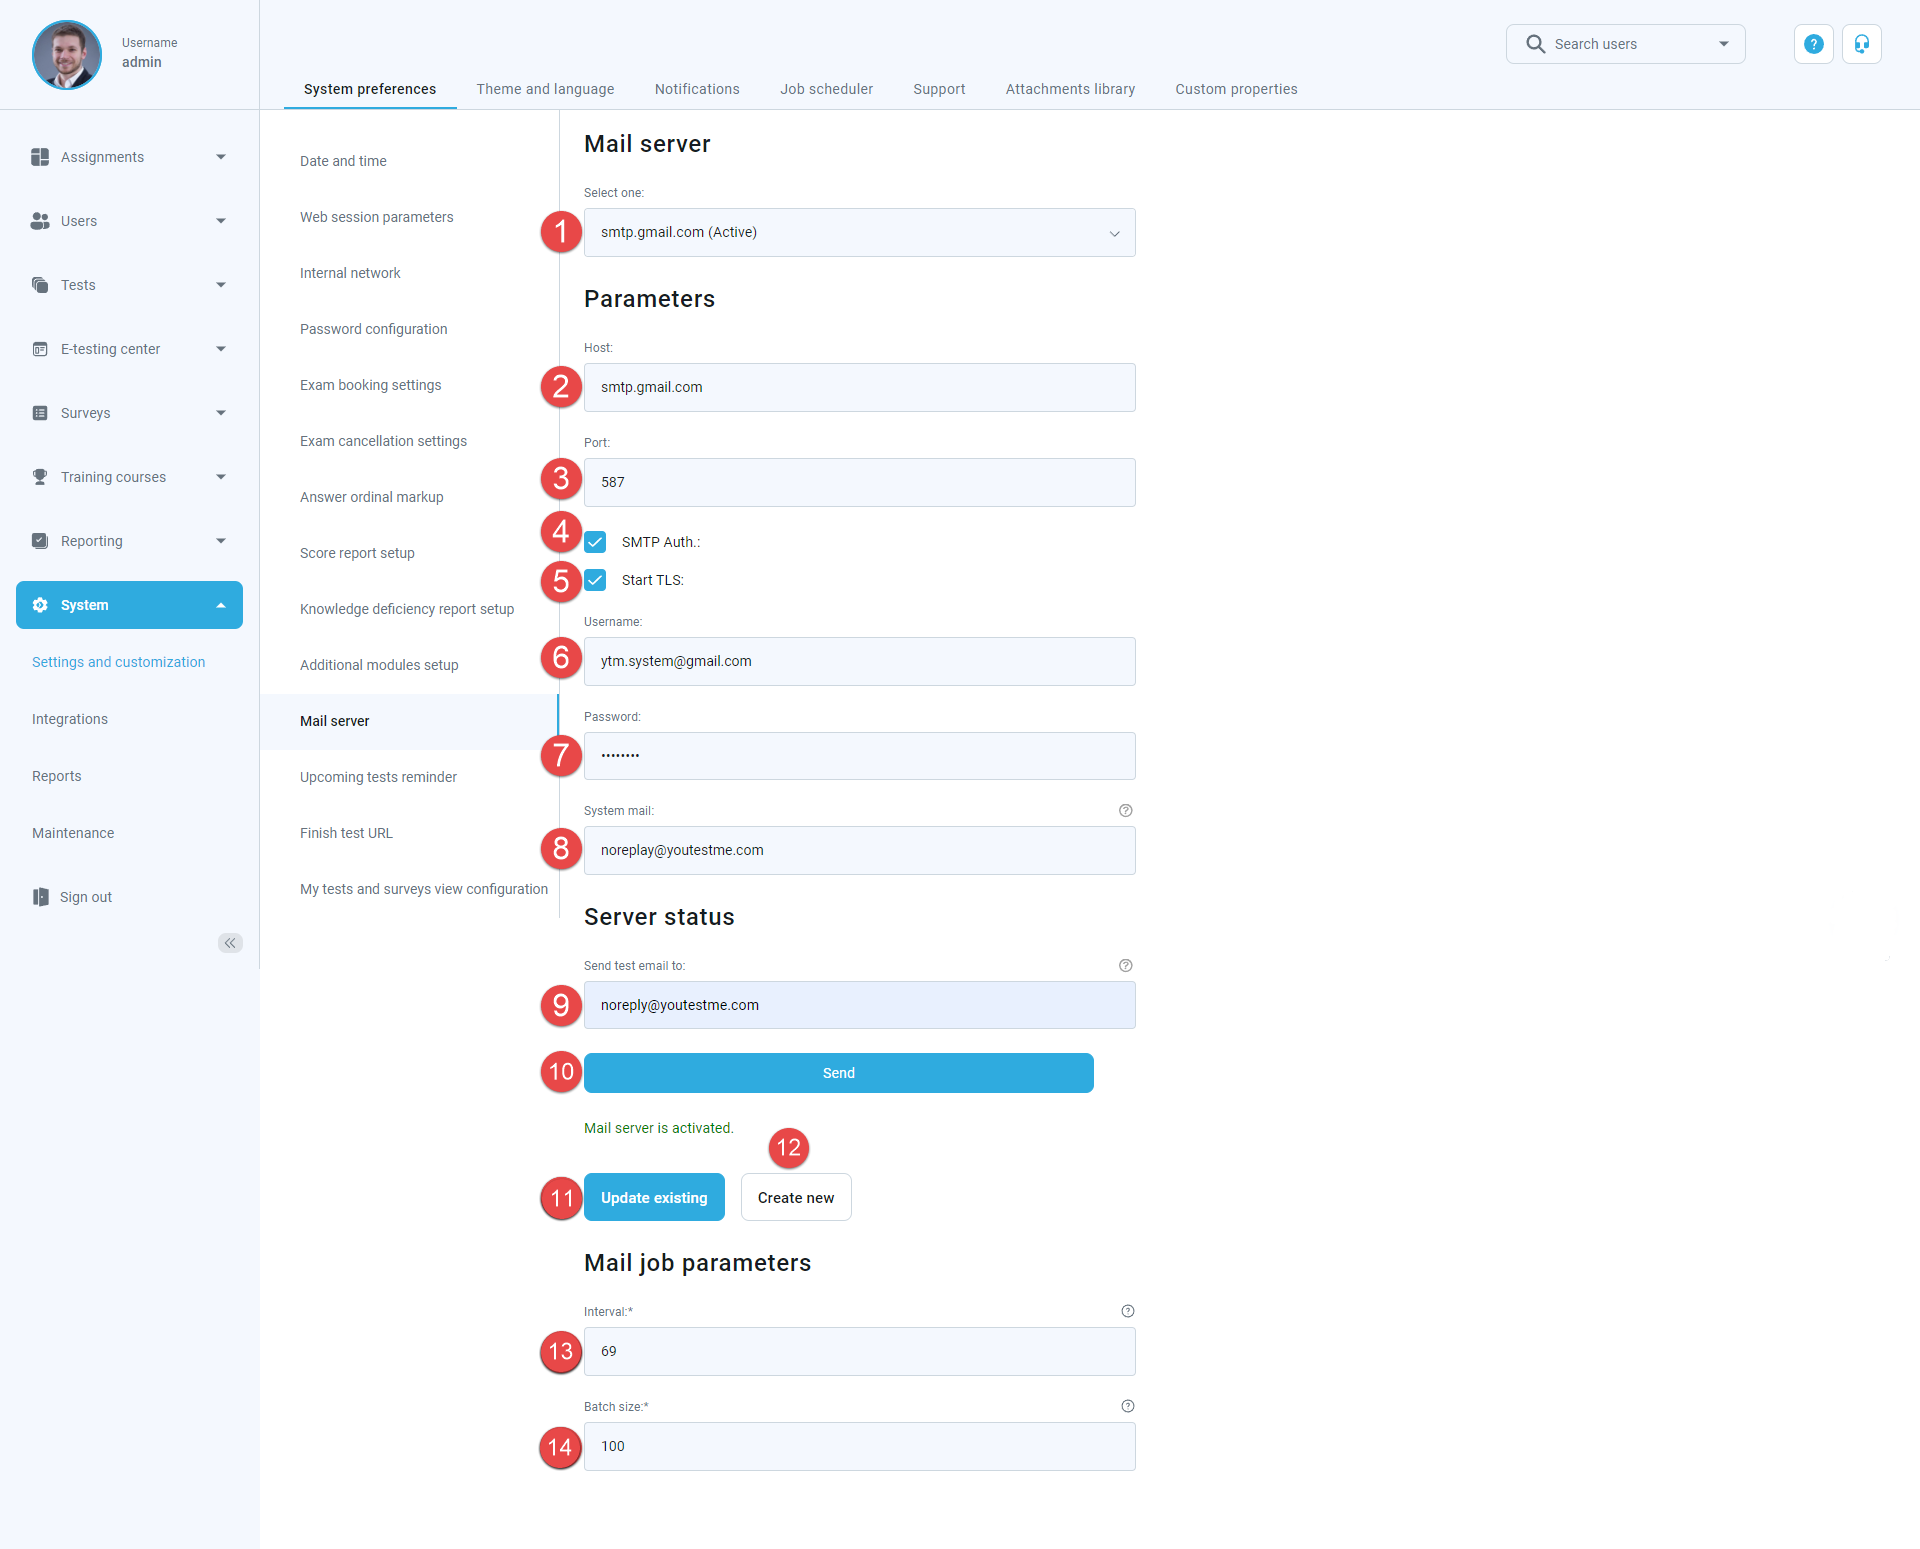
To configure the mail server, you need to set up the following:
- The drop-down list determines the mail server from which the parameters are displayed.
- Enter the SMTP hostname of the mail server.
- Enter the SMTP port number of the mail server.
- Enable SMTP authentication.
- Enable starting TLS protocol.
- Enter the username of the mail server.
- Enter the password for the mail server.
- Enter the email address a recipient will see as the sender’s address.
- You can test if the mail server works by sending an email to the address you specify in the Send a test email to field.
- Click the Send button to send the test email.
Note: Only one mail server can be active at a time. You can set a mail server to be active by clicking on the Activate button in the form of an inactive mail server. Only inactive mail servers can be deleted by clicking on the Delete button in the form of the inactive mail server. - By clicking the Update existing button, the entered parameters will be applied to the selected mail server.
- You will create a new mail server with the entered parameters by clicking on the Create new button.
- Interval– enter the number of seconds between two successive executions of the mail job.
- Batch size – enter the maximal number of emails sent during one execution of the mail job.
Language settings
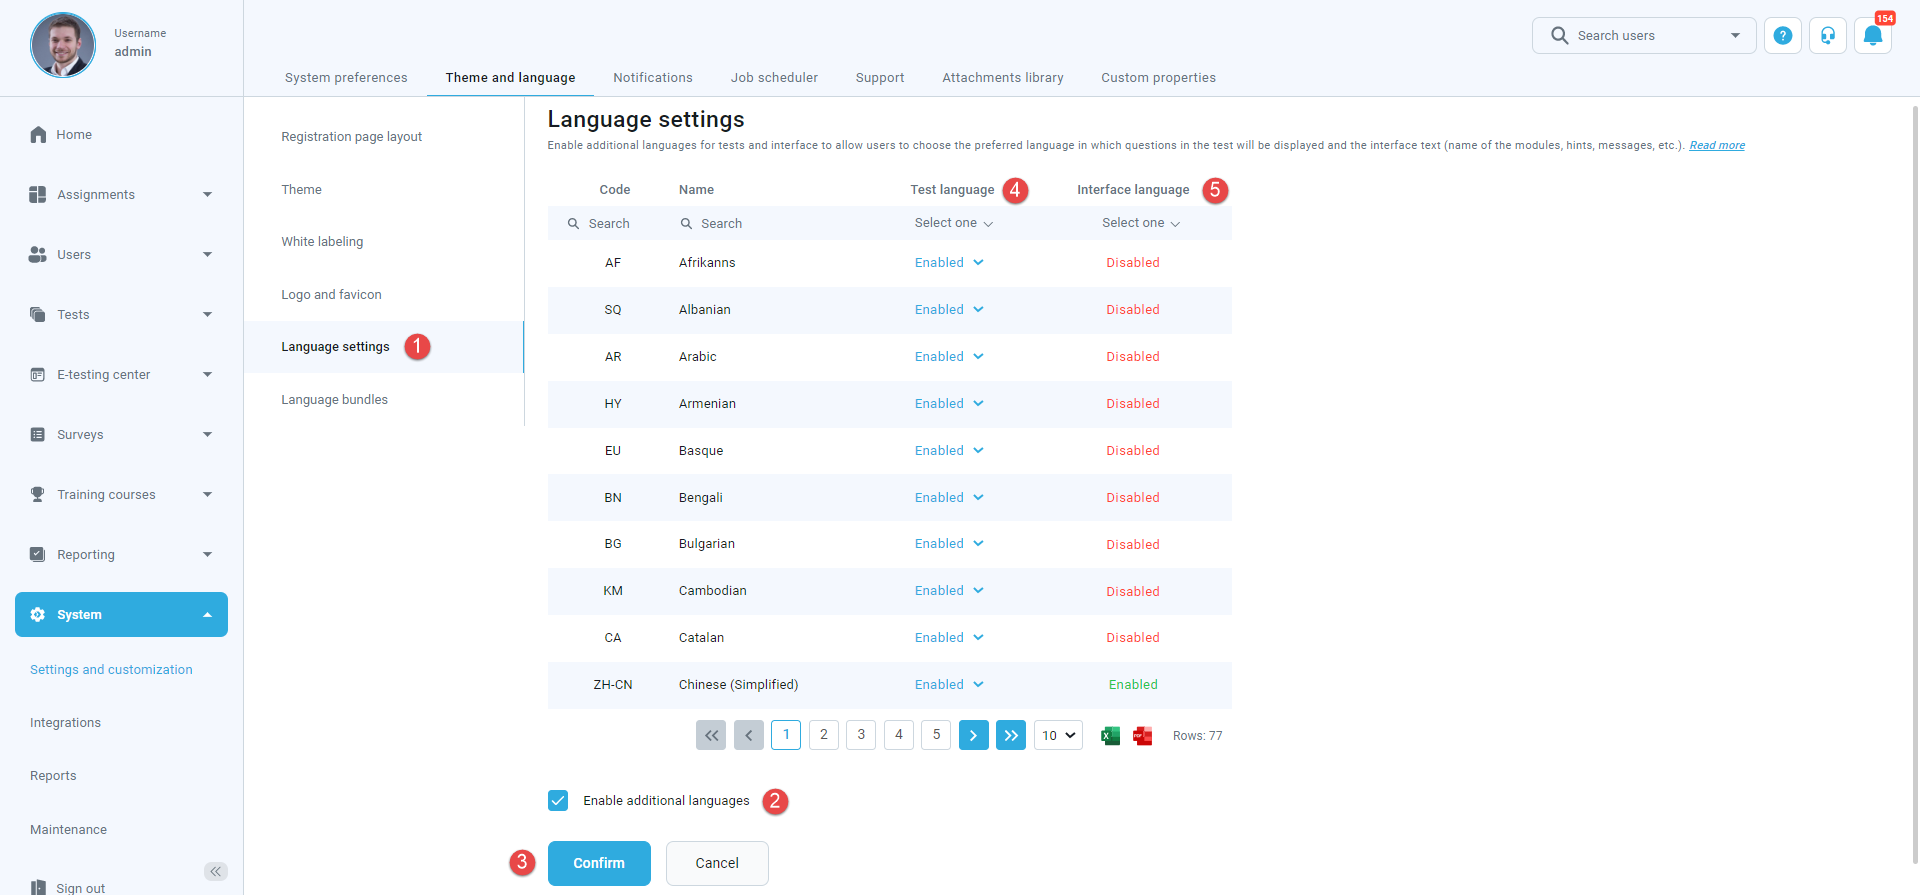
To set up the desired language, do the following:
- Go to the Language settings.
- Thick the checkbox Enable additional languages.
- Click on the Confirm button.
- Enable/disable test language.
- Enable/disable interface language.
Language bundles settings
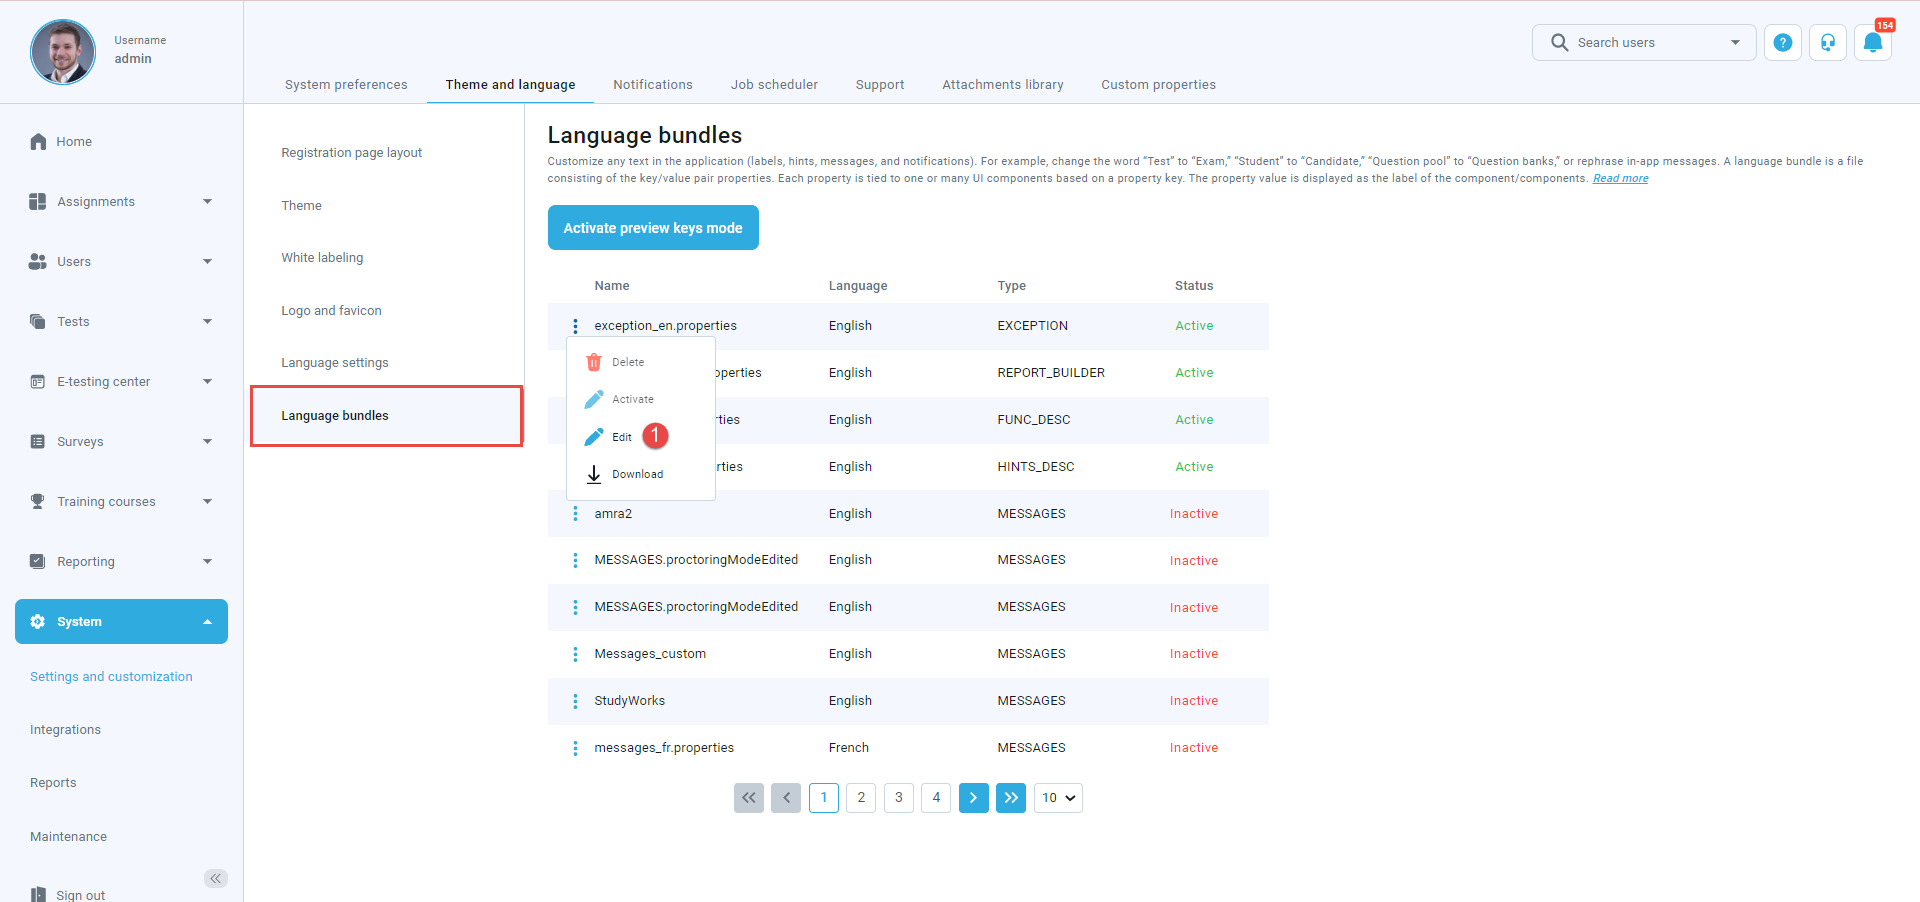
Users can customize the application interface text in the Language bundles tab according to their needs – change labels’ names, create new hints, and modify notifications’ content.
A language bundle is a file consisting of the key/value pair properties. Each property is connected to one or multiple UI components based on a property key.
Note that it is impossible to delete default language bundles, but you can create new ones based on them. Also, it is not possible to have two active bundles of the same type simultaneously.
There are two ways to create a custom language bundle:
- Changing the language bundle by editing one-by-one property values.
- Downloading the language bundle, editing the file offline using the desired text editor, and importing it into the application.
Note: The keys must not be changed. Otherwise, the changes will not be visible.To create a new language bundle by editing one-by-one property values:
- Click the Actions option and select the Pencil icon for the language bundle based on which you want to create a new one.
- Search for the property value or key you want to change.
- Choose the desired key from the list. If you cannot find the key for the desired property value, you can use the preview key mode to find it easily.
- Edit the text.
- Confirm or discard the changes you made in the property value field.

