Article verified for Release 14.2 on May 14, 2025.
This article explains how to create a simple test without sections and assign candidates. A test without sections is a simple test that consists of a defined number of questions on a single topic. You can also watch our video that covers this topic.
Test Creation
To create a simple test, follow these steps:
- Select the Tests > New test button.
- Leave Test with sections checkbox empty, and you will create a test without sections. For more instructions on how to create a test with sections, refer to the following article.
- Test wizard for tests without sections is divided into seven steps: Information, Settings, Method, Add questions, Grading, Certificates, Review, Testing sessions, and Save test. Below, you will discover more details about each of these steps.

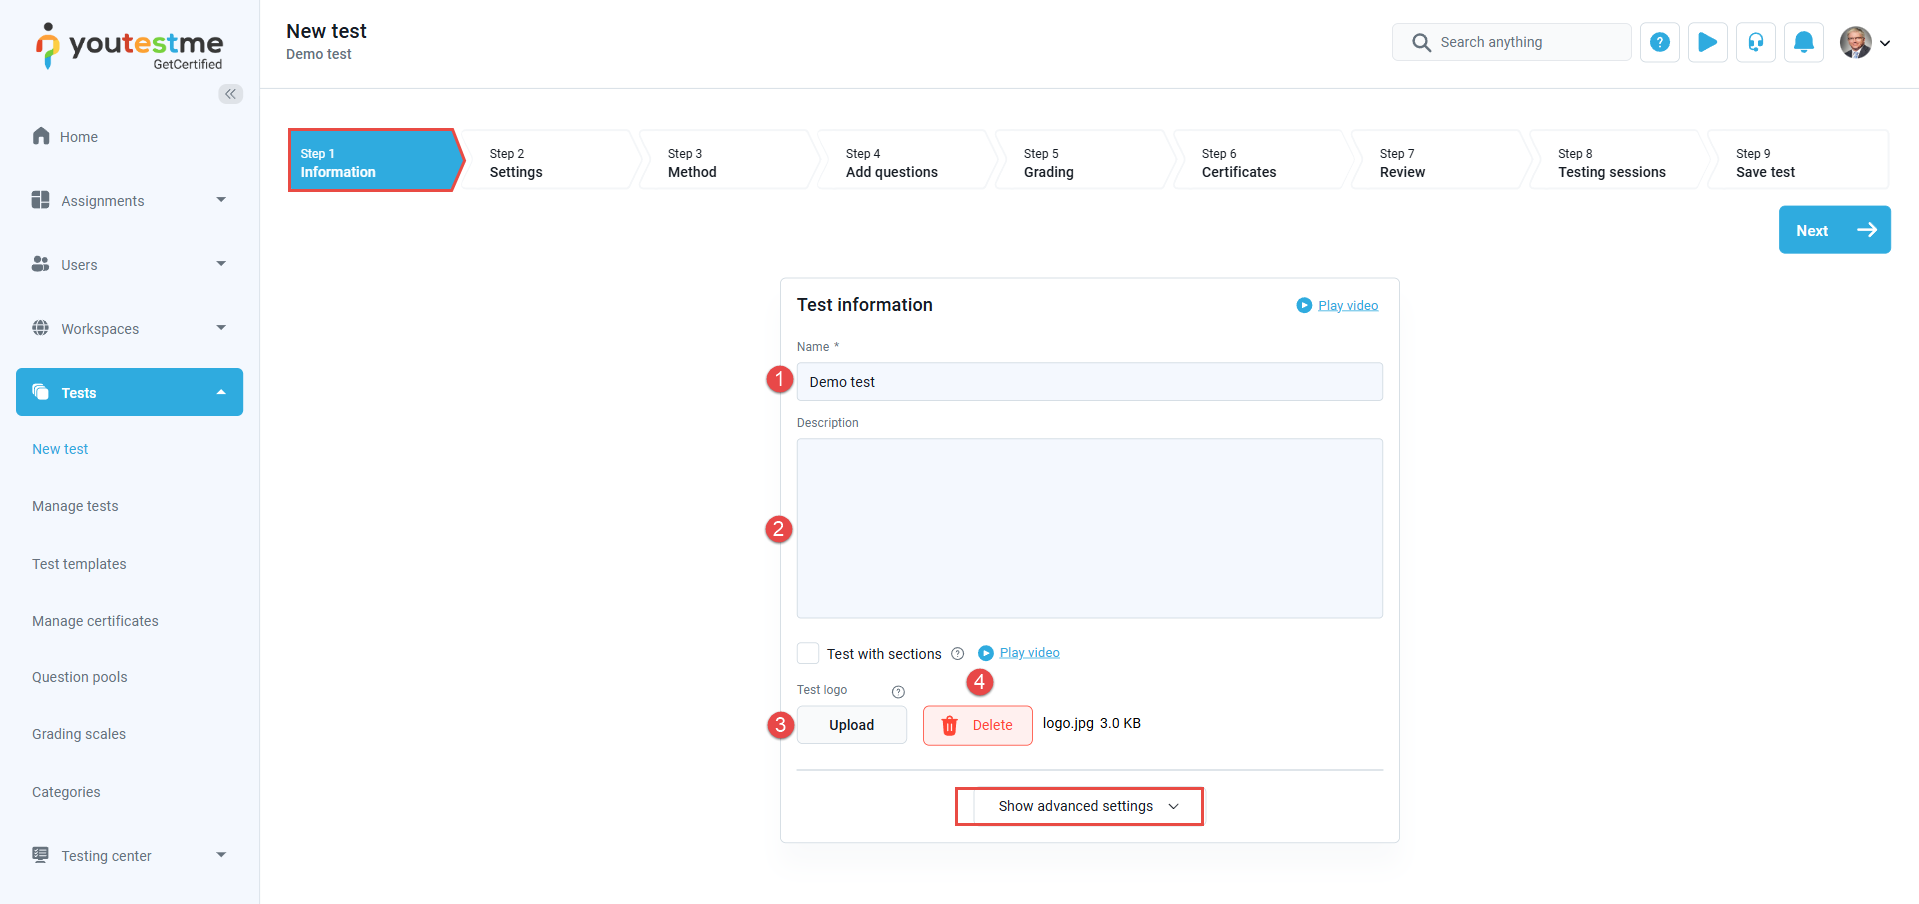
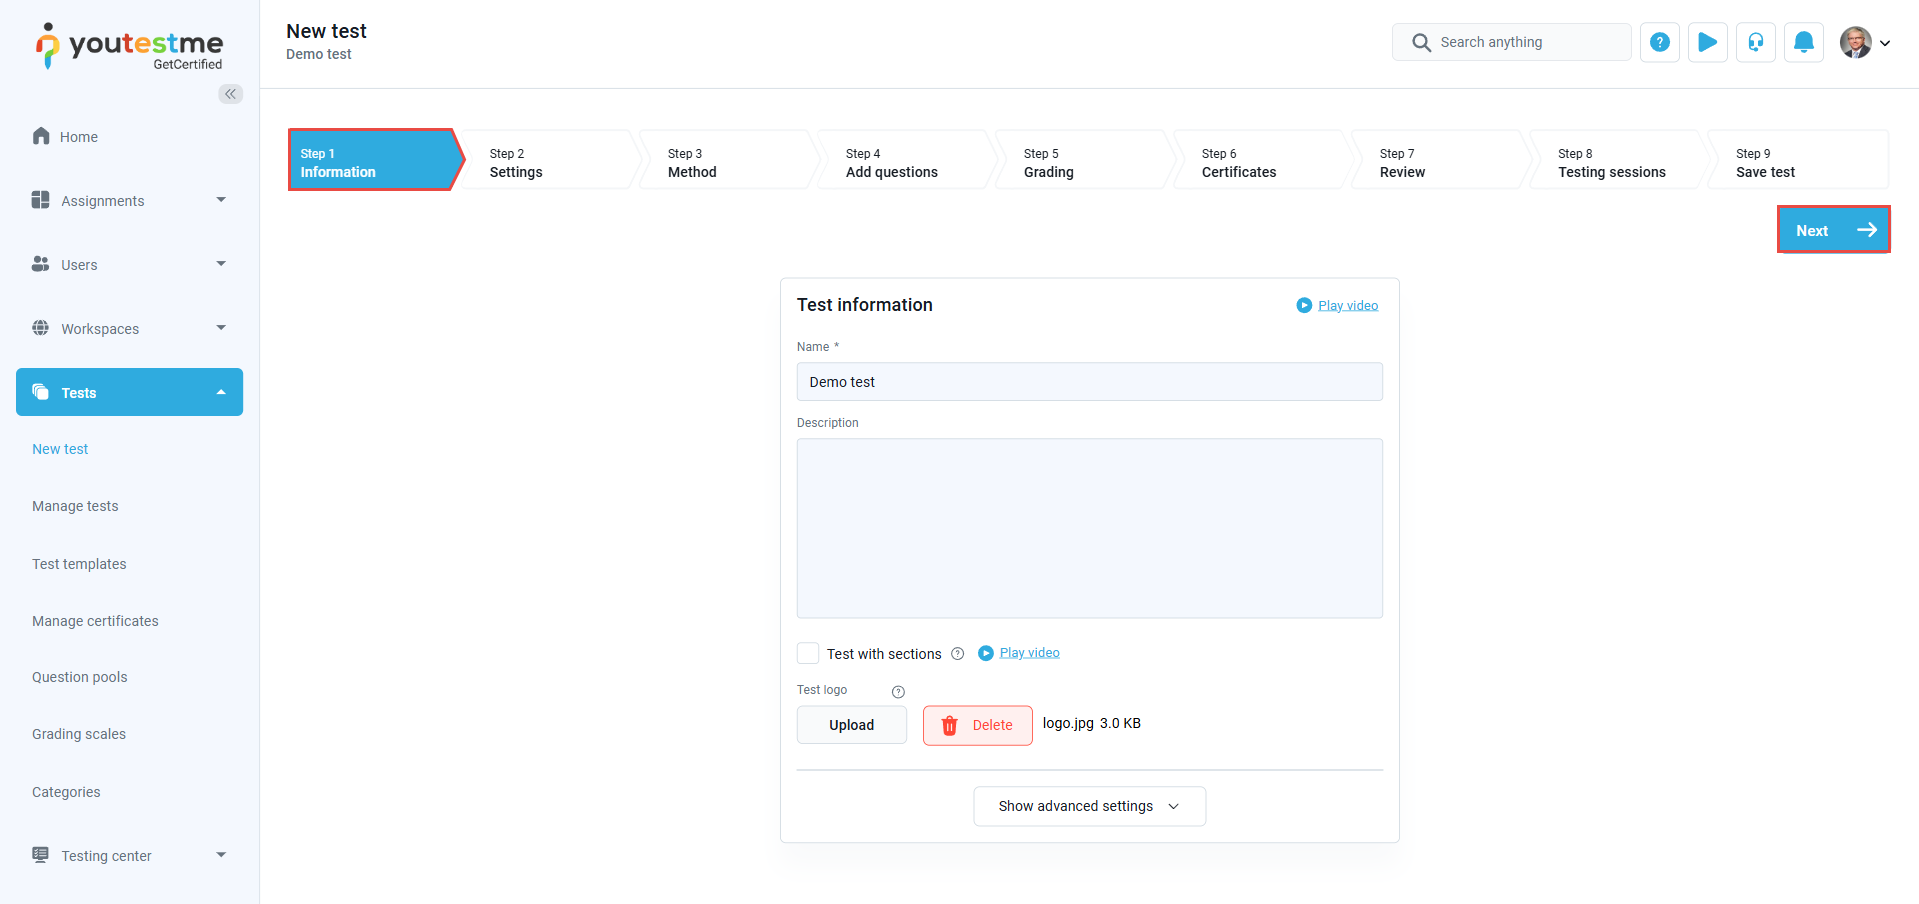
Step 1: Information
In this step, you can:
- Enter the Name of the test.
- Enter an optional test description to provide additional details about the test.
- Optionally, you can upload a test logo, which will appear as an image on the candidate’s My tests page when they begin the test. Supported file types include JPG, PNG, and BMP, with a maximum file size of 1 MB. Upload a square image measuring 200 x 200 pixels or larger for optimal presentation.
- After uploading, the file name and size will be displayed. You can remove the uploaded logo by clicking the Delete button if necessary. If no logo is assigned to a test, the application favicon will be used as the test logo.
You can preview and modify the advanced test settings by clicking the Show Advanced Settings button.
The advanced settings have the following fields:
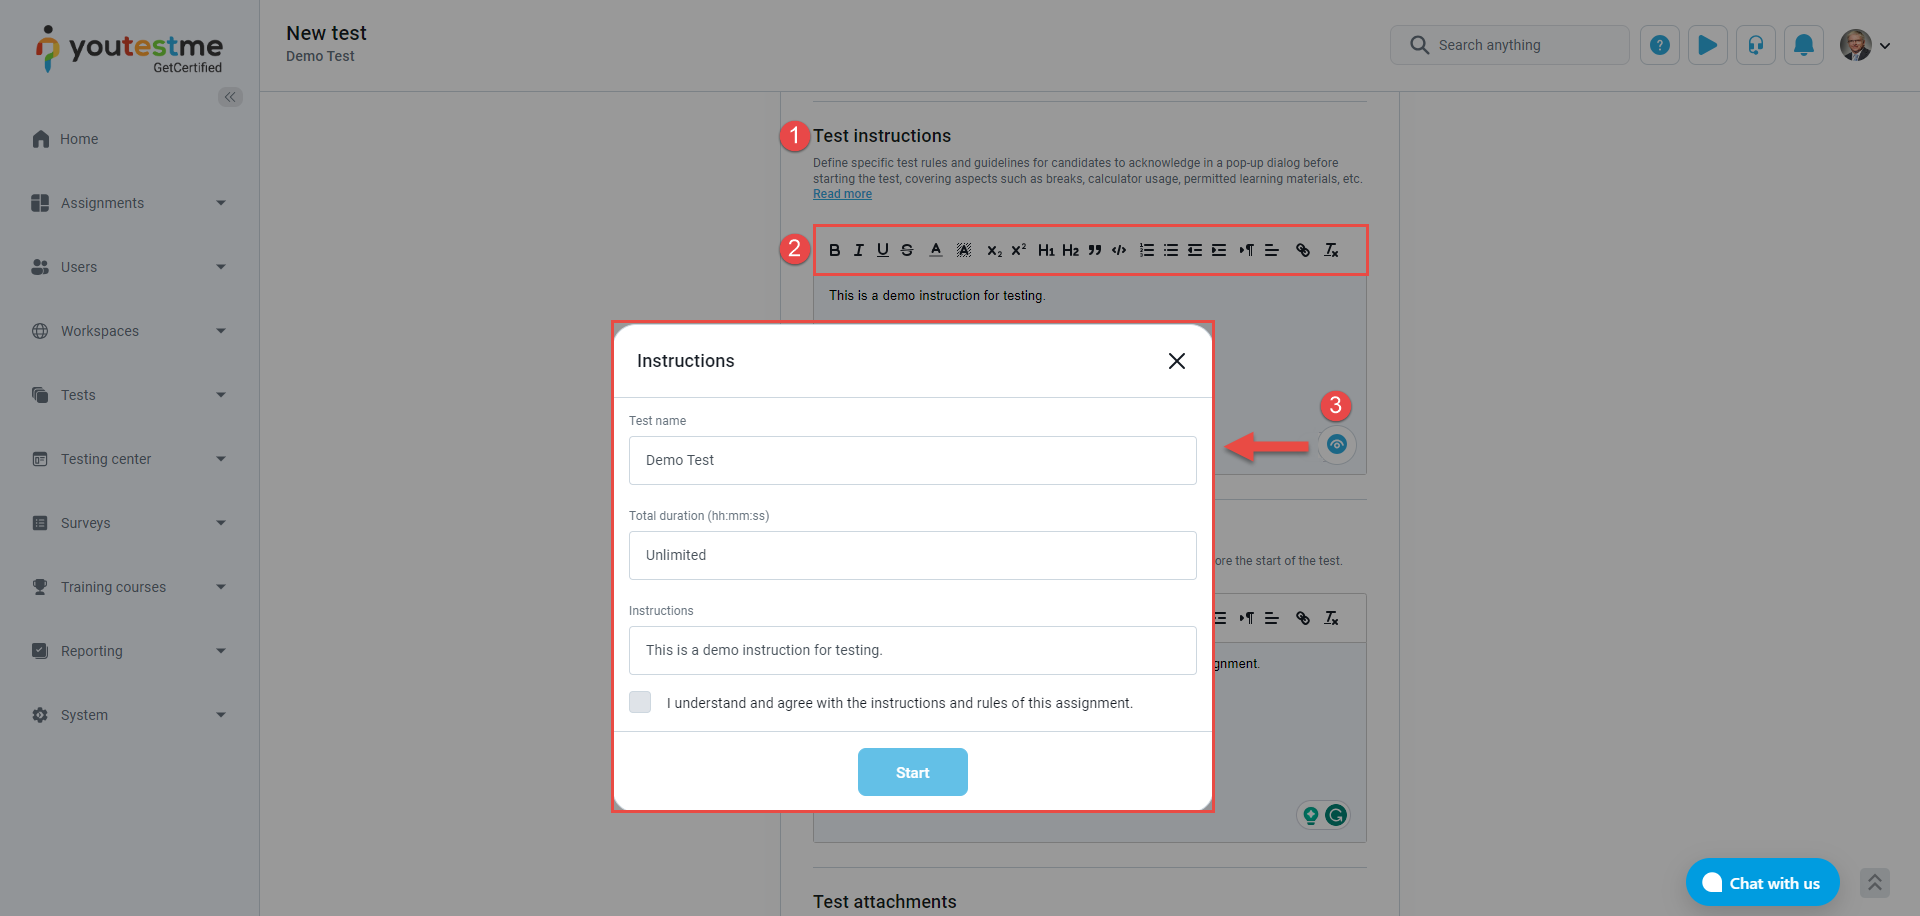
- Enter the test instructions, which are specific rules or guidelines that students must acknowledge, in a pop-up dialog before starting the test. These instructions can be accessed under the instructions icon during the test-taking process and may cover details such as breaks, calculator usage, permitted learning materials, and other relevant information.
- You can use the advanced editor for test instructions, allowing you to format the text with bold, italic, underline, and more.
- Click the preview icon to review the test instructions and view the dialog appearing to candidates when they start the test. This allows you to ensure that the instructions are presented as intended and that candidates receive the necessary information before beginning the test.

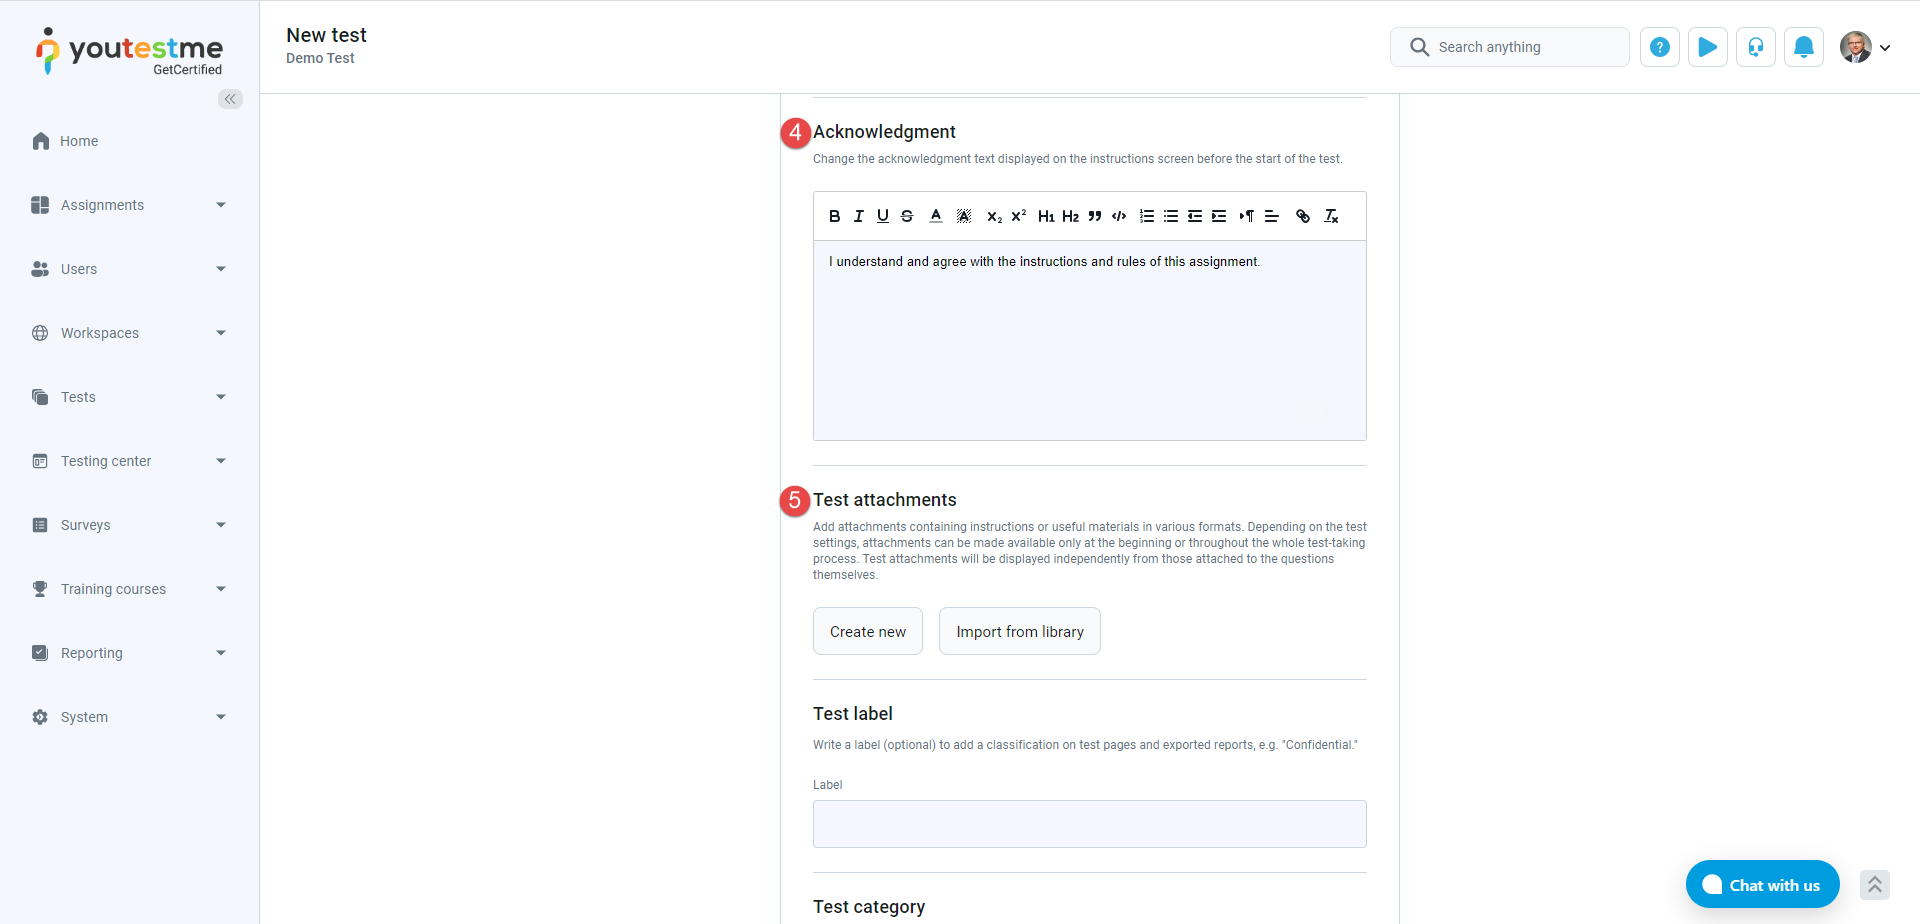
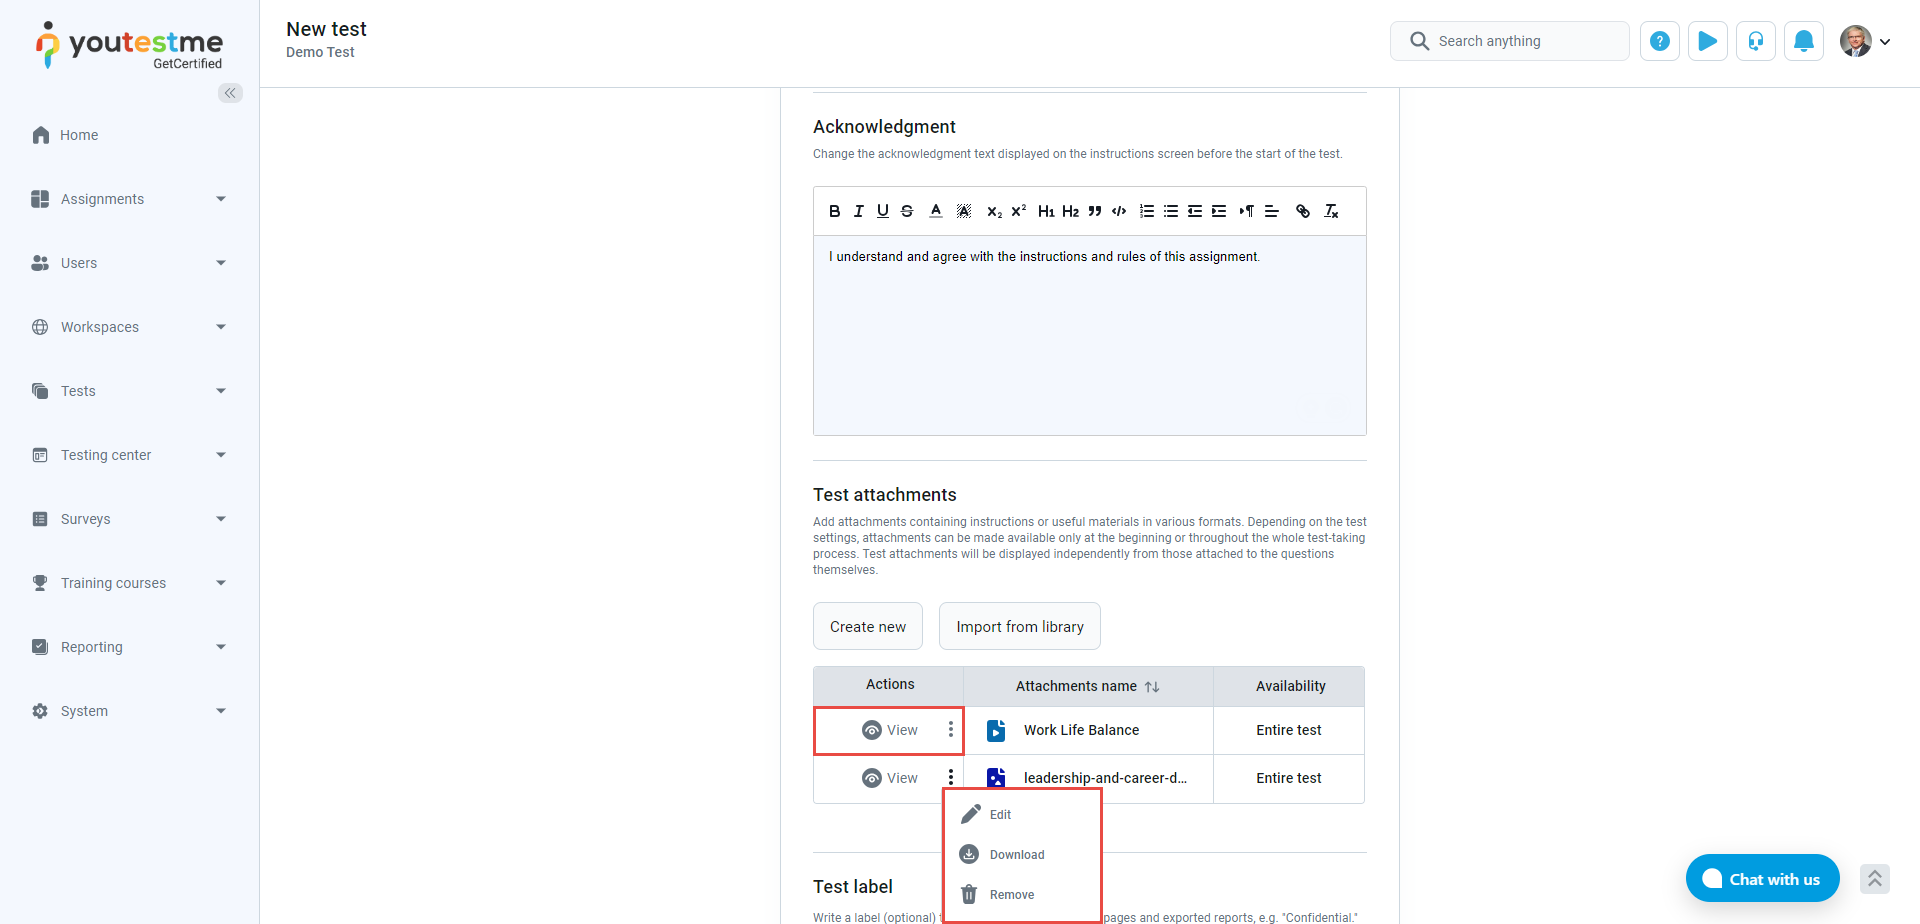
- Change the acknowledgment text displayed on the instructions screen before the test starts. You can also use the advanced editor for test instructions, allowing you to format the text with bold, italic, underline, and more.
- Test attachments– In this section, you can include test attachments containing instructions or useful materials in various formats. Depending on the test settings, these attachments can be made available at the beginning or throughout the test-taking process. It’s important to note that test attachments are distinct from those attached to individual questions.

- Tocreate a new attachment:
- Click theCreate newbutton.
- A dialog will appear where you can specify the attachment name and provide an optional description.
- By default, attachments are displayed throughout the entire test. If you prefer an attachment to be visible only at the beginning, check theShow at the beginning of the test-onlyoption.
- To make the attachment available to any test creator, check theAttachment is available for any test creatoroption.
- Select the type of attachment and upload the file. For attachments requiring a link, such as Vimeo or YouTube videos, paste the link in the provided field. If adding a text-type attachment, enter the desired text in the provided field.
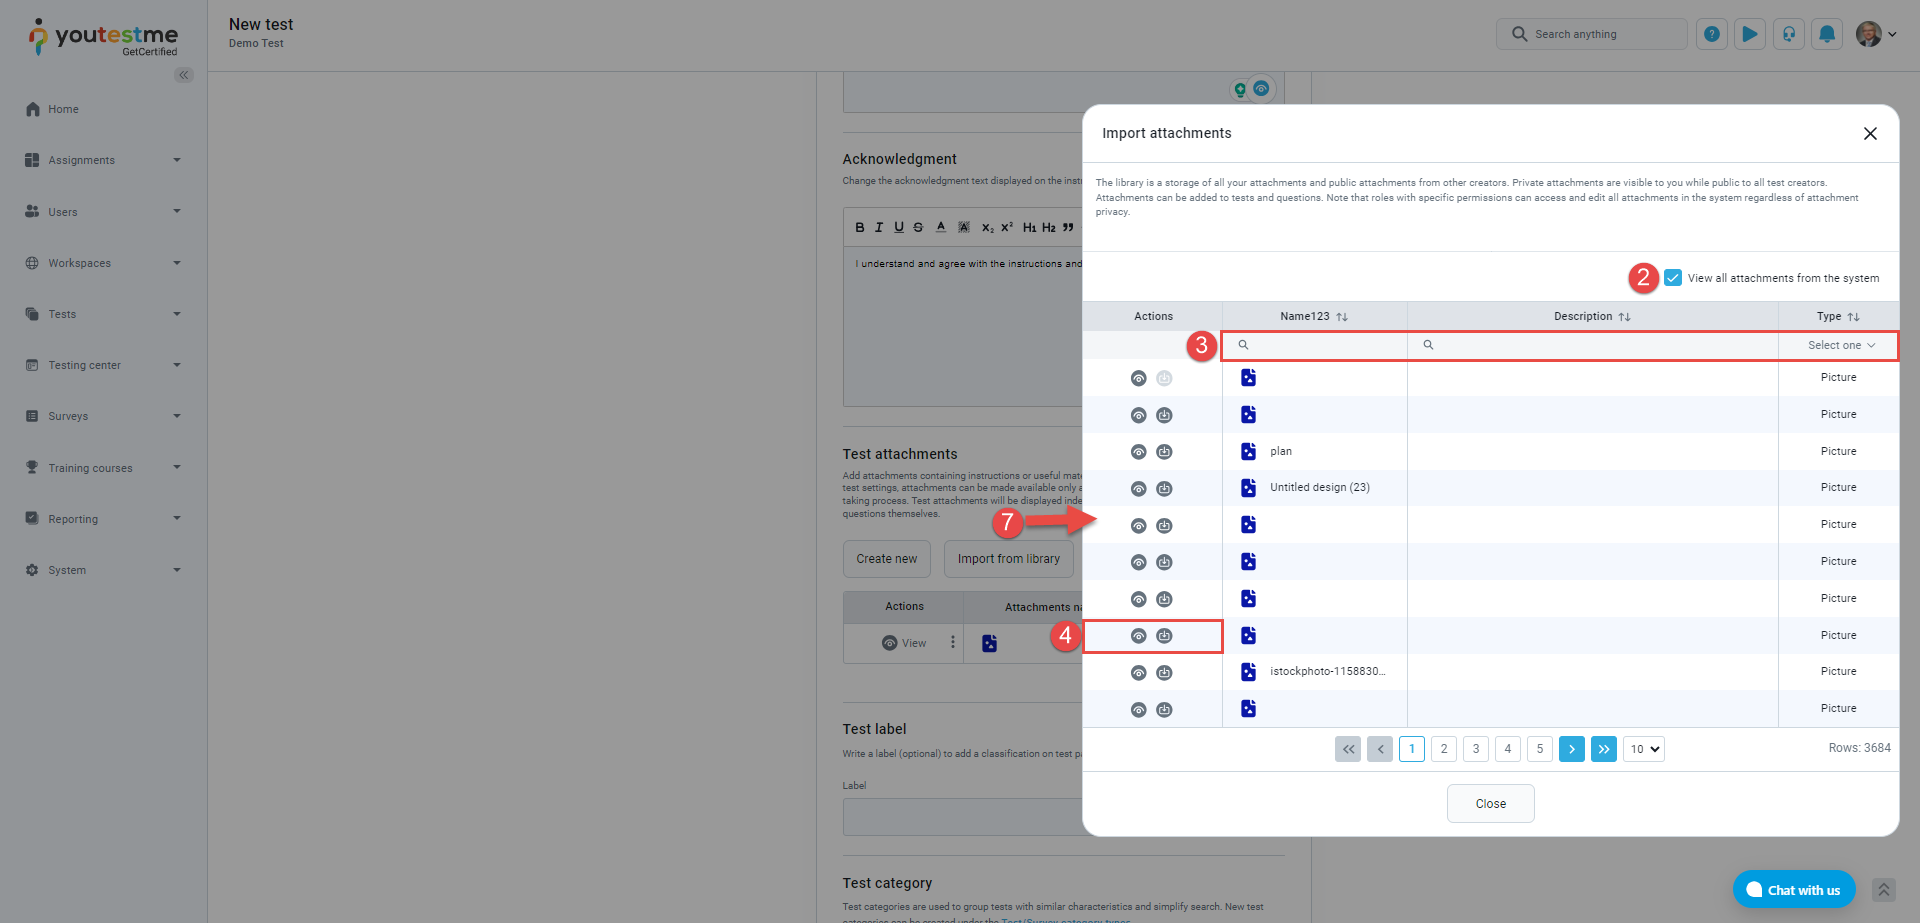
- Click theSavebutton to create the attachment.To import an existing attachment from the library:
- Click the Import from Library button.
- You can view all attachments in the system visible to you by checking the View all attachments from the system checkbox.
- Search for a specific attachment by name, description, or type.
- Preview the attachment if needed, and import the ones you find relevant.
 After creating or importing an attachment, you can manage it in various ways. Use the provided options toview,edit,download, andremovethe attachment from the test.
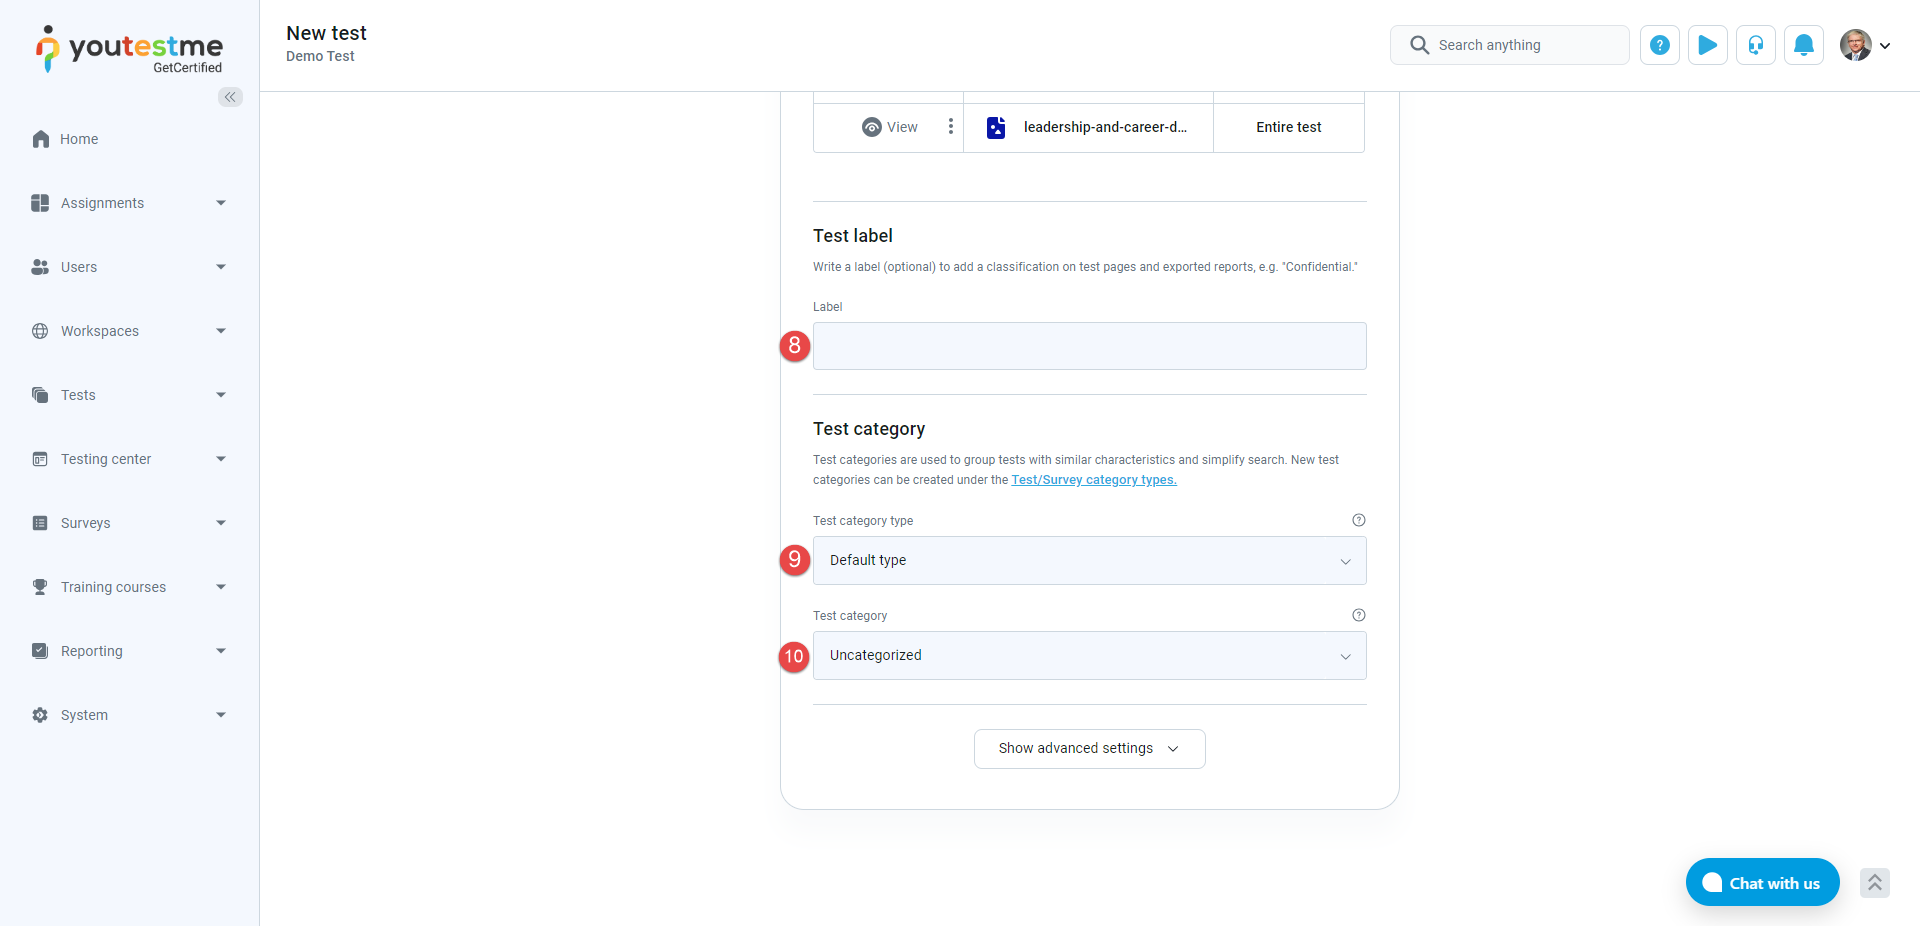
 - Test label– Provide a label to categorize and classify test pages and exported reports. For instance, you may use a label such as‘Confidential’.
- Test category type– Test categories group tests with similar characteristics, simplifying the search. Choose the type of category you want to add to the test. It is possible to create new types or add new categories to the predefined one underSystem/Settings and Customization/Custom properties/Test categories.
- Test category– Choose one of the previously created test categories.
 When configuring test information, click the Next button to proceed to the next step.

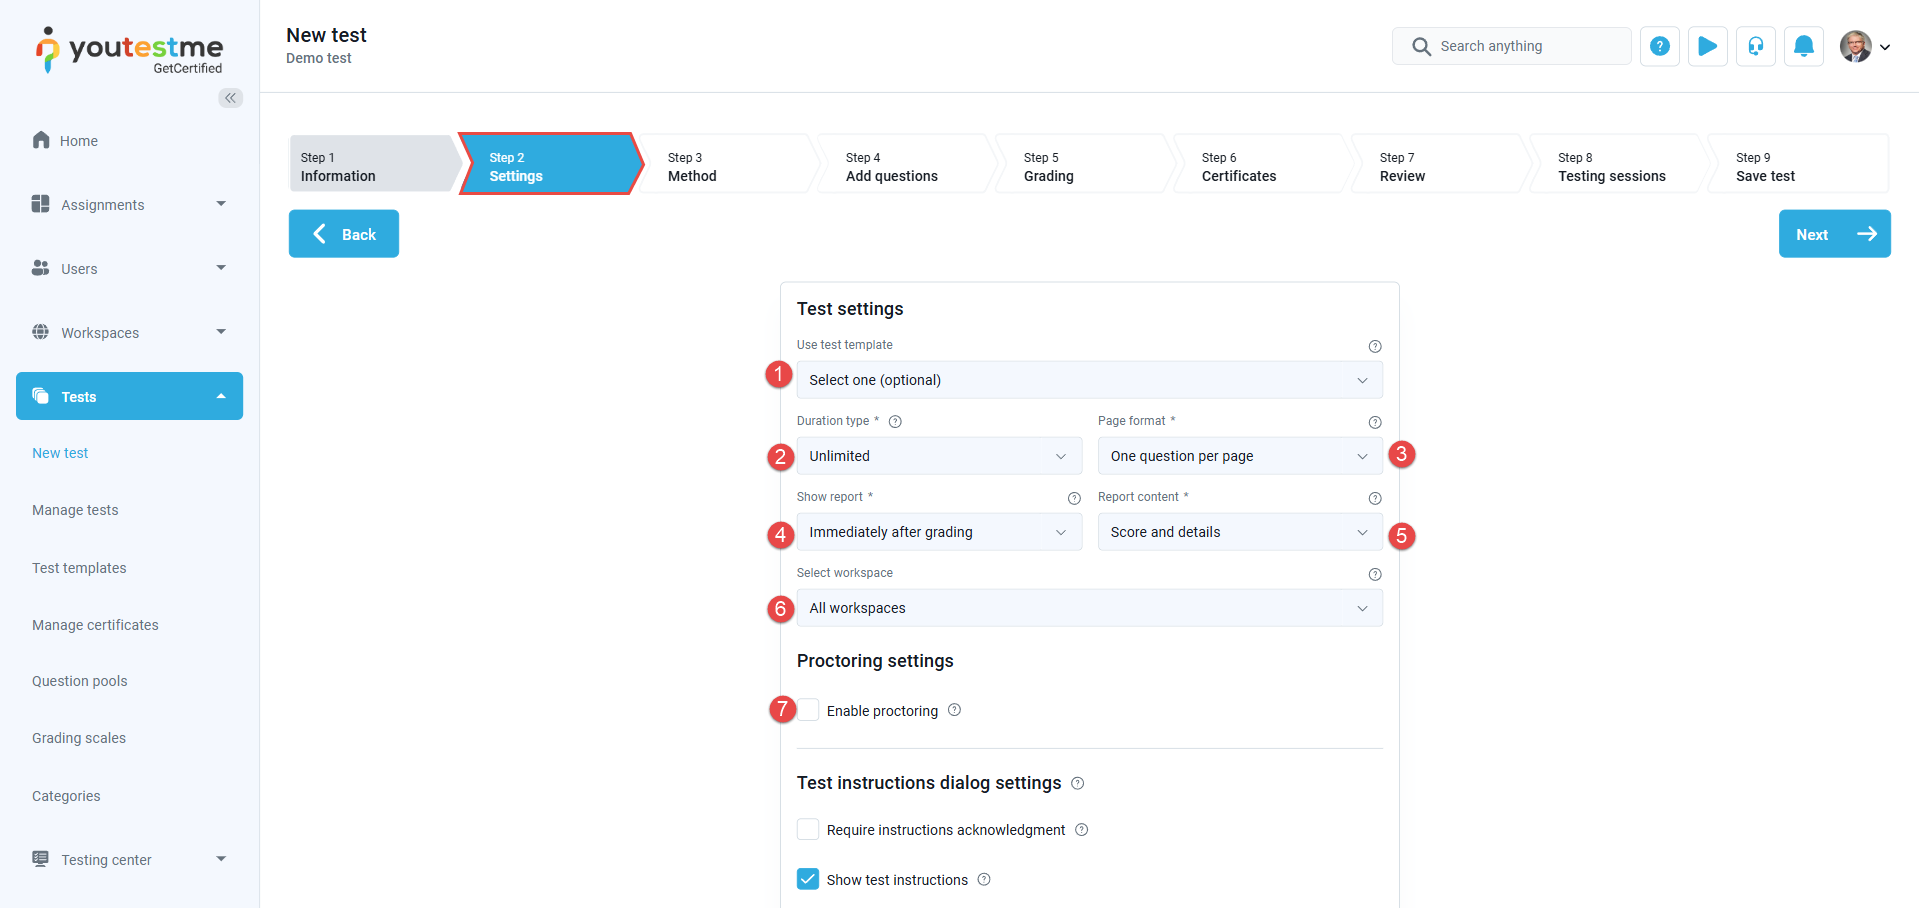
Step 2: Settings
The Settings step contains the following options for configuring your test:
- Test template– When creating a test, you can save its settings and question pool configuration as templates. You can use one of the previously created test templates by choosing it from the drop-down menu, and all saved test configurations will be automatically applied. For more information, please visit Test templates.
- Duration type– Choose how you want to time-limit your test by selecting the duration type:
- Unlimited– the test will not be time-limited.
- Time per question– each question in the test will have its time limit. The exact time limit for each question can be configured during the question creation process.
- Time to answer all questions– set the time limit for the whole test.
- Page format– set how the questions will be displayed, whether you want to display each question on a separate page, or you want all questions to be displayed at once. You can choose between:
- One question per page
- All questions on one page.
Note: If the test contains branching questions, the option All questions on one page is automatically disabled. This option is recommended for tests up to 20 questions.
- Decide when the report will be available to candidates. Options include:
- Immediately after finishing the test.
- Immediately after result grading.
- Immediately after result verification.
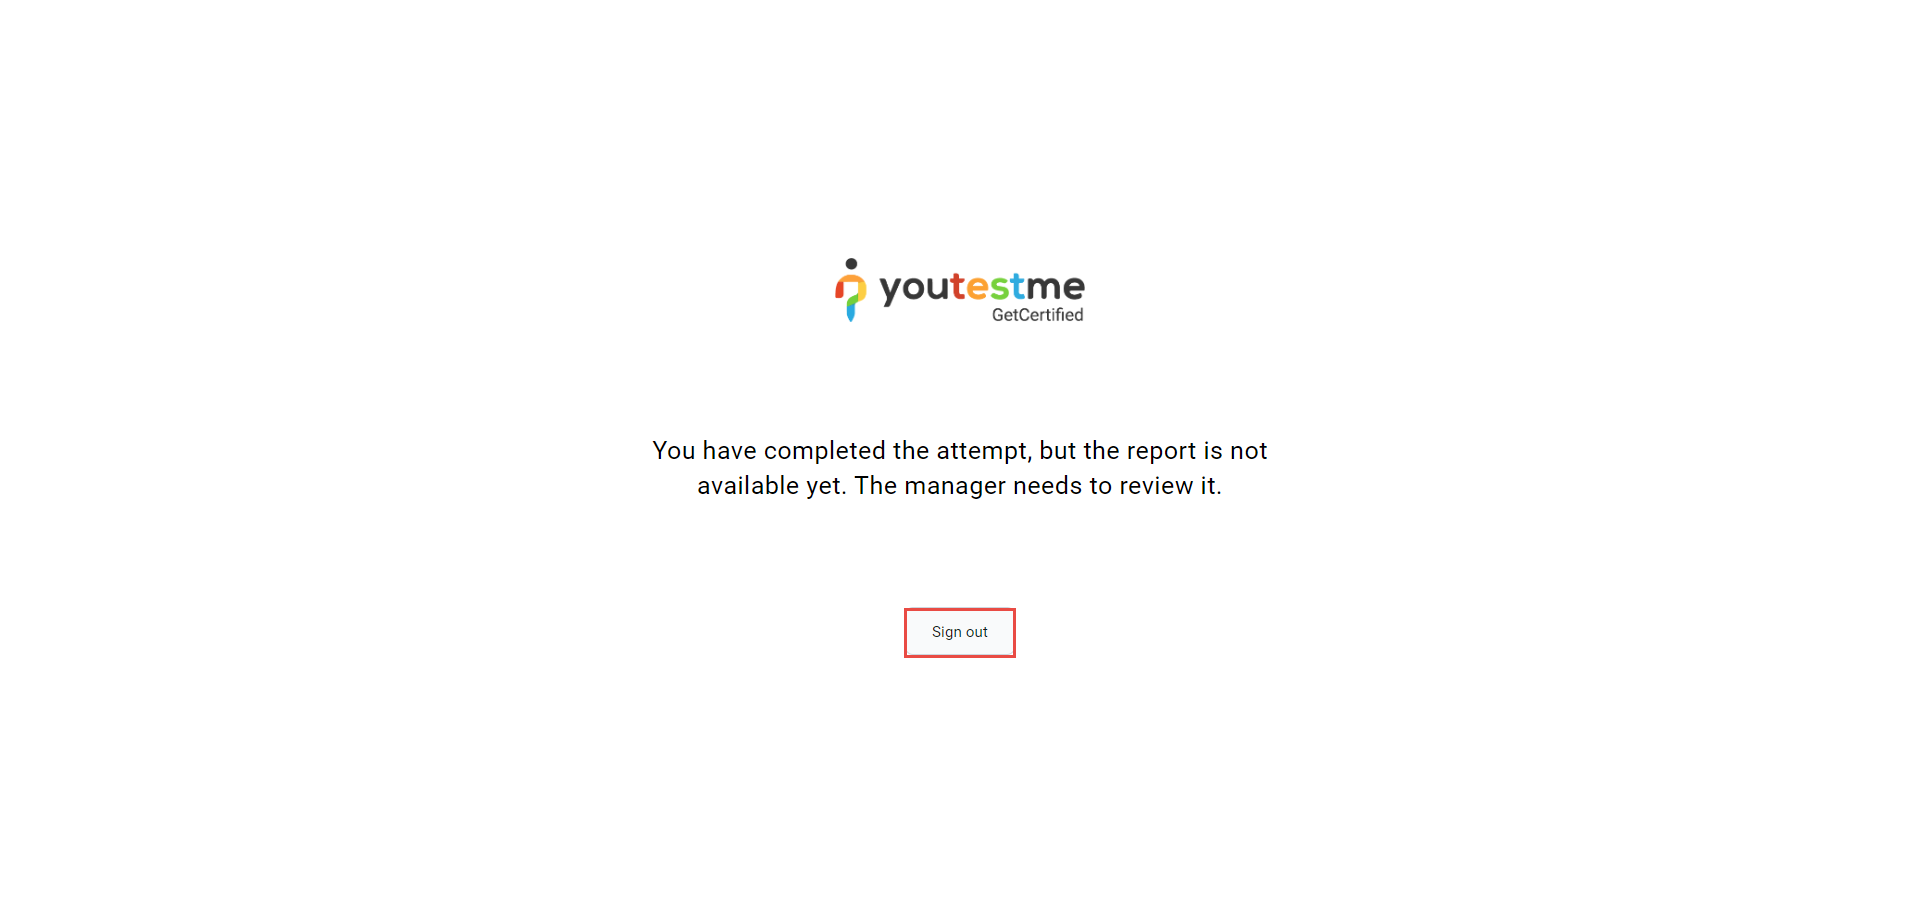
- On manager’s approval.
- Real-time grading.
- Report content – define the content of the report that the test-takers will receive. You can choose between two options:
- Score and details– the candidates will see their score and all questions and answer details – e.g., their answer and the correct answer.
- Score only– the candidates will see only the score and basic test details.
- Workspace – If the application is organized through workspaces, here you can see the list of all available workspaces to which you can assign this test. Optionally select the desired workspace to make it available only to users from that workspace. Tests set to global can only be accessed by test managers and users with the system role permission Manage any test, survey, or training course. To make the test accessible to workspace instructors, turn off the global property and set the workspace. However, only users with the system role permission to Create test, survey, or training course can manage this property. Furthermore, users with the system role permission can still access the test added to a workspace.
- Proctoring mode – If enabled, a specialized proctoring tool is used to prevent cheating on the test. The system will receive the information from the user’s web camera, microphone, and screen and flag suspicious behavior (e.g., background noise and unauthorized faces in front of the camera). You can also examine the video recording afterward or live to monitor the users. The system will generate the video recording as a PDF report that is available for download. Depending on the application’s integration, the proctoring configuration can be YouTestMe Proctoring or Proctorio.

By clicking on the Show Advanced Options button, you can turn the desired options on/off:
-
- Require instructions acknowledgment– users cannot start the test without acknowledging the instructions.
- Show test instructions– display predefined instructions that users can read before the test.
- Show test duration– display the time available for the users to complete the test.
- Show passing mark– display the passing mark required to be achieved by users to pass the test.
- Show the number of questions– display the number of questions in the test.
- Show remaining number of retakes– display how many times users can retake the test (if retaking is allowed).
- Allow test continuation– enabling this option will allow users to save their answers, pause, and continue the test within the test’s availability period. The availability period is set later in the testing session creation process.
Note: This option can not be combined with the Enable browser lockdown option. - Allow test retaking – by checking this option, users can retake the test during the test availability period. You can limit this option by selecting the Limit for test attempts and setting the number of attempts and the time between attempts.
Note: Users can retake the test during the availability period by checking this option. You can limit this option by selecting option 17. and 18. - Test attempts– you can choose between two options.
- Unlimited– the users can repeat the test an unlimited number of times.
- Limited– the users can repeat the test as often as it is allowed.
- Time between attempts– set the time required to pass between two test attempts.
- Define retake availability in days– Define a time frame during which candidates can retake. For instance, if set to 2 days, retakes can only be done within the following 2 days after the initial attempt.
Note: This option will only be available if the Allow test retaking option is enabled. - Allow test retaking only for failed attempts – The retake option won’t be available for candidates who passed the test initially or who passed after the retake.
- Enable limited number of free reschedules– Set a limited number of free reschedules users can use. After spending all of the free reschedules, they will have to send a request to reschedule again.

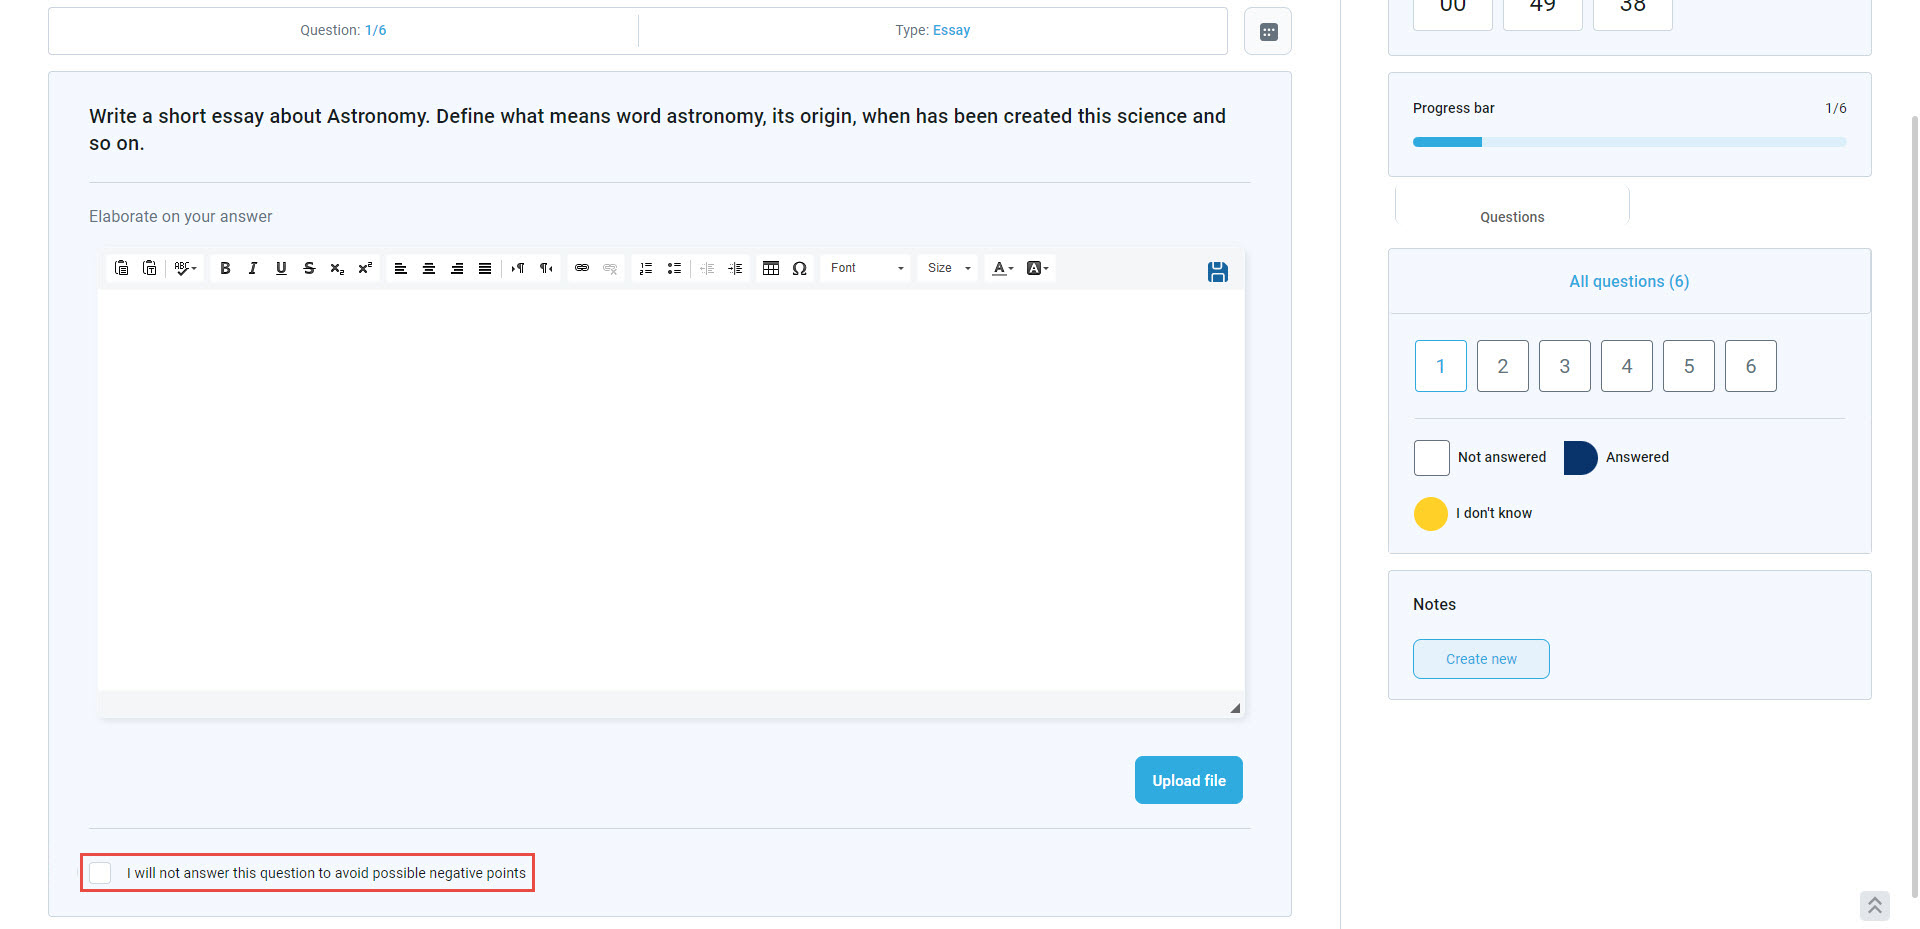
- Enable “I don’t know” option – test-takers can check the I don’t know box when answering the question to avoid negative points.

- Enable answer feedback– This option enables feedback for the selected answers during the test-taking process, which will be displayed upon moving on to the next question. Feedback should be defined during the question creation process.

-
Show question attachments – Show question attachments to candidates during the test-taking process.
-
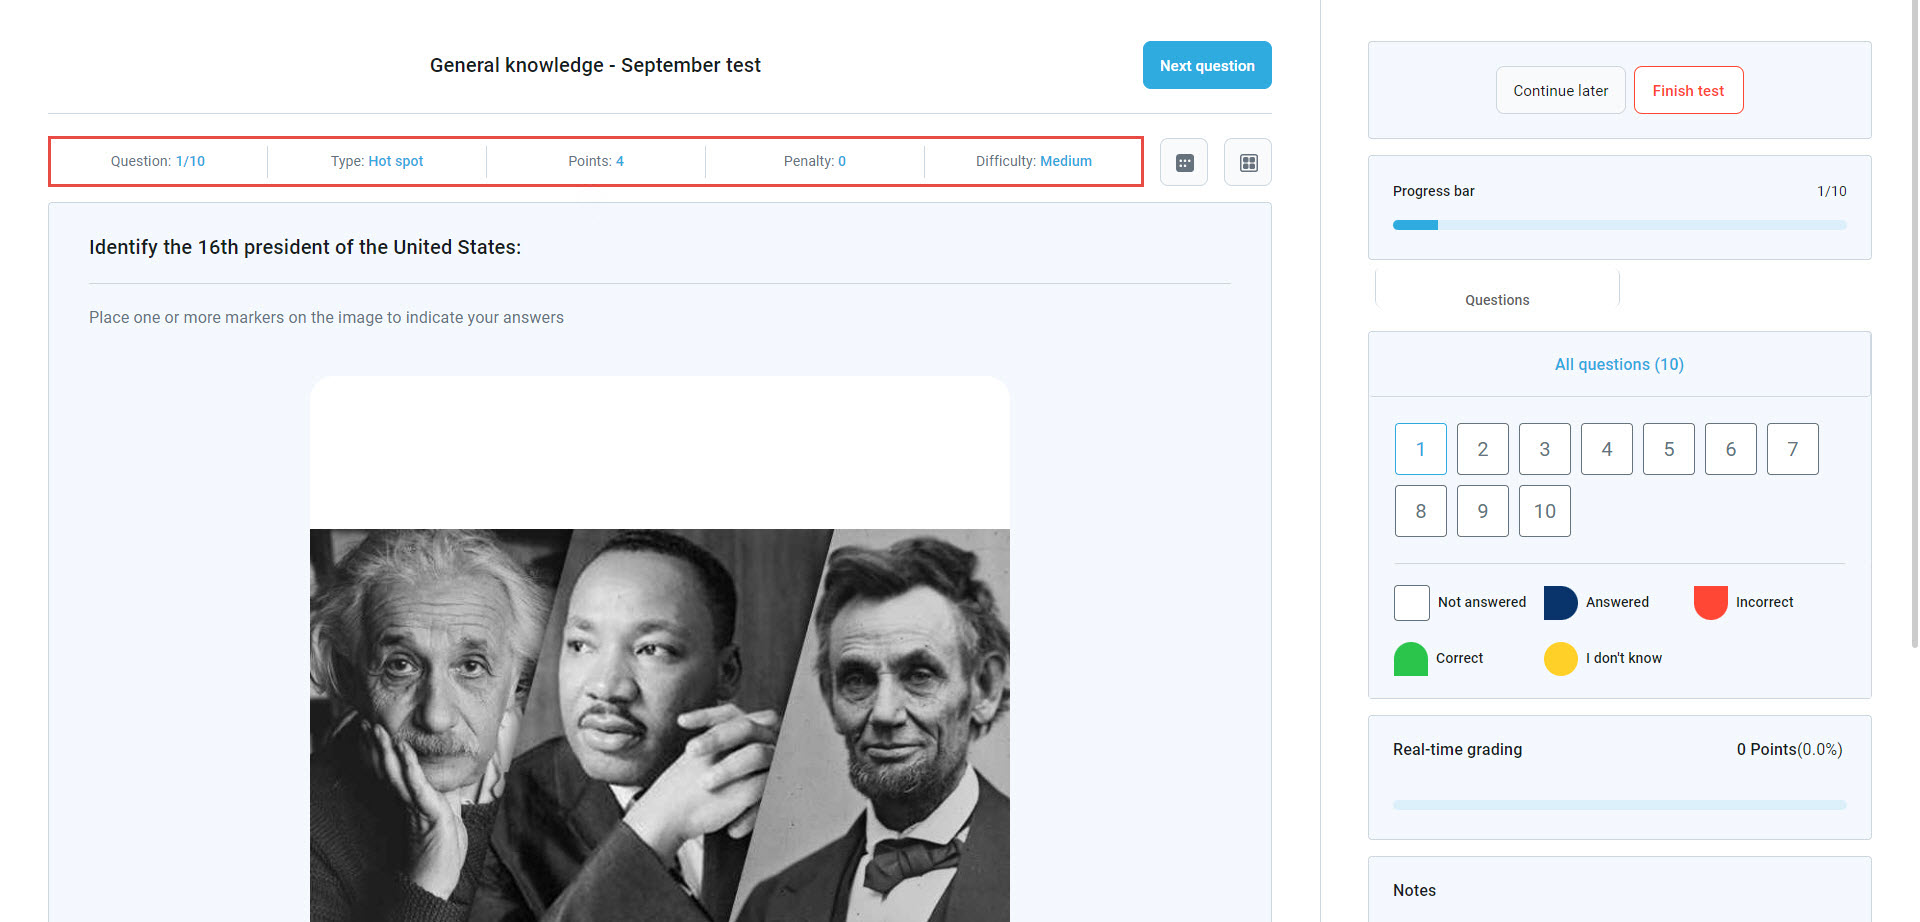
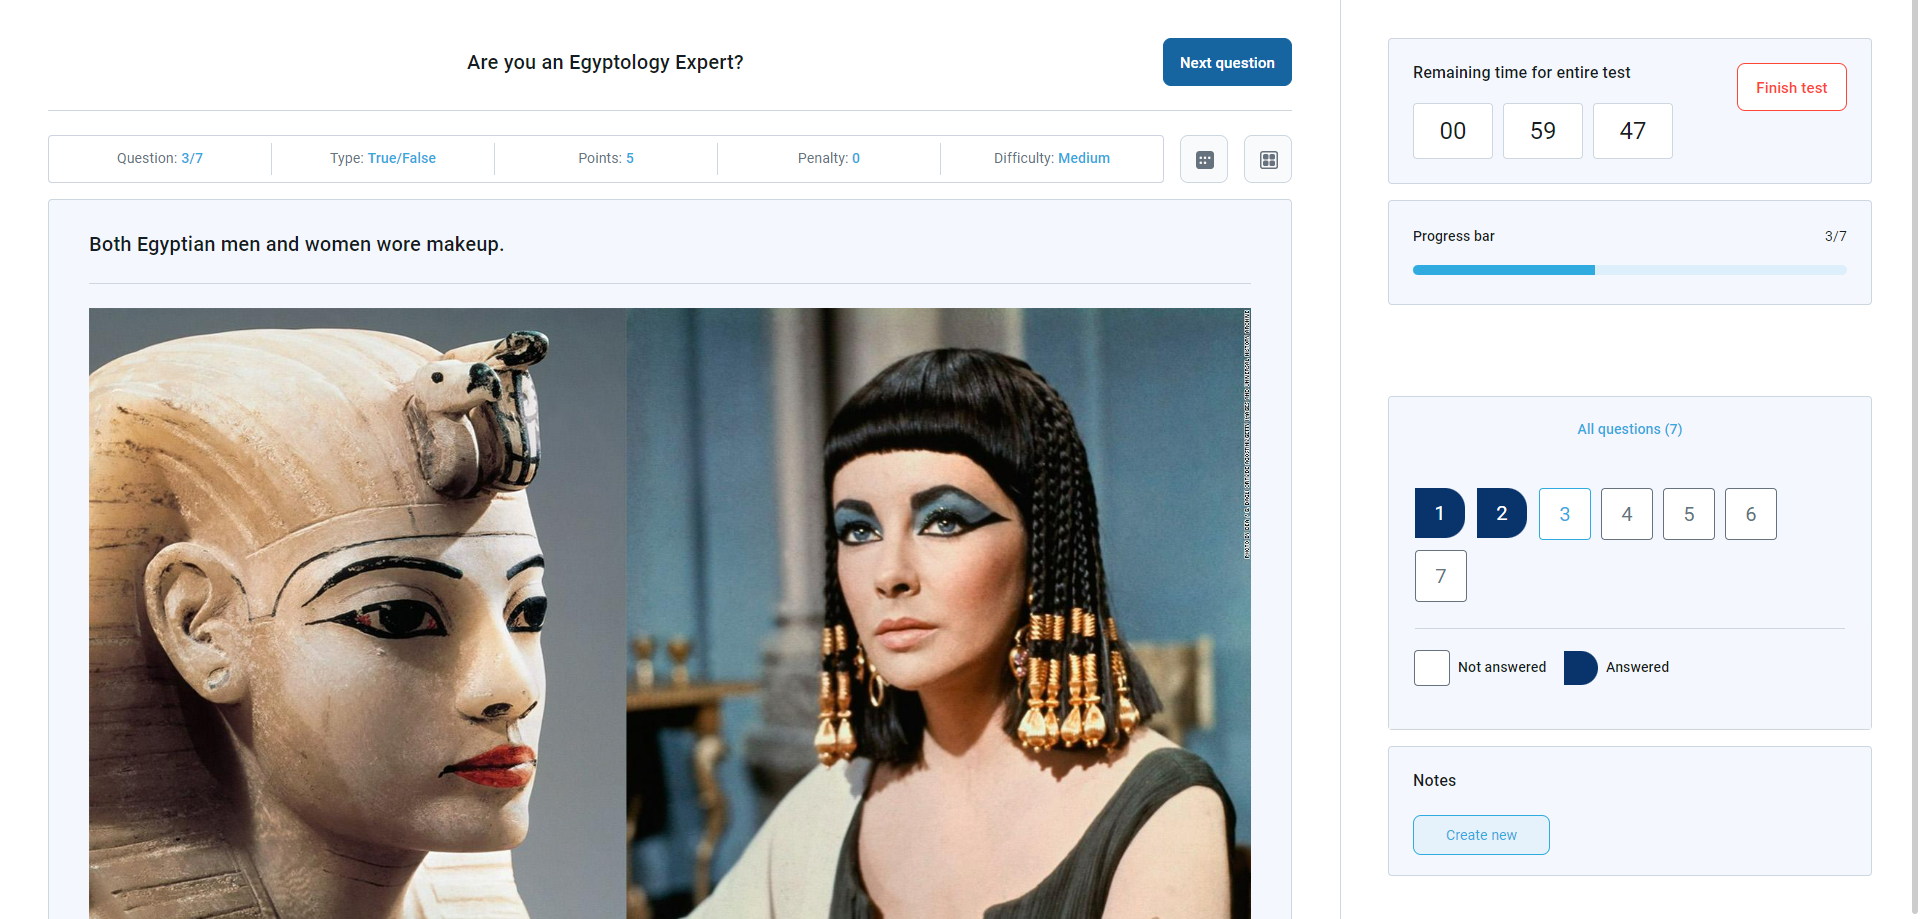
Show question metadata to candidate– test-takers will be shown question points, type, and difficulty level during the test-taking.

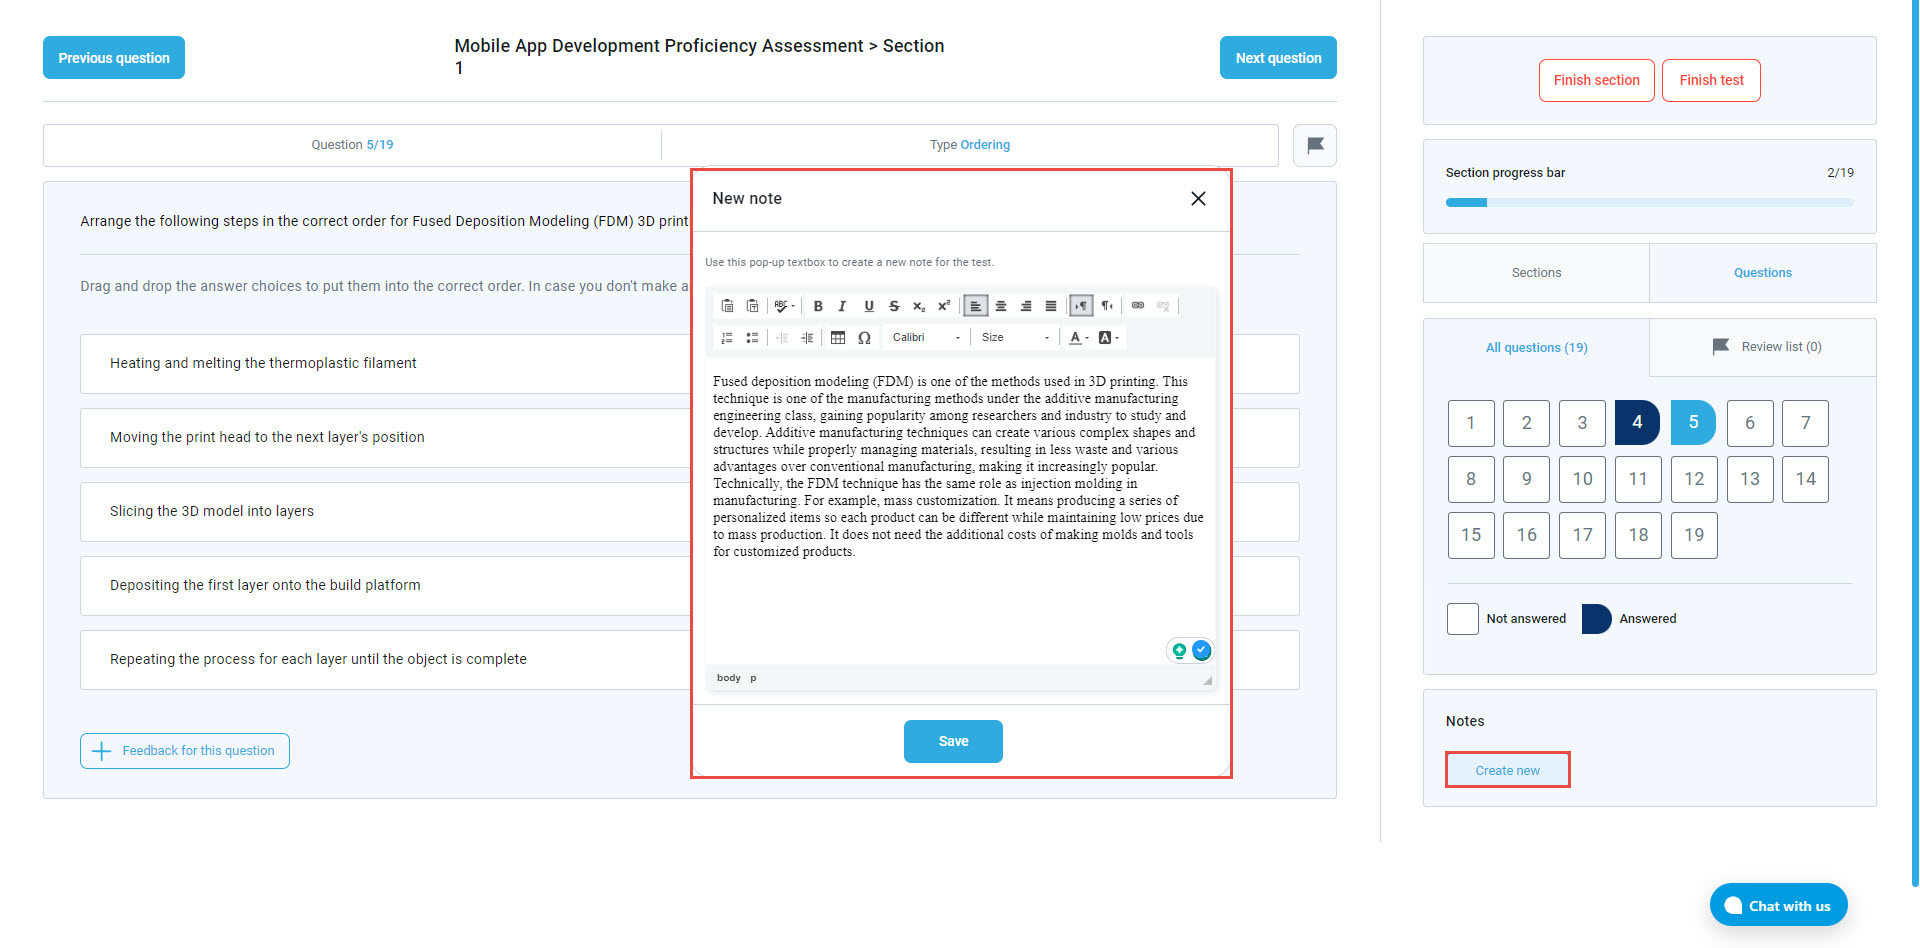
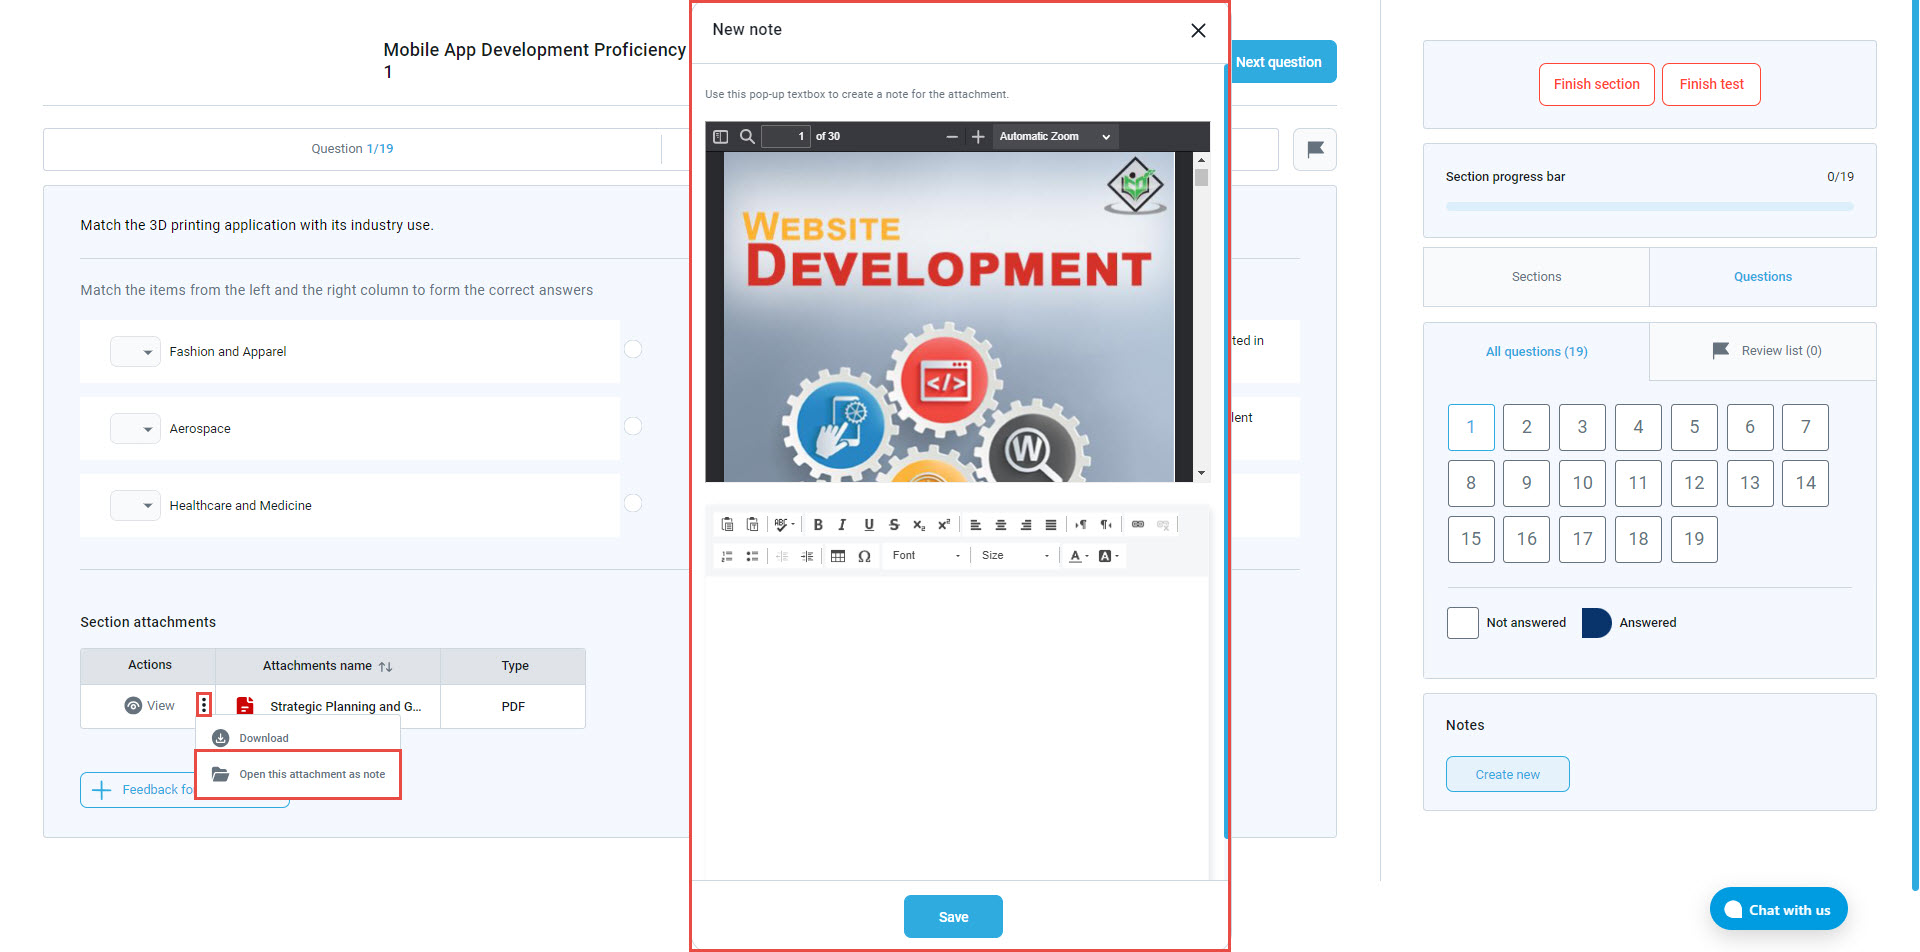
18. Enable notes– Allow test-takers to take notes during the test-taking. They will be presented with a text editor where they can write formatted and styled text. This option will only make the notes visible to the candidate during test-taking. If the test contains sections, you must enable notes on each one.

Further, if the test or question has attachments, the test-taker can open the attachment as a note and write text underneath it by selecting the Open this attachment as note option.

19. Make notes persistent – If checked, the notes will be saved and presented in the report for both instructors and candidates.
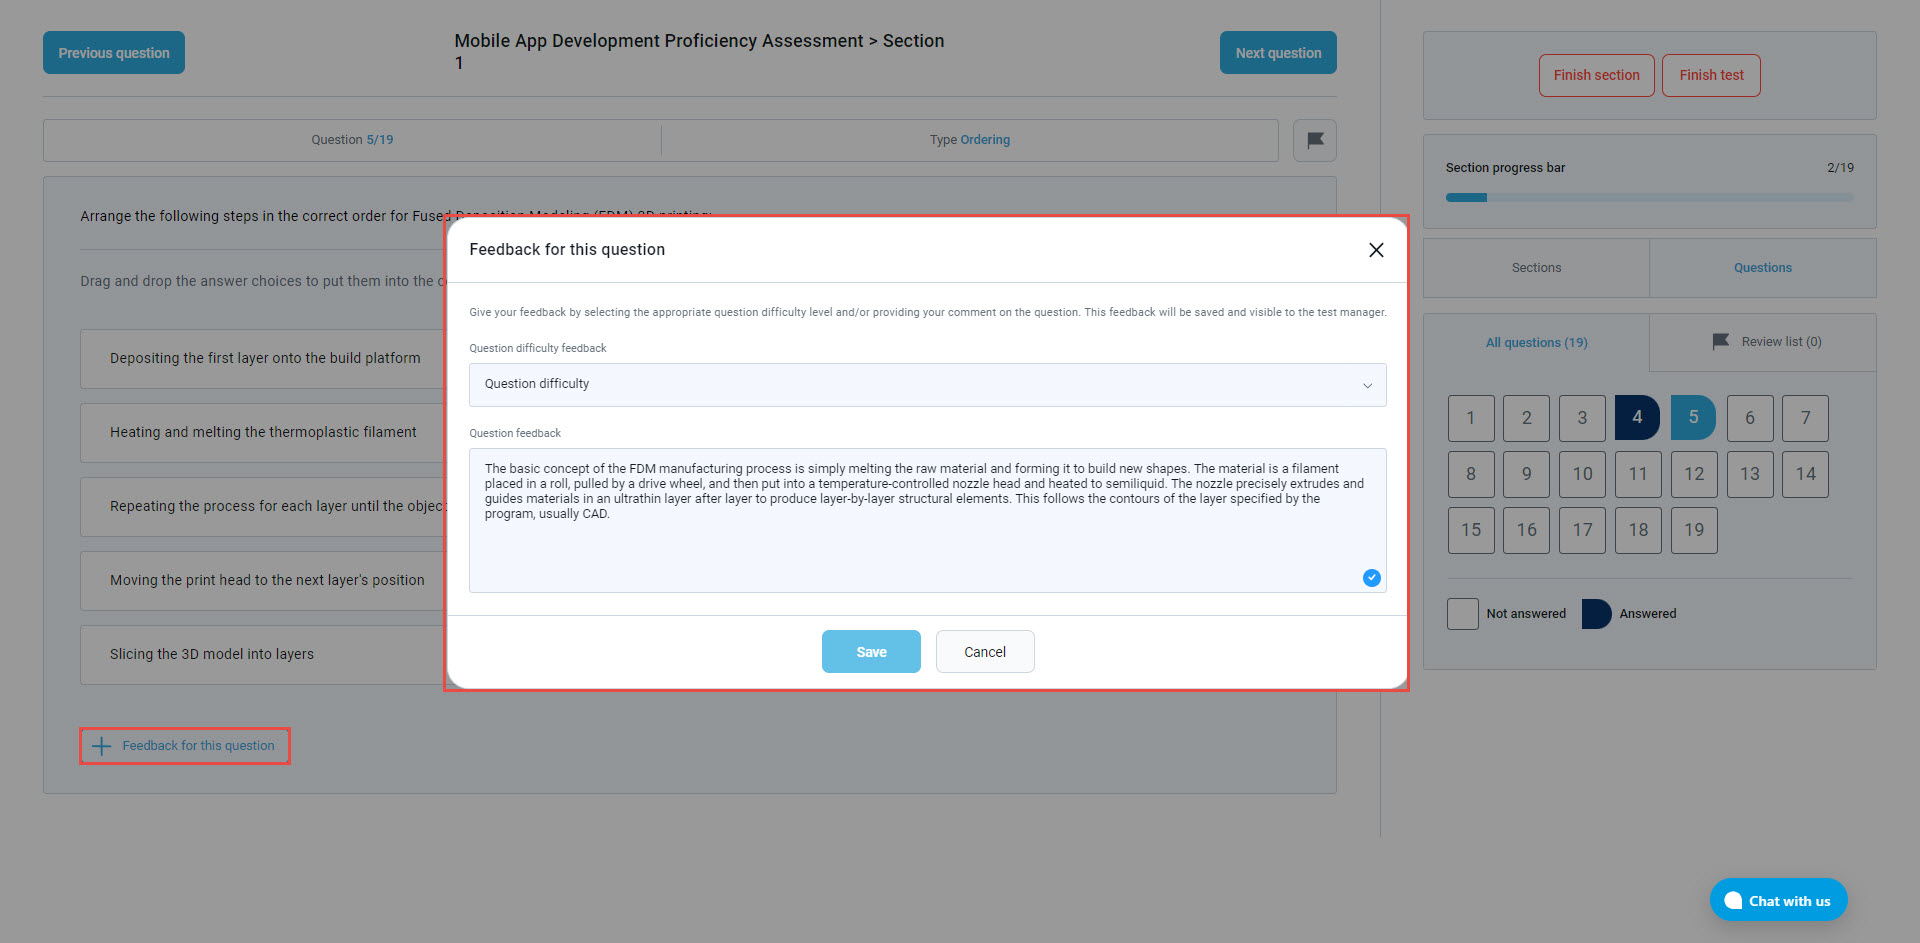
20. Enable candidates’ feedback on questions– Allow candidates to leave feedback on each question during the test-taking process.
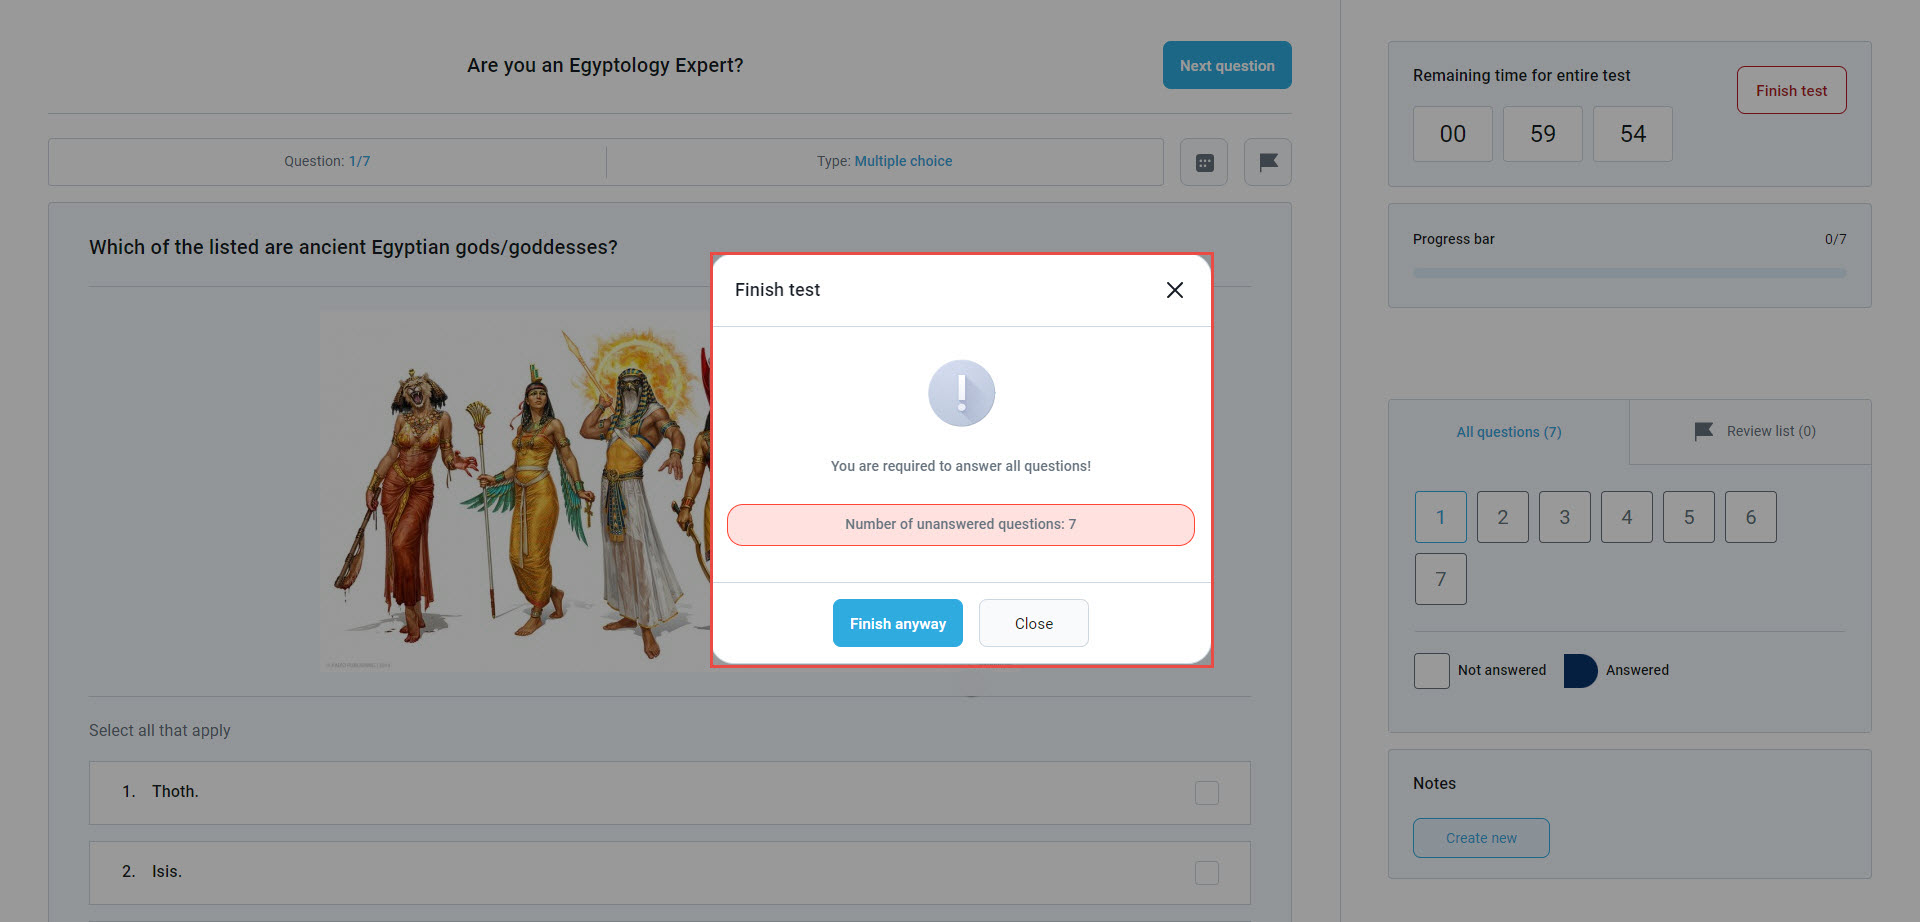
21. Require answering all questions– If you choose this option, candidates will be notified that it is required to answer all questions before finishing the test. Still, they can click the Finish Anyway button to finish the test.
22. Disable going backward in the test– test-takers cannot go back to the previous questions while taking the test, if you check this option.

23. Disable deselect– do not allow the test-takers to deselect their answers once selected. This applies to the single-choice, multiple-choice, and true/false questions.
24. Automatically log out candidates after finishing– the candidates must log out of the application after test completion.

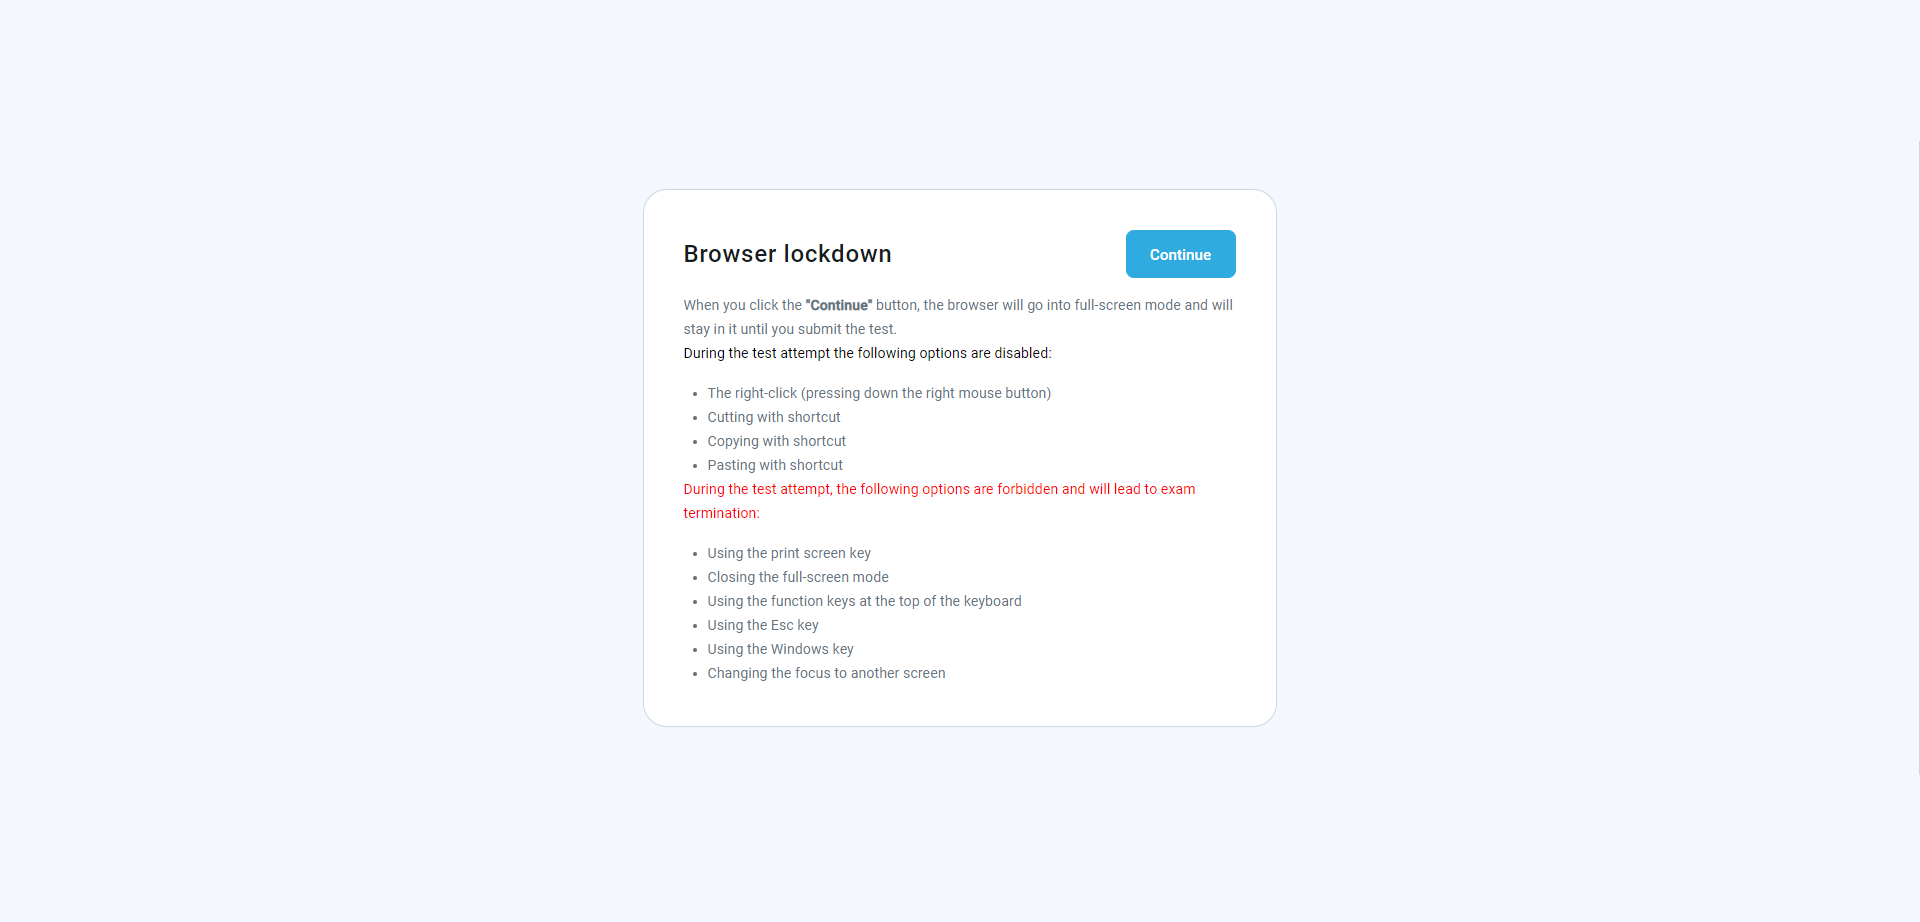
25. Enable browser lock-down– the test-takers cannot cut, copy, save, or print anything from the screen during the test-taking process. Also, the web browser will be in full-screen mode, and if the users try to minimize it, the test attempt will be terminated.
-
Built-in protection– the test-takers cannot cut, copy, save, or print anything from the screen during the test-taking process. Also, the web browser will be in full-screen mode, and if the users try to minimize it, the test attempt will be terminated.
-
Safe Exam Browser– Test-takers can only do the exam using the Safe Exam Browser (SEB). SEB offers complete protection from cheating by turning off all third-party screenshot programs, screen recorders, and chat applications. By selecting this option, a default configuration will be used for SEB. Configuration files can be changed by uploading a custom configuration created with the SEB Configuration Tool. SEB needs to be downloaded and installed on all test-taker devices (test-takers will see a download link for SEB if they start a test with a different browser).
Note: This option can not be combined with the Allow test continuation option. Also, this option will not function if proctoring is enabled.
-

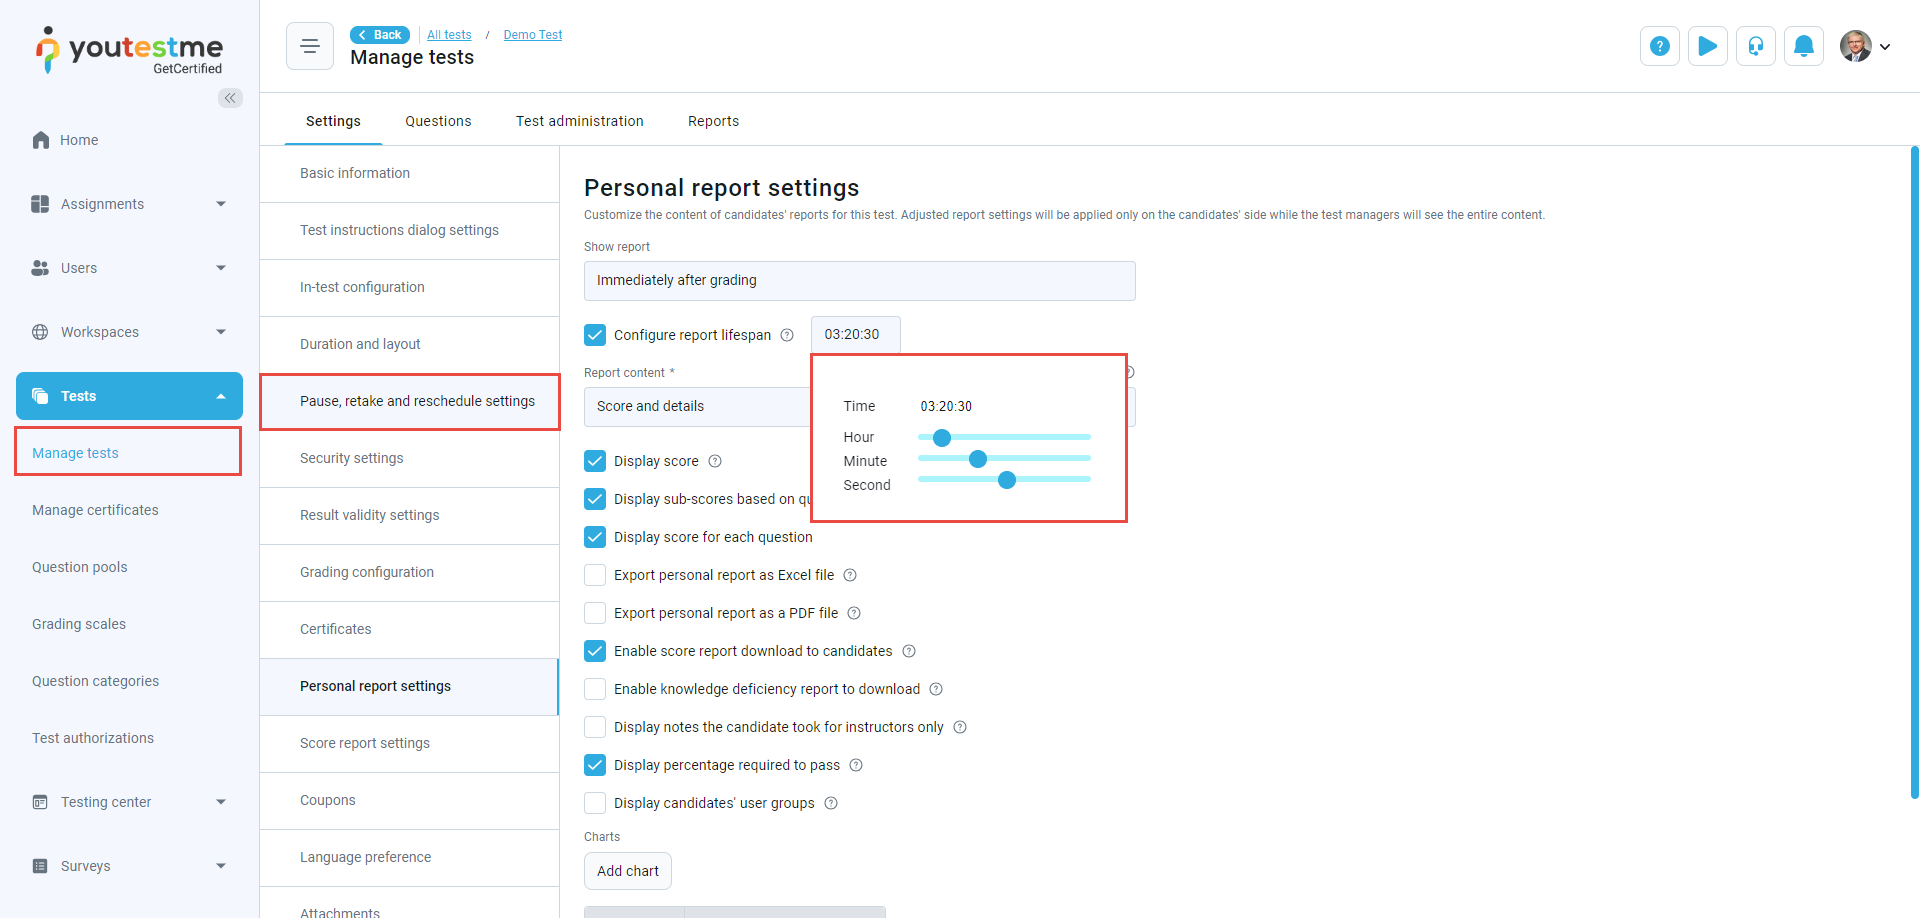
26. Hide assignment metadata – Enable this option to hide metadata on the Assignments page (logo, assignment type, location, certificate name, etc.).
27. Configure report lifespan – set how long the question details are visible to the test-takers after they open their personal report for the first time.
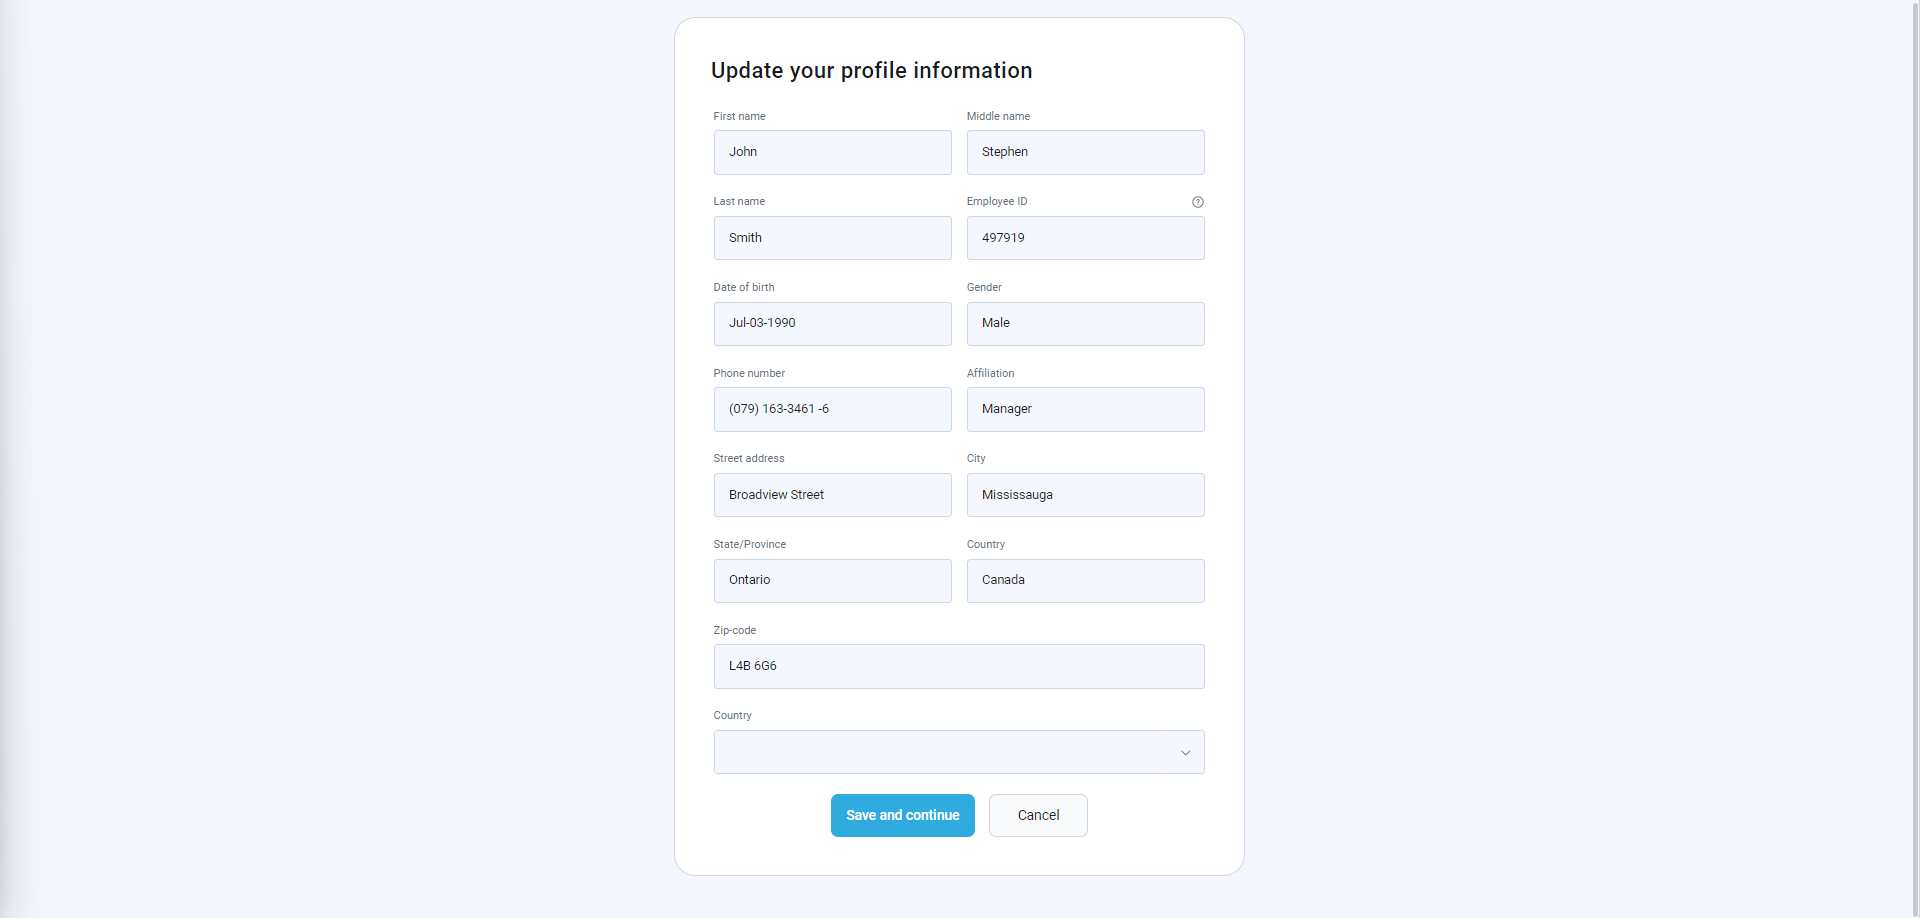
28. Require updating personal information – when initiating the test, a form with the test-taker’s personal information will appear. The test-takers can update their personal information before starting the test.
29. Network access – you can limit access to the test only to people within your local (internal) network. Please see the internal network for more information on defining the internal network.
30. Set Delivery preference – Delivery preference is a filtering label used for test categorization. Depending on the chosen type of delivery preference, the candidate will choose among the common testing containing tests that favor the chosen delivery preference. Delivery preferences include Online (Default), Paper-based, Pearson VUE testing center, Online AI-proctored, and Online live-proctored.
Adding questions
You can choose from the following methods to add questions to your test:
- ‘Pick questions from pools or create them on the spot,’ or ‘Upload a test. ’
- ‘Let the generator select questions. ’
For more information about creating a generated test, please view this article.
In this guide, we will use the “Pick questions from pools or create them manually” method.
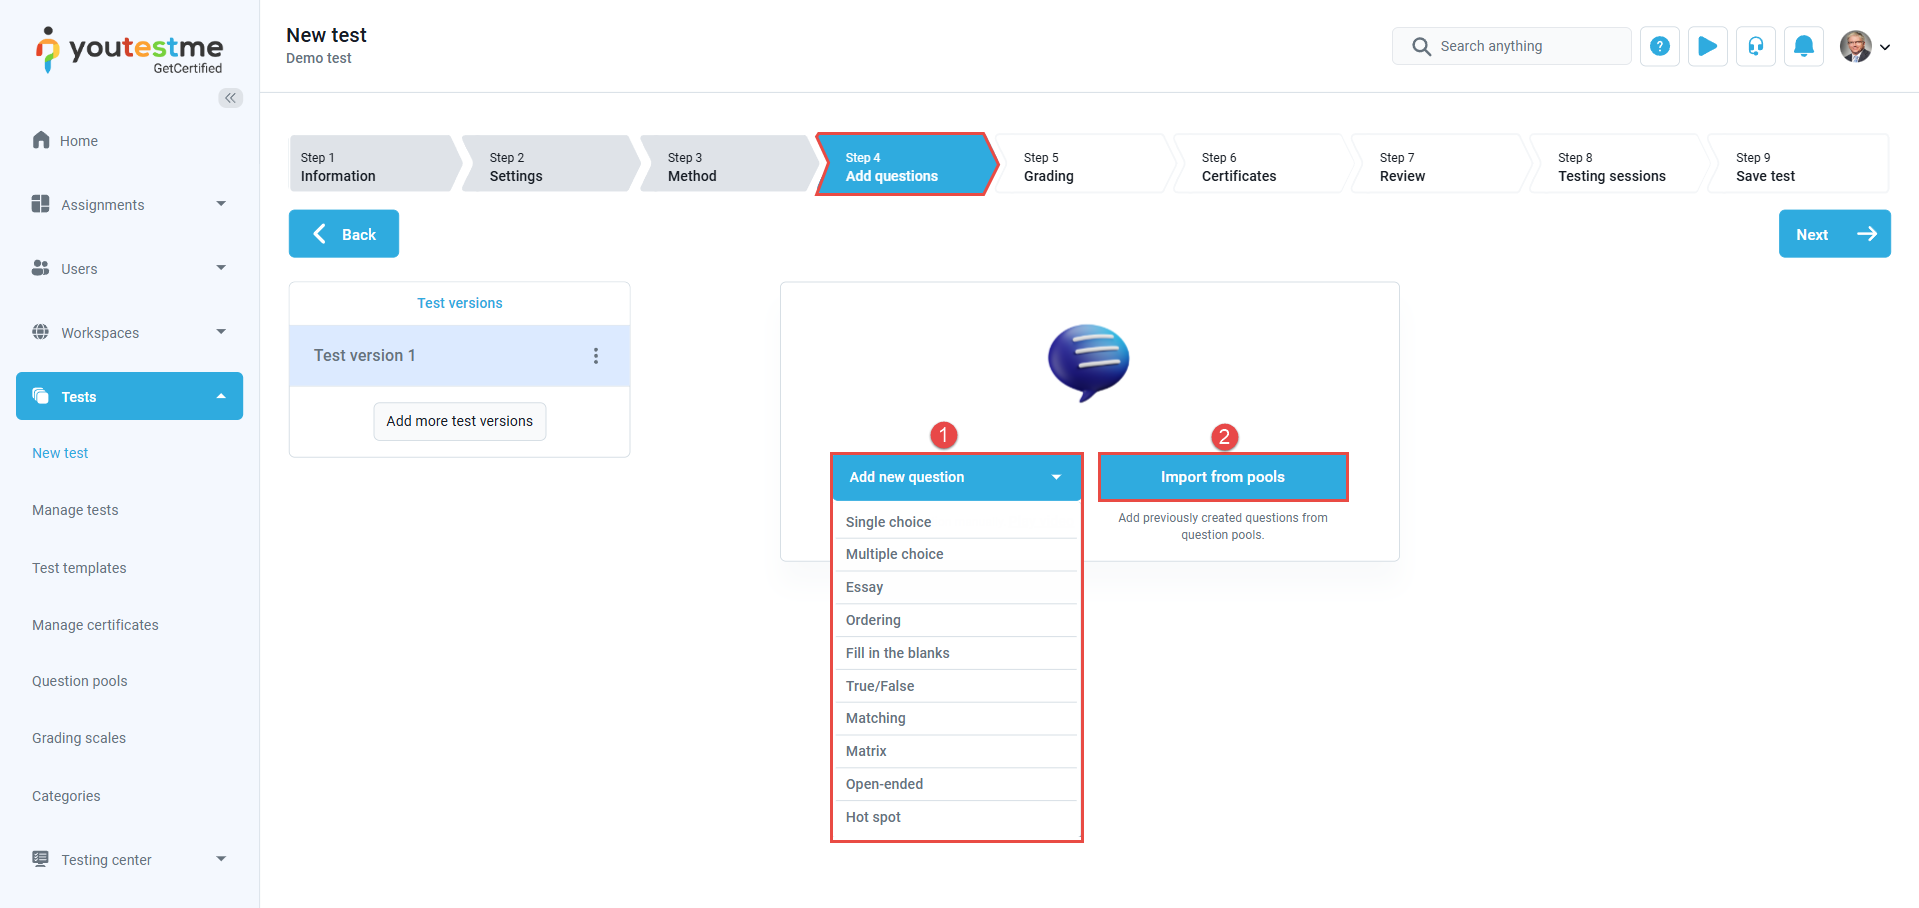
Within this method, you have two options:
-
Add New Question – Manually create a question using the desired format and type.
-
Import from Pools – Select a question pool and import the required number of questions.
In the following steps, we will demonstrate how to manually add questions to your test.
Here is an example of how to add a single-choice question.
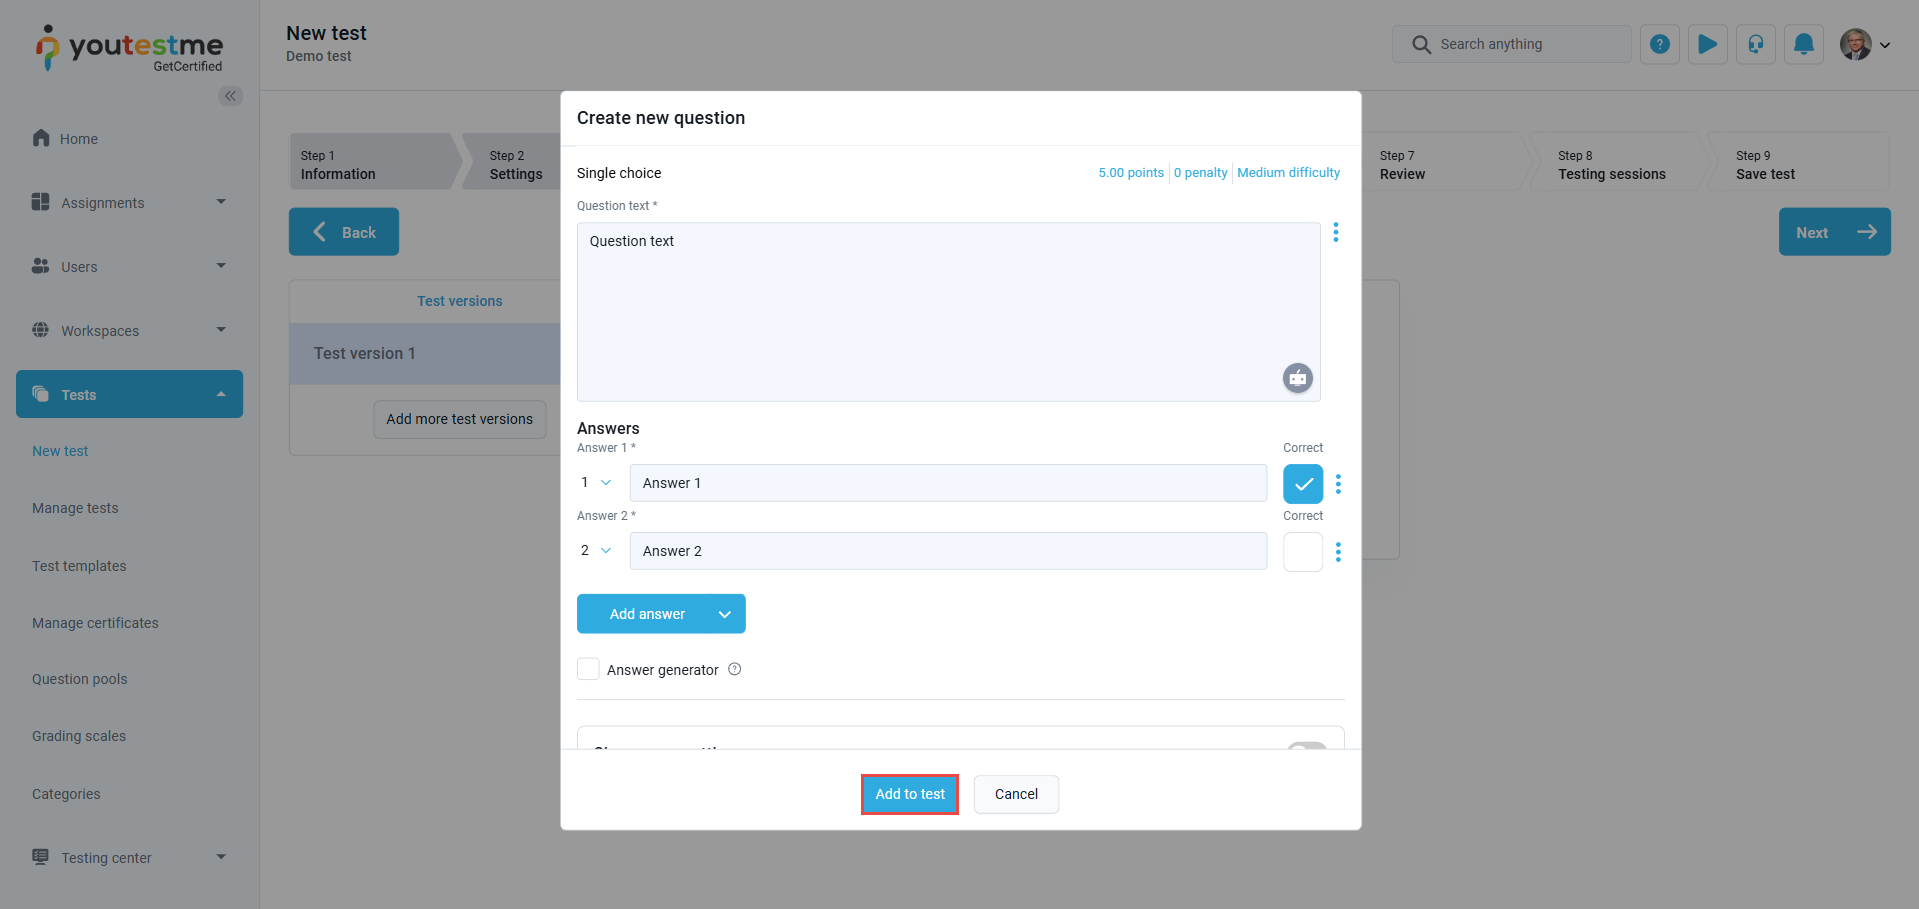
Once you fill in the question text field, add answer choices, and select the correct answer. Add the question to the test by clicking the Add to Test button at the bottom of the page.
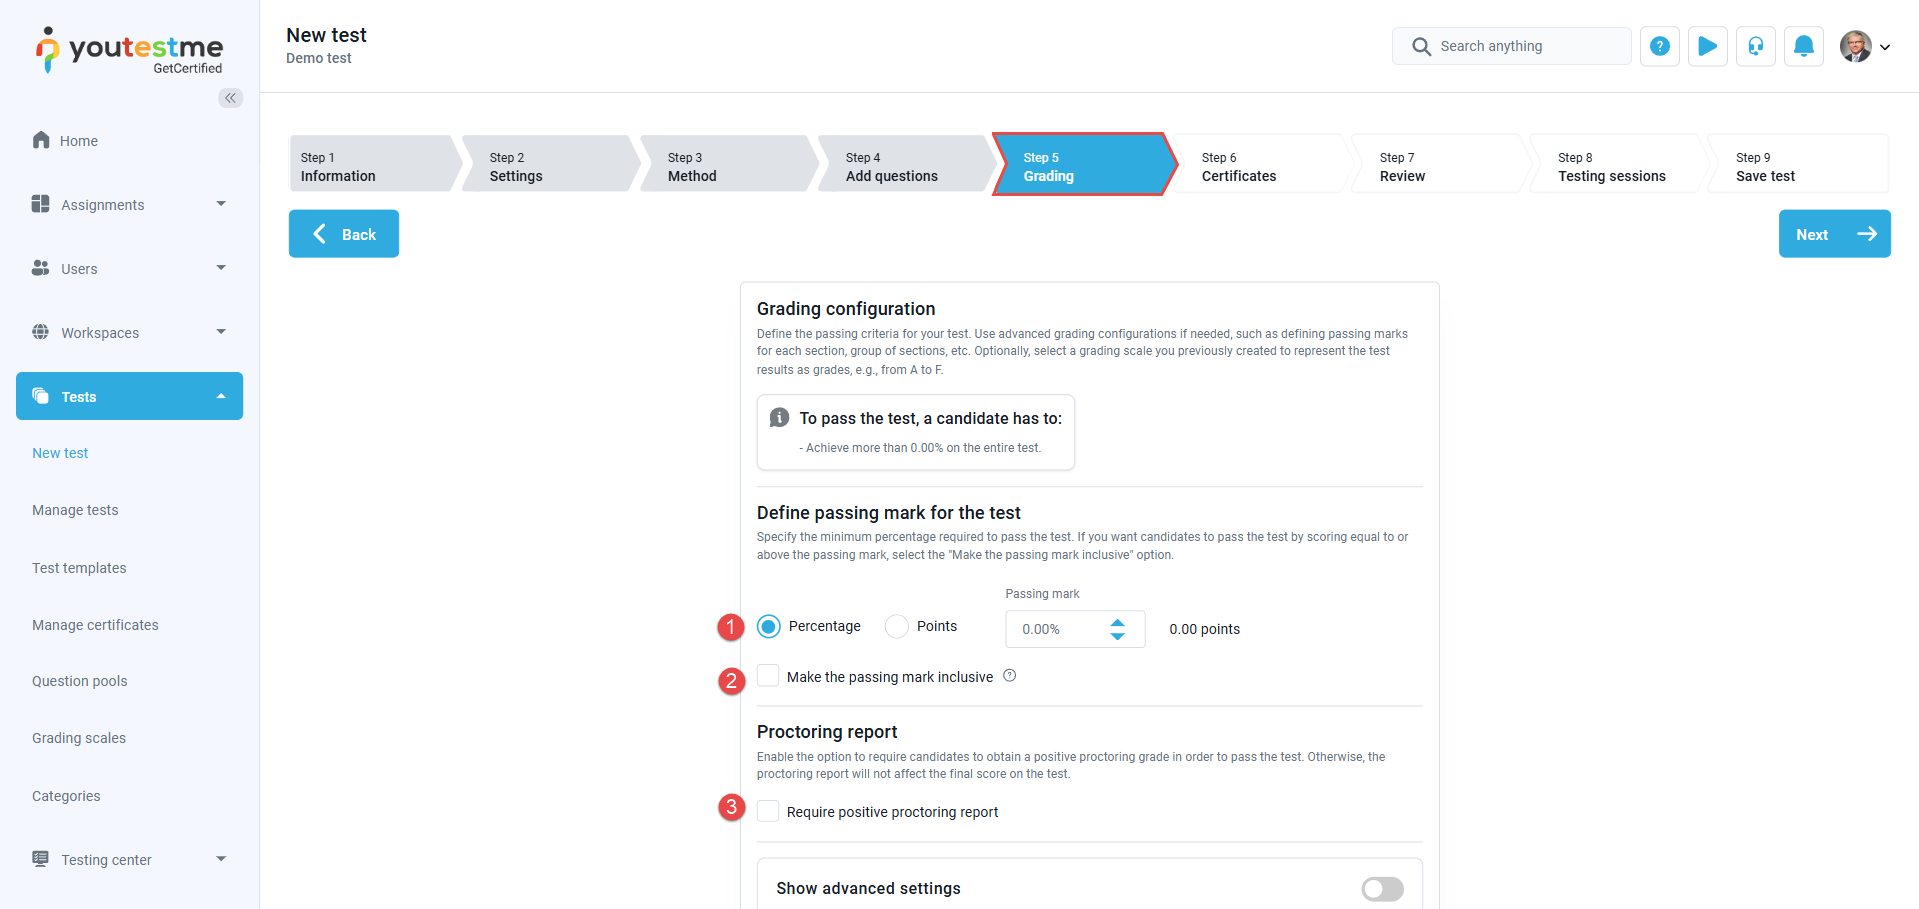
Grading test
On this step, you can define the passing criteria for your test. Use advanced grading configurations if needed, such as defining passing marks for each section, group of sections, etc. Optionally, select a grading scale you previously created to represent the test results as grades, e.g., from A to F.
-
Set passing mark – Define the passing mark in percentage or points.
-
Make the passing mark inclusive, and candidates will pass the test if they gain a score equal to or higher than the passing mark.
-
Enable the option to require candidates to obtain a positive proctoring grade in order to pass the test. Otherwise, the proctoring report will not impact the final score of the test.

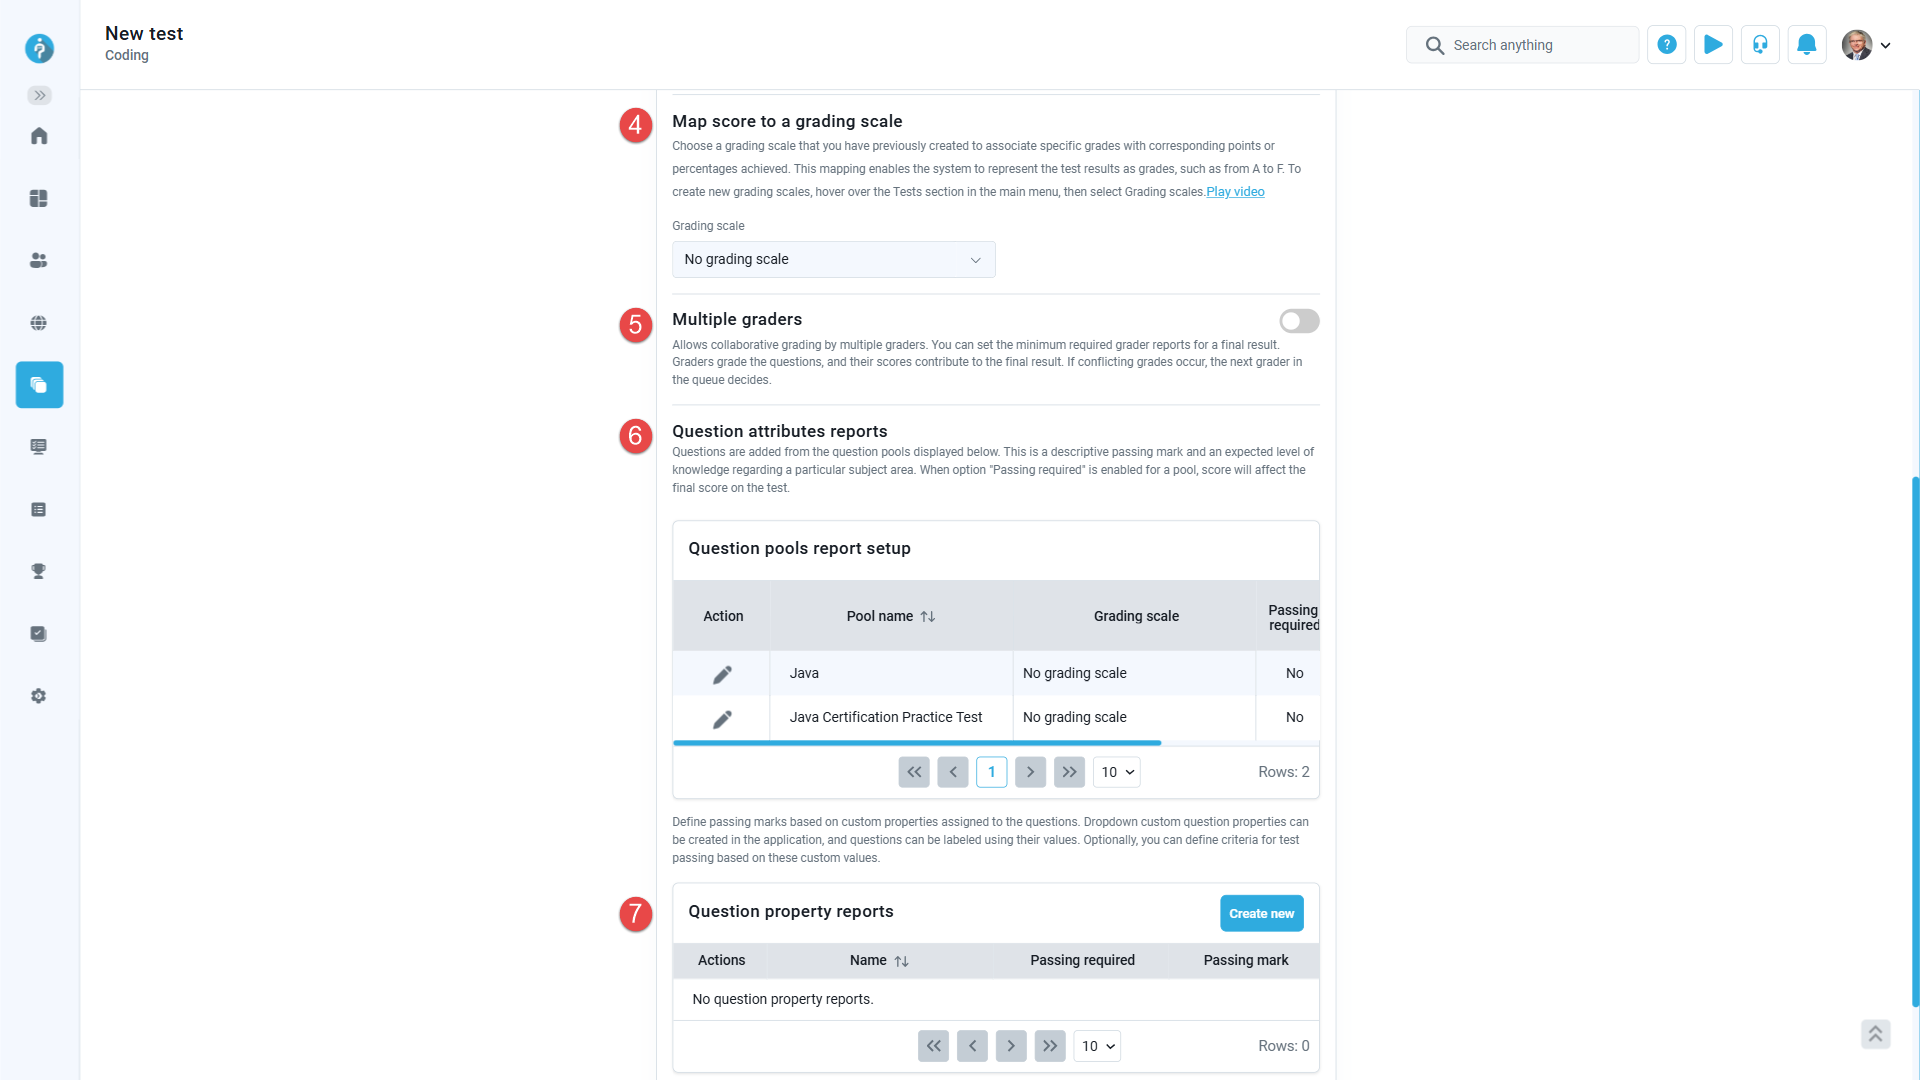
-
Select a grading scale that you have previously created to link specific grades with corresponding points or percentages achieved. This mapping allows the system to represent the test results using grades, for example, from A to F.
-
Allows collaborative grading by multiple graders. You can set the minimum required grader reports for a final result and enable automatic grader assignments. With auto-assign enabled, the system automatically dispatches grading requests to the specified number of graders based on the minimum required grader reports configuration. Alternatively, you can manually add graders for each candidate’s attempt. In both cases, graders are chosen from the list defined under the Test administration page.
Once a candidate completes the test, the assigned grader for that specific version, first in the queue, receives a notification. If a grader declines the request, it moves to the next in the queue until the minimum accepted reports are received. Graders assess the questions, and their scores contribute to the final result. In cases of conflicting grades, the next grader in the queue makes the decision. For more detailed information, refer to the Grader report help page.
-
View the list of all question pools used in the test and define passing marks for each. These passing marks represent the expected level of knowledge for a particular topic but do not affect the final score on the test, unless “Passing required” is checked. In that case, the achieved percentage has to be greater than the passing mark in order to pass the test. Option “Inclusive passing mark” allows the achieved percentage equal to or greater than the passing mark.
Ability to define a grading scale for each pool in the Question Pools Report Setup. This feature allows setting specific grading scales per pool, providing a detailed performance overview for each topic. It helps assess student performance in each area independently, offering insights into strengths and weaknesses.
-
Define passing marks based on custom properties assigned to the questions. Dropdown custom question properties can be created, and questions can be labeled using their values. Optionally, you can define criteria for test passing based on these custom values.

Certificates
In this step, you can either create a new certificate or use an existing one. This step is optional.
For detailed instructions on how to create a certificate, please refer to this article.
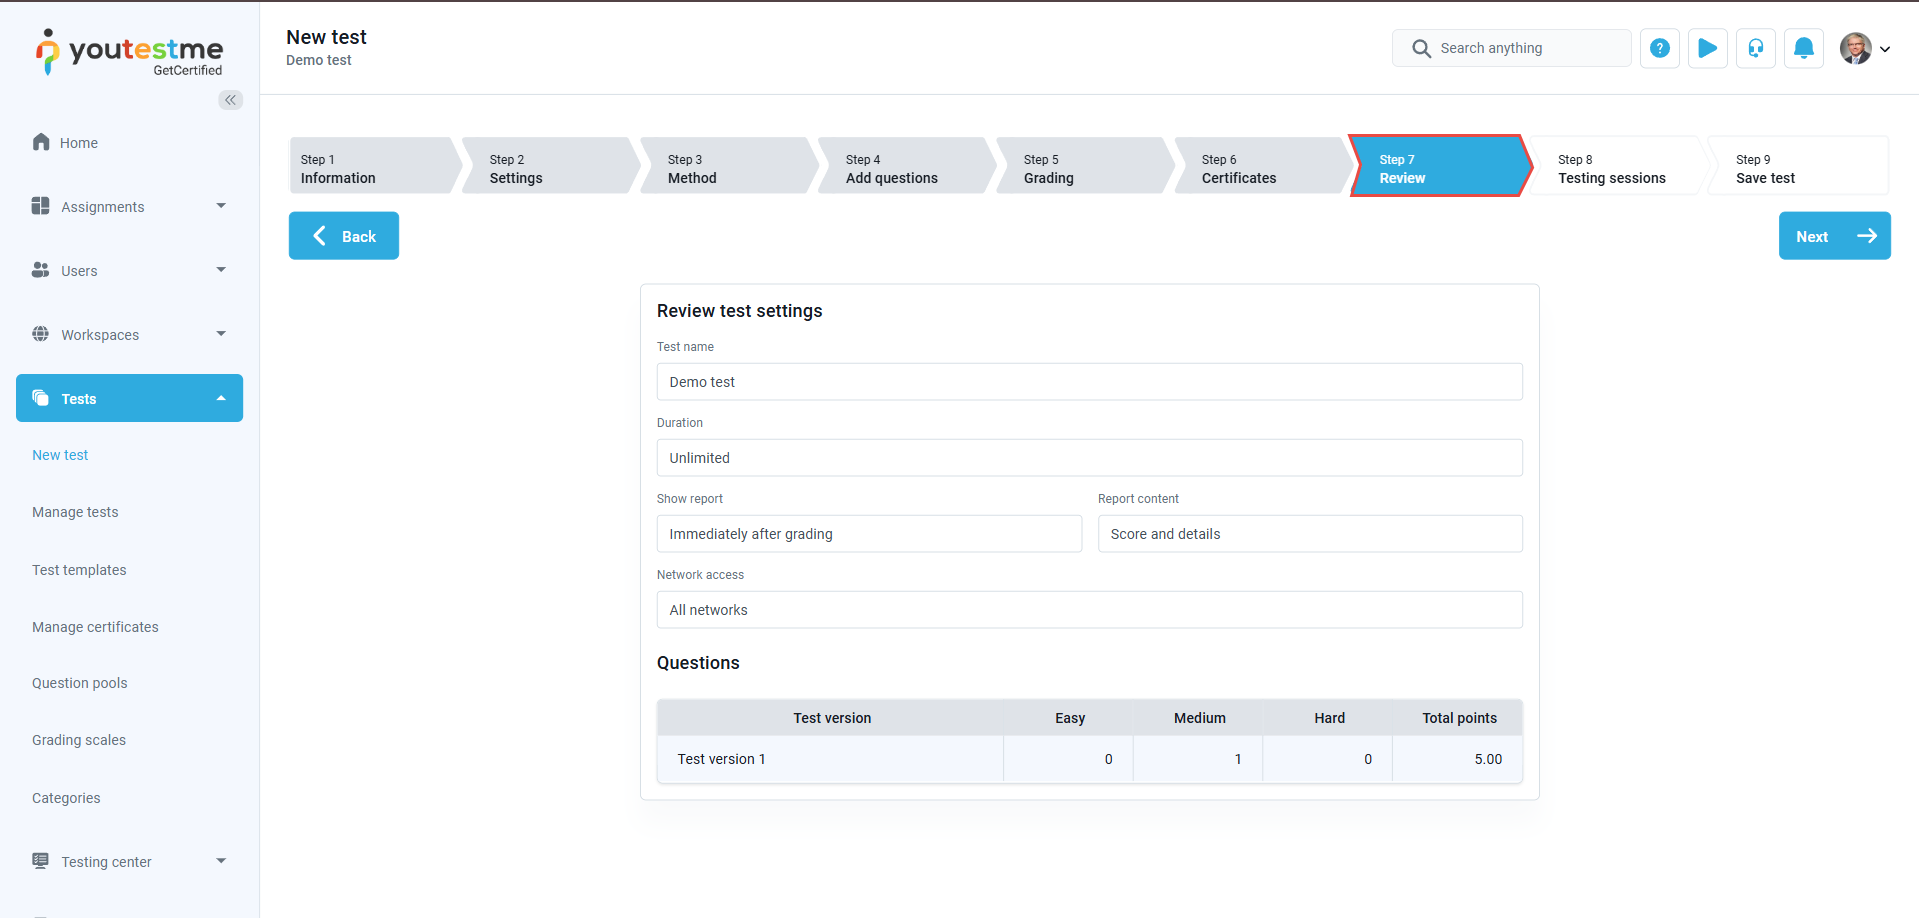
Review a simple test
The next step in the test creation process is Review. It summarizes the test settings and lists the questions or question pools used. If you are satisfied with your test settings, you can press the Next button to continue the test creation process. If you want to change the existing tests, you can still go back and edit them.
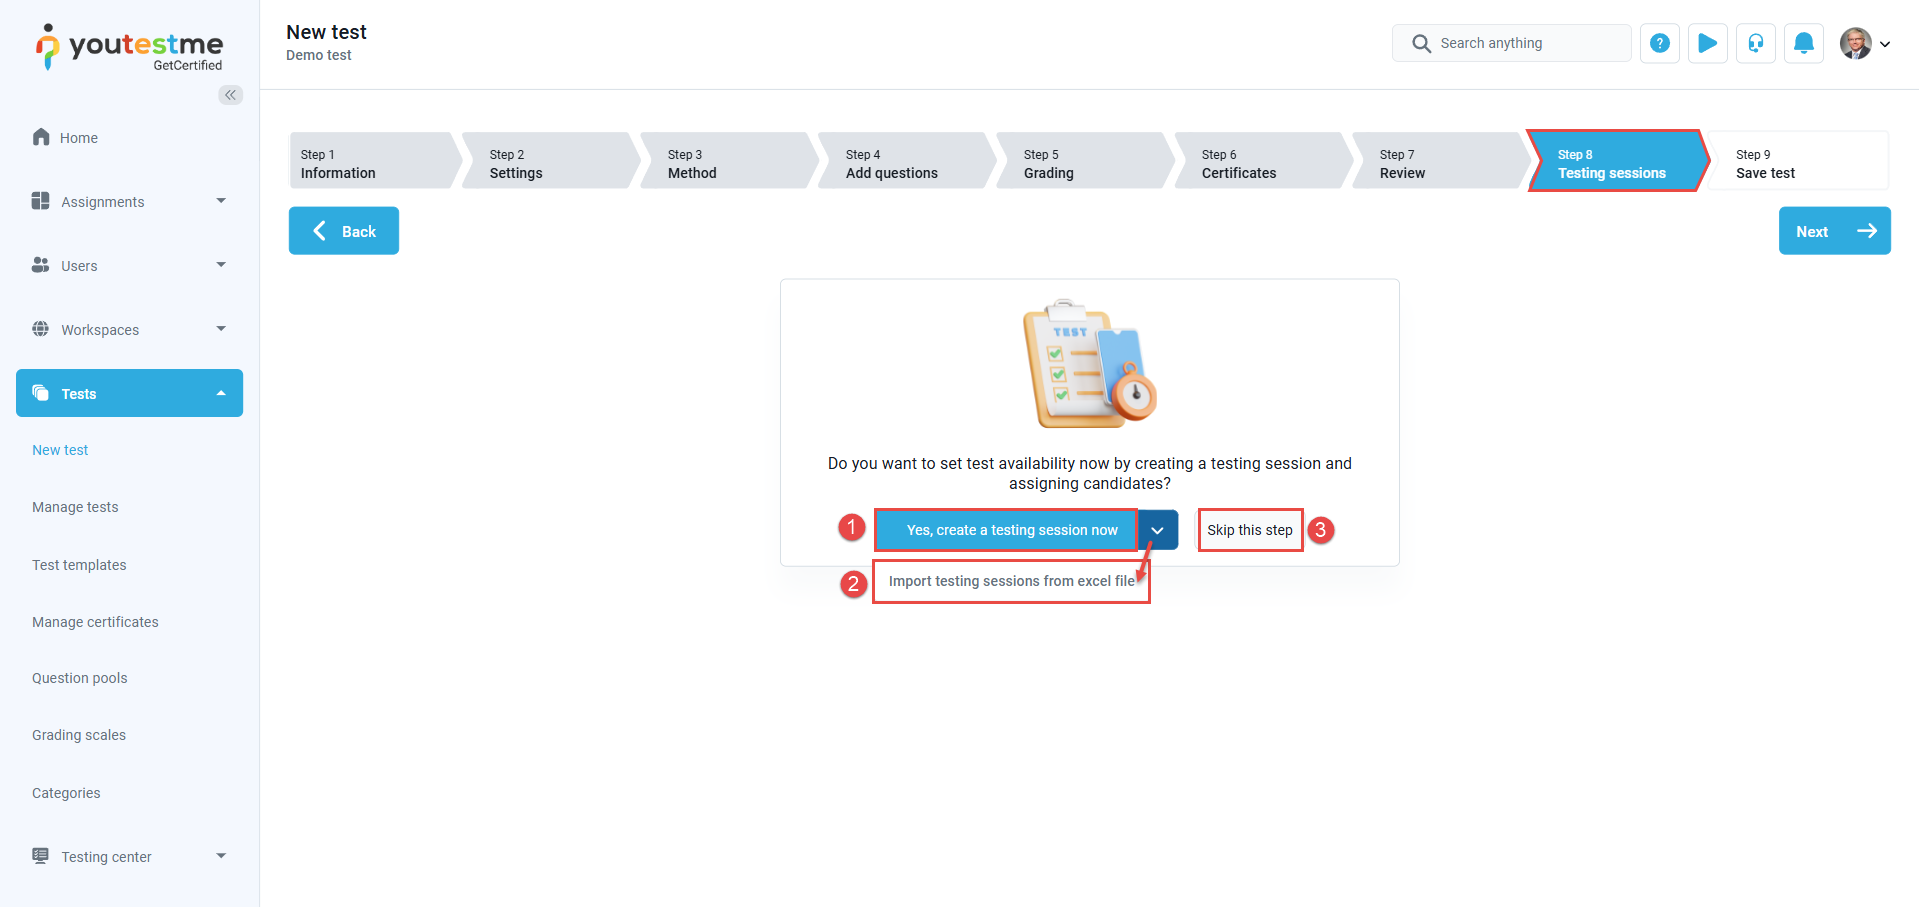
Testing sessions
In this step, you have the option to create testing sessions. The testing sessions allow you to organize tests for candidates located at different locations (e.g., different time zones, states, continents, etc.).
- Manually create a testing session – For step-by-step instructions, please refer to this article.
- Import testing sessions via Excel – Upload an Excel file to import multiple testing sessions and assign candidates to each session directly within the file. For detailed guidance, see the article.
- Skip this step – Since this step is optional, you can skip it and proceed to the final step.
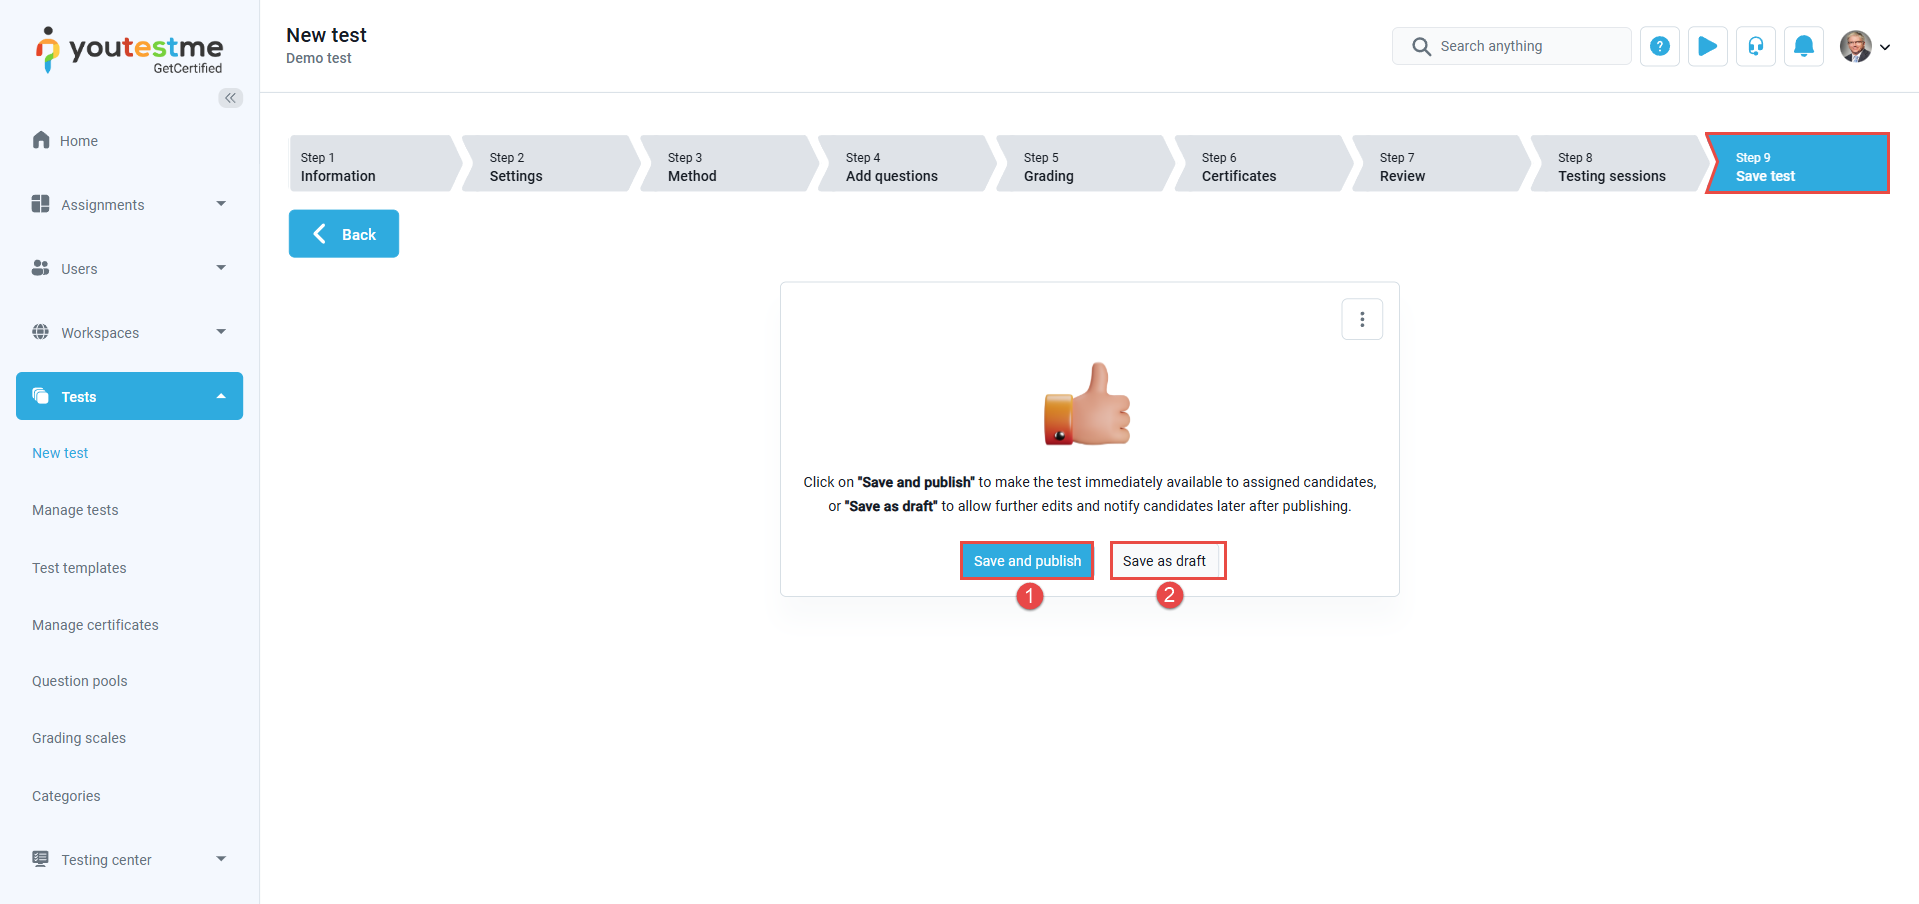
Save test
The final step in the test creation process is saving your test:
-
Click Save and Publish to make the test available to candidates. If a testing session has already been created and configured accordingly, the test will immediately become visible.
-
Click Save as Draft to save your test without publishing it. Even if testing sessions have been created, the test will remain hidden from candidates until it is published.
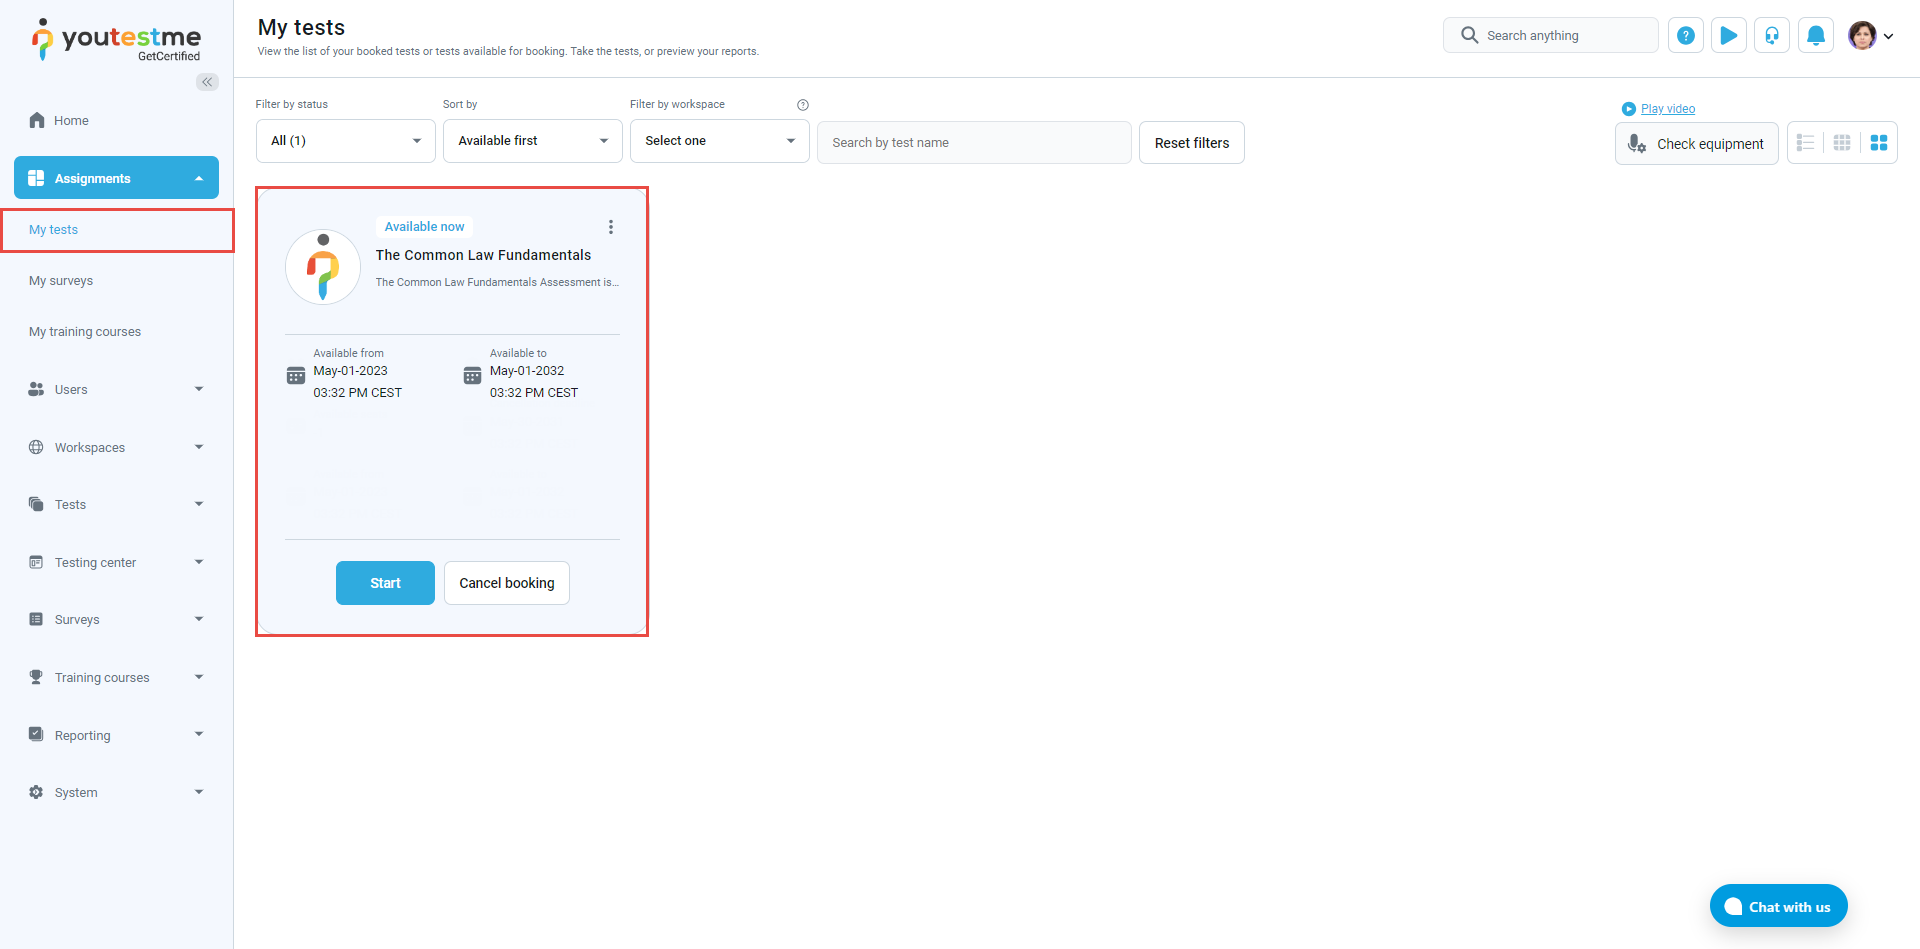
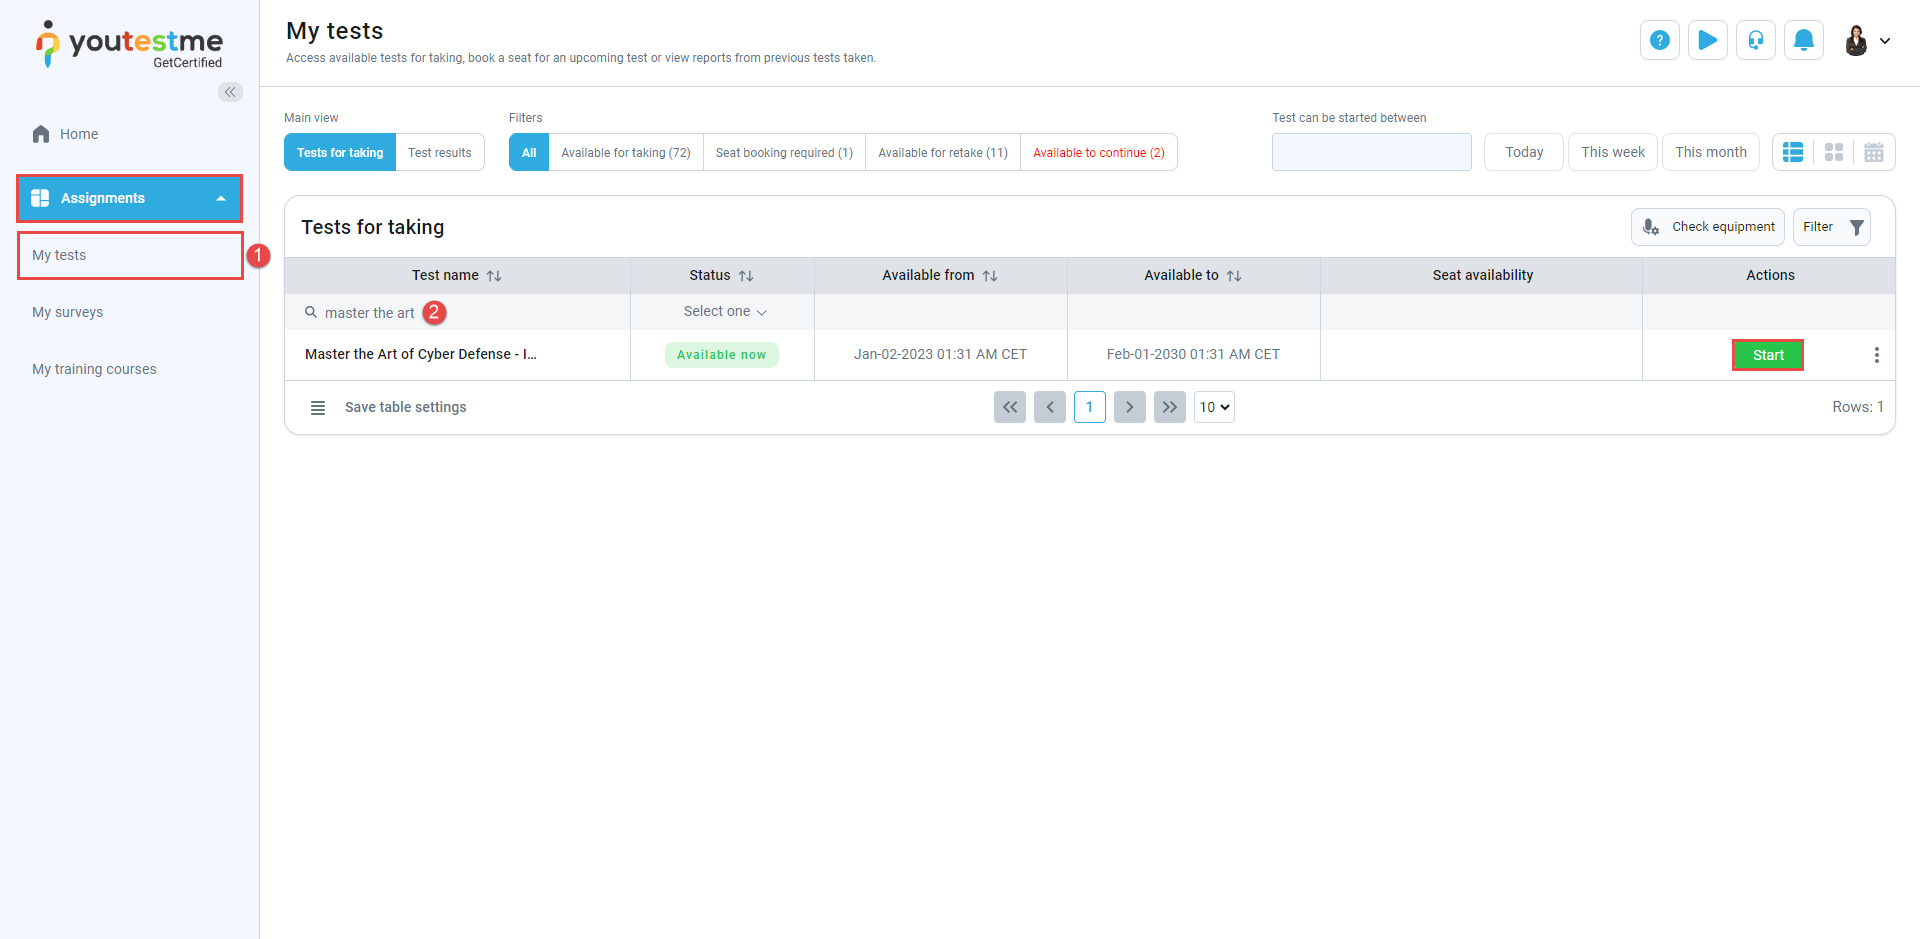
- Select the Assignments tab and then the My Tests tab.
- In the search bar, search for the desired test and select the Start option from the list of assignments for the test you want to take.
Note: For further information, please watch this video tutorial on creating a simple test without sections and assigning candidates.


