Article verified for Release 15.1 on October 1st, 2025.
This article explains how to manually assign certificates to candidates without requiring them to complete a test. This feature is helpful when a certificate needs to be issued retroactively or independently from test results.
Assigning a Certificate to a Candidate
To manually assign a certificate to a candidate, follow these steps:
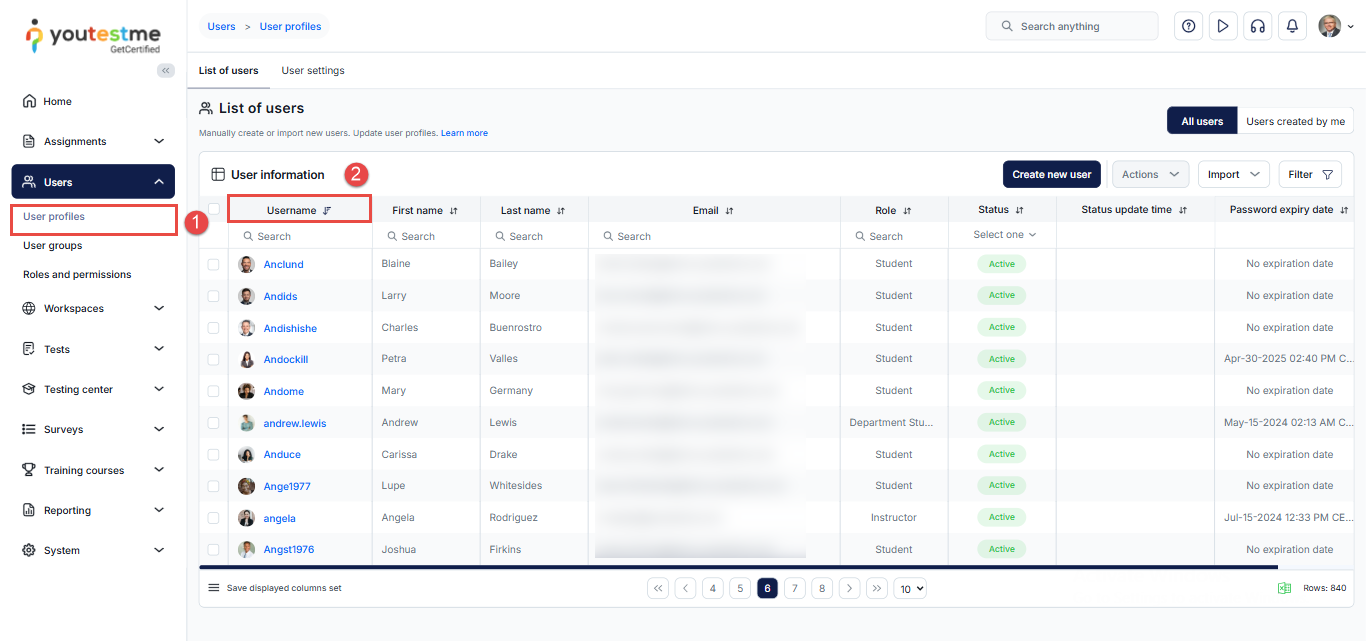
- In the main menu, select Users and then choose User profiles. The list of all users in the system will be displayed.
- Use the search box to find the candidate and click the username to open the candidate’s profile.
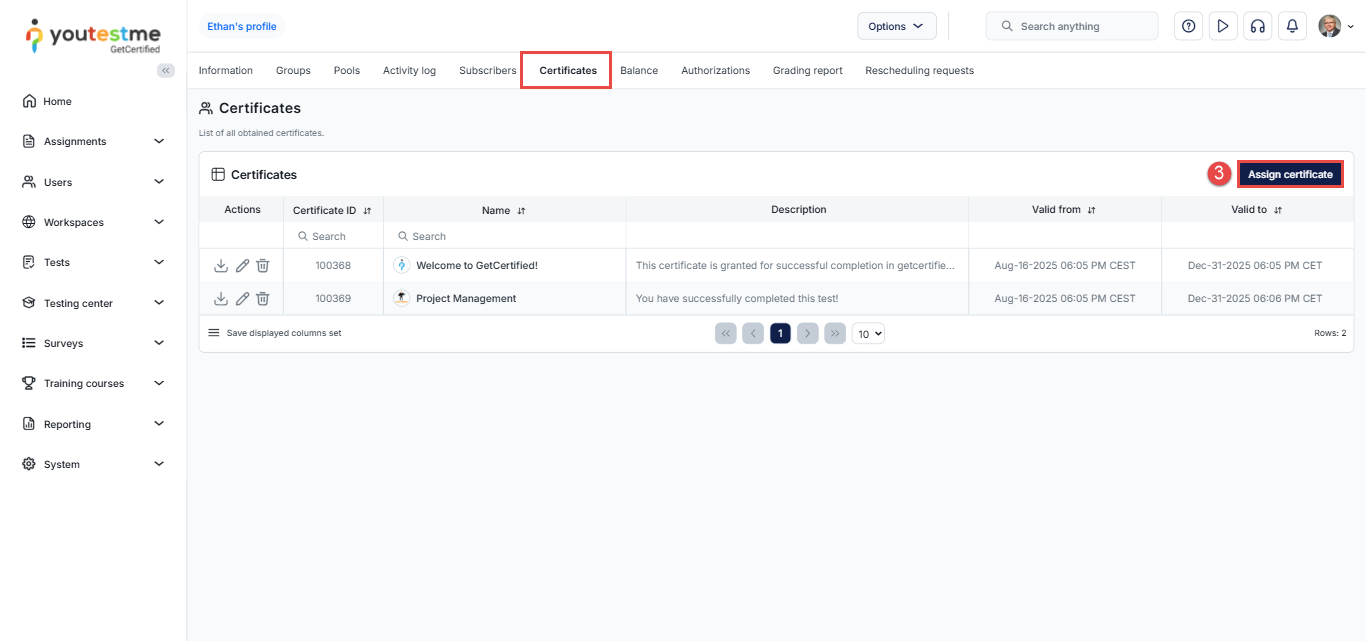
- Open the Certificates tab and click the Assign Certificate button.
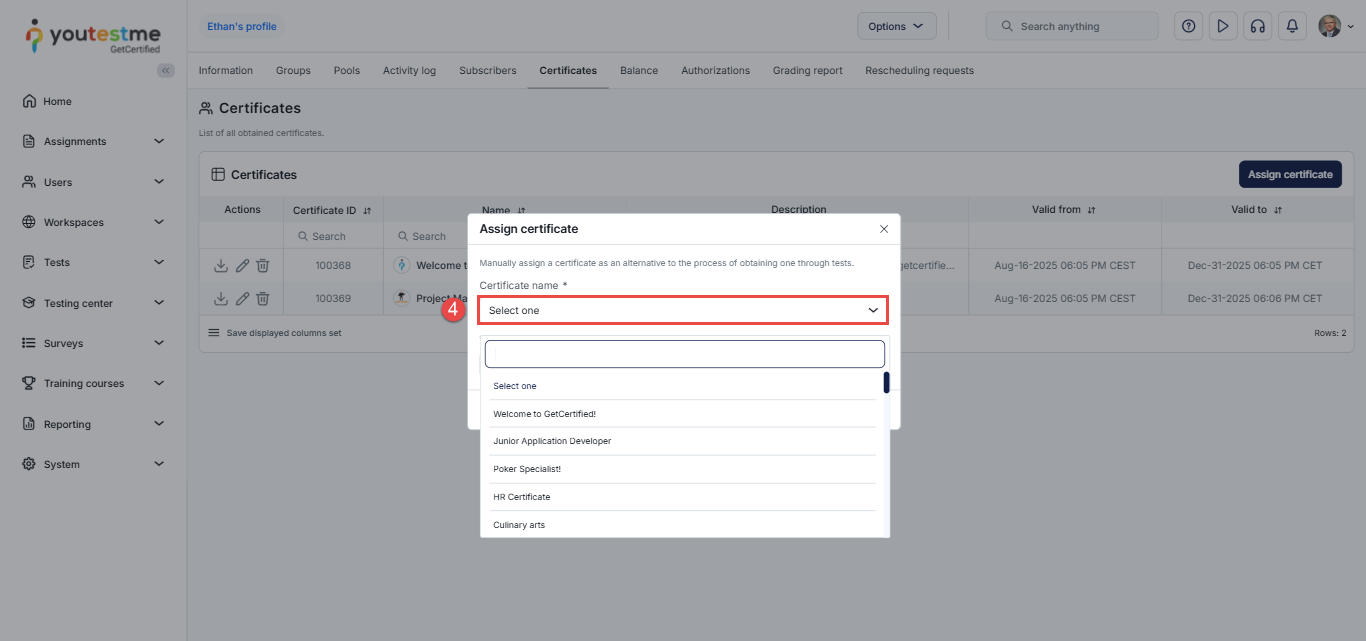
- A pop-up window will appear, allowing you to select the certificate you want to assign to the candidate from the drop-down menu. For detailed instructions on creating certificates, please refer to this article.
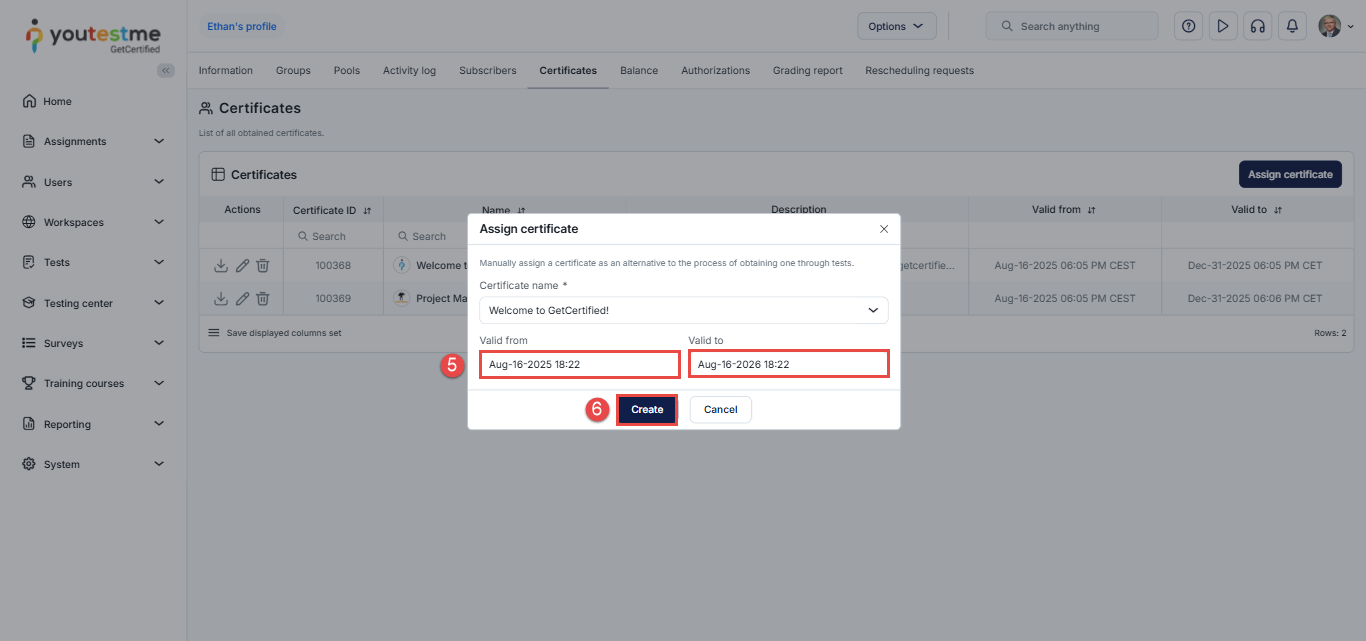
- Specify the validity period by filling in the ‘Valid from’ and ‘Valid to’ fields. If the certificate should remain valid indefinitely, leave these fields blank.
- Click the Create button to save the changes and assign the certificate.
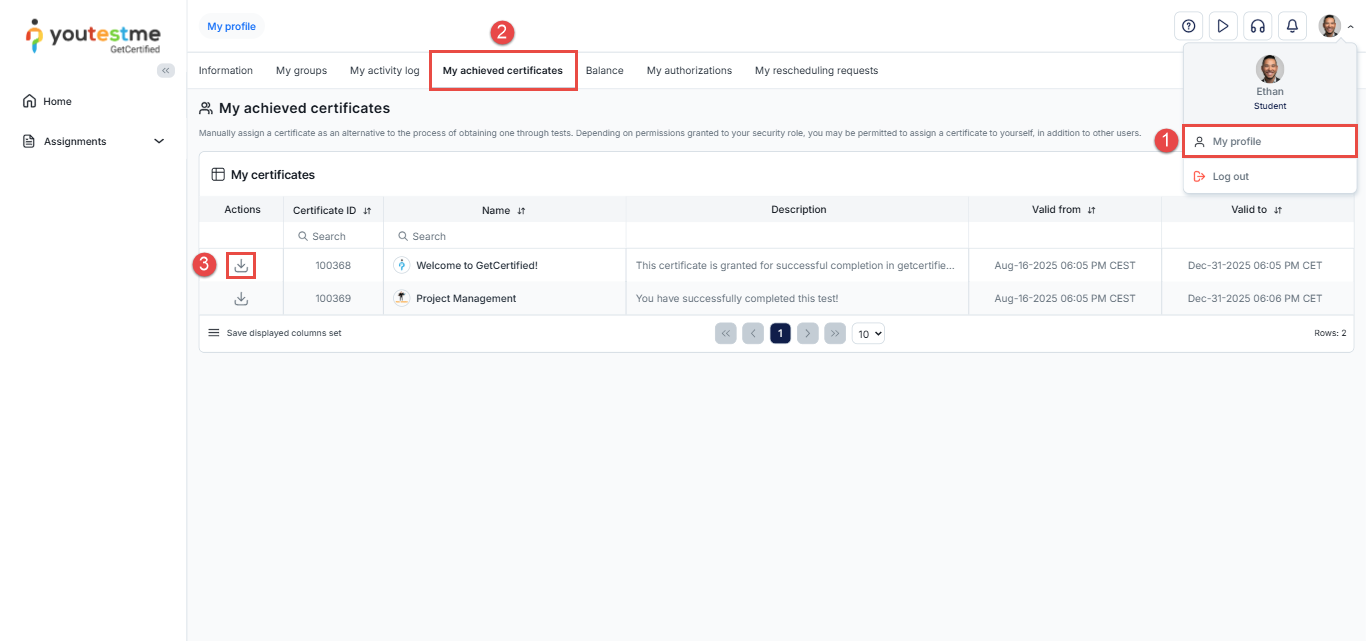
Candidate’s perspective
After a certificate is issued, candidates can access and download it by following these steps:
- Open My Profile.
- Navigate to the My Achieved Certificates section.
- From the Actions column, click the Download icon to save the certificate.
Note: If the certificate template automatically includes the test name, manually assigning a certificate will not add the test name. To avoid this, use a template that either already includes the test name or does not have a test name field.
For additional related topics, please refer to the following articles:


