This article explains how to create question categories in the YouTestMe application.
YouTestMe allows creating exams based on question categories, where the exam generator selects questions according to predefined rules for each category. For more details on creating a test using the question categories, please refer to this article.
The following instructions outline two methods for creating question categories:
- Through the Categories module.
- Through the Settings and Customization module.
Use case example
For a Mathematics Assessment that evaluates Trigonometry, Calculus, and Mathematical Reasoning, you can create a category for each topic and assign questions accordingly.
When setting up the exam, use the exam generator to include:
- 3 questions from the Trigonometry category
- 2 questions from the Calculus category
- 2 questions from the Mathematical Reasoning category
The system will then automatically and randomly select the defined number of questions from each category, ensuring a balanced and varied exam for every candidate.
Creating question categories in the “Categories” module
The Categories module under the Tests section allows users to create two types of categories: test categories (for organizing tests or surveys) and question categories (for organizing questions).
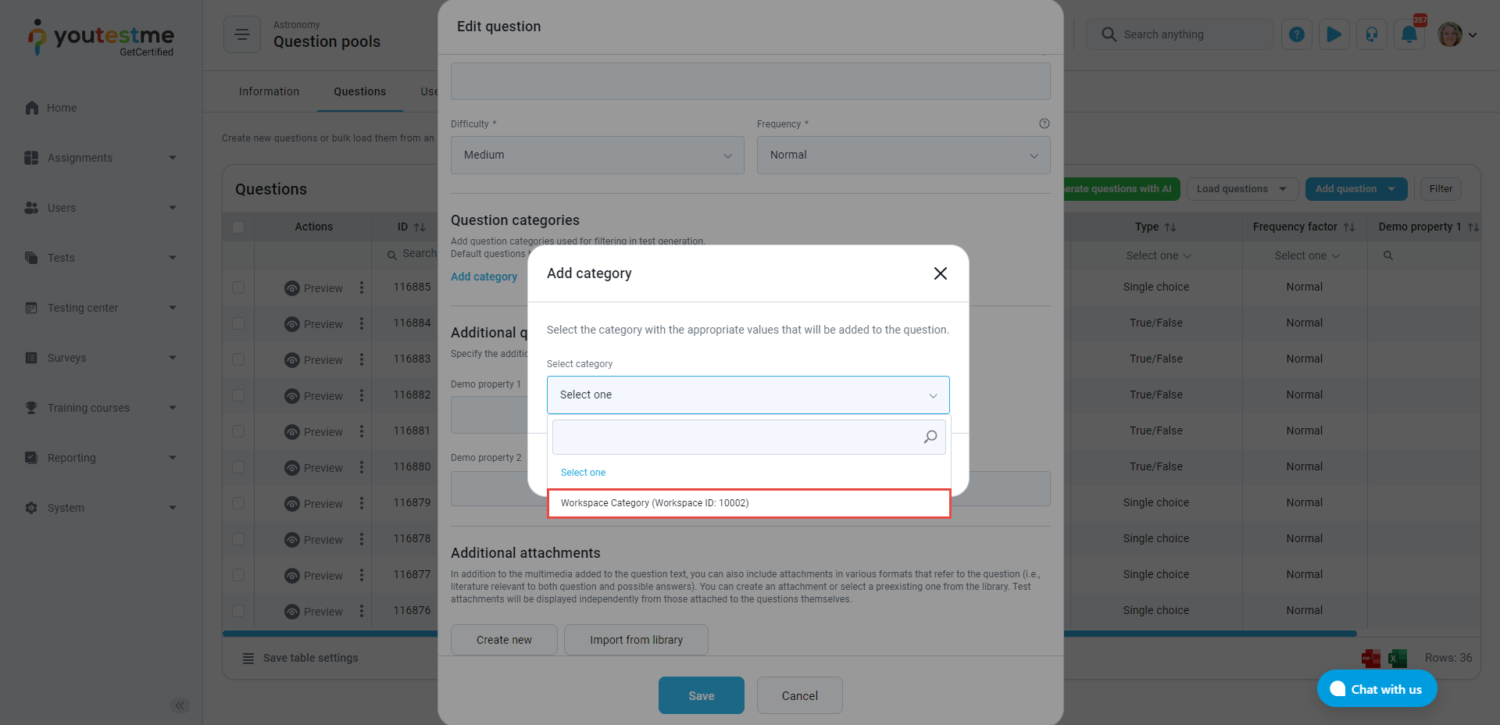
Question categories can be made available globally to all users across all workspaces or restricted to a specific workspace.
To create question categories, follow the steps below:
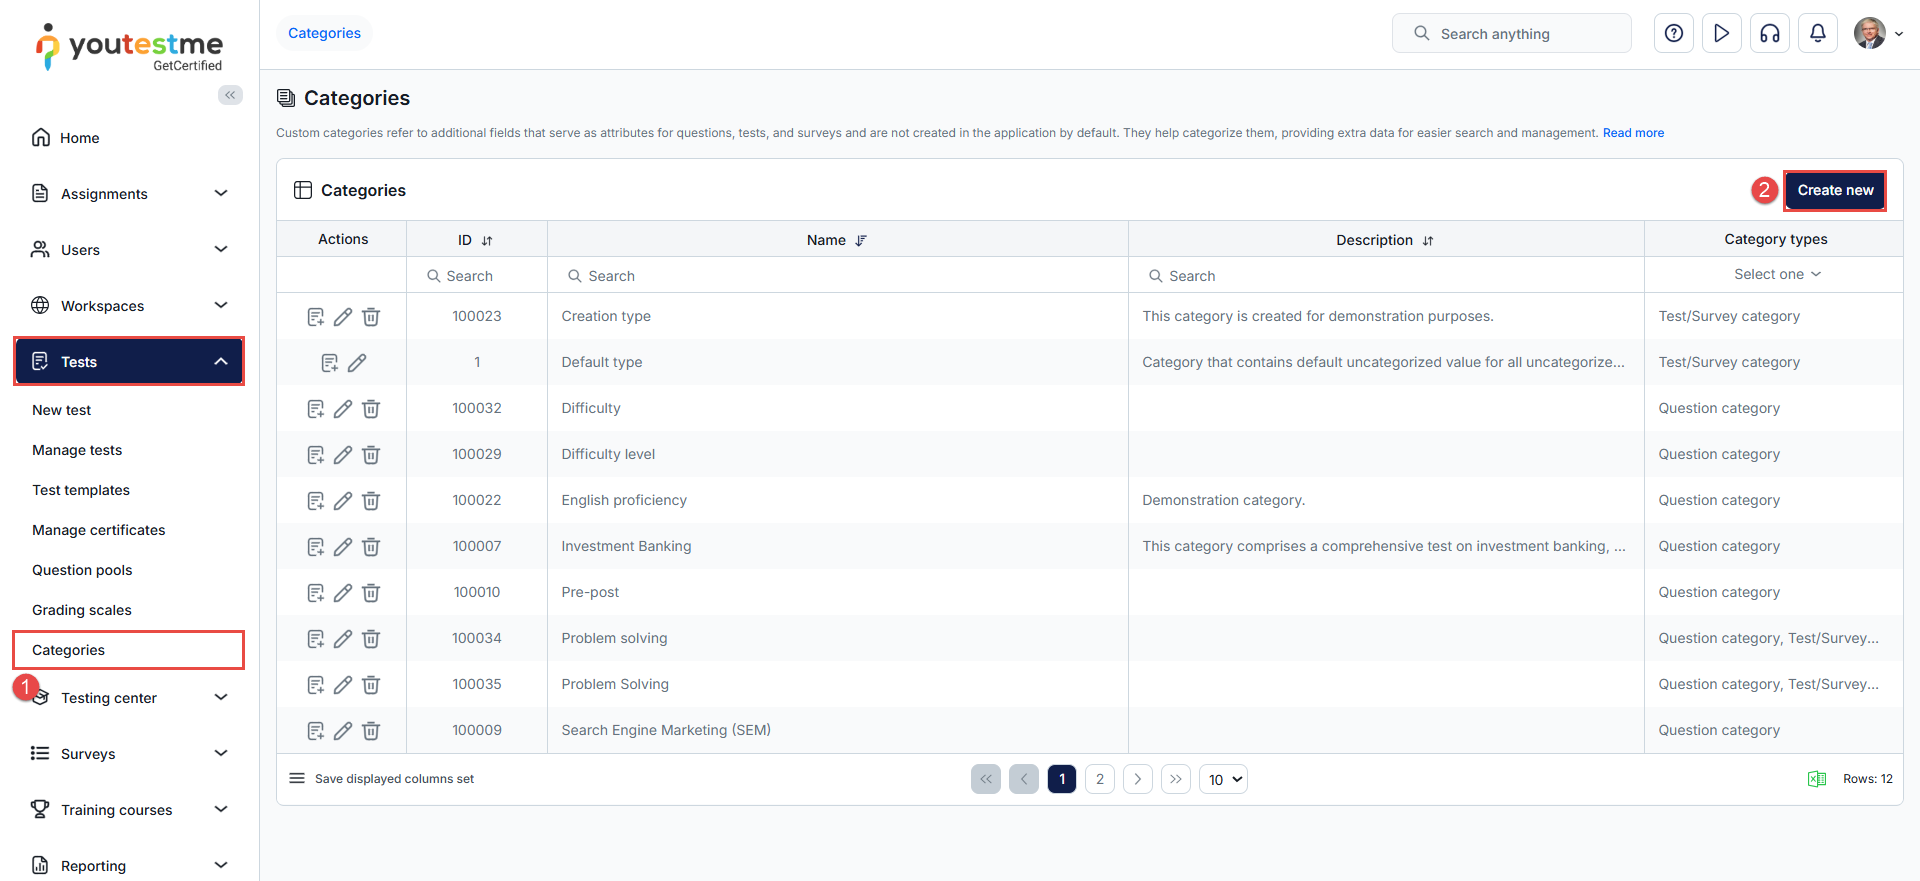
- Click the Tests section in the left-side menu, then choose Categories.
- Click the Create new button.
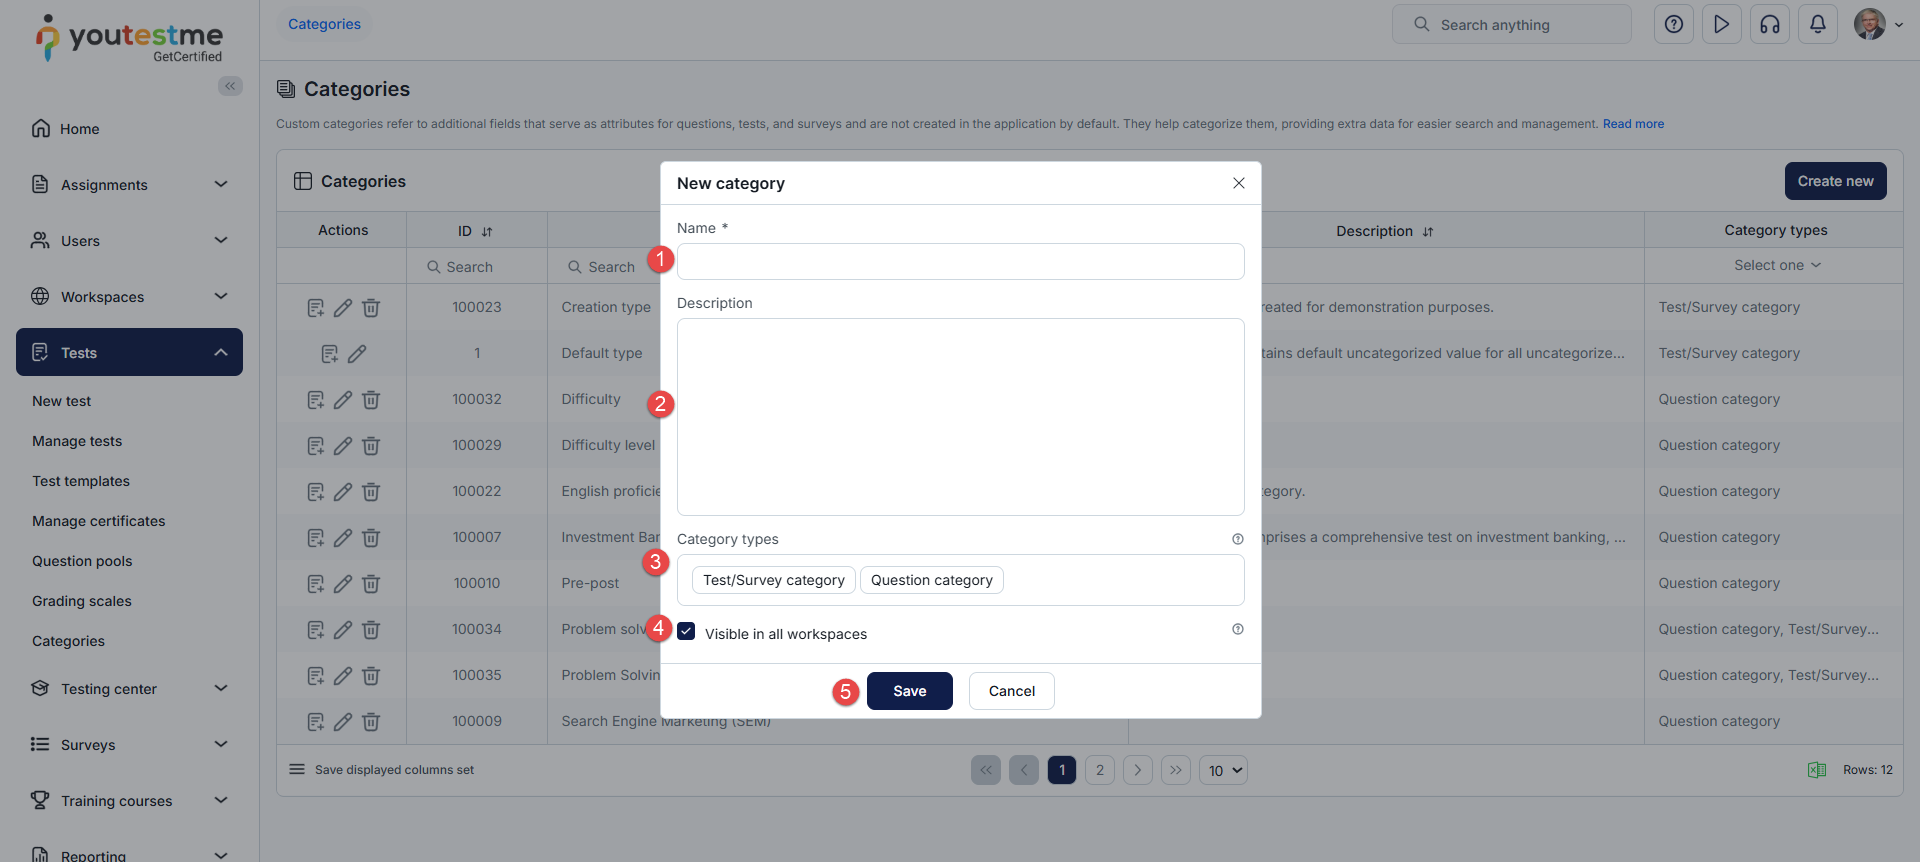
A pop-up window will appear where you need to input the following:
- Enter the category name.
- Optionally, enter the description.
- Choose the category types.
-
Enable the Visible in all workspaces option to make the created category available globally to all users across all workspaces. If the category should be available only in specific workspaces, disable this option and select the desired workspace(s) from the list.
- Click the Save button to preserve all the changes.
 Adding Values
To add the desired values for the created category:
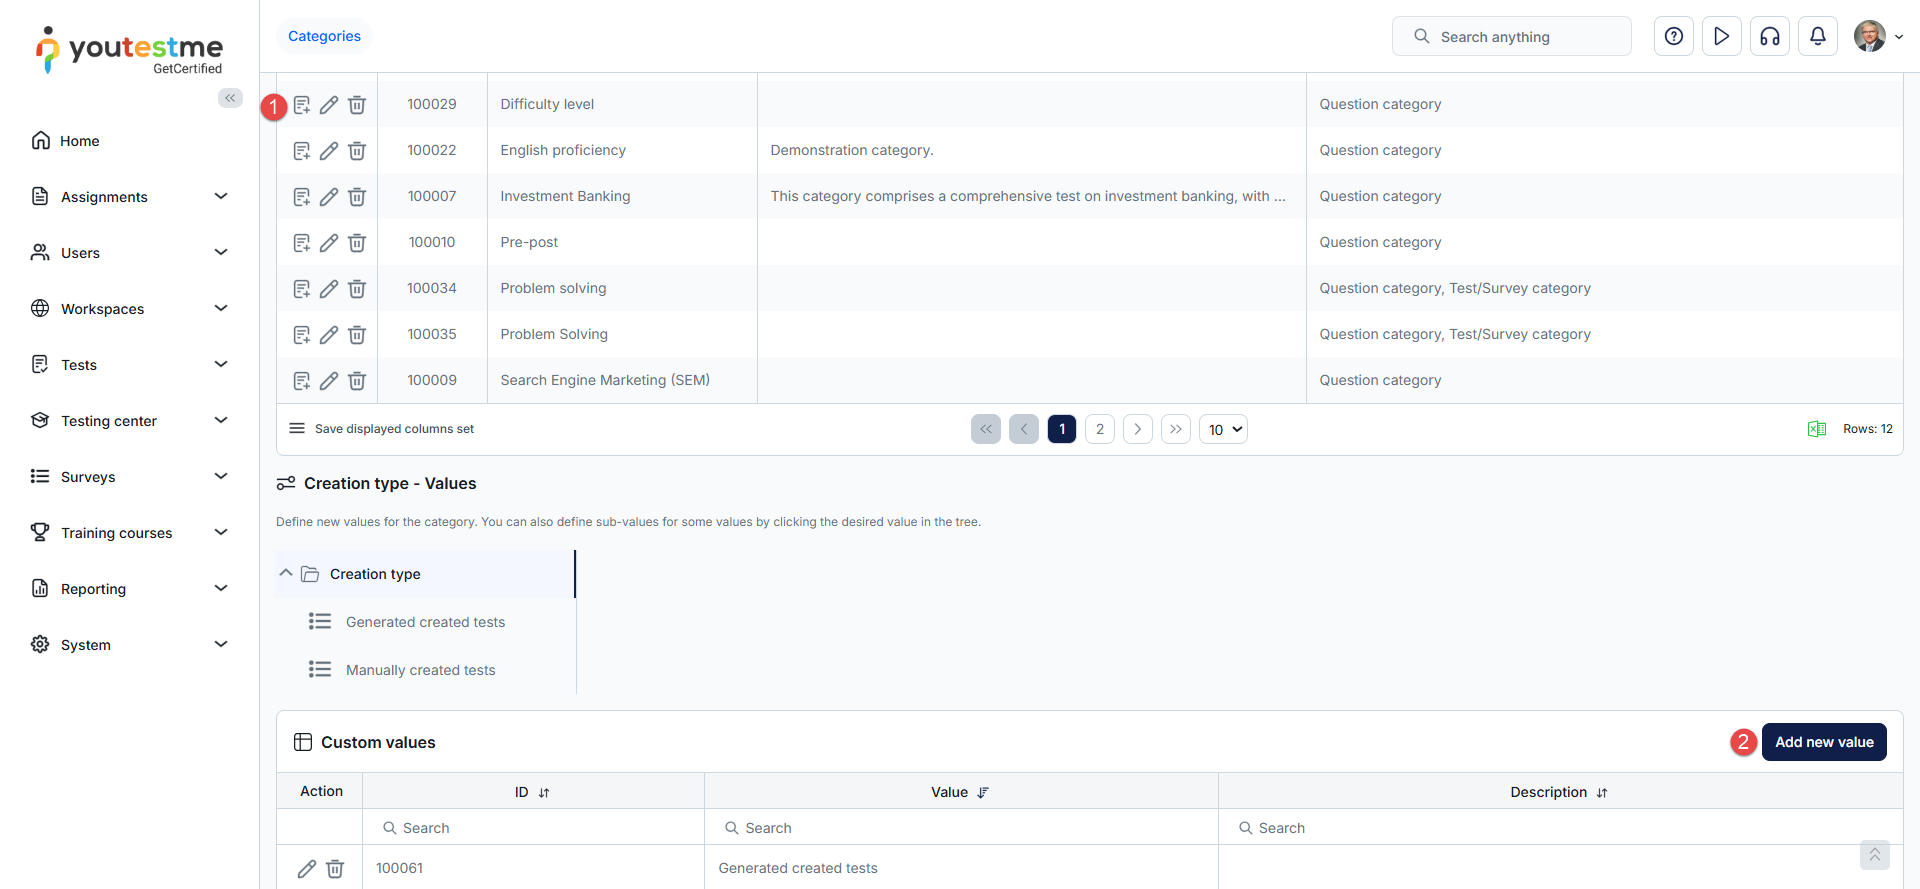
- Click the Define values button.
- Click the Add new value button.
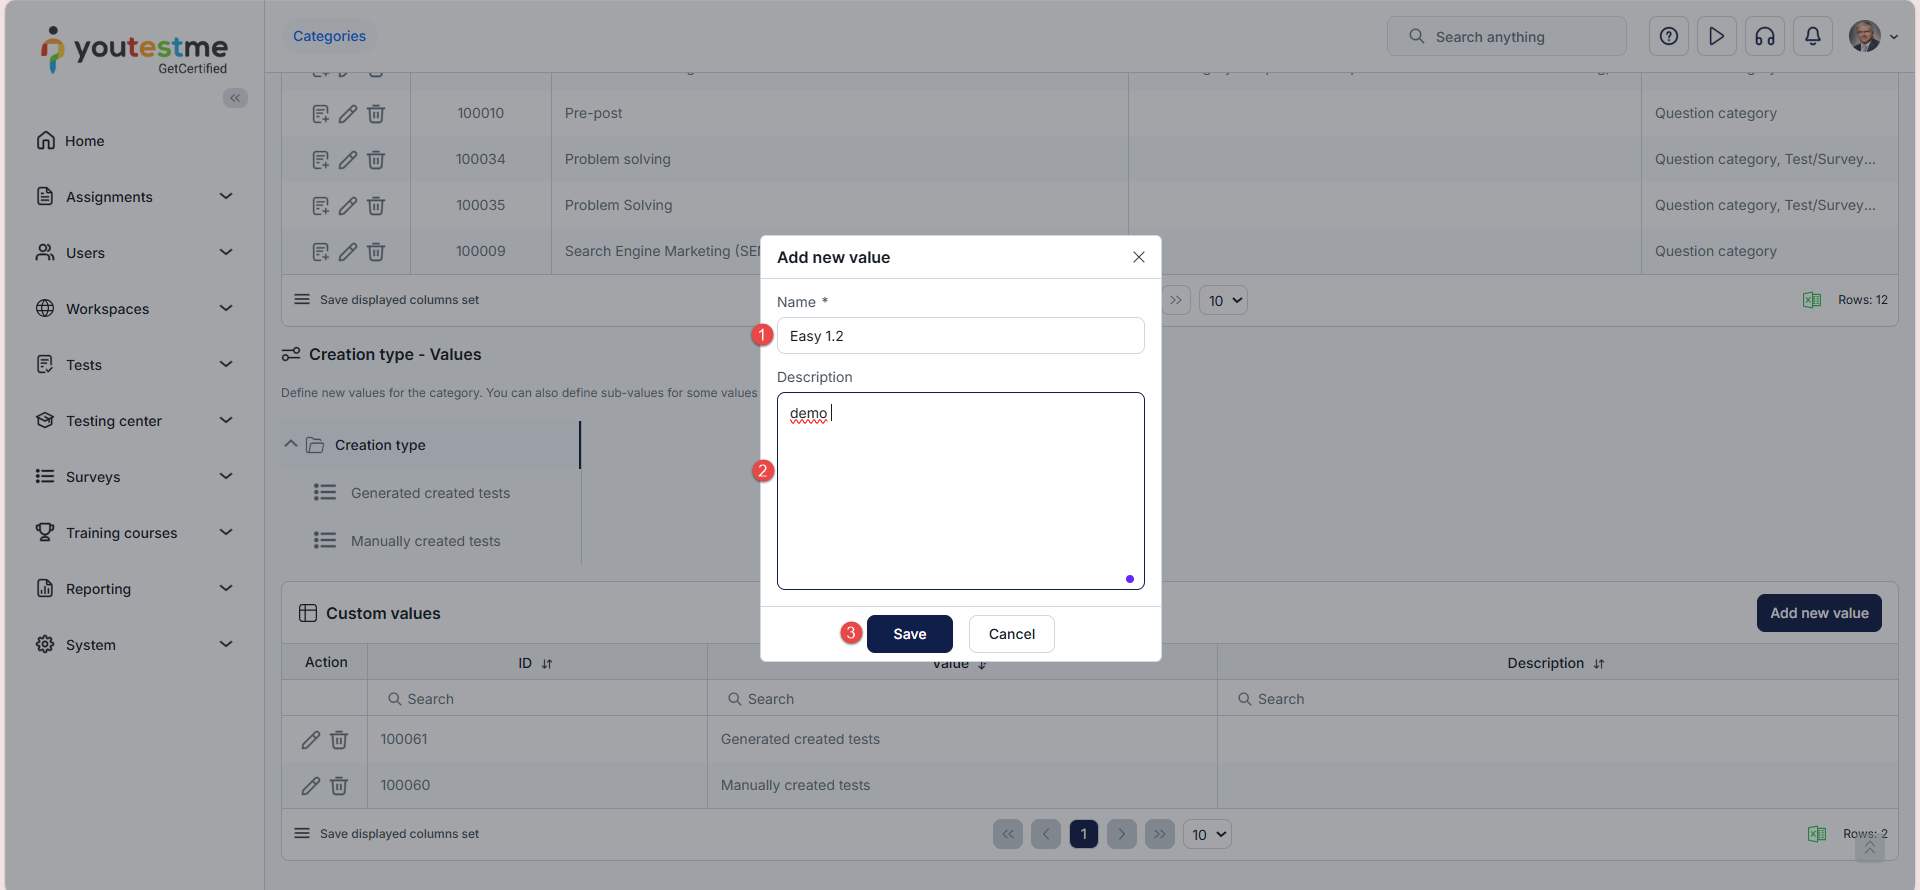
A pop-up window will appear where you need to input the following:
- Enter the name for the value.
- Optionally enter the description for the value.
- Click the Save button.
Note: You can add as many values as needed, and also create sub-values. There is no limit to the number of values or sub-values you can add; simply repeat the same steps described above.
Global admin vs. Workspace admin View
- Global Admin: Sees all question categories in the system, including workspace-specific ones.
- Workspace Admin: Sees only categories in their assigned workspace.
Creating Question Categories in the Settings and Customization module
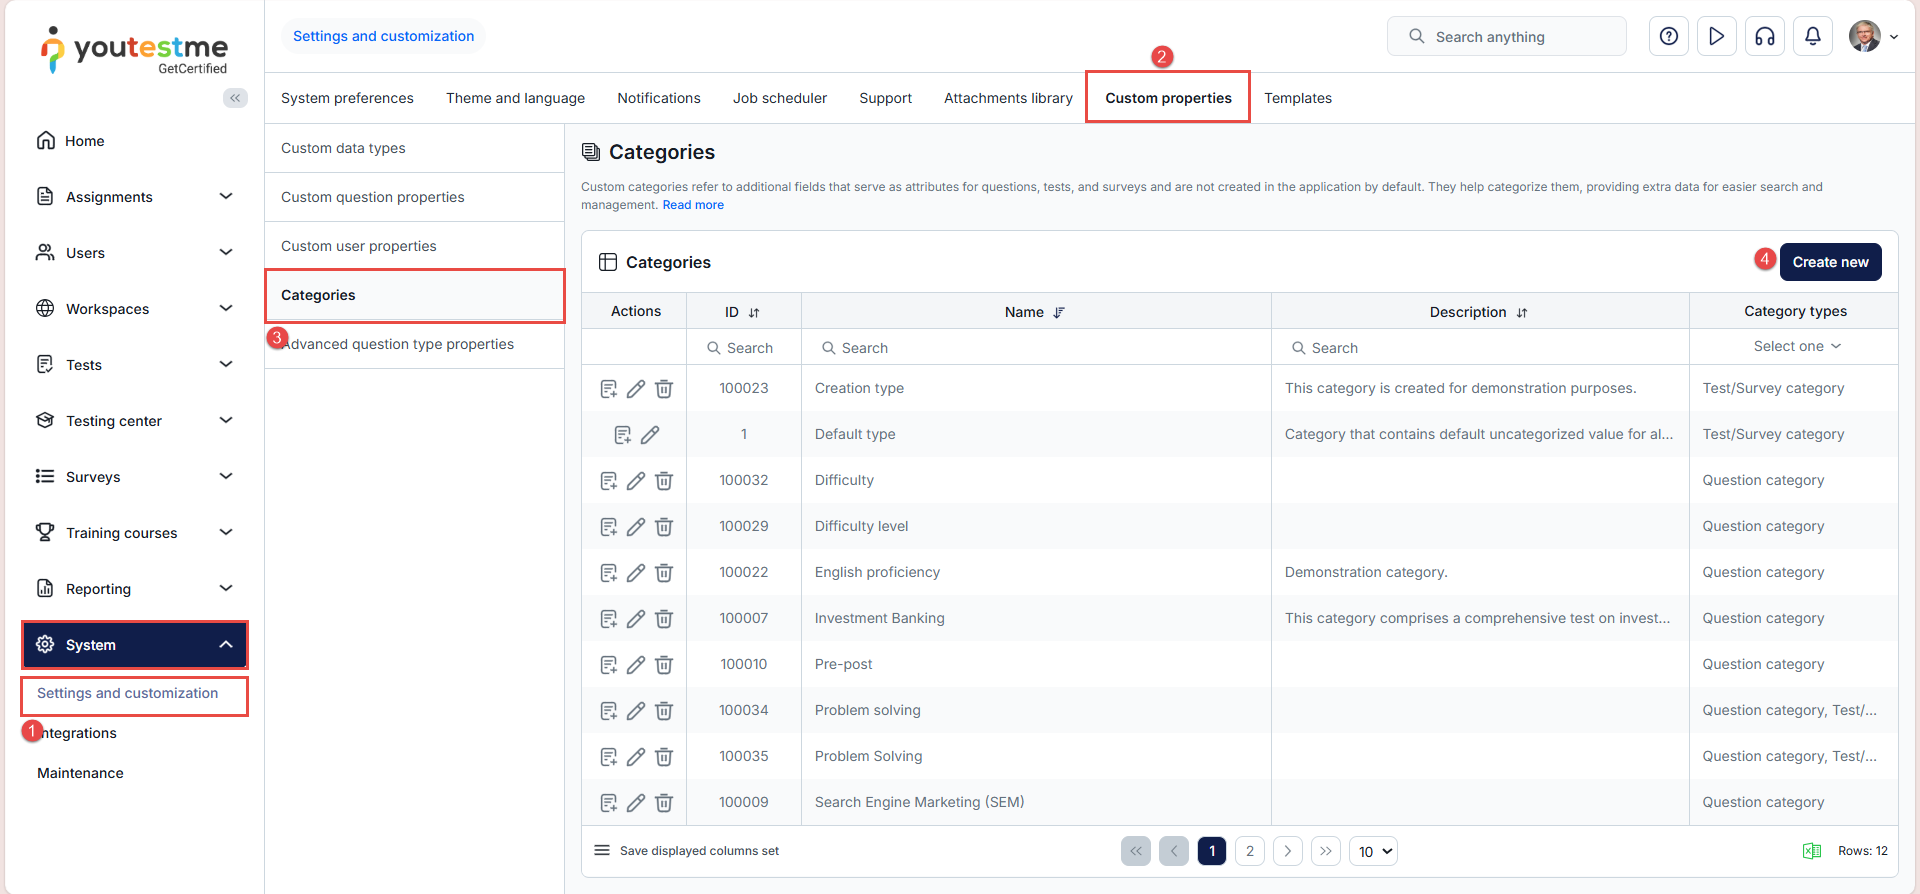
You can also create question categories from the System – Settings and Customization module, following the steps described below:
- Select the System, and navigate to the Settings and customization tab.
- Navigate to the Custom properties tab.
- Select the Question categories option in the side menu.
- Click the Create New button and follow the same steps outlined in the previous chapter to create the category and its values.
