Article verified for Release 15.0 on August 19, 2025.
This article explains how to add attachments to the training course step. Attachments represent the learning material that candidates should review and learn to complete the training course.
Supported Attachment Types
YouTestMe allows you to enrich training courses by adding various attachments. Supported file and link types include:
- Images
- Video (MP4)
- Audio (MP3)
- PDF documents
- Archive files
- SCORM packages
- Google Docs
- YouTube videos
- Vimeo videos
- Web links
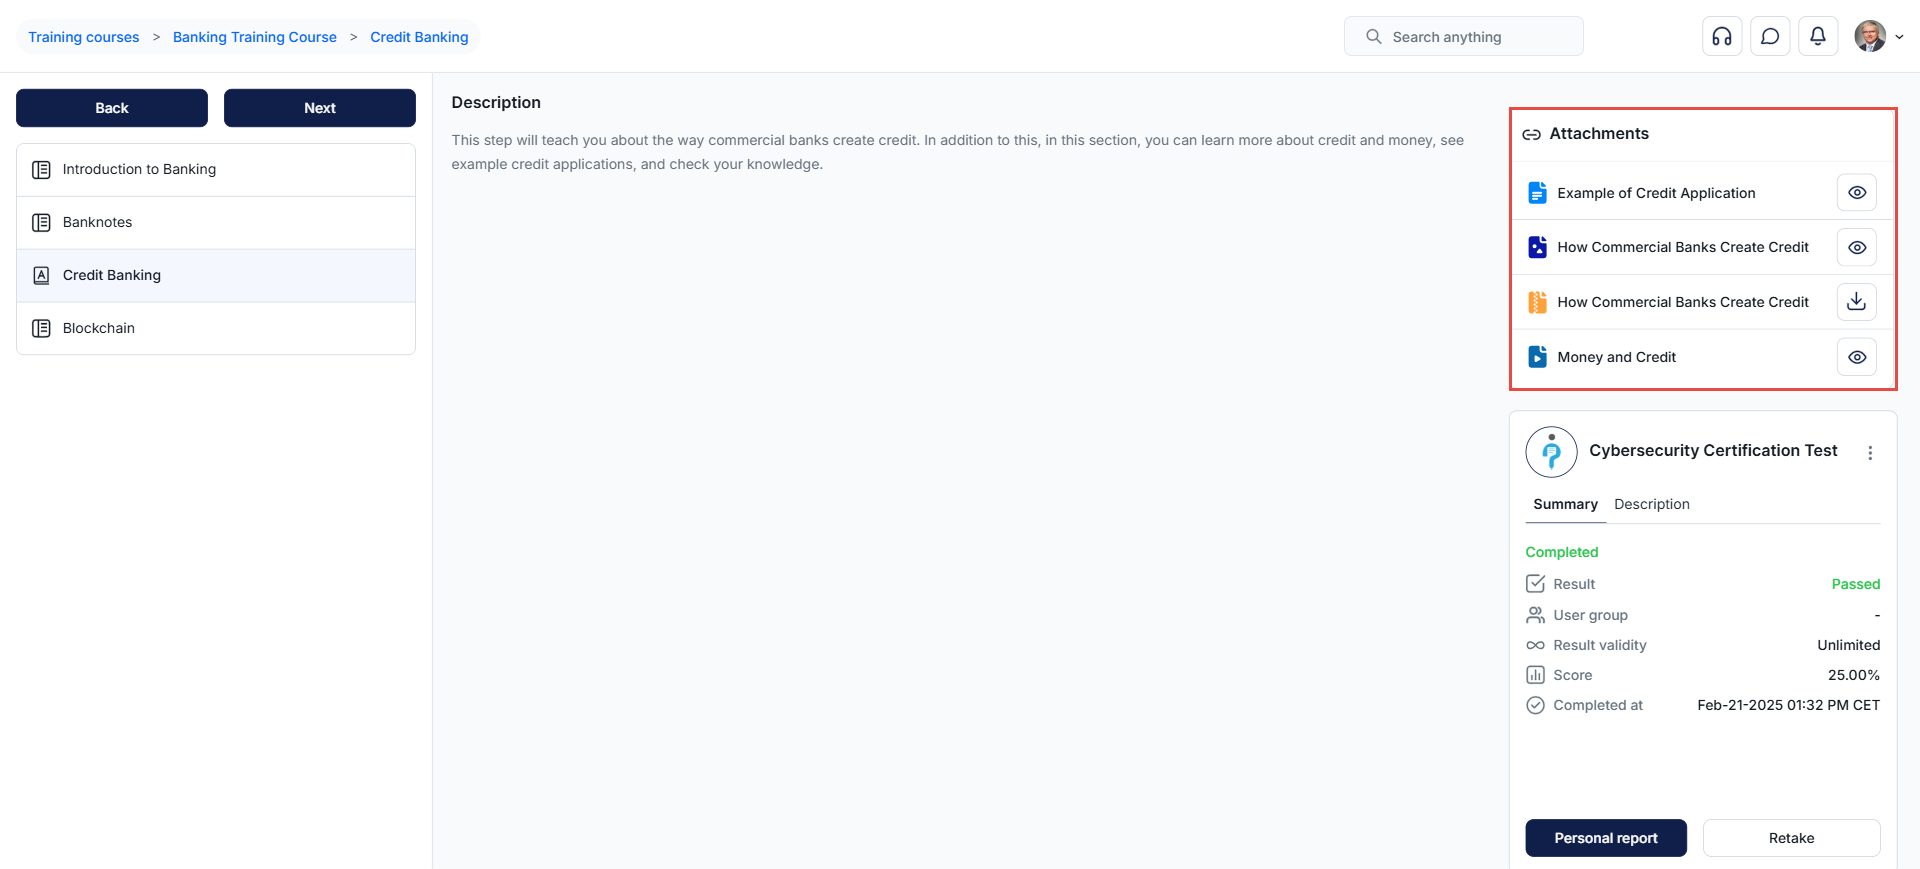
Attachments added to a training step appear in a side panel, where candidates can access them by clicking View or Download.
Alternatively, attachments can be embedded directly in the training step description. This option makes the content visible within the step description itself, without requiring candidates to access attachments from the side panel.

In the training settings, administrators and course managers can also make reviewing attachments mandatory. When this option is enabled, candidates must view all attachments in a step before they are allowed to proceed to the next one.
For more information on configuring training course settings, please refer to the dedicated article.
Creating a new Attachment
To upload an attachment from your local device library and add it to a training step, follow the steps below:
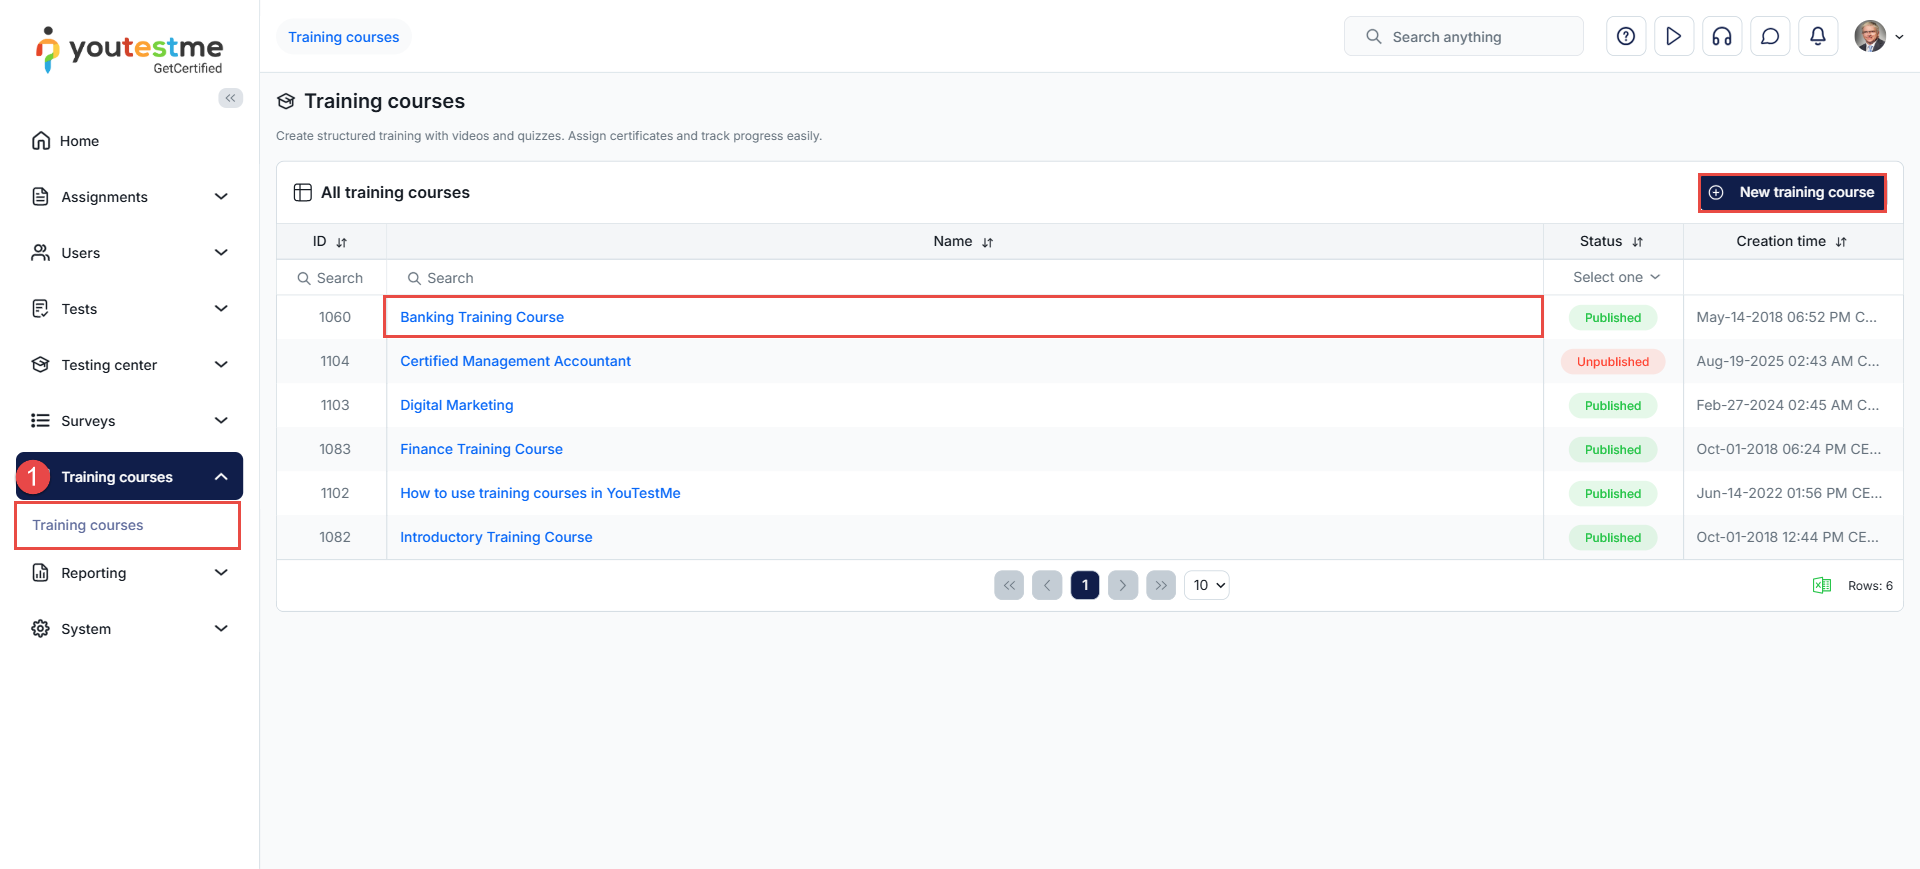
- Navigate to the desired training from the Training courses module or create a new one using the New Training Course button
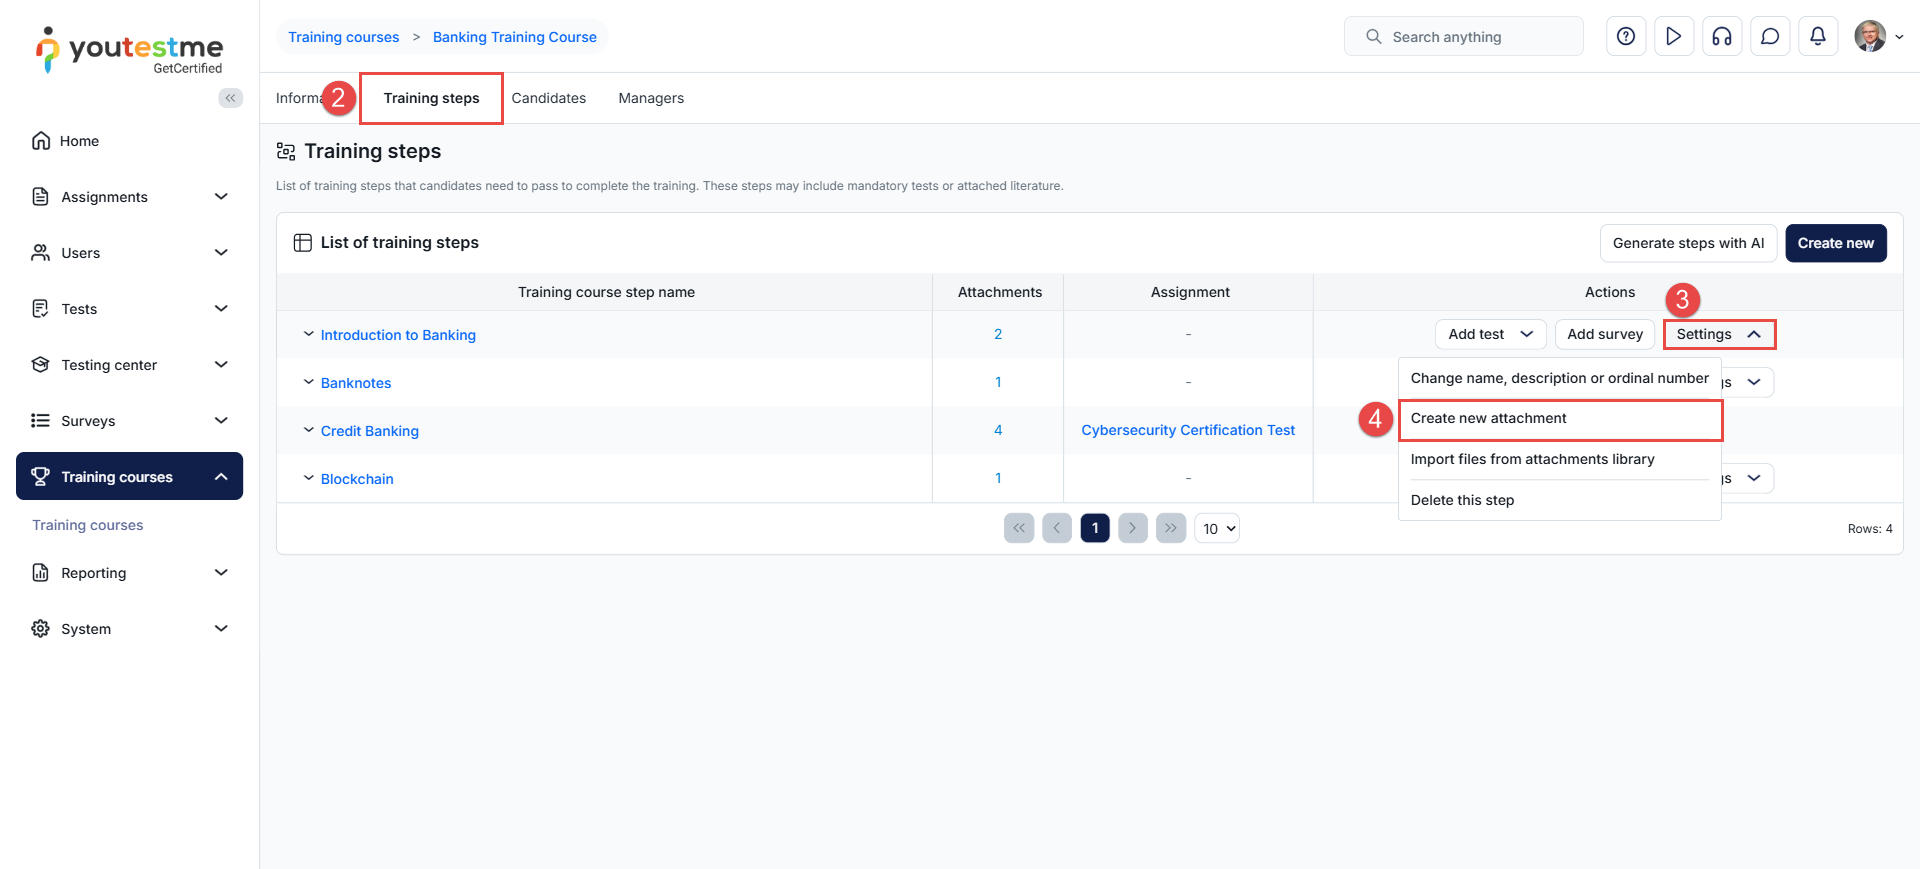
- Navigate to the Training steps tab.
- Click the Settings button available in the Actions column of the desired training step row.
- From the dropdown menu, choose the Create new attachment option.
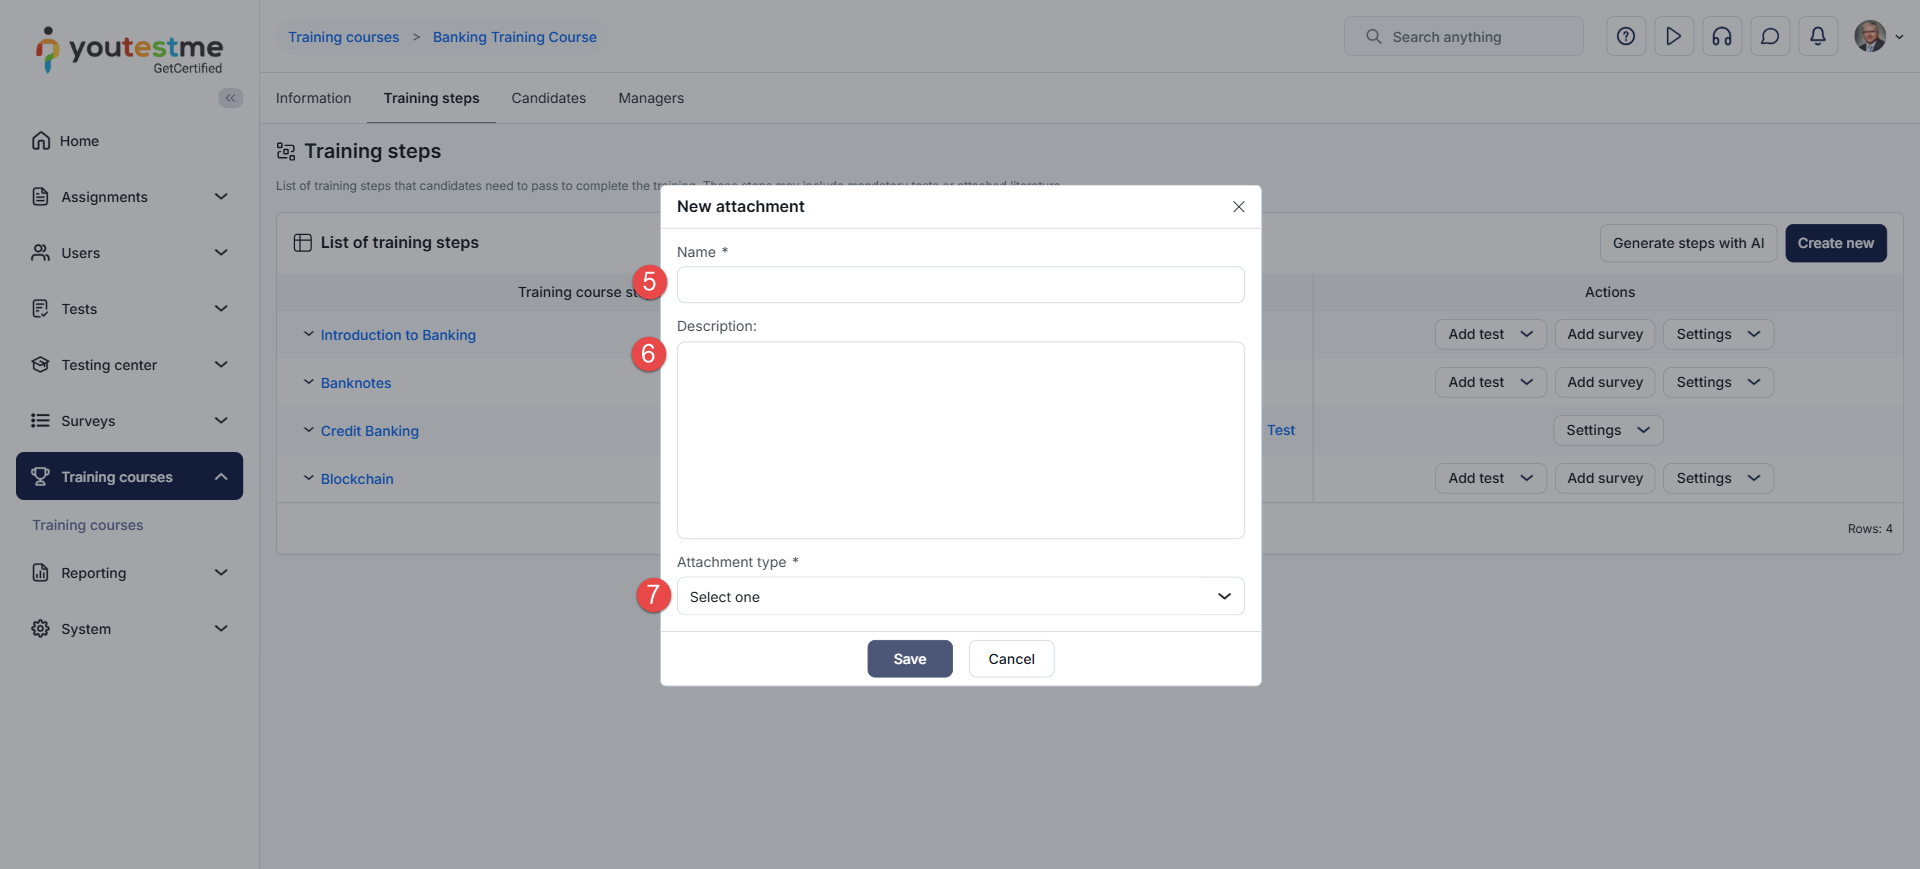
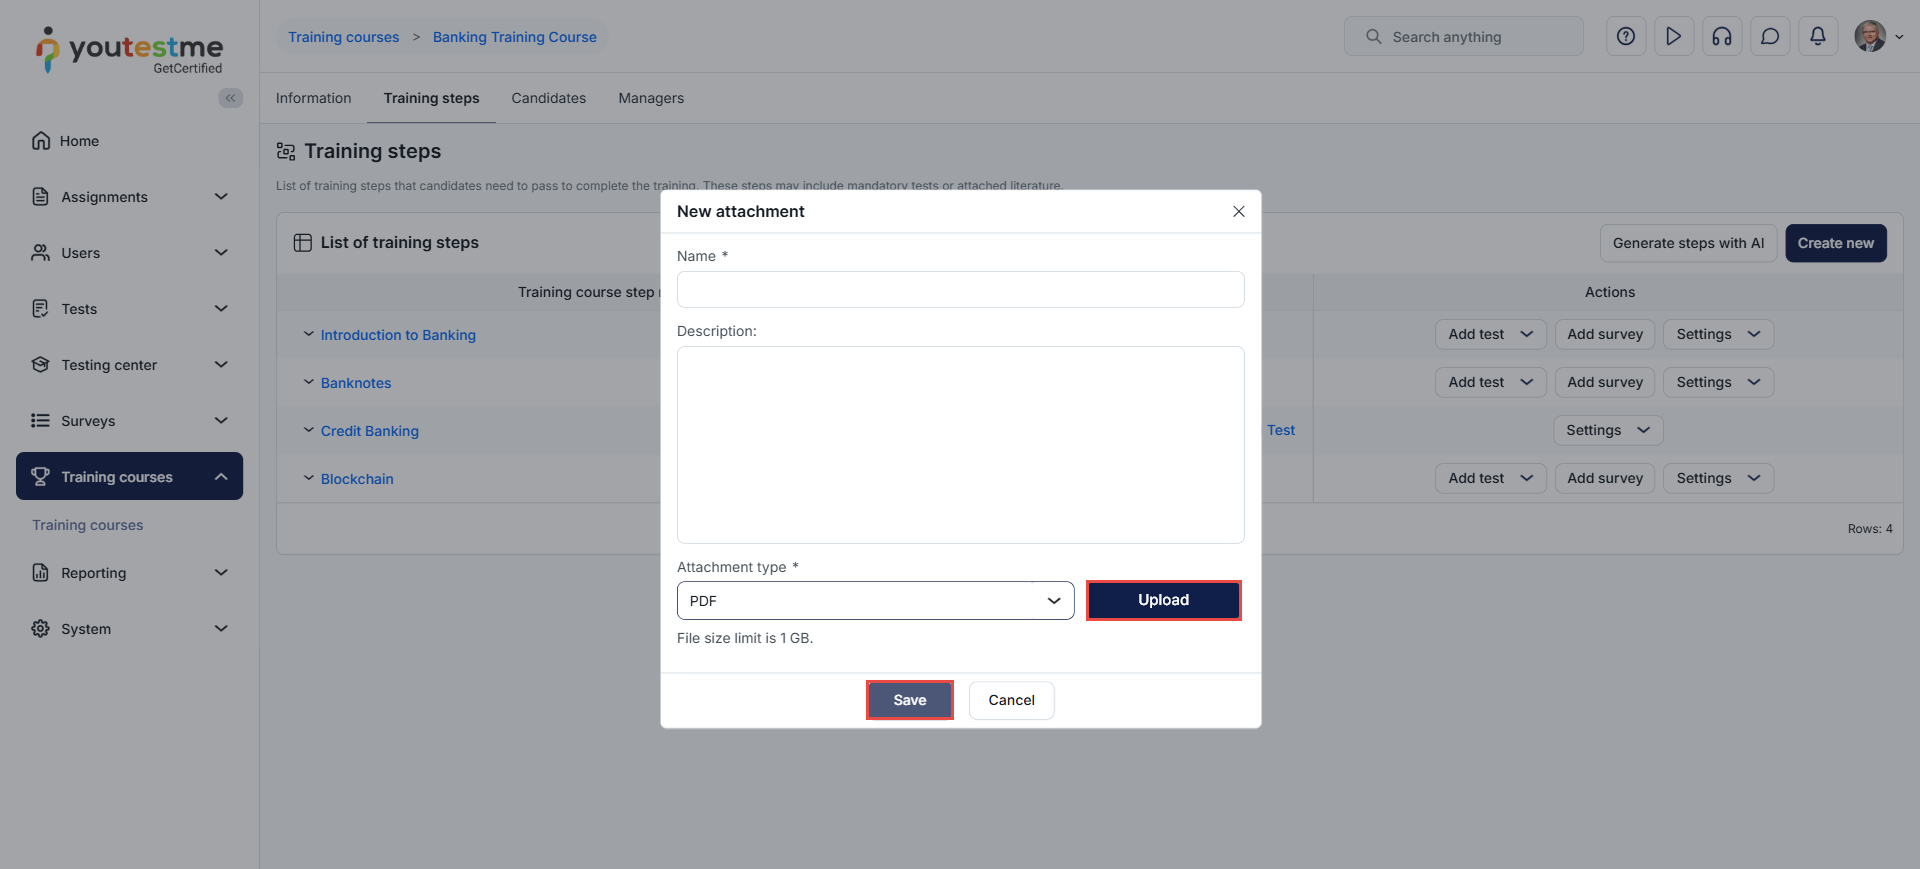
- In the New Attachment dialog, enter the attachment name
- Enter the Attachment description
- Select the desired attachment type
Depending on the type of attachment selected, you will either be prompted to upload a file from your local device or provide a link.
For file-based attachments such as images, videos (MP4), audio files (MP3), PDF documents, archive files, and SCORM packages, you can upload them directly using the Upload button, up to a maximum file size of 1 GB.
For online resources, such as Google Docs, YouTube videos, and Vimeo videos, you simply need to enter the corresponding link.
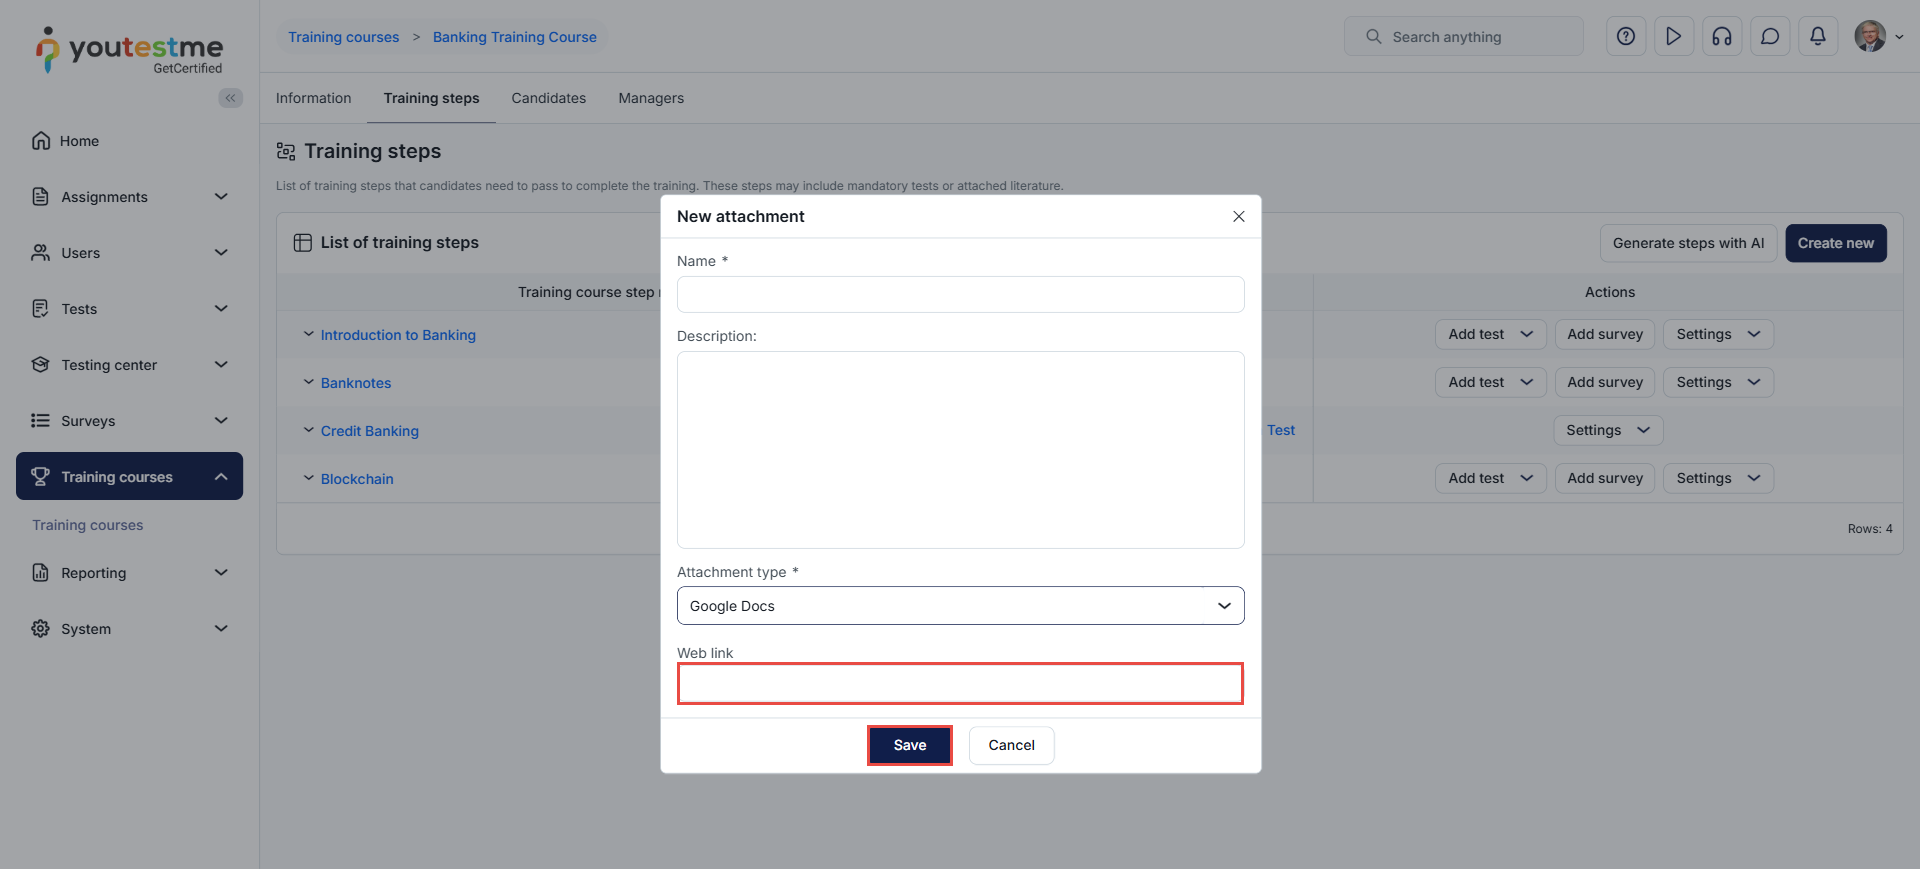
Click the Save button to add the attachment to the training step.
Importing an Attachment from the Attachments Library
To select and import an attachment that has already been uploaded and saved in the YouTestMe System Library, follow the steps below:
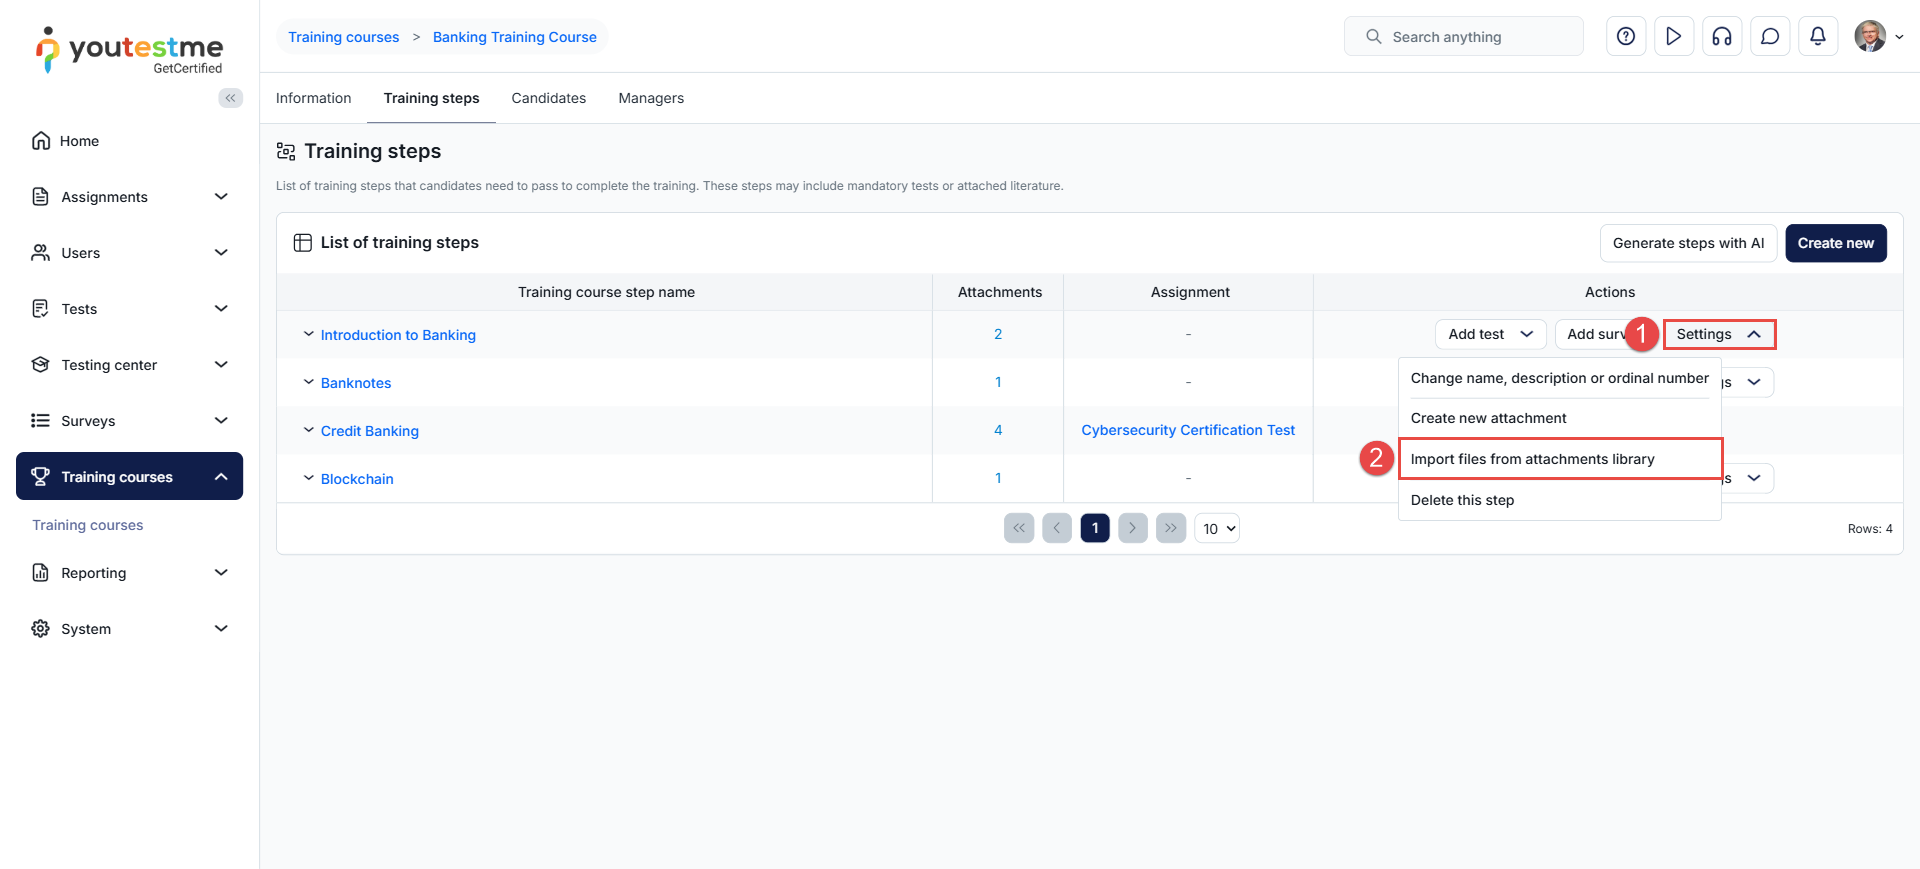
- Click the Settings button available in the Actions column of the desired training step row.
- From the dropdown menu, choose the Import Files from Attachments Library option.
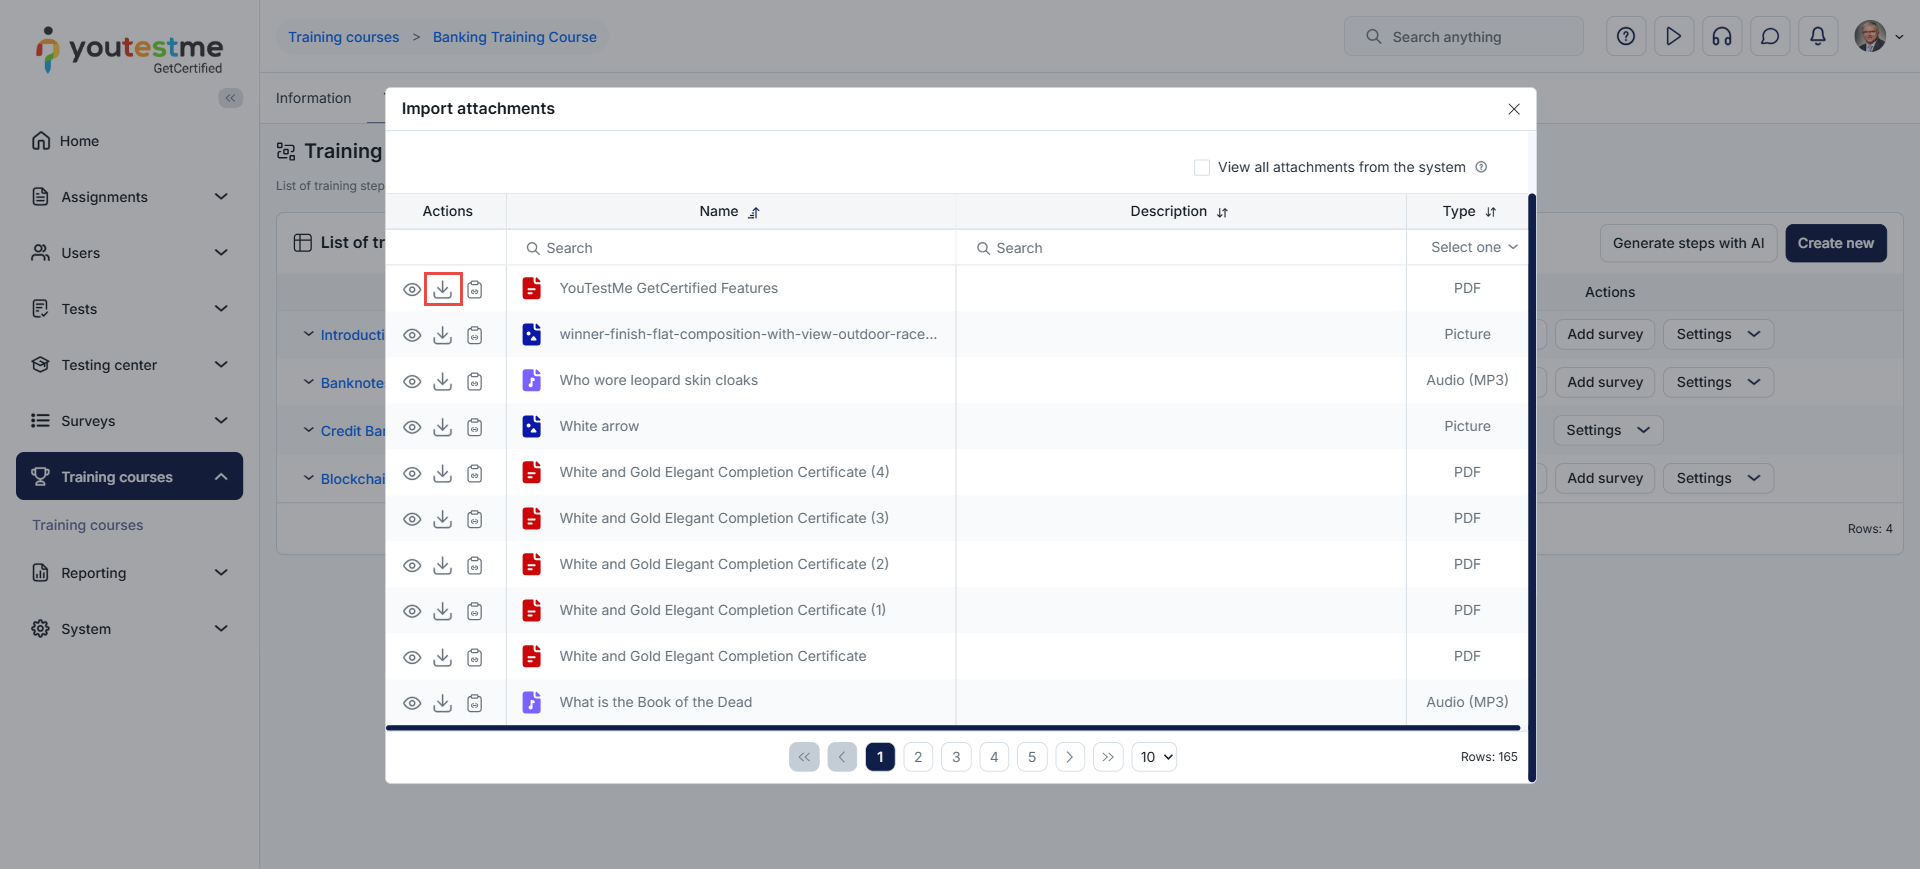
A list of all available attachments from the attachments library will be displayed. Click the Import button next to the desired attachment.
Adding attachments directly to the step description
To make an attachment visible to trainees in the step description section, follow these steps:
- Click the training step name.
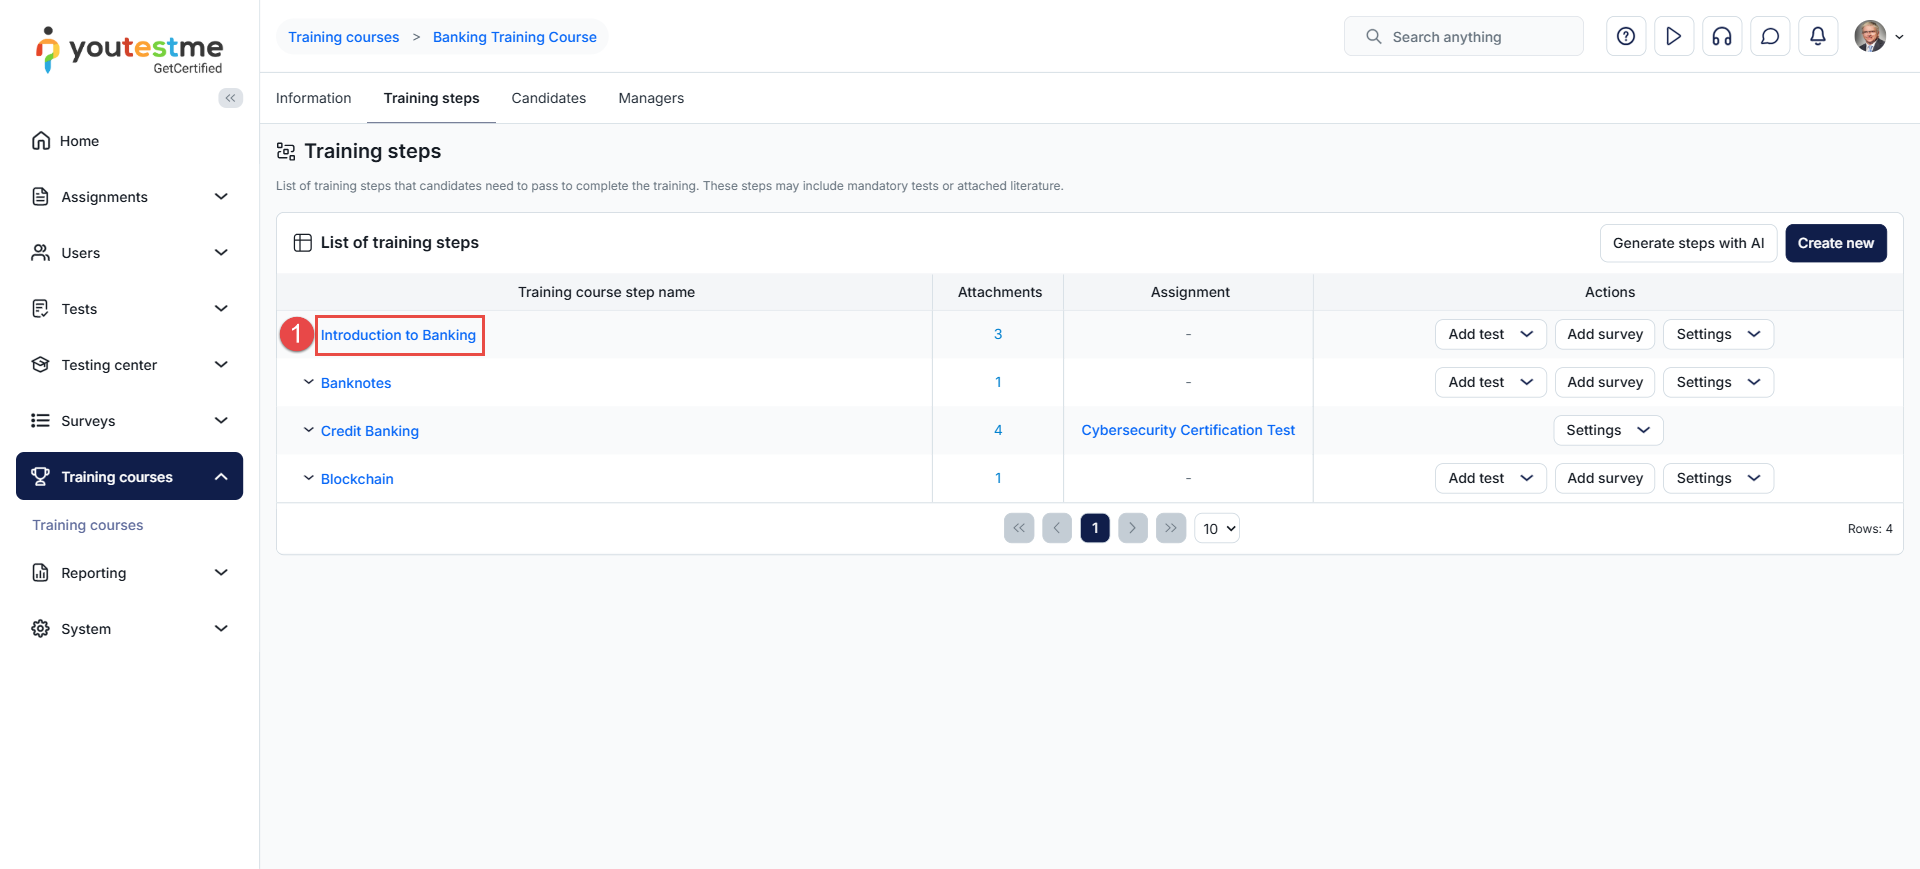
- In the Edit Training Step dialog, select the appropriate icon based on the attachment type (camera, picture, audio, or link icon).
![]()
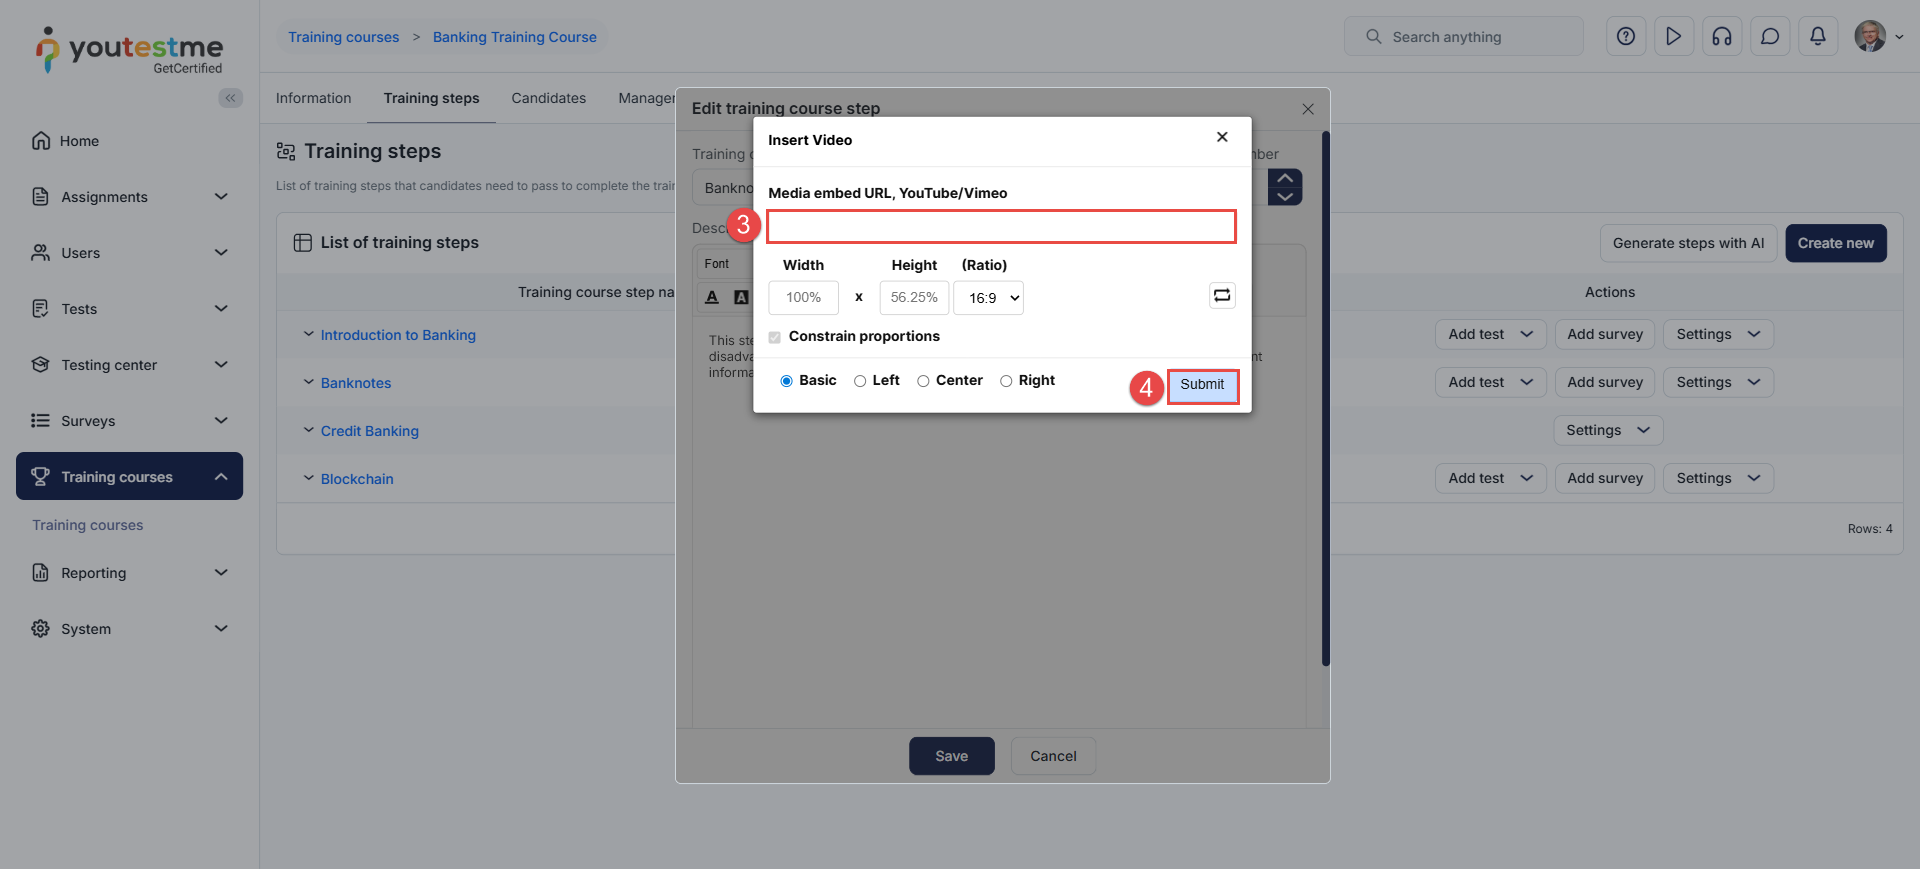
- In the Attachment Settings dialog, enter the attachment URL and adjust the layout as needed (e.g., ratio and placement on the page).
- Click Submit to add the attachment.
Obtaining the Media Embed URL
If the media file you want to add to the training description is already available online, simply copy its URL and paste it into the designated field.
If the media file is not available online, follow these steps to obtain a Media Embed URL:
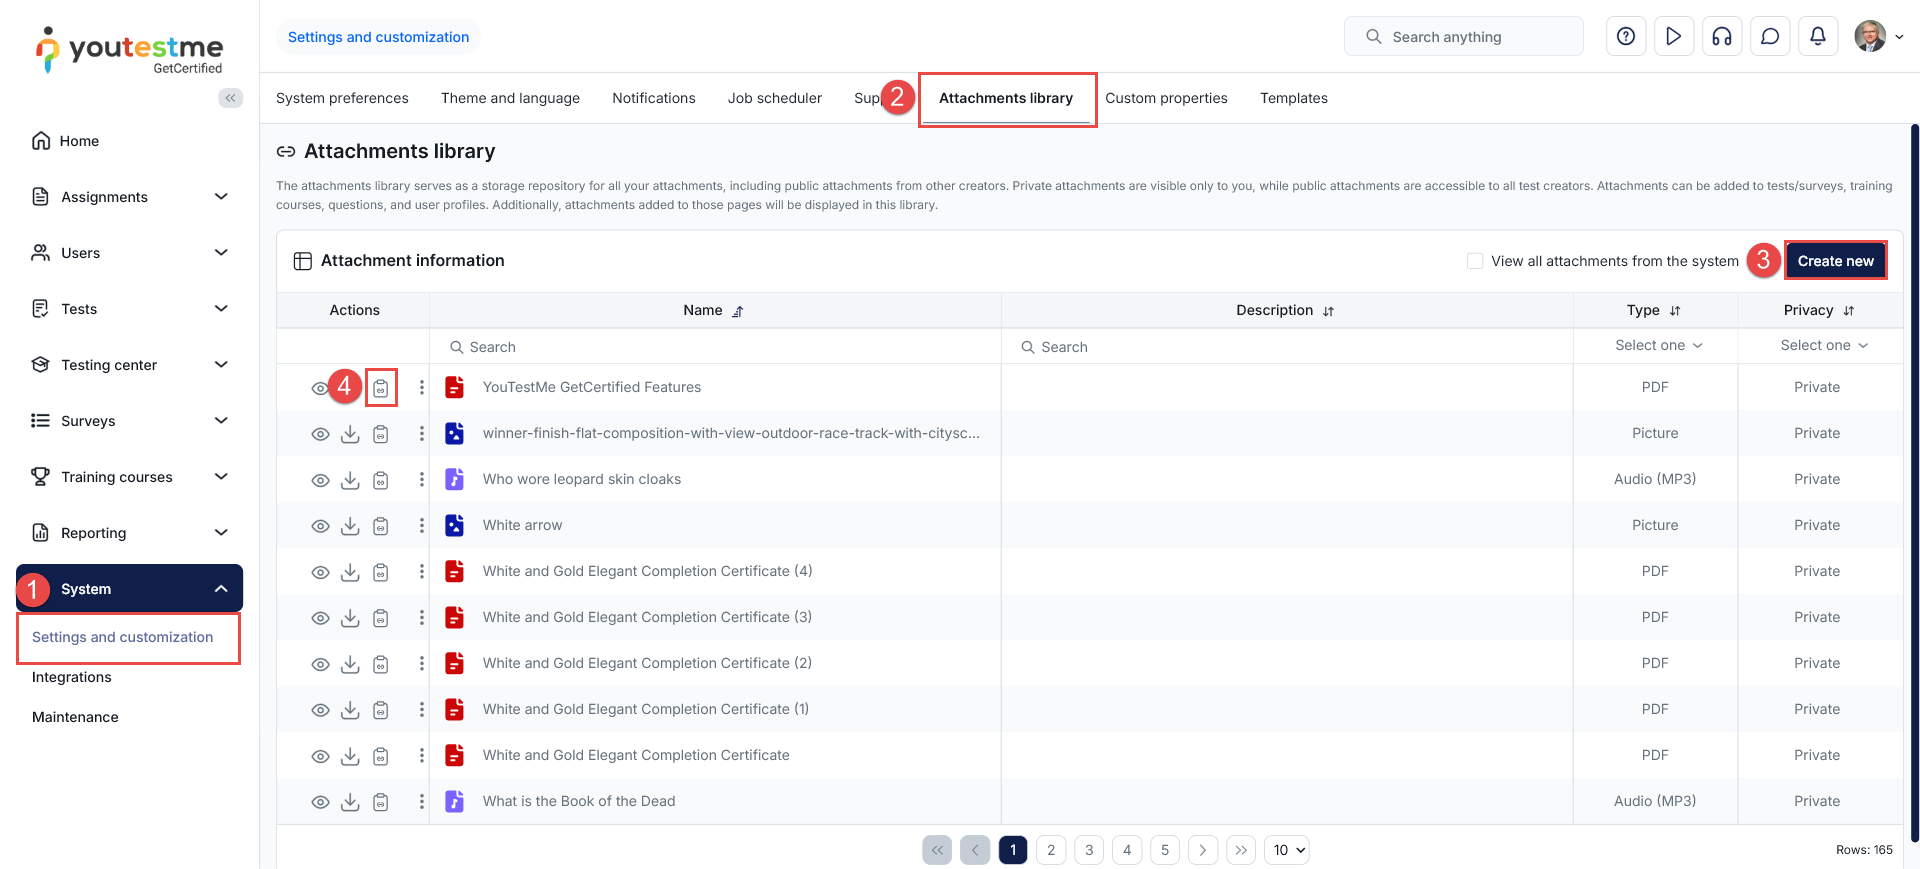
- In the main menu, go to System and select Settings and Customization.
- Open the Attachments Library tab.
- If the file is not already uploaded, click Create New to upload it to the library.
- Once uploaded, click the Get Media Embed URL icon to copy the link, then paste it into the required field.
Managing Training Course Attachments
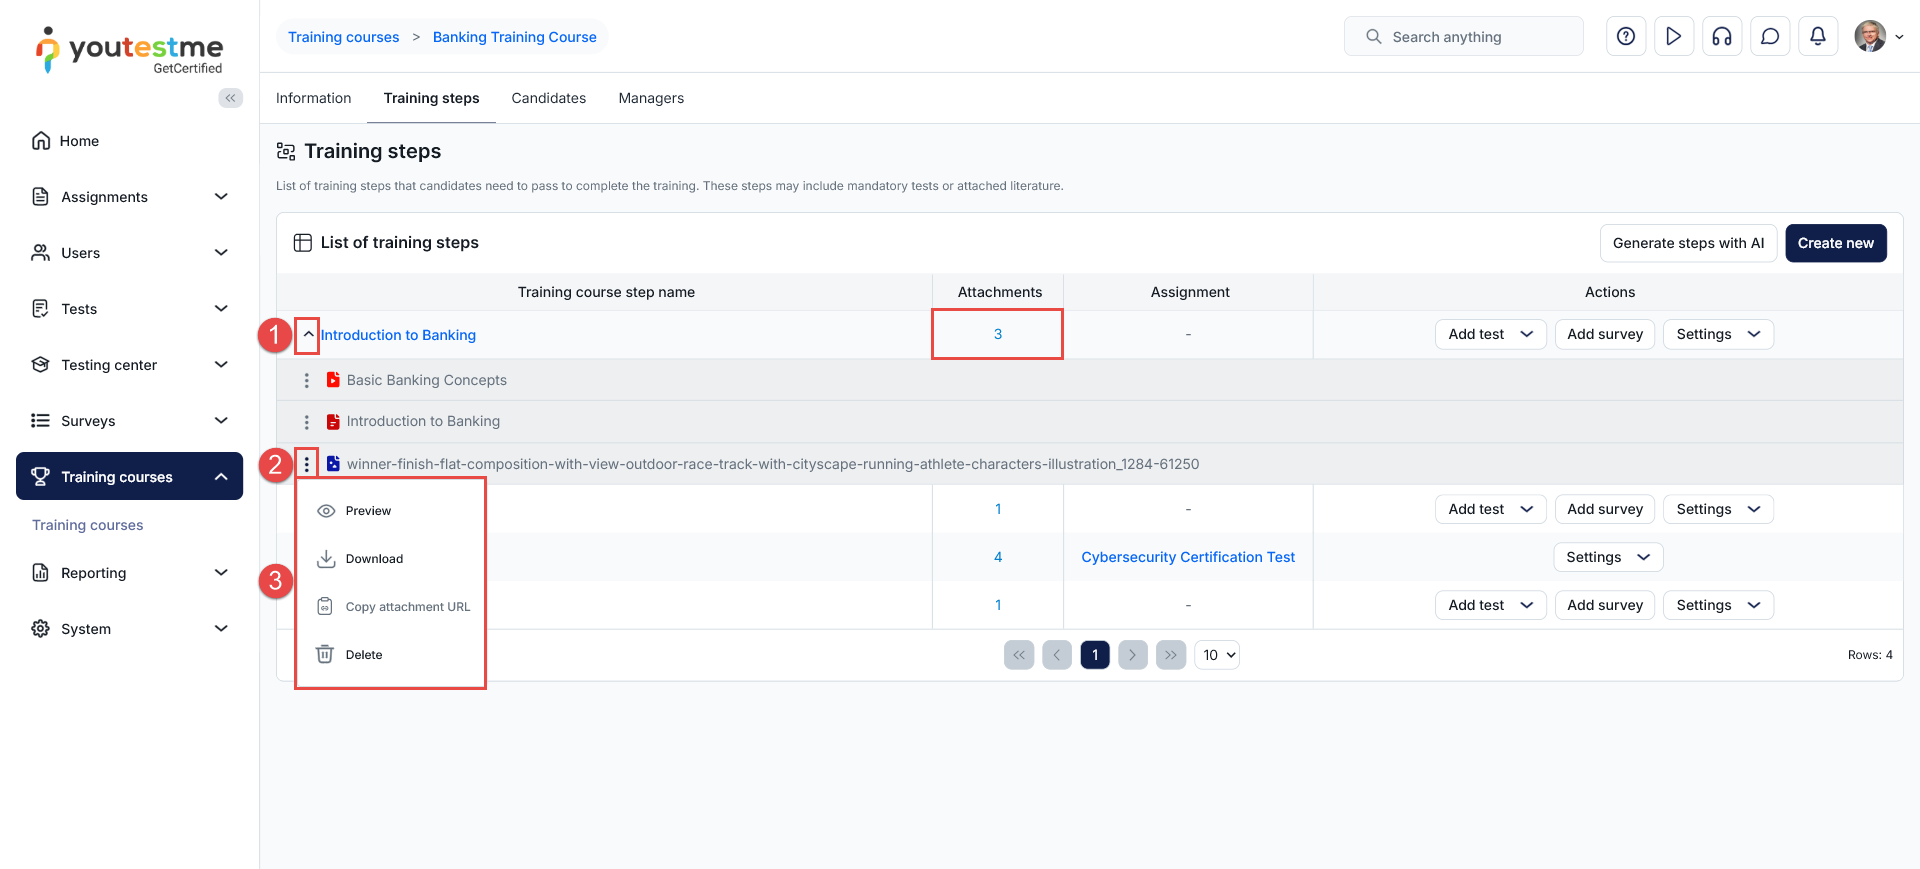
The number of attachments available for each step in the training course is displayed in the Attachments column. Please note that this count does not include attachments added to the step description using the Embed URL option.
To manage the attachments for a specific step:
- Expand the attachments list by clicking the arrow next to the step title.
- Click the kebab menu (three vertical dots) next to the attachment name.
- Choose one of the following options:
- Preview
- Download
- Copy Attachment URL
- Delete
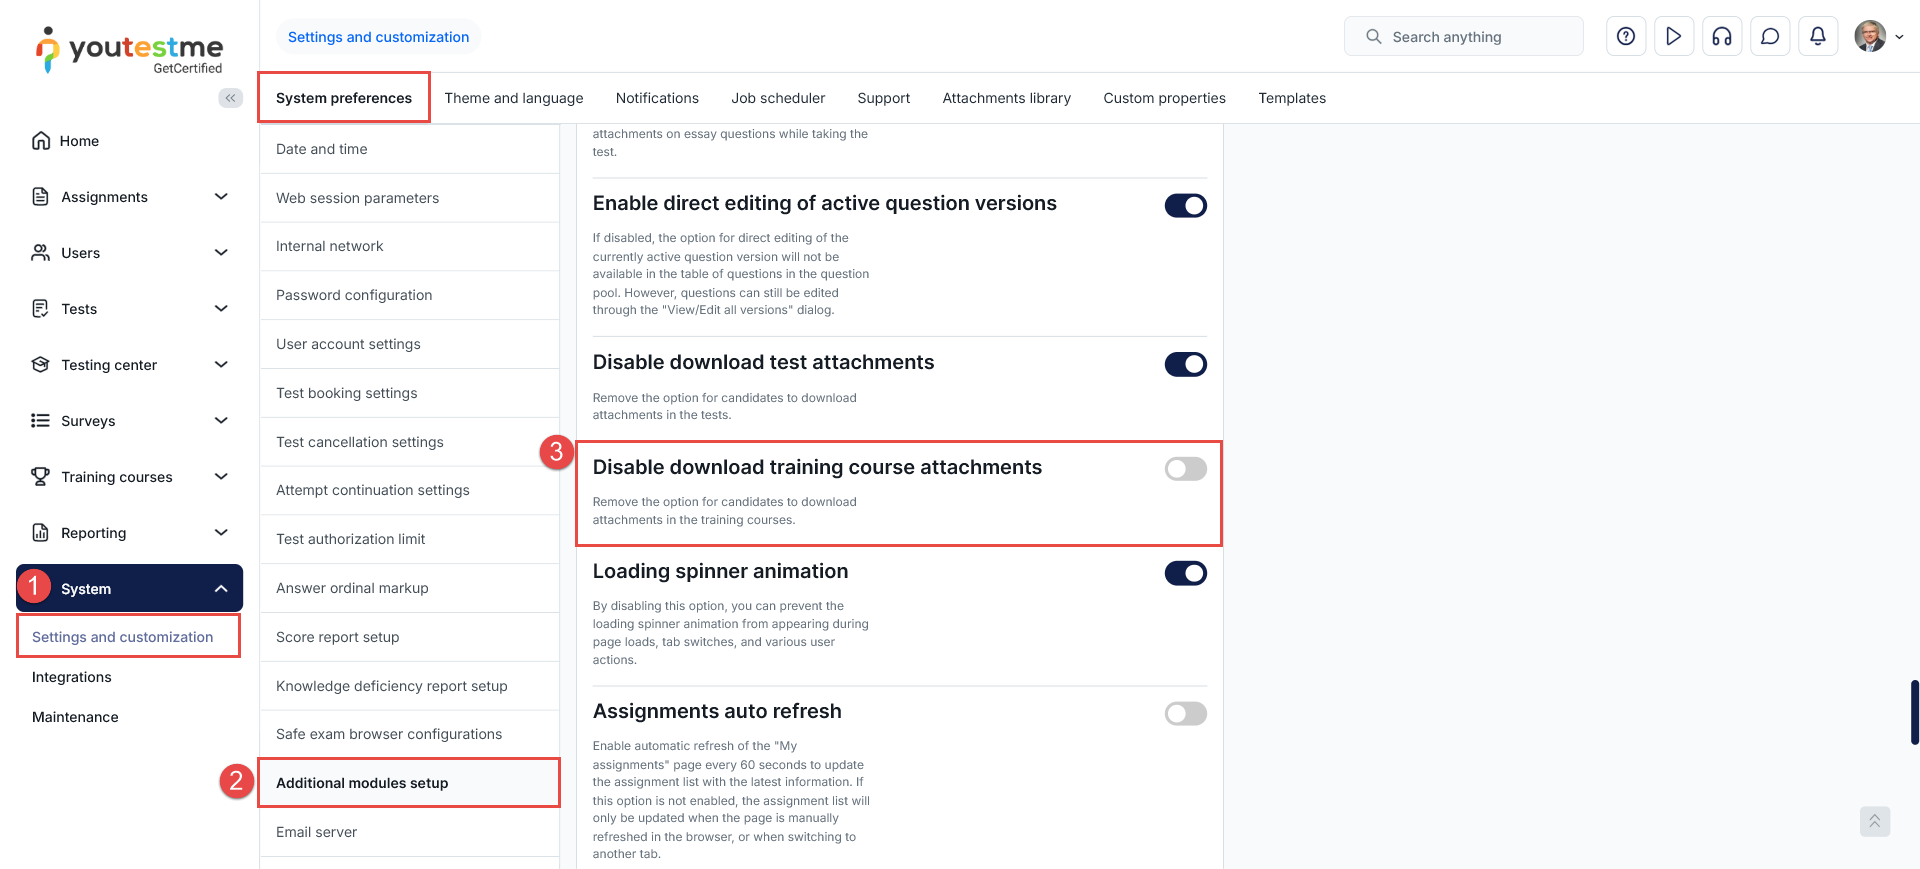
Restricting Attachment Downloads
By default, trainees are allowed to download training attachments. To prohibit this action, follow the steps below:
- In the main menu, go to System and select Settings and Customization.
- Navigate to Additional Modules Setup under System Preferences.
- Scroll down and enable the option “Disable download training course attachments.”
For more related instructional material, please see:
- How to pin training course to the Assignments page.
- How to place candidates in a specific course step.
- How to start a training course.


