This article explains creating a generated test with unlimited or limited versions. This method includes importing questions from question pools instead of adding the questions manually.
Accessing the page #
Select the Tests/Manage tests tab and select the New test button.

Creating a generated test #
In the Method of Test Creation Wizard, select one of the two possible methods for generating questions based on the following:
- Question difficulty
- Question categories

Method based on question difficulty #
Once this method is selected, proceed by following the next steps:
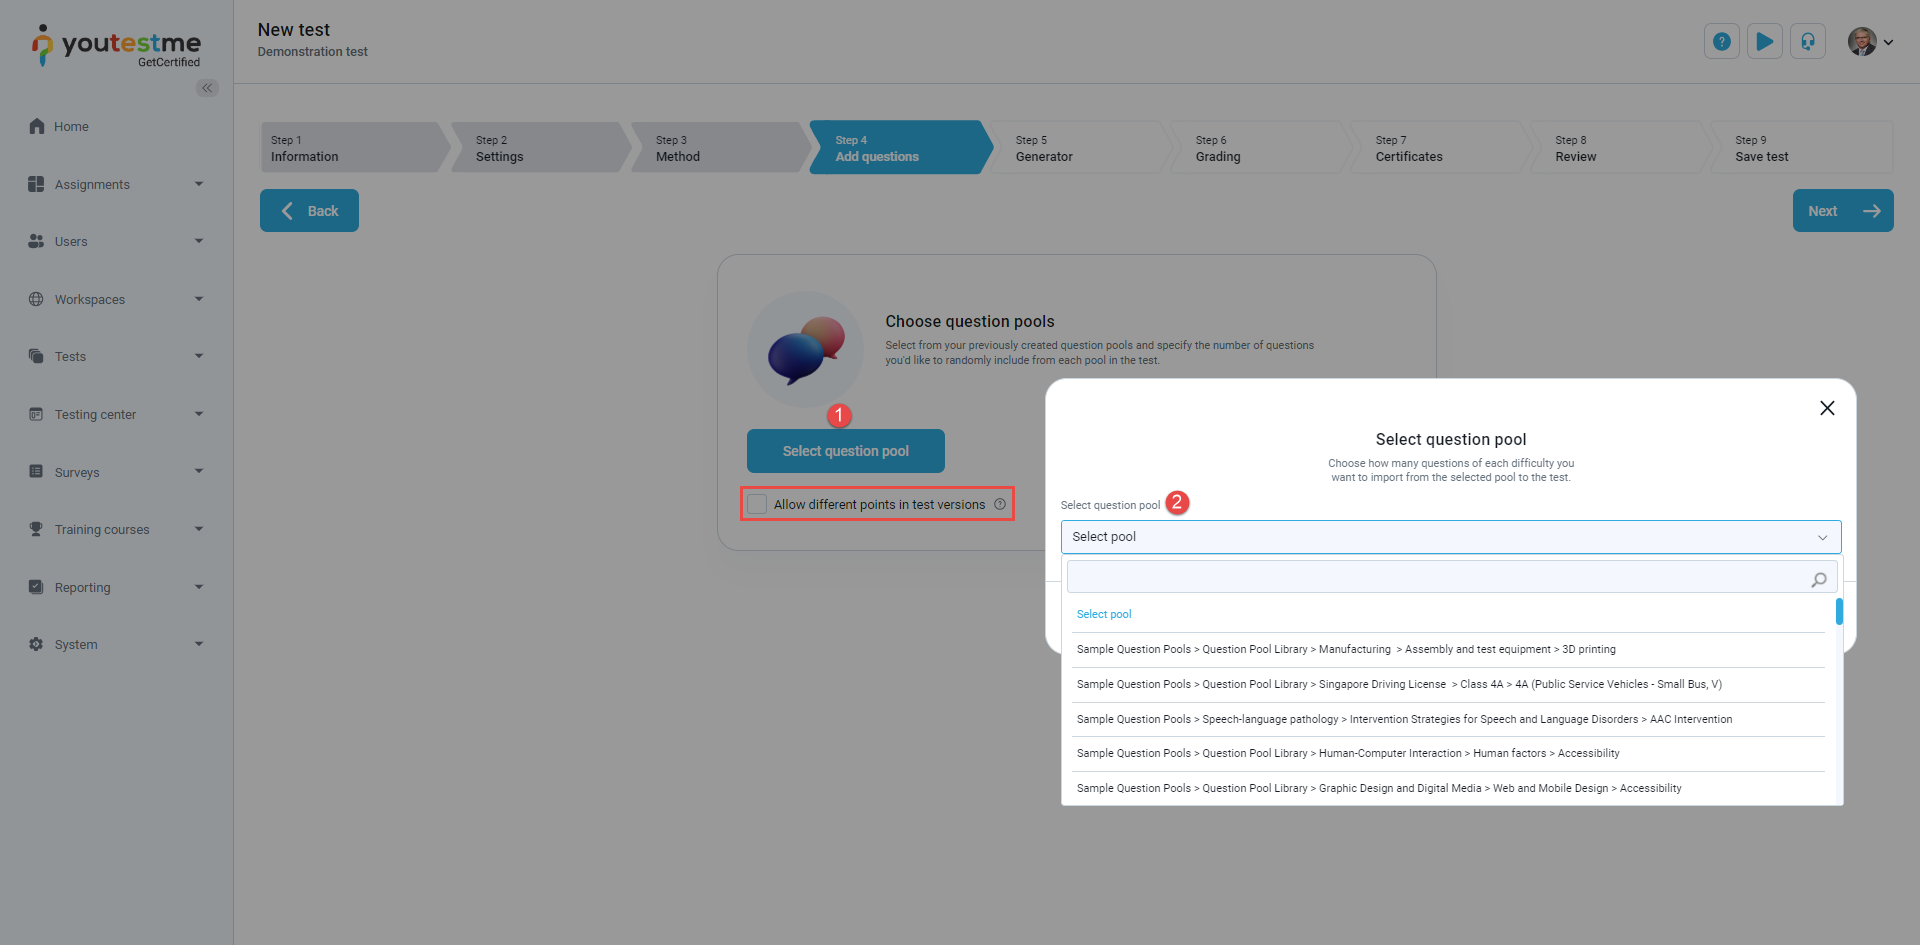
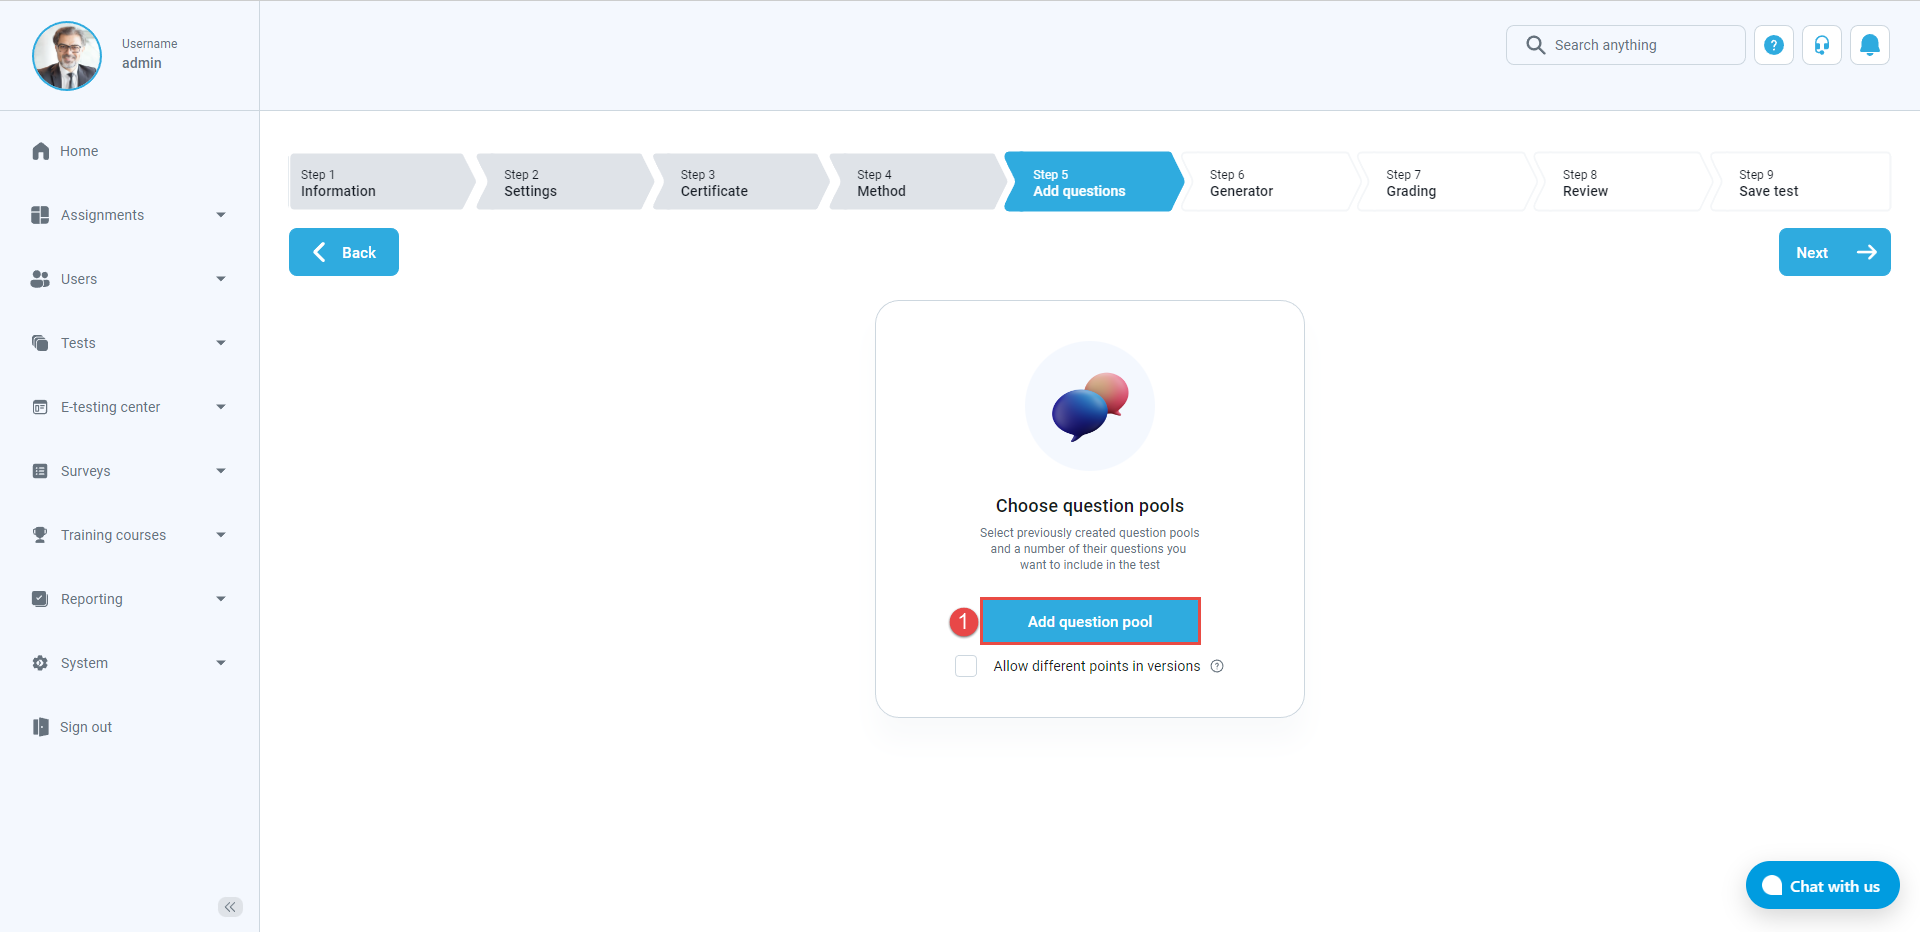
- Click the Add question pool button to include questions from as many question pools as you wish. The system will use questions from selected pools to generate different test versions. You can also Allow different points in test versions. The point and penalty of each question will be pulled from the configuration of the question itself instead of making it uniform for all questions. By enabling this option, you can include branching questions and questions with the scoring method By answers weight in test versions as well.
- Click on the drop-down menu to view all available pools in the system and select the desired question pool.

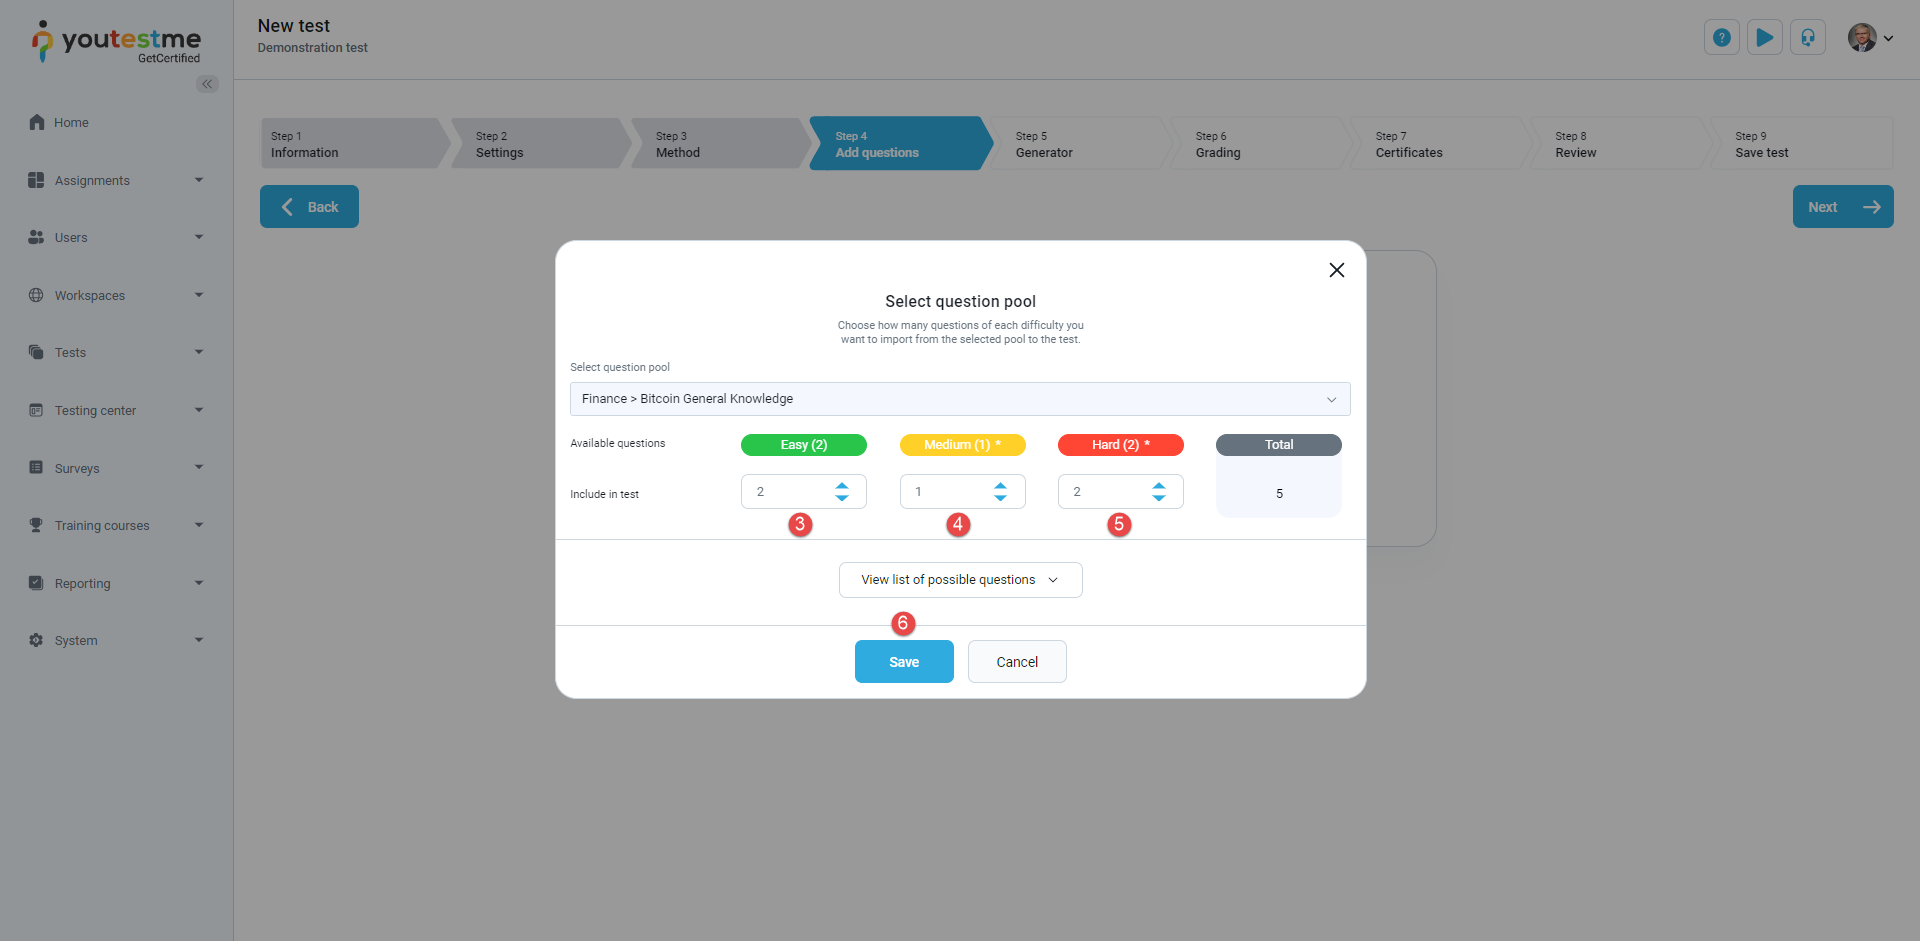
- Select the number of easy questions that will be imported from the selected pool to the test. If no questions are labeled as Easy, you won’t be able to add them.
- Select the number of medium questions that will be imported from the selected pool to the test. If no questions are labeled as Medium, you won’t be able to add them.
- Select the number of hard questions that will be imported from the selected pool to the test. If no questions are labeled as Hard, you won’t be able to add them.
- Click the Save button.

- Edit the question pool by clicking the pencil icon.
- Delete the added question pool by clicking the trash icon.

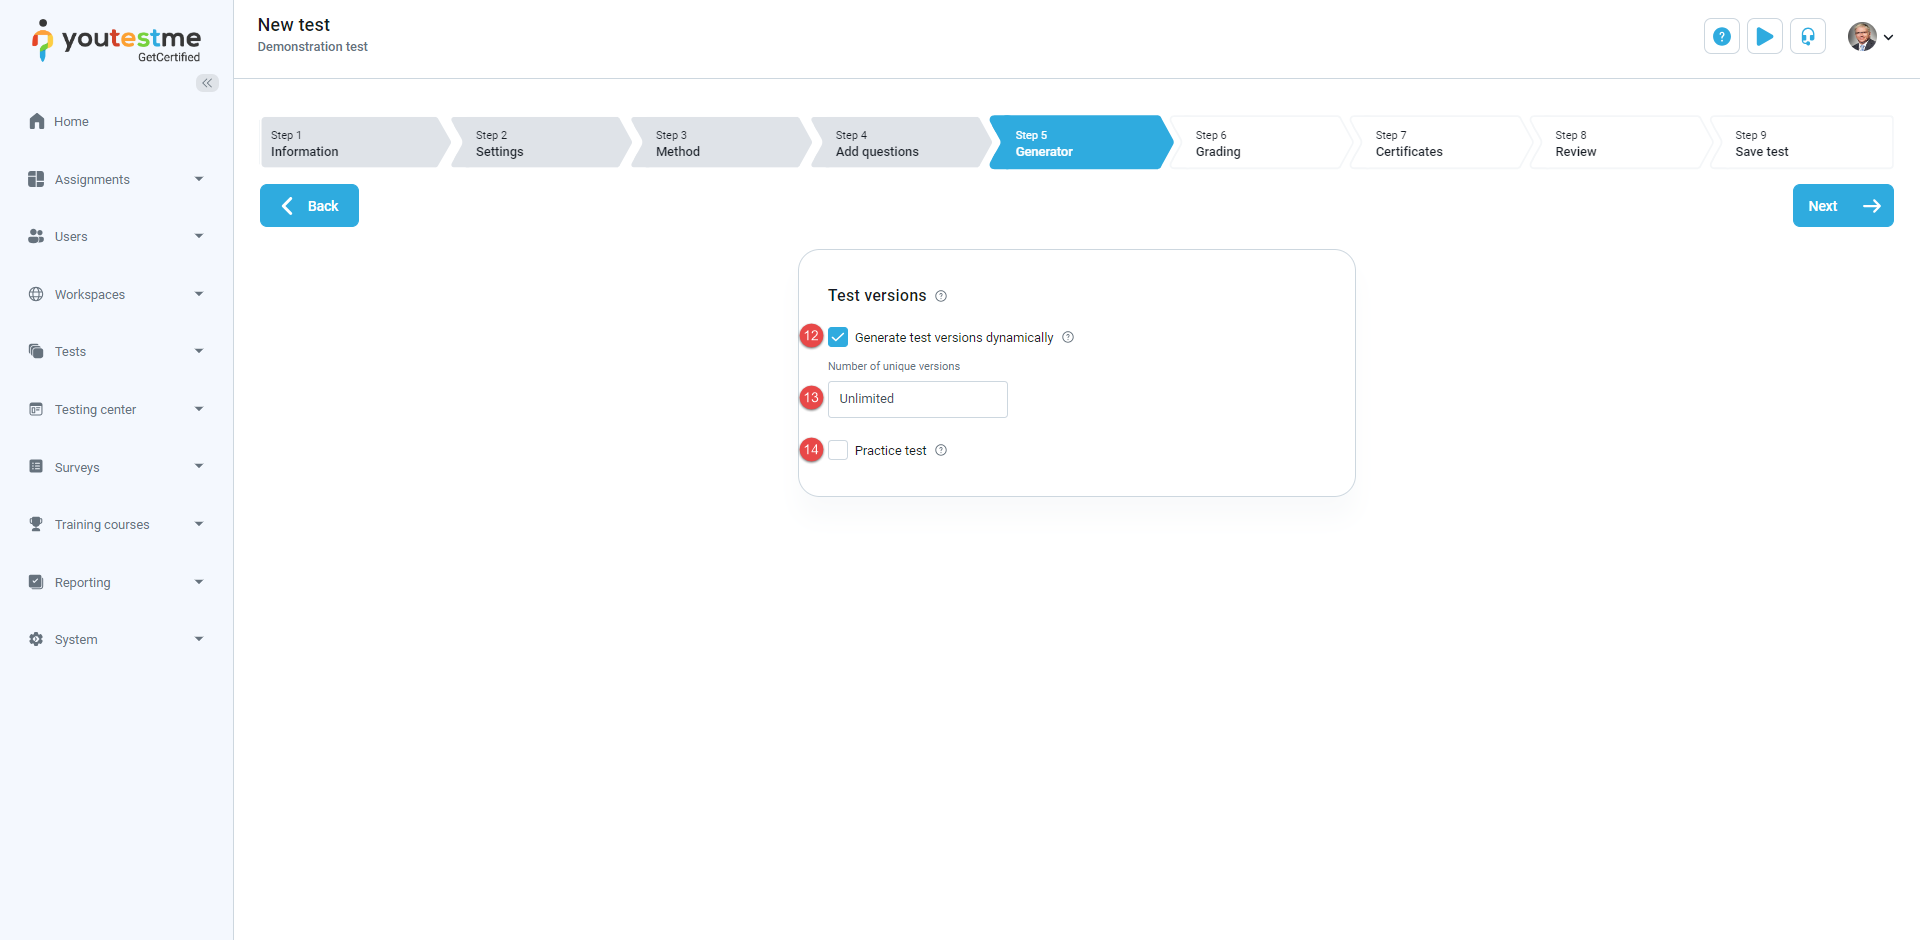
- Generate a dynamically unlimited number of test versions.
- Define the number of different test versions that will be created.
- When starting the test, allow candidates to specify the desired number of questions from each question pool that the test will contain.
- Define the number of points per question difficulty category – Points a candidate will achieve for answering correctly easy, medium, and hard questions
- Define the number of penalty points per question difficulty category – Points a candidate will achieve for answering incorrectly easy, medium, and hard questions.


Method based on question categories #
Once this method is selected, proceed by following the next steps:
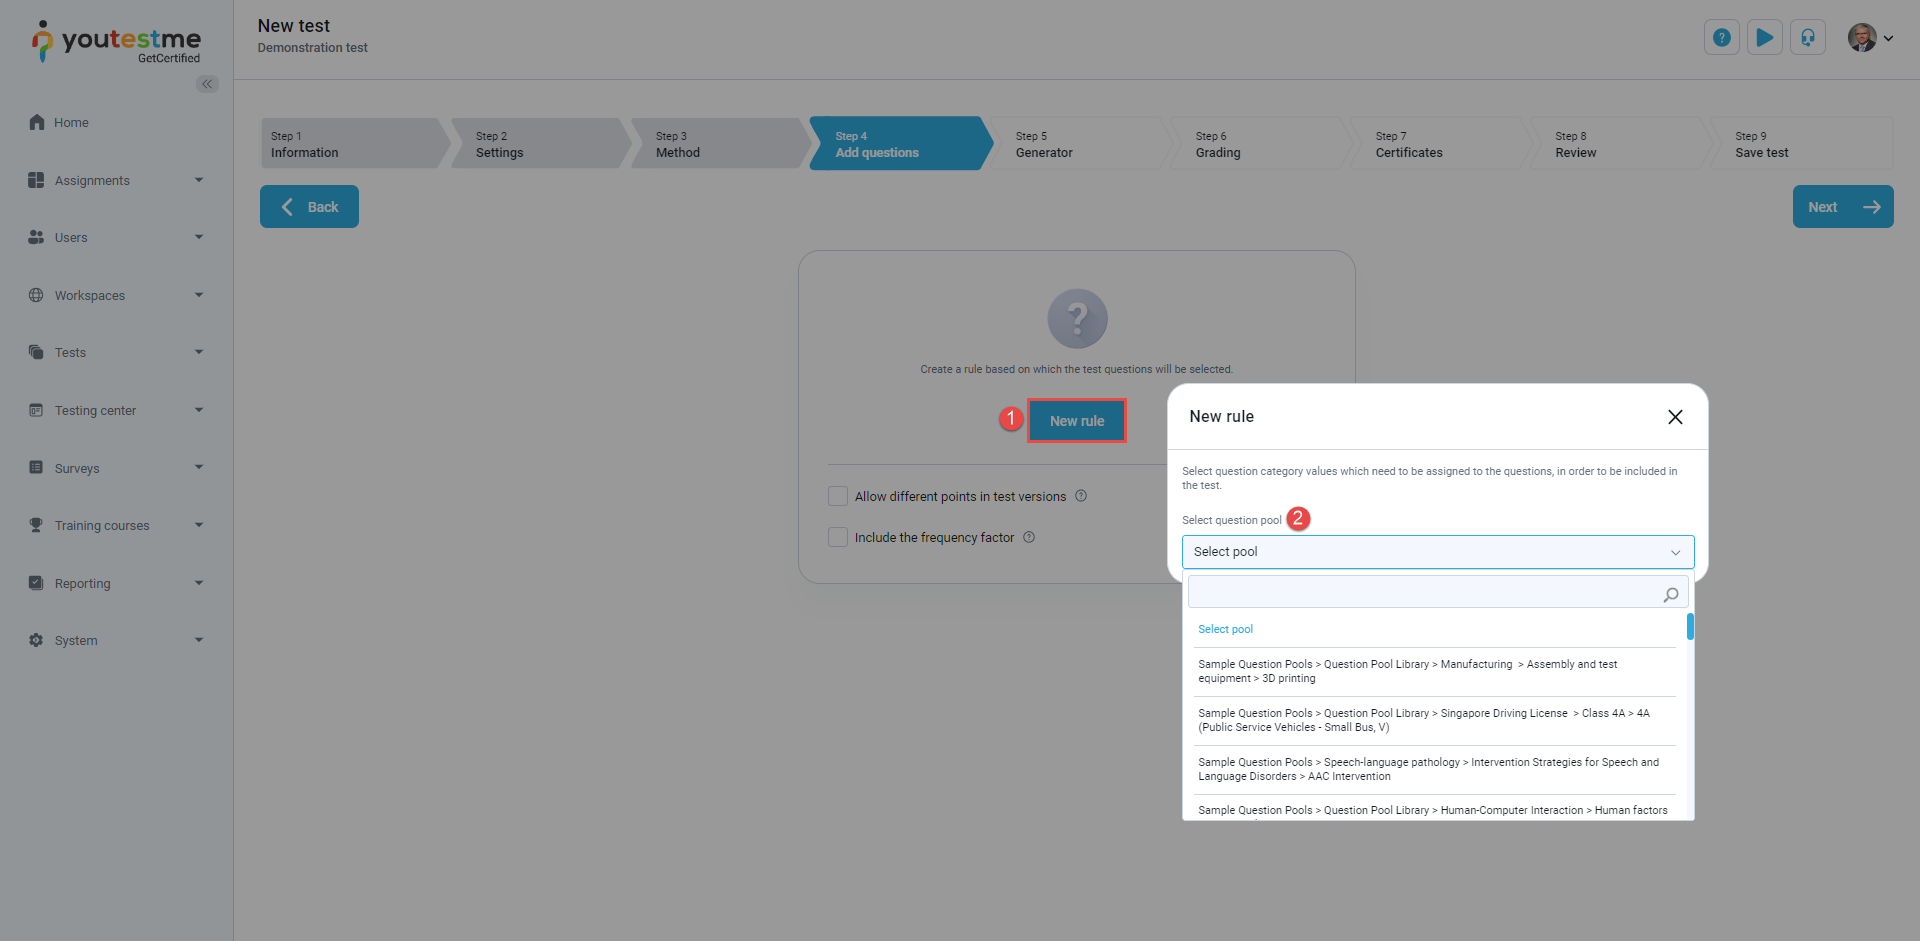
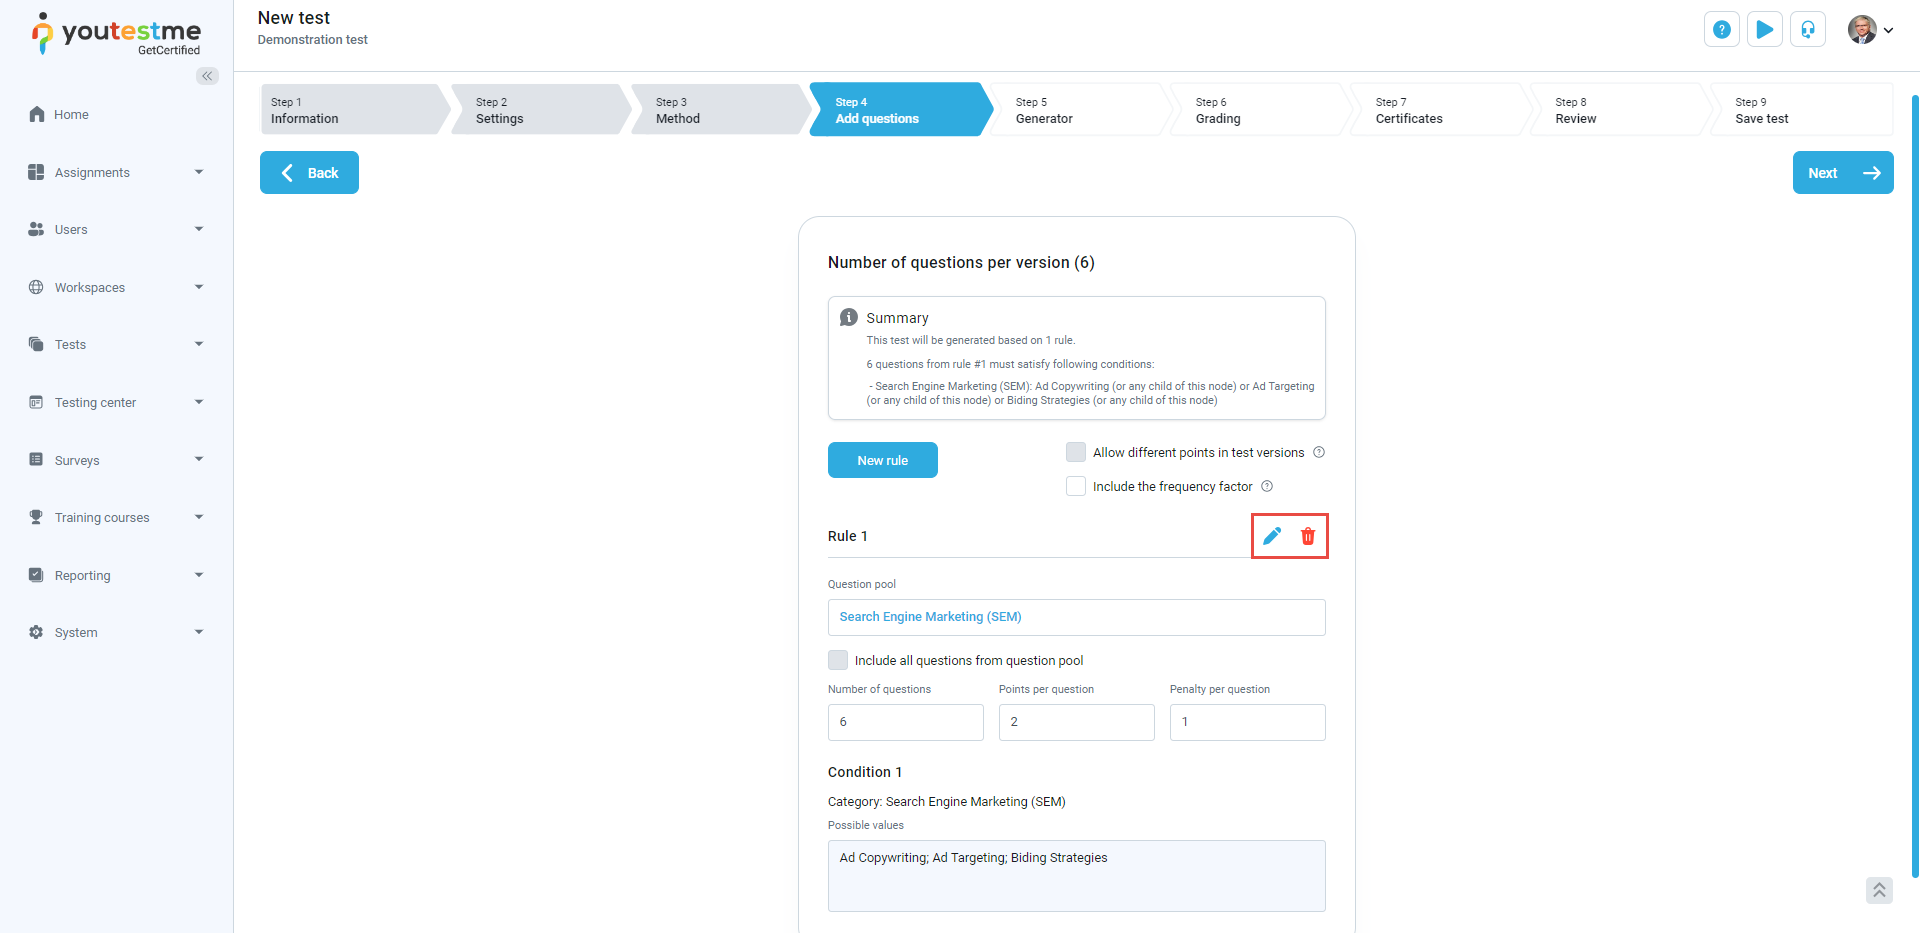
- Click the New rule button to include questions from as many question pools as possible. The system will use questions from selected pools to generate different test versions.
- Click on the drop-down menu to view all available pools in the system and select the desired question pool.
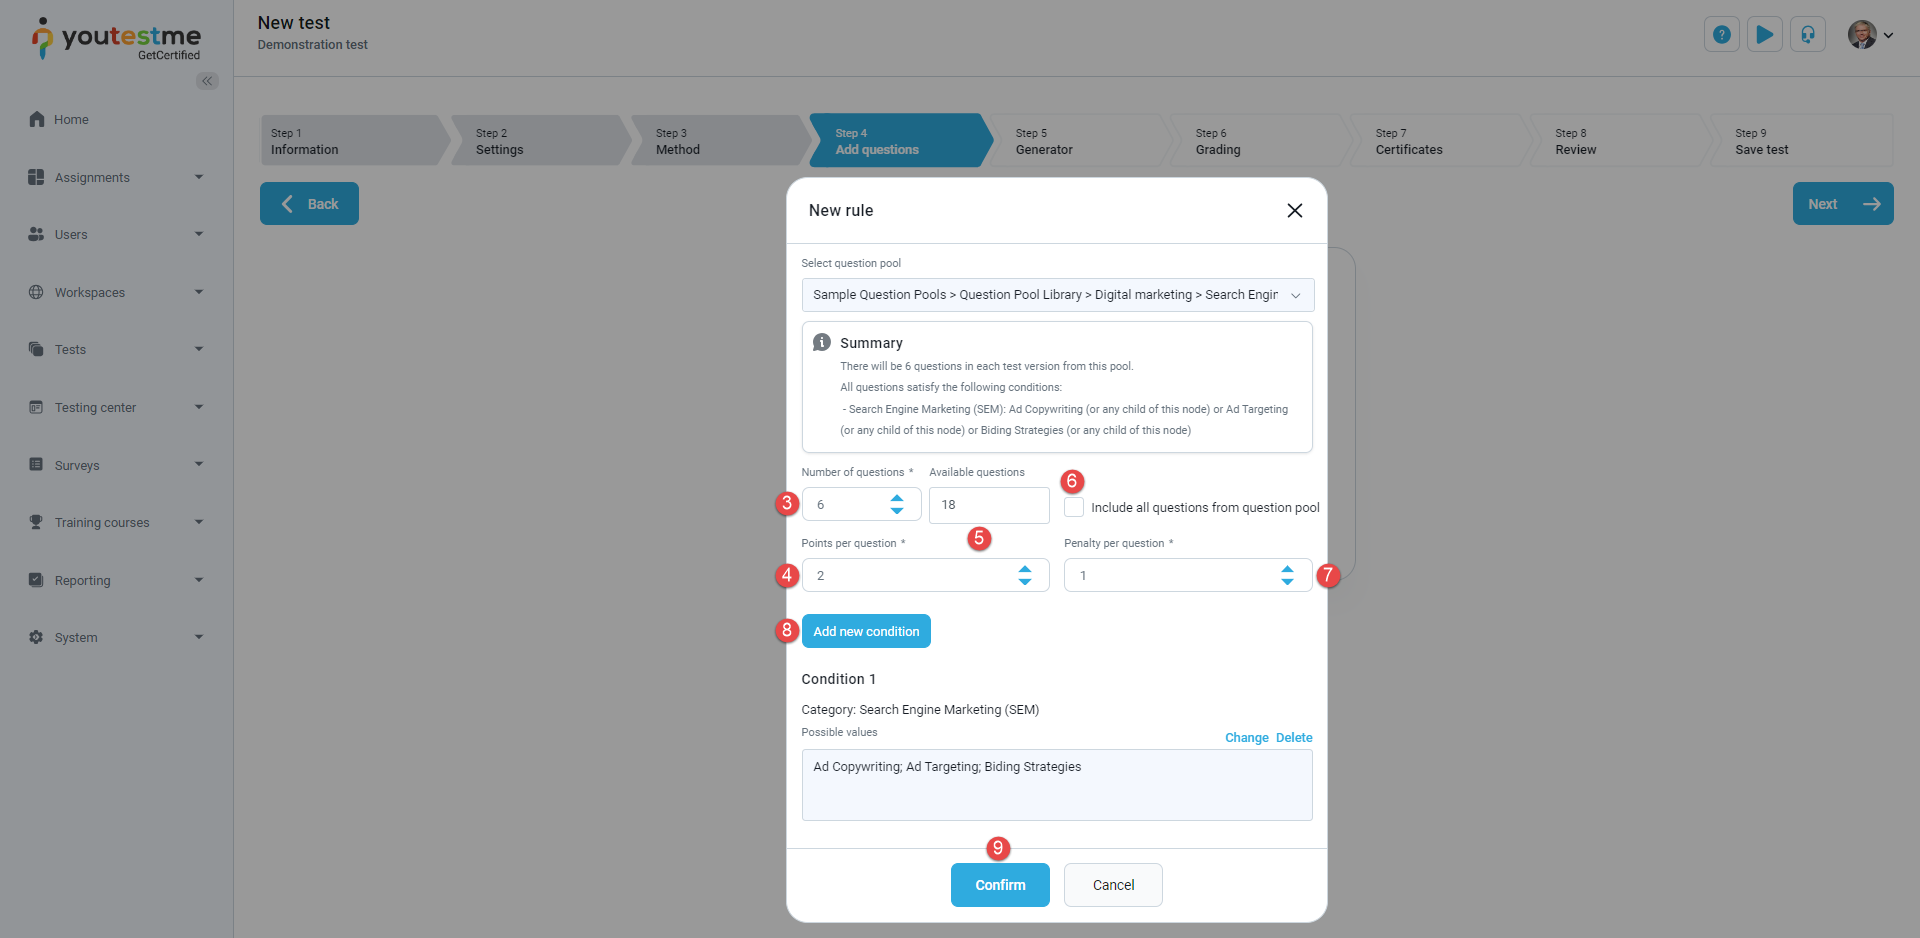
- Choose the number of questions that will be imported from the selected pool to the test.
- Set the number of points for each question.
- Check the number of available questions.
- Include all questions from the question pool with the desired condition.
- Set the penalty for each question.
- Click the Add new condition button to set values for a question category that will be used for filtering in the test generation process.
- Click the Confirm button.

- Edit the settings by clicking the pencil icon.
- Delete the added rule by clicking the trash icon.

- Generate a dynamically unlimited number of test versions.
- Define the number of different test versions that will be created.
- When starting the test, allow candidates to specify the desired number of questions from each question pool that the test will contain.
To see all steps of creating a test process, please read this article.
Use Cases #
AI and Live proctored tests – recommended configuration #
Following a set of configurations for each step is recommended to create Online AI-proctored and Live-proctored tests. These configurations will ensure the proper setup and execution of your test, providing a smooth and secure testing experience for all involved.
Information Step #
The following should be entered and configured:
-
- Name – Enter the test name.
- Test Instructions – Students need to acknowledge Specific rules or guidelines in a pop-up dialog before starting the test and in the notes during the whole test-taking process.
- Select a test logo.
- Test attachments – click the Create new button to import a new attachment from your computer or Import attachments to add new attachments from the library of previously imported or created attachments. For more information, please read this article.
- Test label – Write a label to add a classification on test pages and exported reports.

Settings Step #
The following should be set:
- Duration type and Total duration – Set duration type to Time to answer all questions and set desired test total duration.
- Page format – Set it to One question per page.
- Show report – Set it to On manager’s approval.
- Enable proctoring by default.
- Test instructions dialog settings – Enable the following options:
- Require instructions acknowledgment
- Show test instructions
- Show test duration
- Show the number of questions

- Define specific test rules and guidelines for candidates to acknowledge in a pop-up dialog before starting the test, covering aspects such as breaks, calculator usage, permitted learning materials, etc.
- Acknowledgment – Change the acknowledgment text displayed on the instructions screen before the test starts. Enable the Require instructions acknowledgment option in the Test instructions dialog settings to make the acknowledgment visible.
Note: The default text I understand and agree to the instructions and rules of this task is integrated into the system and can be translated depending on which language is selected. Custom acknowledgment sentences will not be translated.

- Additional possibilities for candidates – Enable the following options:
- Show question attachments
- Show question metadata to the candidate
- Enable notes
- Make notes persistent
- Delivery preference – Select either Online AI-proctored or Online live-proctored, depending on whether you want to create a test that a human proctor will monitor in real-time or a test available at any time.


To enable the lockdown browser, do the following:
- Select the Tests/Manage tests tab.
- Select the desired test.
- Select the Schedule option.
- Create a new session or edit the existing one.
- Select the desired browser lockdown option.


By enabling this option, the users cannot cut, copy, save, or print anything from the screen during the test-taking process. Also, the web browser will be in full-screen mode, and if the users try to minimize it, the test attempt will be terminated. It disables candidates from switching screens and tabs, right-clicking, or making screenshots.
Methods & Add questions Steps #
These steps are already explained above within this article.
Grading Step #
The following should be set:
- Passing mark – Set the desired passing mark.
- Make the passing mark inclusive – Allow candidates to pass the test if they score equal to or higher than the passing mark.
- Require positive proctoring mode – If this option is selected, the candidate will pass the test if they score the passing mark or higher.


